Builds Tink's preservation - 1964 FST (1 Viewer)

This site may earn a commission from merchant affiliate
links, including eBay, Amazon, Skimlinks, and others.

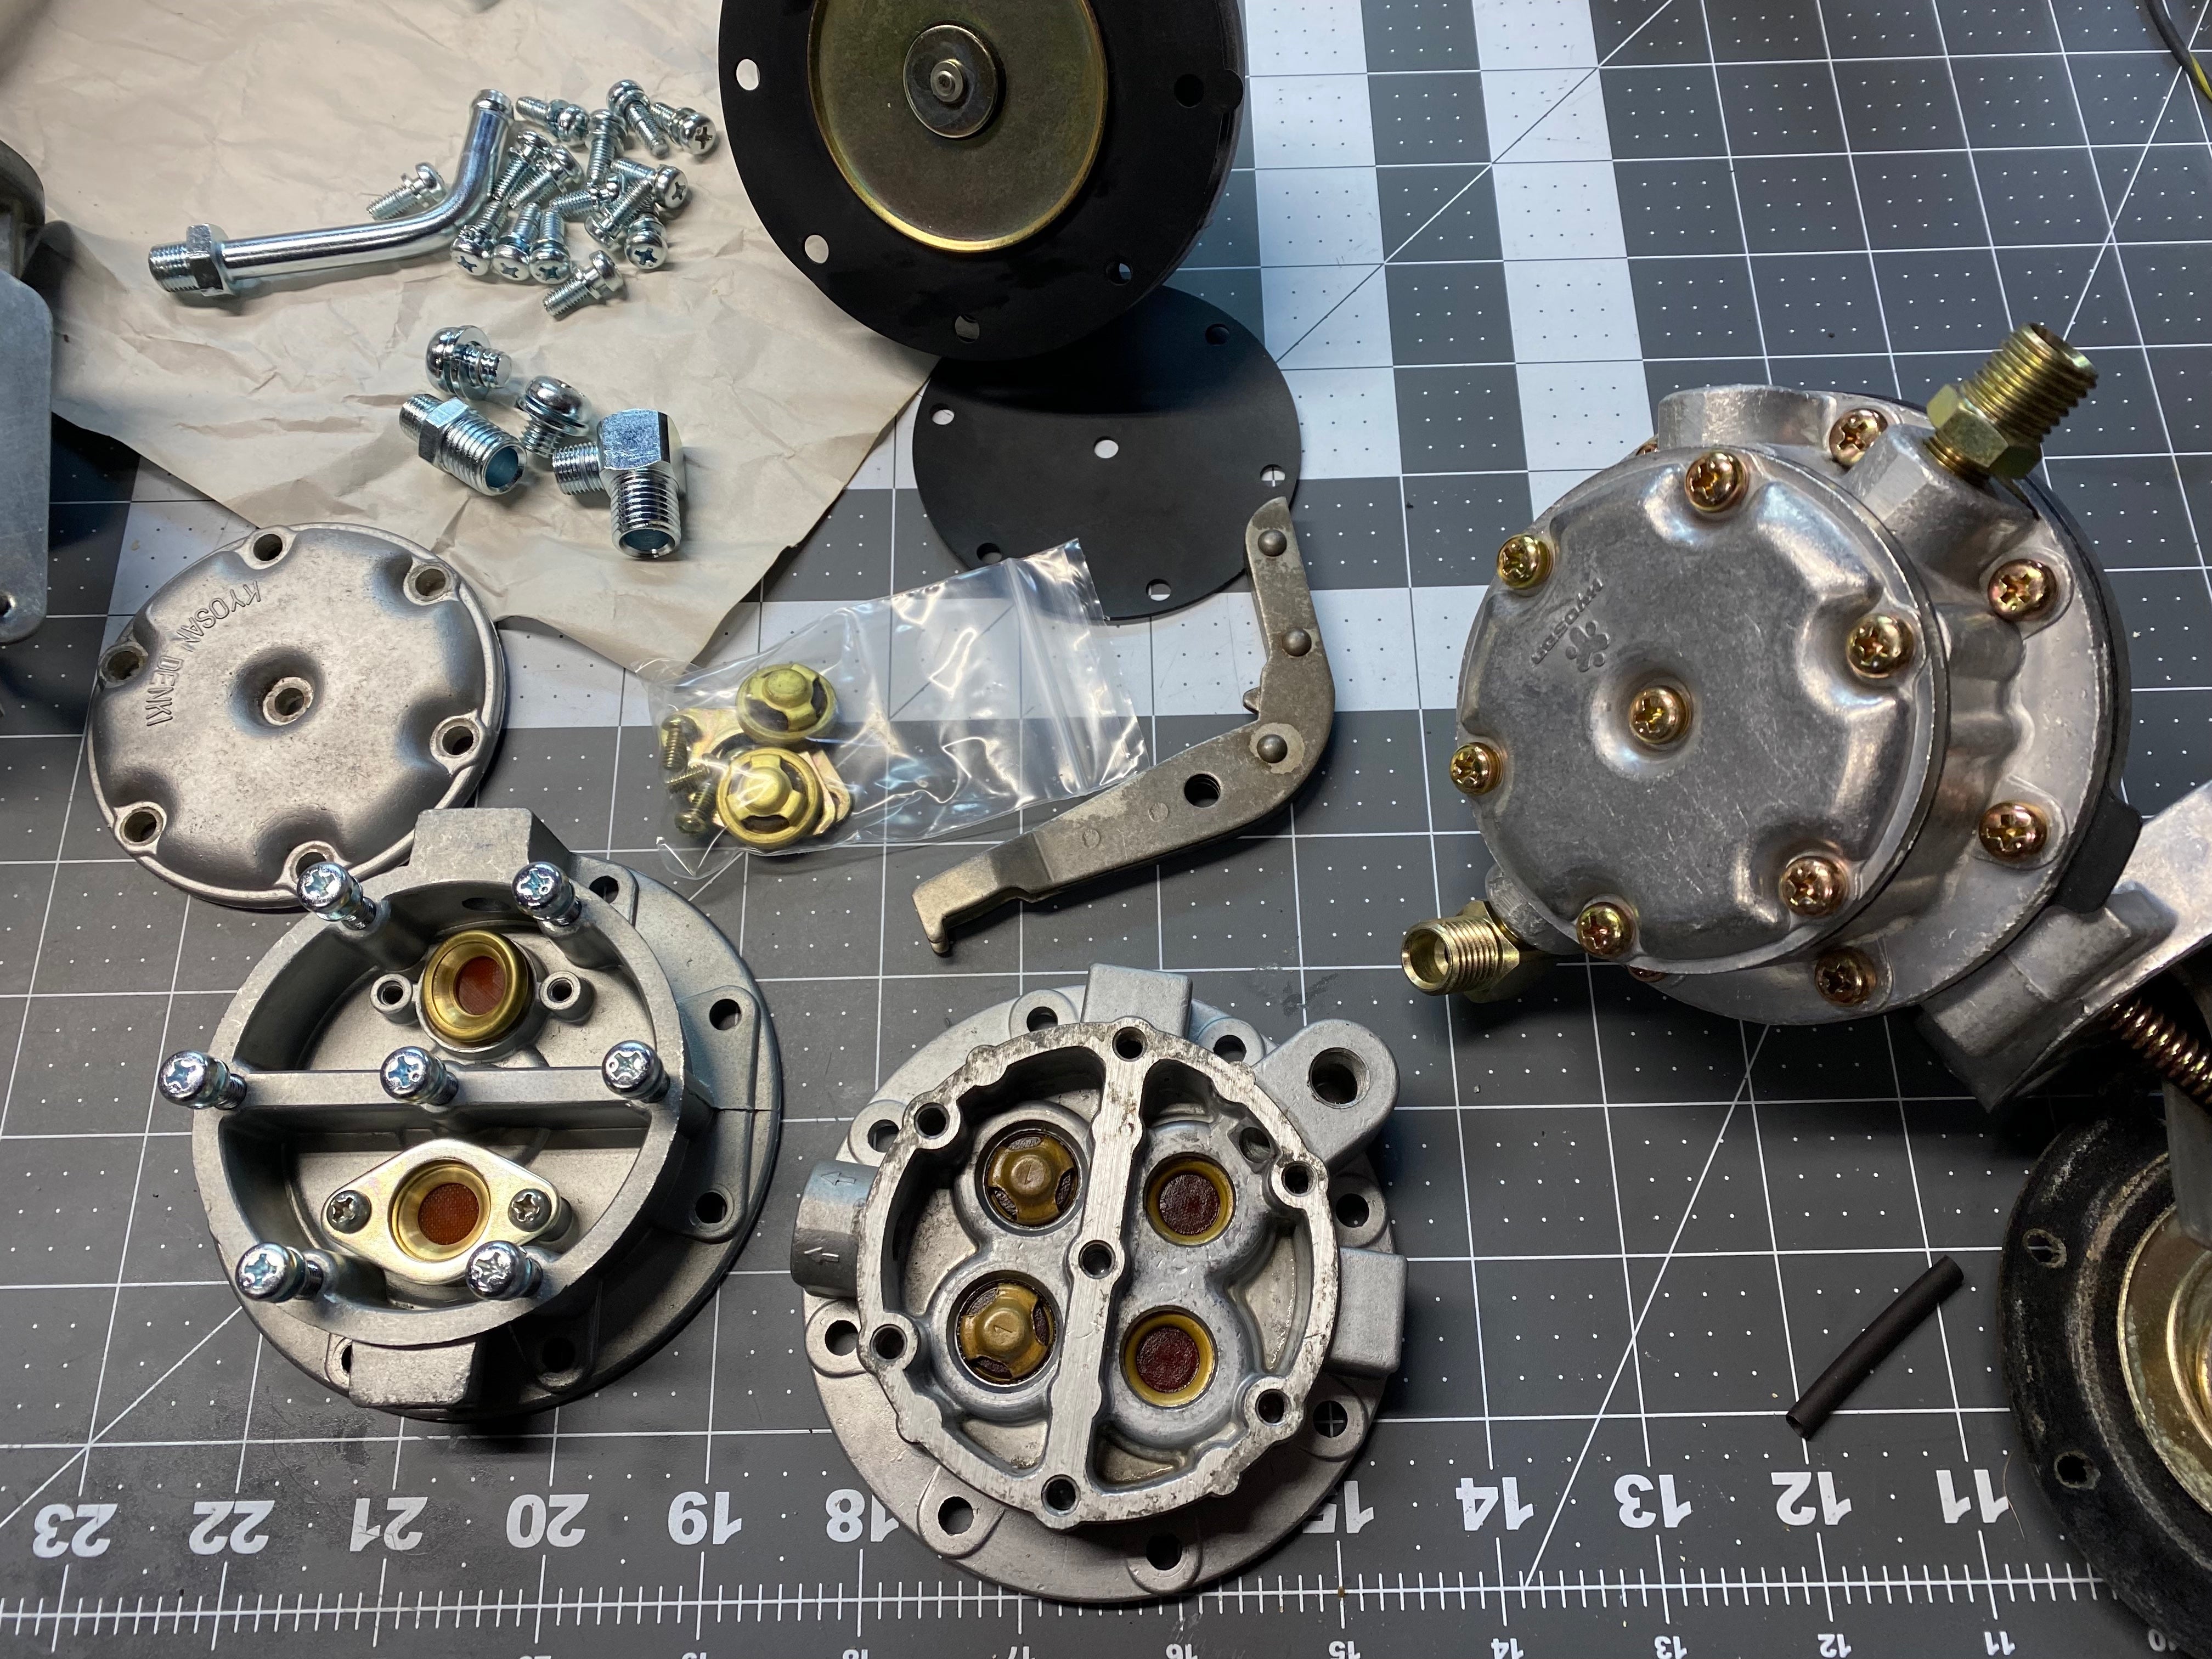
The original fuel pump was sitting in a box of parts. Decided to look inside and see how bad it was. Stiff and cracked rubber seems to be the reason it was removed. Ordered a rebuild kit from @Cruiser Cult . After watching their YouTube video it looks like a good cleaning and their kit will allow this little gem to go back on Tink.


IMG_1783 (1).jpg
 
Last edited:
Worked on the TNK wiper motors this week. Followed the thread by @jvincig01 in the 40/55 Tech Section that explains how to clean out the old grease that has become gummy and crusty. Both motors work great now. Need to locate new rubber grommets and rubber washers for the re-install. 58 year old rubber tends to shatter.
Still have two spare motors that don't function after cleaning. Anyone know a good repair shop? Also, anyone know a source for the rubber seal that goes on the shaft just behind the wiper arm?
Early - 1967 Wiper Motor Restoration (with pics) - https://forum.ih8mud.com/threads/early-1967-wiper-motor-restoration-with-pics.908481/
View attachment 2930221

View attachment 2930222
If memory serves the rubber bonnet stay grommet from a late 70's J4 worked perfectly well on the shaft behind the wiper arm. Don't have the part number handy now to make life easier.

I will happily take one or both of the non-op TNK wipers off of your hands, need a second three contact one still for my '64
 
A spray of engine degreaser and a quick scrub with a nylon brush revealed this stamping. 7 H 2 Somebody can chime in on how to read it. 1967 Aug 2nd is my guess. So not original but closer in age than the new one currently hooked up.

EDIT 3/22/22 The kit came in and I replaced the rubber and the two valves along with their seals. Have not put fuel in the system yet.

IMG_E1786.jpg


IMG_1841.jpg
 
Last edited:
@kunzma - love the progress. You’ve accomplished more in a few months than I did in nearly a decade.

So glad I was able to pass it on to someone who shared my vision and is following through, with vigor!
 
@kunzma - love the progress. You’ve accomplished more in a few months than I did in nearly a decade.

So glad I was able to pass it on to someone who shared my vision and is following through, with vigor!
It has been a ton of fun. Thanks!
 
I thought I should dig into why Tink's parking brake wasn't working. Seems the cable was in tough shape with a brittle and partially melted jacket. Ordered one from SOR. Found that the seal in the speedo housing was leaking into the brake housing and soaked the brake shoes. The backing plate had a couple of day soak in Zep degreaser to remove all of the build up. Ordered up a Valley Hybrids speedo housing kit with the double seal modification. @Cruiser Cult has a great YouTube video explaining the swap. Cruiser Teq supplied the brake shoes and kit. Had to grind down the shoe ends to allow them to fit in the cam adjuster. Took a couple of weeks to get all the parts in, but just a couple of hours to install.

IMG_1810.jpg


IMG_1824 (1).jpg


IMG_1818 (1).jpg


IMG_1827.jpg


IMG_1854.jpg
 
Last edited:
More pics of the brake job. Least fun was attaching the cable to the handle lever under the dash. Fashioned a lever to stop the drum from spinning while removing and installing the 29mm castle nut. 120ft/pounds using the Snap On torque wrench.

IMG_1853.jpg


IMG_1851.jpg


IMG_1852.jpg


IMG_1857.jpg


IMG_1855.jpg
 
Last edited:
Reading posts in other threads about rebuilding the original water pump. This returns some originality and allows me to run lines up to the heater in the cab. Sent the original pump off to The Flying Dutchman Water Pumps in Oregon. Had it back in 2 weeks ready to install. While waiting for the pump I removed the later version pump and cleaned the block surface. I found the original bolts and cleaned them up. Also figured out I had an original bypass fitting sitting with other parts in a box.

IMG_1843.jpg


IMG_1844.jpg


IMG_1749.jpg


IMG_1750.jpg


IMG_1845.jpg
 
Last edited:
Pics showing the bypass T fitting. One line to the heater connects to the new nipple supplied by @ToyotaMatt . The other line to the heater taps into the down tube. I did have the down tube, but didn't have the connector with the shutoff valve. Thanks to Mark @65swb45 supplying the shutoff valve. City Racer supplied the stainless steel hose clamps that mimic the originals. Gasket seal on the original radiator cap was cracked. @ToyotaMatt has the right size smaller cap with chain for the original radiator.

IMG_1848.jpg


IMG_1862.jpg


IMG_1860.jpg


IMG_1864.jpg


IMG_1866.jpg
 
Last edited:
Hoping to start putting fluids back in soon. On top of coolant and fuel, I drained the oil and front differential in order to put new seals on the drain plugs to stop drips.
 
Last edited:
Good stuff! Your radiator cap orientation brings up a question I guess I should know the answer too, but…. I’ve seen caps installed parallel to the top of the radiator and some perpendicular like yours. I can turn my cap to either position. The overflow hose on my Toyota replacement radiator exits parallel to the radiator, not perpendicular like yours. Thoughts?
 
Good stuff! Your radiator cap orientation brings up a question I guess I should know the answer too, but…. I’ve seen caps installed parallel to the top of the radiator and some perpendicular like yours. I can turn my cap to either position. The overflow hose on my Toyota replacement radiator exits parallel to the radiator, not perpendicular like yours. Thoughts?
Not sure about either of your questions. Looking back at my pictures, I didn't find one of the old cap. I will have to dig it out to refresh my memory. As for the new cap I will try to re-orient it. I haven't paid attention to the drain line of other radiators. Mine seems original, but in 50 plus years it could have been modified.
 
Yeah I’m definitely not saying yours is not right, I’m just wondering what the orientation should be for mine. Here’s a pic of mine, it has no arrows on the cap which is what came with the replacement Toyota radiator. In the past I’ve had caps that had an arrow on them that pointed to the overflow outlet. Mine works as installed - the overflow gains fluid after running and then gets sucked back in when cooling. So I guess I’m just mostly curious since I’ve seen several caps oriented like yours.
IMG_3663.jpg
 
Yeah I’m definitely not saying yours is not right, I’m just wondering what the orientation should be for mine. Here’s a pic of mine, it has no arrows on the cap which is what came with the replacement Toyota radiator. In the past I’ve had caps that had an arrow on them that pointed to the overflow outlet. Mine works as installed - the overflow gains fluid after running and then gets sucked back in when cooling. So I guess I’m just mostly curious since I’ve seen several caps oriented like yours.
View attachment 2961478
The old one orients the same as the new.

IMG_1867.JPG


IMG_1868.JPG
 
I have two versions of hard lines that run between the carb and distributor. Wondering which is correct? Also wondering how these are fastened in the engine compartment? Or, do they run without fastening to the firewall? In search of an original distributor right now.

IMG_1869.JPG


IMG_1870.JPG
 
Last edited:
My cap tabs and slots are oriented the same as yours. So that brings up is the arrow showing the direction to turn the cap when installing, or when removing? Either way, I don’t think it makes a difference from operation standpoint as it looks like the gasket seal is uniform all around as well as the radiator fitting. Sorry for the thread hack 🍻.
 
I have two versions of hard lines that run between the carb and distributor. Wondering which is correct? Also wondering how these are fastened in the engine compartment? Or, do the run without fastening to the firewall? In search of an original distributor right now.

View attachment 2961529

View attachment 2961530
The vacuum line follows the fuel hard line from the pump to the carb -
Screenshot_20220324-205425.png
Screenshot_20220324-205332.png
Screenshot_20220324-205259.png
Screenshot_20220324-205354.png
 

Users who are viewing this thread

Back
Top Bottom