Thermostat Install FZJ80 (1 Viewer)

This site may earn a commission from merchant affiliate
links, including eBay, Amazon, Skimlinks, and others.

Joined
Dec 14, 2019
Threads
22
Messages
342
Location
Texas
Alright, this goes out to the people who are new at doing this job! It's really easy but there are a couple important things you need to know.

These are the things you will need:

1) Thermostat: 90916-03117
2) Thermostat Gasket: 16346-66020 (order two, mine slipped and got crushed tightening up the housing)
3) 3 x M8 1.25 Flange nuts
4) 12mm and maybe 13mm wrench for the new nuts.
5) Ratchet with 12mm and 13mm drives
6) Blue Loctite (not necessary)
7) And of course what every other person on here says when doing work on our trucks, a nice cool set of crocks. Oh, I mean some brewskies!

IMG-8470.jpg

IMG-8480.jpg


First things first. I really didn't want to do this but the more I looked into my engine bay the more rational I became. I decided to drain my coolant because I didn't want coolant all over my belts and my compressor or condenser (whatever it is) when I removed the thermostat housing.

1) find the petcock. It stands out once you're under your truck. It's on the drivers side and it's pointed towards the cab. Picture for reference. When it drains it'll come out through the frame hole right below it so have your catch can in place. It'll take about 10-15 minutes to fully drain so start drinking and finding other little projects to work on.

IMG-8477.jpg


2) Time to remove some nuts! I saw some guys mention removing the heat shield above the headers but that would just be a waste of time. Use your wrench to do quarter turns to loosen. It's a small bolt so it only takes about 5 minutes.
IMG-8472.jpg


3) This was a little tricky but found the best method to take off the nut on the bottom was to just use a ratchet wrench WITHOUT an extension (saw this mentioned as well but with my size tools it didn't work)
IMG-8481.jpg
 
Last edited:
4) Now that you've taken the nuts off go put your catch can underneath the housing.
5) Pull the housing off the bolts. You'll see the thermostat. Grab a tiny flat head screwdriver and lightly pry the old thermostat out. (Just pry from the gasket) Some coolant is gonna come out.
IMG-8483.jpg


Previous owner really dropped the ball by putting an aftermarket thermostat in here. The shape of it is completely different than OEM and look where the "wiggly thing" is...strange.
IMG-8485.jpg


6) Now it's time to grab your FRESH OEM Thermostat and gasket. The gasket goes around the lip and the gasket has an indention that makes it easy to attach.
IMG-8486.jpg


7) Installing the Tstat. Make sure the wiggly thing is in the 11-1 o'clock position AND MAKE SURE THE GASKET IS SEATED PROPERLY.
IMG-8489.jpg


8) I put some blue loctite on, changed to a 13mm drive and wrench, then buttoned her up with the new nuts
IMG-8490.jpg


9) Now onto the bypass which is to the right of the thermostat housing if you're looking at the truck from the front. Go to the second page.
 
Last edited:
I believe this is the first time anyone has posted a photo of their crocs, while working on a 80 series. One concern is that of safety while working in
that type of footwear.

Otherwise, good photos.
 
I believe this is the first time anyone has posted a photo of their crocs, while working on a 80 series. One concern is that of safety while working in
that type of footwear.

Otherwise, good photos.
It certainly feels good being the first. No worries, I don't have toes ;) I only wear these if I'm doing simple jobs like these.
 
I did that a few months back. I had to borrow a box end wrench to get one of those nuts off.

I ended up buying a set of box end wrenches later. They are slow but have been useful more than once.

Also The radiator drain made a big mess for me. If I had to do it again I would attach a short piece of hose over the drain barb to better direct things into my catch bucket.


Btw, I’m also a croc guy. But I have to wear the ones with the fleece insalutuon here in Wyoming. And I would never go out in public with them or link pictures of me wearing them.
 
Btw, I’m also a croc guy. But I have to wear the ones with the fleece insalutuon here in Wyoming. And I would never go out in public with them or link pictures of me wearing them.

I was offended when my wife gave me this pair for my birthday. But now, I have no shame.
 
Just an FYI, I purposefully changed the contents of the Wits’ End thermostat kit to now include the three o-rings for the coolant bypass off the thermostat subassembly because they will eventually leave. It seems for anyone taking the time out, draining their coolant, it’s the ideal time to change out those bypass o-rings.
 
Just an FYI, I purposefully changed the contents of the Wits’ End thermostat kit to now include the three o-rings for the coolant bypass off the thermostat subassembly because they will eventually leave. It seems for anyone taking the time out, draining their coolant, it’s the ideal time to change out those bypass o-rings.
Thanks for bringing that up. It actually looks like mine is already leaking. I'm planning on doing it tomorrow since I still have all the coolant out. 👍🏼 But I'm a little apprehensive as I've seen some posts talking about how fragile the sleeve is and how you need to finesse it out a special way. I'll add to the "how to" when I do it. Btw do you know the part number for the hose that's connected to the thermostat housing? Mine needs to be replaced.
 
Last edited:
Thanks for bringing that up. It actually looks like mine is already leaking. I'm planning on doing it tomorrow since I still have all the coolant out. 👍🏼 But I'm a little apprehensive as I've seen some posts talking about how fragile the sleeve is and how you need to finesse it out a special way. I'll add to the "how to" when I do it. Btw do you know the part number for the hose that's connected to the thermostat housing? Mine needs to be replaced.

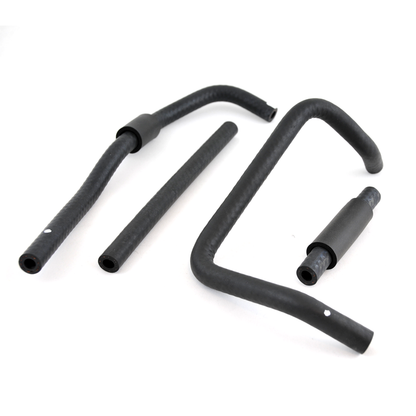
its part of the Small Hose Kit but it’s one of four part numbers I have listed on this page:
 
15 ft lbs. IIRC

That is the correct spec, yes.

Though I’ll confess I’m far too lazy to do this many steps. I usually put a drain pan under the thermostat, take the housing off and let it drain from there, put in the new one, torque it down, fill it up and let the truck idle for a bit, topping off as needed. should take about 10-15 minutes?
 
Thanks for bringing that up. It actually looks like mine is already leaking. I'm planning on doing it tomorrow since I still have all the coolant out. 👍🏼 But I'm a little apprehensive as I've seen some posts talking about how fragile the sleeve is and how you need to finesse it out a special way.

Just don't grab the bypass sleeve and rock it back and forth or try to twist it. I used electrical tape to pad the jaws on a small pair of vise grips then used a screwdriver and a small pry bar to lever the sleeve straight up out of it's bore. Put the tool underneath the jaws of whatever you use to grip it with and pry upward. Once it starts to move....you'll be fine.

I've seen folks completely mangle the sleeve and then need to replace it. It isn't expensive...but probably not immediately available at your Toyota dealership either.

Bypass Orings1.jpg
Bypass Orings2.jpg
water bypass.jpg
 

Users who are viewing this thread

Back
Top Bottom