The Long Slow Build - 1980 FJ40

This site may earn a commission from merchant affiliate
links, including eBay, Amazon, Skimlinks, and others.

Nice work, looking good! Subscribed to this thread for sure...
 
Tub is coming along. Been making all the brackets to hold the fuel lines on along with the brackets to hold the two heat shields to the tub. Pics of that coming soon.

in the mean time, I've been test fitting the P side fender to see what problems I've caused by moving the battery tray back - to accommodate the AC compressor. Only problem I see is the charcoal canister mount. Need to move that back about 1 inch.
001.webp
002.webp
003.webp
 
Super! Nice work, I also have a Freeborn Red '78 though Where your axles and frame both powdercoated? Please keep up the pics..........
 
Yes. Basically everything that won't melt has been powder coated. We did put ceramic on the rear drums & the manifolds. Snow & ice here in GA slowing things down but tub should be on in a month or so.
 
Full engine rebuild - ceramic coated the manifolds, powder on just about everything else - tranny & t-case also rebuilt I love the way the valve cover turned out.
What did you have done to your valve cover? Coated or just brushed/polished? It does look nice. I'm leaning towards just polishing and clear coating mine but I like the durability of powder coating it, if I can find the right color.

Nice work, BTW!
 
Very nice work, but 2 years isn't slow ;) (try 6 1/2 years...) Takes a lot time to get something to look that nice.

BTW can I ask where you got the overflow/windshield fluid reservoir? That a nice setup.

Thanks
 
Those are the original overflow & windshield bottles. I used the peroxide & oxi-clean method on them to de-yellow the plastic. Here is one link, but just Google "clean yellowed plastic" or something similar. You can get the high concentrate peroxide at a hair salon supply place.

http://www.retrofixes.com/2013/10/how-to-clean-whiten-yellowed-plastics.html

I did paint the large lid black - just couldn't get it clean enough. found a replacement on ebay for the small one.
 
While waiting on the tub to be finished, I rebuilt the AC unit. It was made by Clardy, a dealer installed option if I'm not mistaken. Motor tested & working properly, evaporator tested & cleaned, new O-rings, and everything painted with SEM in satin black.
003.webp
001.webp
002.webp
 
Been a while since an update - so here goes.

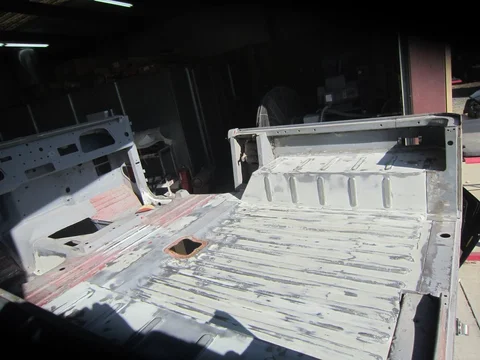
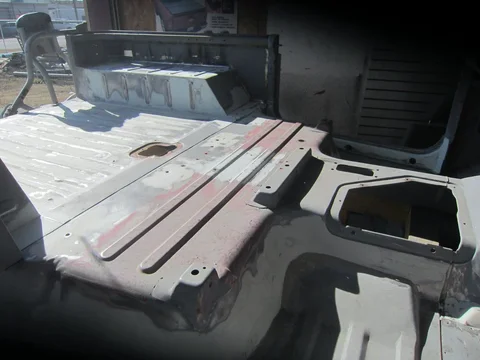
Bottom of tub has been blasted, welded as needed, wiped and sanded. Ready to set back up on the cart. We replaced both floor pans, the PS rocker panel, and replaced the brackets the support the side steps. Fitted the side steps to the tub. Also, replaced about 20 nuts that had broken bolts in them (rust sucks).

001.webp


002.webp


003.webp


005.webp
 
Working on inside of tub. From the seats forward is ready as the floor pans are molded in. A little progress on the rear bed. Baby steps, but any progress is better than no progress.
Rear Bed 1.webp Rear Bed 2.webp
 
Rear bed & fender wells ready for primer, finally. (I did call this the Long, Slow Build)

A little work on the outside is next. It will need some attention where the new rear quarters are molded in, and the DS outer rocker needs a little work. Cowl is in really good shape, just some minor issues to deal with. And a few small things to address - location of rear emblems and the rear reflectors, spare tire carrier adjustment, etc. Anyway, here are a few pics of the progress.

Bed 1.webp Bed 2.webp Bed 3.webp Cowl.webp Mid bed.webp
 
really nice work. don't forget to seal all those seams to prevent from having to do it again someday!
 
Also, worked on the vertical lines where the rear quarters transition to the rear seal below the doors. And made some adjustments to the rear tire carrier and welded the nuts in place for that.

001.webp
002.webp
003.webp
004.webp
005.webp
 

Users who are viewing this thread

Back
Top Bottom