Based on KAON's install guide for their Rear Seat Delete Mounting Points, they should be M10 x 1.25 x 30. Check out the fitting instructions Rear Seat Delete Tie Down Points to suit Toyota LandCruiser LC200 - https://www.kaon.com.au/lc200-rear-seat-deleteDo you remember the bolt size for the anchor points you used? I saw in one of the threads but can't find it. Threw mine out with the seats.
Navigation
Install the app
How to install the app on iOS
Follow along with the video below to see how to install our site as a web app on your home screen.
Note: This feature may not be available in some browsers.
More options
Style variation
You are using an out of date browser. It may not display this or other websites correctly.
You should upgrade or use an alternative browser.
You should upgrade or use an alternative browser.
Builds Tex's 200 build thread
- Thread starter Tex68w
- Start date
This site may earn a commission from merchant affiliate
links, including eBay, Amazon, Skimlinks, and others.
More options
Who Replied?Thanks! I've had a hard time finding a M10x1.25 at the local hardware store. Seems most are 1.50.Based on KAON's install guide for their Rear Seat Delete Mounting Points, they should be M10 x 1.25 x 30. Check out the fitting instructions Rear Seat Delete Tie Down Points to suit Toyota LandCruiser LC200 - https://www.kaon.com.au/lc200-rear-seat-delete
Mine has them in the plastic boxes above the bulk bins. Look for metric flange bolts or jis bolts


- Thread starter
- #146
I received these LED under hood lights as a Christmas gift from the misses. We don't find ourselves under the hood of these vehicles that often due to how reliable they are but I have been wanting some dedicated under hood lights for use with my compressor in low light conditions. I also figure that as it ages I'll find myself in there more often and they could come in handy for routine maintenance and for other uses as well.
This kit while nice, tells you to simply drill a 1/8" hole and then use a supplied self-tapping screw to mount them but I wasn't keen on a fresh hole in the hood substructure if I could help it. I didn't want to lose the insulating material as a whole nor did I want to cut into it for the lights to be flush mounted to the metal either so I sat around for a few minutes and considered my alternatives. I decided that the cleanest install would be to hide the wiring under the insulating material and then use longer push pins within already existing push pin holes to secure the lights. This would only require a small incision in the insulating mat under the lights to recess and hide the wiring for a cleaner install. I think it turned out great and the supplied labeled toggle switch is a nice piece as well. I made use of a grommet I had lying around to protect the wires coming out of the hood from the sharp edge and it cleaned up the look a bit too. The switch and ground wire are mounted to one of the existing ground junctions on the fender near the battery and the power wire is fused.
Overall I am very happy with how they turned out and they do a great job of lighting up the engine bay. The only thing I might add would be a pin switch that would automatically turn off the lights should I forget to before closing the hood. At $90 the kit includes the corrugated wire loom, switch, harness and lights, for the money I don't think that these can be beat.
mdrei
SILVER Star
Nice to see you got the CV issue resolved. I like the under hood lighting kit...I may have missed it but was that a KC HiLites kit by any chance?I received these LED under hood lights as a Christmas gift from the misses. We don't find ourselves under the hood of these vehicles that often due to how reliable they are but I have been wanting some dedicated under hood lights for use with my compressor in low light conditions. I also figure that as it ages I'll find myself in there more often and they could come in handy for routine maintenance and for other uses as well.
This kit while nice, tells you to simply drill a 1/8" hole and then use a supplied self-tapping screw to mount them but I wasn't keen on a fresh hole in the hood substructure if I could help it. I didn't want to lose the insulating material as a whole nor did I want to cut into it for the lights to be flush mounted to the metal either so I sat around for a few minutes and considered my alternatives. I decided that the cleanest install would be to hide the wiring under the insulating material and then use longer push pins within already existing push pin holes to secure the lights. This would only require a small incision in the insulating mat under the lights to recess and hide the wiring for a cleaner install. I think it turned out great and the supplied labeled toggle switch is a nice piece as well. I made use of a grommet I had lying around to protect the wires coming out of the hood from the sharp edge and it cleaned up the look a bit too. The switch and ground wire are mounted to one of the existing ground junctions on the fender near the battery and the power wire is fused.
Overall I am very happy with how they turned out and they do a great job of lighting up the engine bay. The only thing I might add would be a pin switch that would automatically turn off the lights should I forget to before closing the hood. At $90 the kit includes the corrugated wire loom, switch, harness and lights, for the money I don't think that these can be beat.
CV failure post OME 2" lift and SPC UCA install.
I missed this. Did you post about it in another thread?
- Thread starter
- #150
Nice to see you got the CV issue resolved. I like the under hood lighting kit...I may have missed it but was that a KC HiLites kit by any chance?
I pick it up this evening, I still need to verify CV angles prior to departing on my 90 mile journey back home. I don't want to get on the road and eat another CV coming back. And yes, the lights are KC Cyclone V2's.
I missed this. Did you post about it in another thread?
Yes, here it is.

CV failure
I had my 2" lift installed last night, springs, shocks, SPC UCA's and Dobinson's adjustable rear pan-hard bar. I drove it home 10 miles, no issues other than the alignment being off as expected. I took it to the alignment shop today (they specialize if aligning lifted vehicles and have for...
 forum.ih8mud.com
- Thread starter
- #151
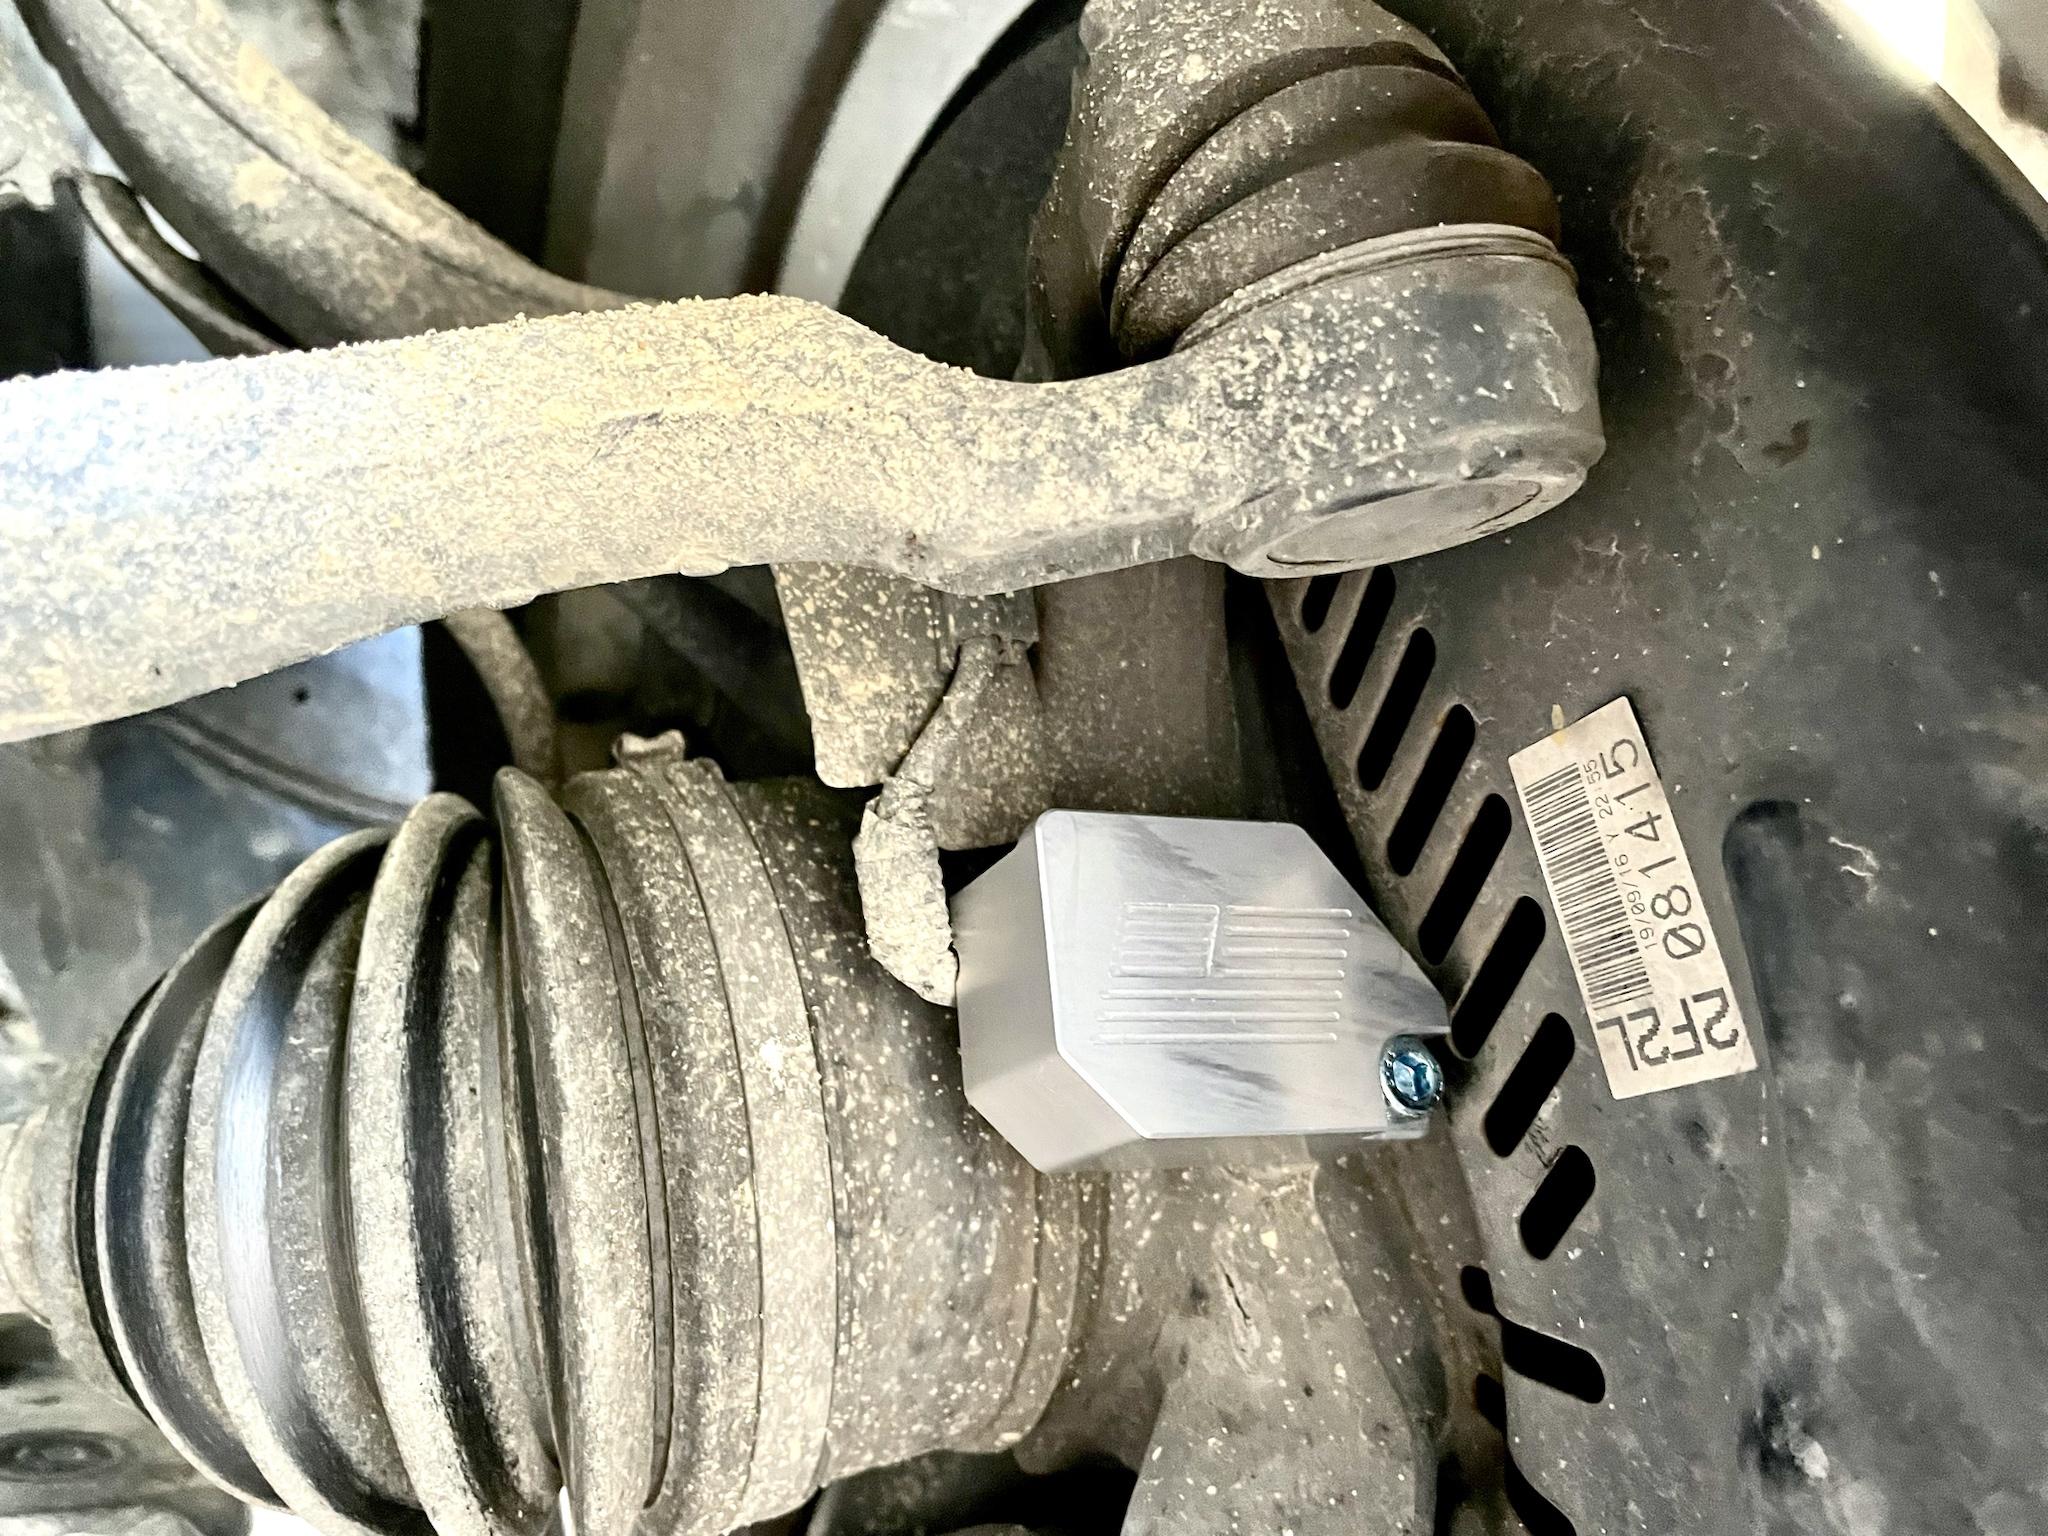
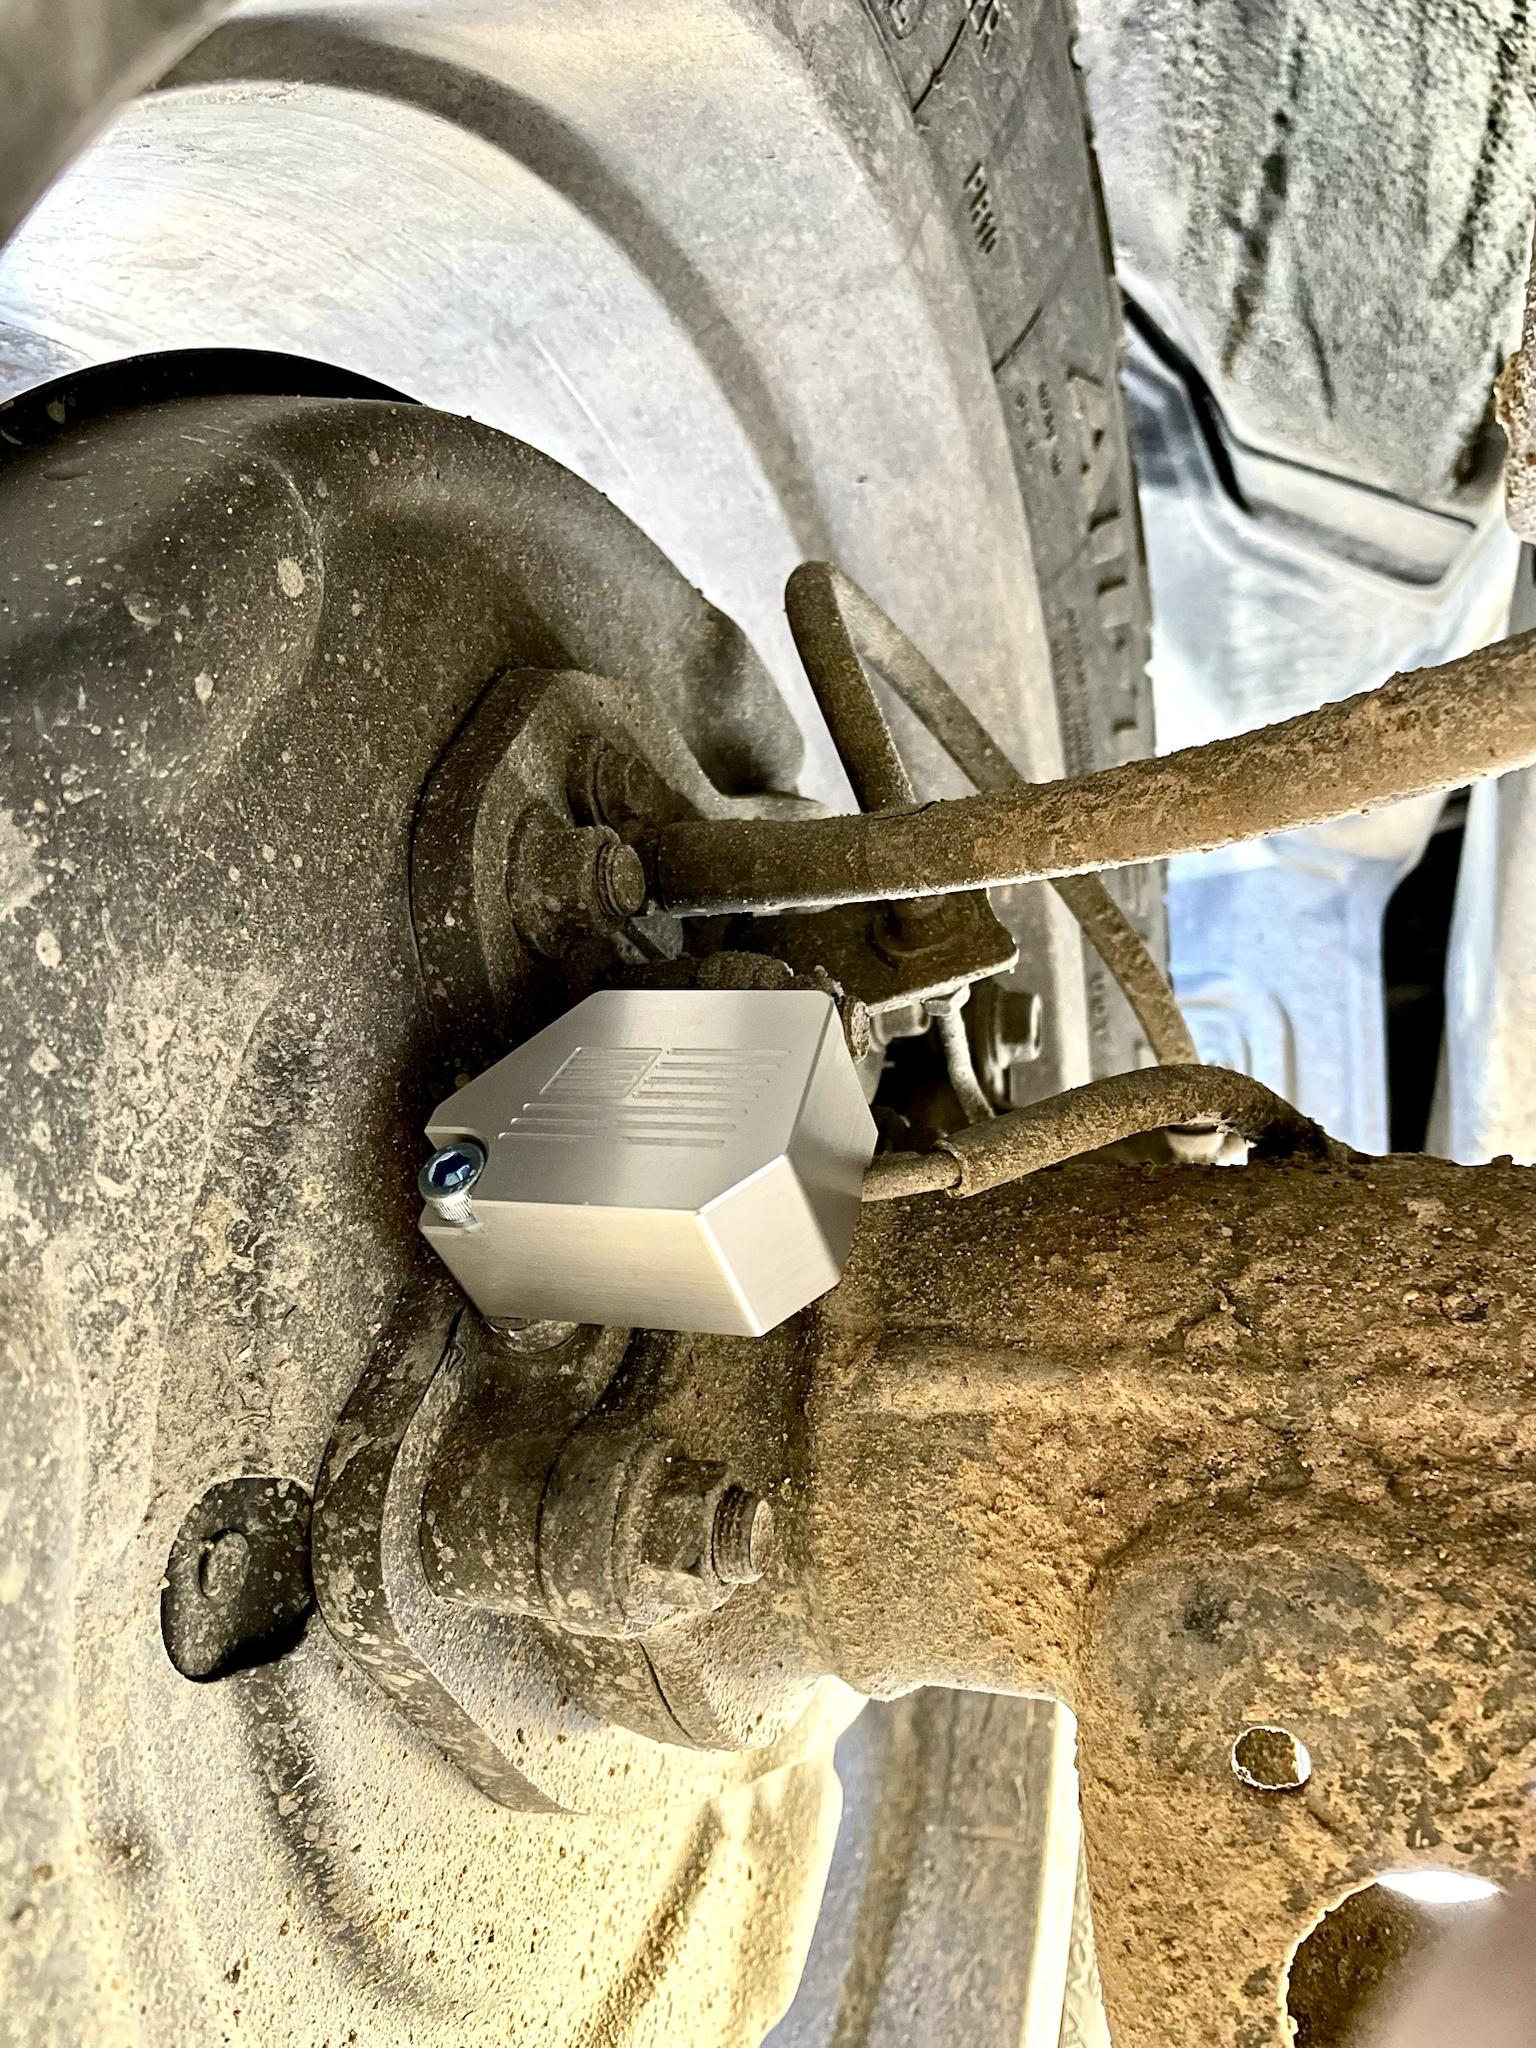
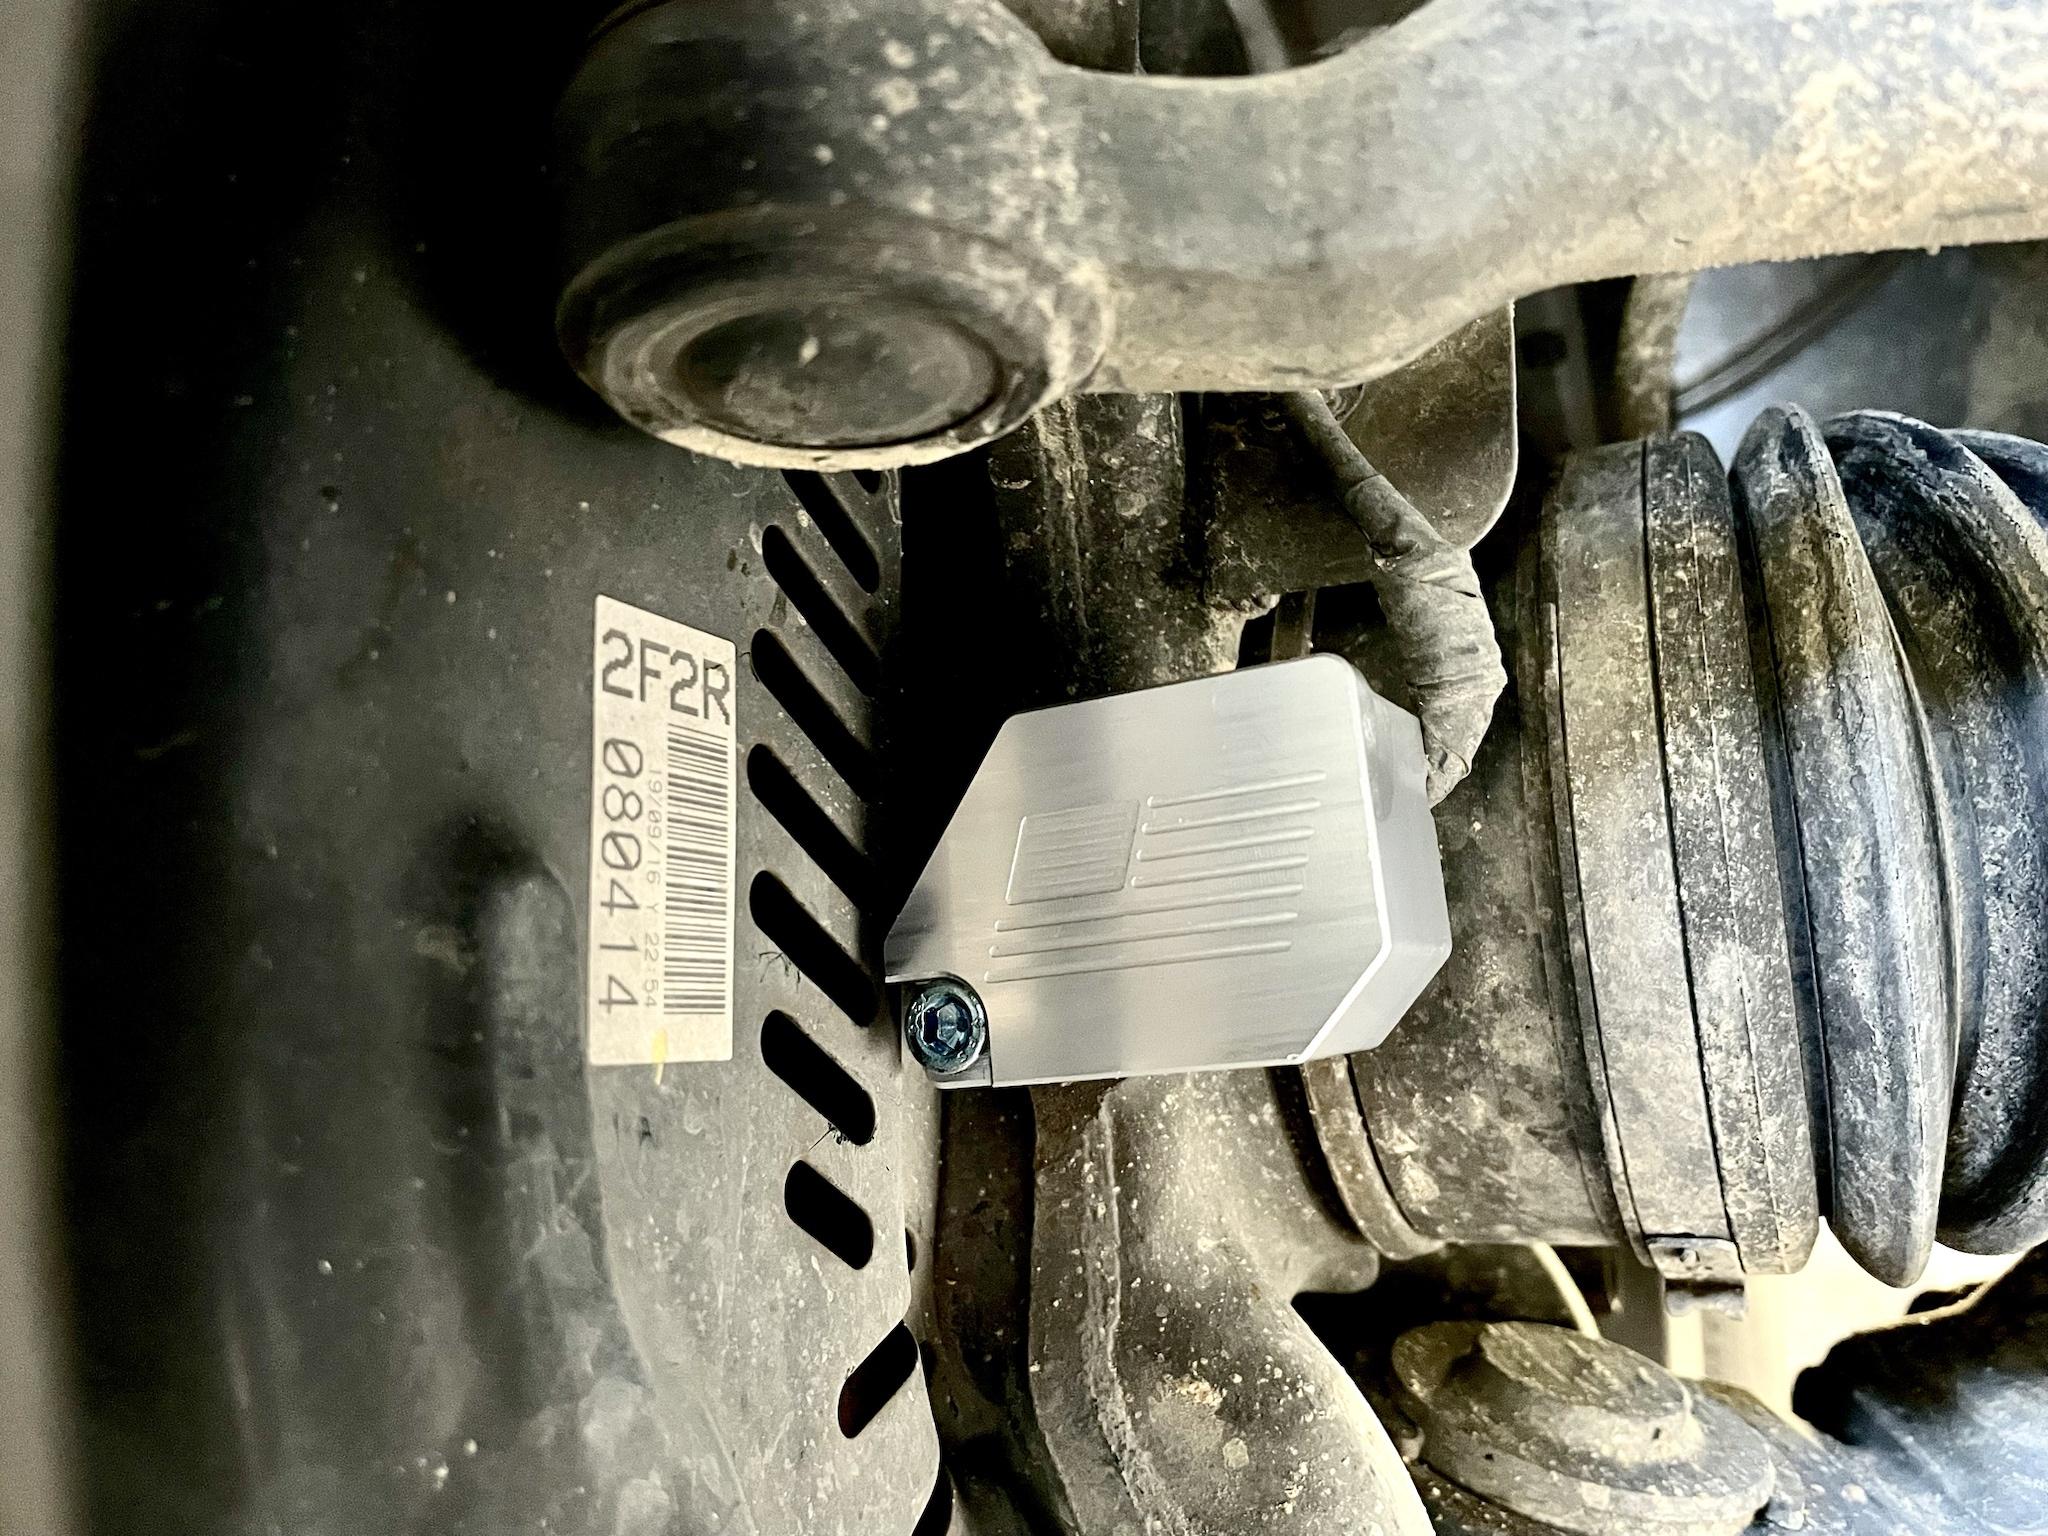
I received my black front recovery points from @turbo8 today. I love how low profile they are and the black allows them to blend in with the surroundings and not stick out like a sore thumb like some other recovery points on the market.
Upon removing my factory tow points I had to hit the area with a wire wheel to remove the light surface rust/corrosion left over from the factory hardware and then I applied a few coats of Rustoleum black. The new recovery points come with new hardware to which I applied loctite. A great product from a great member offering new products for our 200's.


Upon removing my factory tow points I had to hit the area with a wire wheel to remove the light surface rust/corrosion left over from the factory hardware and then I applied a few coats of Rustoleum black. The new recovery points come with new hardware to which I applied loctite. A great product from a great member offering new products for our 200's.

Man I really like the look of those wheels, but zero offset with that much rubber doesn't seem like a recipe for success. Have you had a chance to flex the suspension with those yet? Any rubbing?
- Thread starter
- #155
Man I really like the look of those wheels, but zero offset with that much rubber doesn't seem like a recipe for success. Have you had a chance to flex the suspension with those yet? Any rubbing?
Fully stuffed with the wheel turned halfway I can get it to barely touch the body mount on the passenger side with the edge of the outer lugs. Lots of guys running 0 offset these days with 34’s.
If you're in the DFW area, I'd like to check those out in person sometime. Maybe do a Bridgeport trip?
My LC has a set of 4 KMC wheels on it. I want to buy a 5th to complete the set before I move out of state/out of country but KMC doesn't have any in stock and haven't answered any emails, so I'm looking for a backup plan
My LC has a set of 4 KMC wheels on it. I want to buy a 5th to complete the set before I move out of state/out of country but KMC doesn't have any in stock and haven't answered any emails, so I'm looking for a backup plan
- Thread starter
- #157
If you're in the DFW area, I'd like to check those out in person sometime. Maybe do a Bridgeport trip?
My LC has a set of 4 KMC wheels on it. I want to buy a 5th to complete the set before I move out of state/out of country but KMC doesn't have any in stock and haven't answered any emails, so I'm looking for a backup plan
I lived up there for eight years but I’m long gone from there now, closer to Houston these days.


Man this looks really nice
Similar threads
Users who are viewing this thread
Total: 1 (members: 0, guests: 1)