Tackling the doors

This site may earn a commission from merchant affiliate
links, including eBay, Amazon, Skimlinks, and others.

...Saw the gale you had on the news covering the cricket, talk about windy :eek:


Yeah. 130 km/hr wind Alex! Enough to blow the roller across the pitch and if it had really caught that ground sheet it would have lifted anyone silly enough to hold on ... clean out of the ground!

But who wants to talk about the damn cricket? (Let there be rain!......P-l-e-a-s-e!)

Unfortunately today has dawned a beautiful day (no wind at all right now and brilliant sunshine) so NZ is doomed in the cricket and I'll be working on the driver's door rather than doing much on this thread. But at least that'll enable me to take some photos of things I glossed over when doing the passenger door (like .... the removal of the trim panel.)

But I'll just go through the "order of assembly" in this post while it is still in my head....

Reassembly:
  • Fit main door seal
  • Fit window regulator
  • Fit lock assembly
  • Fit outside handle assembly
  • Fit key tumbler
  • Fit inner door belt
  • Fit outer door belt
  • Replace damaged trim caps (if you're silly enough to damage them like I did)
  • Fit lower window run felt
  • Fit L-shaped bailey channel
  • Tap paint out of the holes/threads in the vent-window-frame and in the door (for mounting hinges and mirror)
  • Fit straight section of bailey channel in the vent-window-frame
  • Refit the "plate" for the ventilating window handle to "run on"
  • Cut a section from the original "lower run felt" to fill a 155mm gap
  • Fit the vent-window rubber (time consuming job)
  • Refit the vent window into the vent-window-frame (leaving off the spring, nuts and washers at the bottom of the pivot)
  • Insert the main glass in the door and wind it down towards the lowest position
  • Fit the vent-window-assembly into the door (trying to avoid too much paint-scratching)
  • Refit the spring, nuts and washers to the vent-window-pivot (using original photo as a guide for setting the spring tension)
  • Fit the inside door handle (& clip operating rods in place)
  • Scrape paint from "hinge bush areas" and trial fit the hinges and hinge pins/bushes
  • Fit ONE hinge (upper) to the door and mount door on vehicle
  • Fit the lower hinge
  • Fit the door limiter
  • Rewire the radio speaker
  • Fit the mirror
  • Fit the door trim (with plastic sheeting behind etc)
  • Adjust the striker and hinges to get it all fitting nicely and closing properly.
Saying all this makes me feel depressed ... because I know I've got to go through it all again with the driver's door!
 
Yesterday I started on the driver's door (which would be the passenger door for you folk in those "strange countries" of course).

So here is some stuff on removing the trim.

There's not much to it:

23Mar1.webp

23Mar2.webp
23Mar1.webp
23Mar2.webp
 
And to remove the window-winder, you simply use a piece of old rag and pull it backwards and forwards like this: (Like a stripper does with G-string ... not that I'd know much about that :lol:)

(Some people use metal tools for this but a rag cannot scratch anything.)

23Mar3.webp

Incidentally, the above pic shows where the winder should sit with the window wound fully up. (So this is the orientation in which you refit it.)

And this little clip will just drop out (and run away down a drain if you're unlucky).:

23Mar4.webp

With the clip removed, the handle just lifts off.
23Mar3.webp
23Mar4.webp
 
With those three things removed, you can remove the entire "trim panel".

It is held by clips and you need to take care how you separate them from their "caps" (or "clip recepticles"):

23Mar5.webp

I find a long screwdriver works best with some masking tape on the shank to protect the paint:

23Mar6.webp

Ideally you want to get the blade of the screwdriver right under the head of the clip before applying pressure.

Because if you're rough, you can rip the clips out of the trim panel!
23Mar5.webp
23Mar6.webp
 
Actually Toyota call these "clips" ......trim retainers. And here are some with an arrow showing where you should aim to get your screwdriver blade when you are levering them out of their mating "caps":

D70.webp

(Note: They can "rust into" their caps making extraction difficult.)

And here are the "caps":

D69.webp

I'll mention another example of why I liked dealing with DentDepot/CruiserCorps.......

I damaged/melted some of those white plastic caps with my hair drier when I was heating up the passenger door prior to painting. (I always like things to be slightly above ambient temperatures when I am painting them .. and I particularly try to get "crevices" warmed up.) So I needed replacements for the melted ones and found it damned hard to work out their part number (because Toyota draws them so badly in their "exploded parts views"). So I accidentally gave DentDepot the part number for the "trim retainers" instead of the "trim caps".

Now the experience of my mates at DentDepot made them suspicious of my part number - so they ordered only 3 instead of the 21 I asked for. And then they sent me the above photo of what they received back from Toyota to ask me how I wanted to proceed from there. So by doing this, they saved me from having 21 "trim retainers" that I would have no uuse for. How's that for superior service :clap:.
D70.webp
D69.webp
 
Back to the driver's door....

I have speakers mounted in the trim panels ... but when I fitted them .. I also fitted connectors in the wiring to enable the trim panels to be removed easily (without having to cut or unsolder the wires):

23Mar7.webp

Note: You've already seen me cut the speaker wires on the passenger door. I will cut those same wires on this door too - because whenever a door is opened or closed, those wires twist. And unless I replace them now, they are likely to fail there from "metal fatigue in all the copper strands" some time in the future. (I like to replace that section of wiring approx every 10 years.) :hhmm: So I probably should just show myself cutting these wires really since this wiring is ultimately going to be replaced.


And here is the plastic sheeting that sits beneath the trim panel:
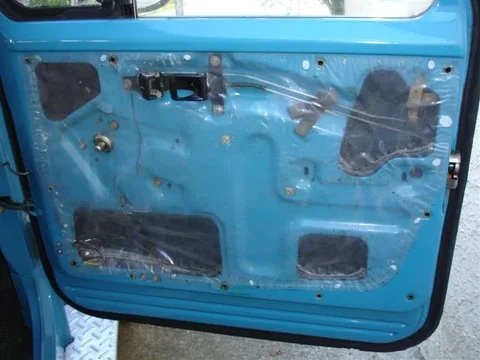
23Mar8.webp

Without this, if you were driving along a side-slope in heavy rain - the water would drain down the window glass (window wound up of course) and drip on the inside of the trim panel (through the holes) making the trim board go rotten and fall to bits! ......Not good.

I cut that sheet myself (from the polythene sheeting sold in garden centres) and will be making up a nice clean replacement too. (Note the little flaps I melted onto the inside surface to direct the water back inside the door cavity.)


And here is the door with the plastic removed. (PS. I hold the plastic in place with bits of "Blue tack". I have found this works best after trying various alternatives. Because it stays soft rather that setting hard.)

23Mar9a.webp

All that black stuff inside the door cavity is "congealed Fishoilene" that I have periodically sprayed liberally inside to try and stop rust.

Fishoilene is made from fish oil - and is an old-fashioned rust-preventative that I still think works better than any other (but only in certain situations).

A lot of people won't use fish oil because your vehicle stinks of fish for a few months after application and it never really sets hard. (Although deoderized versions are now being sold.)
23Mar7.webp
23Mar8.webp
23Mar9a.webp
 
So to get the lower reaches of the door cavity ready for paint, a lot of cleaning work is required before I even start patching the rust holes:

Here's me pouring boiling water inside.

23Mar9b.webp

I find the heat help the Marine Clean dissolve the black sh#t

And long brushes (and tooth brushes) are usefull tools:

23Mar9c.webp
23Mar9b.webp
23Mar9c.webp
 
OK. Back to the passenger door from where I left off..... So it has had the rust holes repaired, and its been repainted except for the upper reaches of the door cavity (which are too difficult to access).

So I recoated those upper reaches with Fishoilene:

D33.webp

D34.webp

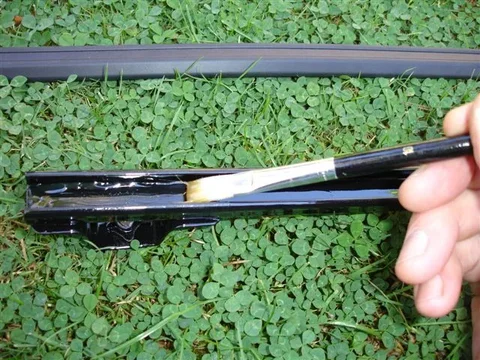
That brush has its tip bent to enable me to apply the stuff more thoroughly.
D33.webp
D34.webp
 
Next thing to do was "fit the main weatherseal".

The seal I used was supplied by "Rare Spares" (which has branches in both Australia and NZ) and I am reasonably happy with it. The big test is when you come to fit the door and while I do have to give it a "good slam" at the moment ... It doesn't sit "proud" and has "no rattles while on the move". So there is room for the rubber to "compress over time" which is what I would expect .... but yet it is already "OK as it is".

The "slamming" isn't really a problem - because female passengers manage to do it themselves without me having to reach over and help.

First I wiped the "talcum powder" off the seal with a damp cloth. (For the driver's door I think I'll wash it in a sink with some dishwashing liquid instead and allow more time for it to dry because I did have some trouble with the contact adhesive peeling away from the rubber in places this time.... requiring quite a bit of extra work.)

D35.webp

I taped the seal to the door in such a way that I could coat the door and seal with contact adhesive at the same time, leave the adhesive to become semi-dry (15 mins approx), and then stick the seal to the door in stages (working my way around).

D36.webp

In this way, sections of the seal just needed to be "turned and moved a little" in order to press them into place.

And here is the adhesive used:

D37.webp
D35.webp
D36.webp
D37.webp
 
Last edited:
Here is the adhesive being applied:

D38.webp

Now the seal being pressed into place:

D39.webp

And this shows a bit of the "detail" that the manufacturer has put into the seal. (I didn't have to cut that notch!)

D40.webp
D38.webp
D39.webp
D40.webp
 
Looking along the base of the door at the drain holes:

D41.webp

And another view:

D42.webp
D41.webp
D42.webp
 
Next I refitted the window regulator (relubed with grease of course):

D43.webp

Mustn't forget the "gasket" that sits between the regulator and the inside surface of the inside-door-panel:

D44.webp

Then I fitted the lock assembly:

D45.webp
D43.webp
D44.webp
D45.webp
 
Then the "outside handle assembly" (with a new gasket I cut from plastic that matches my paint colour):

D46.webp

Then the "key tumbler" (where I reused the old 30-year-old gasket):


D47.webp
D46.webp
D47.webp
 
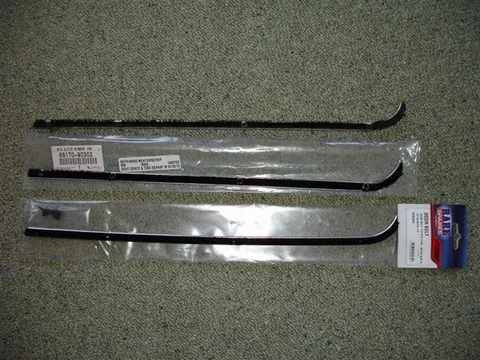
Next I fitted the "inner door belt".

In this next pic.... the top one is the "original", the middle one is an exact OEM replacement (from DentDepot/CruiserCorps), and the bottom one is an aftermarket item supplied by Rare Spares.

D53inner.webp


While I think the Rare Spares item is of acceptable quality for this application ... I went with the OEM item instead. (I ordered the OEM belt later when I found I HAD TO source OEM "Bailey Channel" and "outer belts".)
D53inner.webp
 
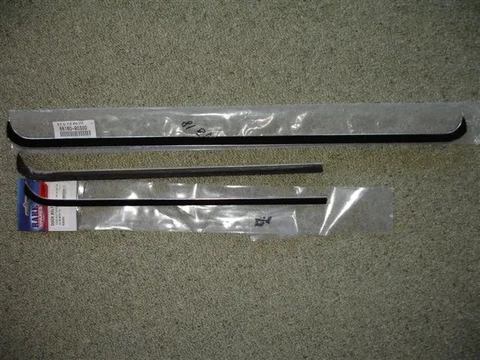
Now the "outer door belts" gave me real grief!

The top one in this next picture shows an "OEM outer belt" meant for "without vent-window doors" and it is suitable for either the driver or passenger door:

D54outer.webp

The middle one is the 30-year-old original and the lower one is the Rare Spares item. (Rare Spares reckon you can use their "inner belts" as "outer belts" too.)

Because these belts (for my doors) curl at one end only ... they become left and right-handed. (That is, one is meant for the passenger door while another is meant for the driver's door.)

Well there is no way I'd use the Rare Spares item as an "outer belt". It is too "flimsy" and I don't think the "felt material" is designed for such exposure to the weather.

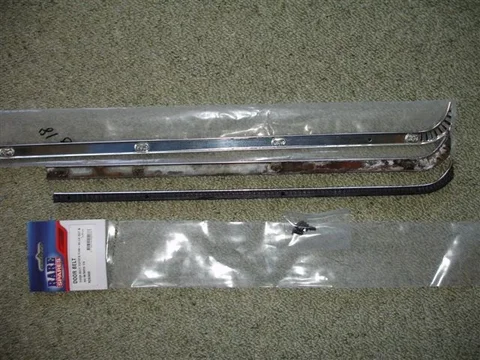
Here's another view of the three together but this time showing the faces that mate to the painted panel surface:

D55outer.webp

This photo shows how really "lacking" the Rare Spares item is (in comparison to OEM).
D54outer.webp
D55outer.webp
 
Last edited:
So, together with the great fellas at CruiserCorps/DentDepot I worked out that I could cut the "outer belts" meant for "without-vent-window doors" to suit my doors. (Because those "curved-at-one-end-only belts" are now unavailable for my doors.)

So here's me cutting one:

D56.webp

And here is a pic showing the original (top), the one I've cut (middle), and the unsuitable Rare Spares item (bottom):

D58.webp

The above photo shows that by adapting this outer belt ... I miss out on one "securing clip". (Arrowed). But I don't think this matters at all.

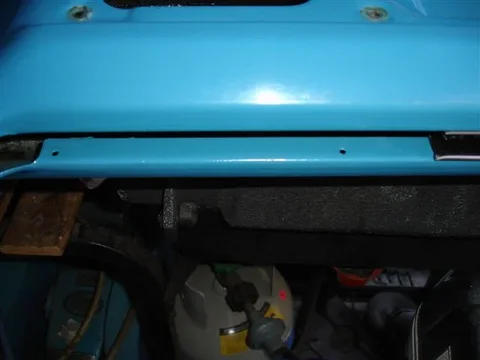
And this pic shows that the same doors are manufactured to suit "without vent window" and "with vent window" applications. (I have unused holes!)

D59.webp
D56.webp
D58.webp
D59.webp
 
By the way, the OEM belts use metal clips:

D20c1.webp

While the Rare Spares belts use plastic clips:

D20c2.webp

I think I would prefer the plastic ones because they can't rust ... (but that's now irrelevant because I didn't end up using any of the Rare Spares belts that I bought).
D20c1.webp
D20c2.webp
 
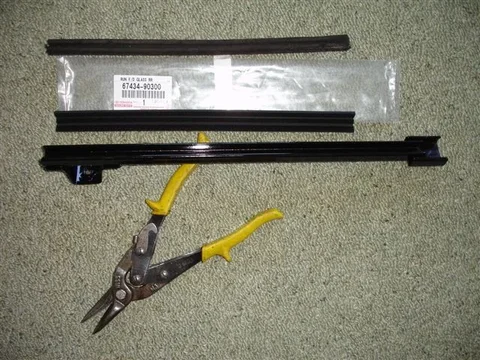
Next job was the "lower window run felt" (that the rear edge of the window winds down into).

While the original was really made of "felt" the new Toyota item is "flocked rubber" instead. (The orininal "real felt" is shown at the top.)

D60.webp

(Ignore the "tin snips" in the photo - I didn't cut anything here.)

It doesn't fill the entire channel (but "sits flush at the bottom" as I recall). Here's me applying the contact adhesive.

D61.webp

D62.webp
D60.webp
D61.webp
D62.webp
 
Well the weather is lousy again - which is why I'm doing this rather than working on the driver's door. But I'm running out steam - as well as running out of time (for today) with lots more photos yet to post.

Anyway.... The next step was the L-shaped Bailey Channel.

I was thinking of using "flexible bailey channel" and actually bought 2 rolls of the stuff from Rare Spares. But then decided that there is no way that that stuff would look good .. or be able to reliably perform its duty. You need the chrome-beaded metal stuff!

Here's the unsuitable flexible stuff (flocked rubber):

D64.webp

And here is the old L-shaped channel (where the metal has mostly turned to rust) alongside the flexible stuff:

D63.webp

But once again - this "chrome-beaded channel" is "no longer available" for my doors. Hence, with the help of DentDepot/CruiserCorps, I decided to "cut-to-fit" the longer channel used on "without-vent-window doors".

Here's me marking where to cut:

D65.webp

That's enough for today. (I'll give Woody some time to find more disk-space for my photos.)
D64.webp
D63.webp


D65.webp
 

Users who are viewing this thread

Back
Top Bottom