- Thread starter
- #201
Navigation
Install the app
How to install the app on iOS
Follow along with the video below to see how to install our site as a web app on your home screen.
Note: This feature may not be available in some browsers.
More options
Style variation
You are using an out of date browser. It may not display this or other websites correctly.
You should upgrade or use an alternative browser.
You should upgrade or use an alternative browser.
Builds Splurge Overkill - FJ60 build
- Thread starter isbj60
- Start date
This site may earn a commission from merchant affiliate
links, including eBay, Amazon, Skimlinks, and others.
More options
Who Replied?spotcruiser
Geezer
Fits like a glove. 
- Thread starter
- #203
Decided to spend some time on the broken caging bolt on the rear air brake can. After some machining, here's the pile of parts:

I had to machine a new sealing washer for the exposed end if the bolt. When the caging bolt is released, the o-ring seals between the nut and the can to keep water out. What I am trying to emulate:

My attempt:

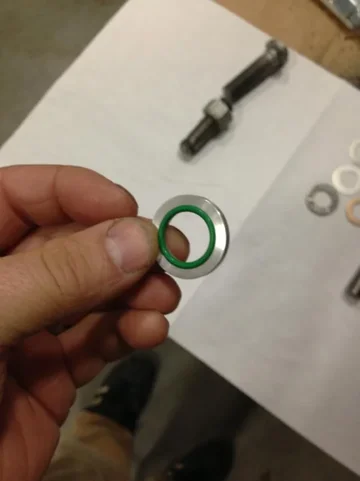
I had to cut down a nut to make the head that is inside the hollow piston. Fitted up:

After my first time tig welding:

Could be prettier, but I am not complaining.
Got it all assembled. The roller bearing made a huge difference. The caging bolt has no troubles operating the brake and is very smooth. I will probably do the other side, too. Another day.


I had to machine a new sealing washer for the exposed end if the bolt. When the caging bolt is released, the o-ring seals between the nut and the can to keep water out. What I am trying to emulate:

My attempt:


I had to cut down a nut to make the head that is inside the hollow piston. Fitted up:

After my first time tig welding:

Could be prettier, but I am not complaining.
Got it all assembled. The roller bearing made a huge difference. The caging bolt has no troubles operating the brake and is very smooth. I will probably do the other side, too. Another day.


spotcruiser
Geezer
Nice fix on the cylinder, Kevin.
The way you have that framed cribbed is a little scary. I hope you're keeping the young'un clear of that.
The way you have that framed cribbed is a little scary. I hope you're keeping the young'un clear of that.
- Thread starter
- #205
Nice fix on the cylinder, Kevin.
The way you have that framed cribbed is a little scary. I hope you're keeping the young'un clear of that.
The kiddo is trained to stay out from under things. Actually, the cribbing is pretty solid. There is a single board across the top that ties the two cribbing stacks together. It's more steady than the jack stands. I shook it really hard and it hasn't come down. That being said, I will be getting some screw jacks before I tear the rear axle and remainder of the frame out.
- Thread starter
- #206
Picked up a transfer case today. I love the fact that ford 6.0 liter powerstrokes self destruct...

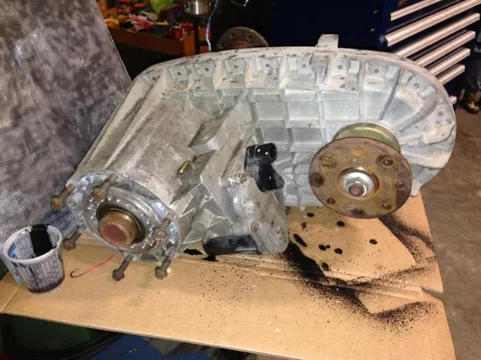
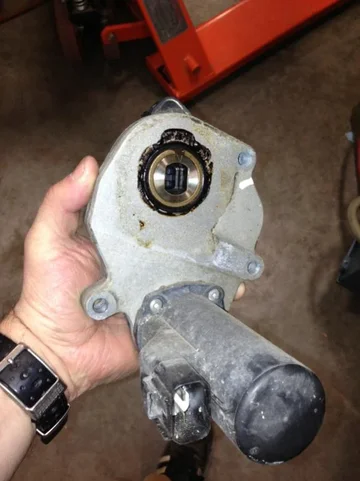
NV273. It's the electric shift model, not too jazzed about that, but I should be able to modify it to manual shift if I want to. But the electric shift model came with synchros for the range shift. I like that. It's about 120# and 22" long. 13" offset on the front output, so it will help me clear the fat roadranger. 7800ft-lb ish torque rating, 17,500 gvwr. 34 spline 1.5" input, and I believe the flanges will except a 1480 yoke. Ford put this thing in f-250's on up. Talk about overbuilding a 3/4 ton...
Rear flange:
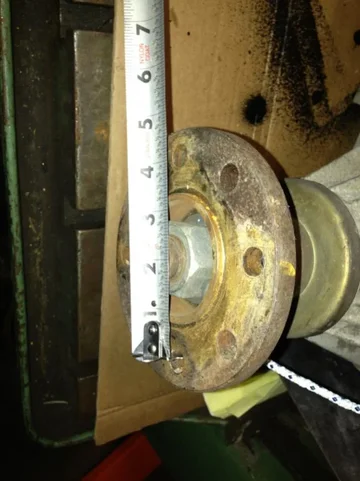
Front flange:

Input:

The bolt pattern is the same as a np205. I think the register size is different, but I have yet to measure that. Now I can finish my adapter and be one step closer to a complete drivetrain.
There is no provision for a speed sender on the output. The transmission does have one, though. The engine ecu can accept a two-speed rear end switch, so it's drivetrain protection calculations would be unaffected, but it does not output to the speedometer. I will either have to pull a signal off of one of the abs sensors like ford does, or just live with the fact that the speedometer will be off in low range. Not a huge deal to me.


NV273. It's the electric shift model, not too jazzed about that, but I should be able to modify it to manual shift if I want to. But the electric shift model came with synchros for the range shift. I like that. It's about 120# and 22" long. 13" offset on the front output, so it will help me clear the fat roadranger. 7800ft-lb ish torque rating, 17,500 gvwr. 34 spline 1.5" input, and I believe the flanges will except a 1480 yoke. Ford put this thing in f-250's on up. Talk about overbuilding a 3/4 ton...
Rear flange:

Front flange:

Input:

The bolt pattern is the same as a np205. I think the register size is different, but I have yet to measure that. Now I can finish my adapter and be one step closer to a complete drivetrain.
There is no provision for a speed sender on the output. The transmission does have one, though. The engine ecu can accept a two-speed rear end switch, so it's drivetrain protection calculations would be unaffected, but it does not output to the speedometer. I will either have to pull a signal off of one of the abs sensors like ford does, or just live with the fact that the speedometer will be off in low range. Not a huge deal to me.
You could always do a GPS speedometer: http://www.speedhut.com/gauges/GPS-speedometers
- Thread starter
- #208
You could always do a GPS speedometer: http://www.speedhut.com/gauges/GPS-speedometers
Never knew that existed. Thanks! That makes life much easier.
Your tax money was used to launch billion dollar satellites, may as well use them.
- Thread starter
- #210
- Thread starter
- #212
Remember that your vin number is on the piece of frame you cut Off
Just aft of the front axle, outboard web, passenger side. I welded a skid plate mount smack dab over it in college. I will probably have to cut the frame into little unrecognizable bits before I dispose of it... Might keep the bits, as I would like to get into casting some day.
Once you get rolling...
Looks like good progress. I have a feeling you're going to school all of us on fabrication.
Looks like good progress. I have a feeling you're going to school all of us on fabrication.
pistonpete
SILVER Star
Man, and i'm worried about putting a 5.9 in mine !!
Good work
Good work
- Thread starter
- #215
Once you get rolling...
Looks like good progress. I have a feeling you're going to school all of us on fabrication.
You flatter me. There is a lot of stuff I have never done before that is upcoming, so i will be making it up as I go. Hopefully it turns out as well as it looks in my head.
Man, and i'm worried about putting a 5.9 in mine !!
Good work
I think what I am doing is actually easier from a fitament standpoint. I can scrap the stock stuff and then dream up new components. Keeping within stock limitations is very difficult. Don't sell that short. I have a ton of respect for those that can put engines like the 4 and 6bt into a stockish landcruiser such that you cannot really tell from the outside. Or 454's. Anything like that. That takes a lot of work.
- Thread starter
- #216
I have the luxury of some pretty clever folks i work with. One mentioned that I should just cut the transmission tunnel and make an appropriate hump to fit everything, and compensate for the loss of foot room in the center rear seating position by just putting in two captains chairs. Since I have to stretch the rear by at least two feet, I can move the rear bench back to what is now the cargo area and have 4 captains chairs AND a bench for the kiddos. Nice! The bench would still fold flat like it did stock to retain cargo capacity. Since it is growing in length, with the rear bench folded down I shouldn't be too much less than what stock cruisers have for cargo area with the bench up. Access to the rear bench would be from between the cargo chairs.
The amount of floor that I would need to put behind where the current rear bench is:


Roughly 34" or so.


The amount of floor that I would need to put behind where the current rear bench is:


Roughly 34" or so.
- Thread starter
- #217
From where the rear of the flywheel housing sits, I have about 60" to the rear drive flange. a picture showing where that is on the inside:

The bubble for the transfer case would be around 52" or so. Right in the middle of the rear foot area. Not a big deal if I go with the captains chairs idea previously mentioned.


The bubble for the transfer case would be around 52" or so. Right in the middle of the rear foot area. Not a big deal if I go with the captains chairs idea previously mentioned.
- Thread starter
- #218
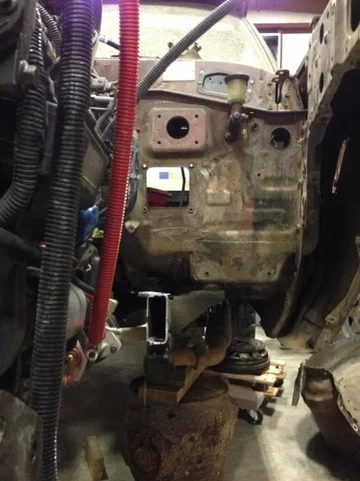
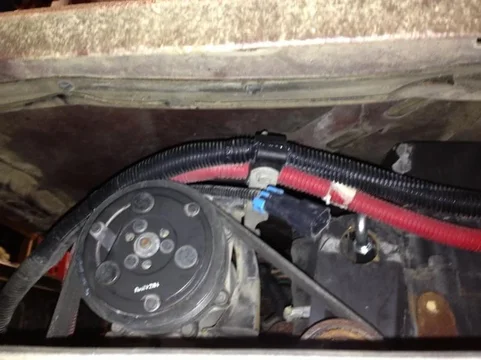
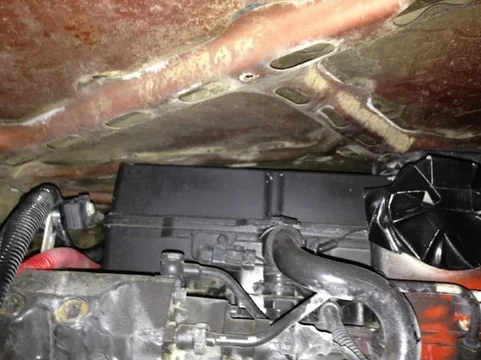
I placed the motor on cribbing to remove the crane so I could look at potential hood modifications. I think I can make a tasteful extension to the already sizable bubble in the hood while keeping the stock lines. Pictures of the fit. There is about 5 inches to the firewall as it sits now, perfect for easy maintenance access, but could be reduced for intercooler fit in the front.




- Thread starter
- #219
- Thread starter
- #220
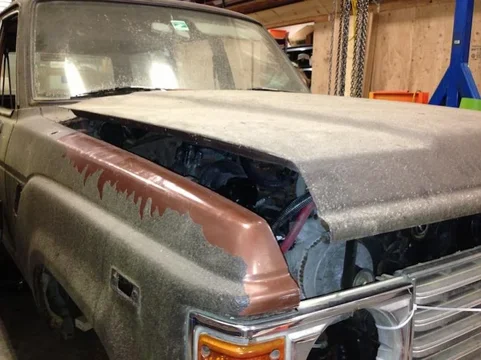

Some notes:
The engine is not exactly centered. It is biased about an inch to the passenger side, by accident. It does give more clearance for steering and front driveshaft/diff this way, though, so I might just go with it.
The hood is pivoting about the crankcase vent filter mounted on top of the valve cover.
The hood clears in the back with no issues. The engine is slanted about 3-4 degrees right now, and I like the way it fits.
All told, I need to make about a 3-4 inch lift in the center bubble to fit it.
Similar threads
Users who are viewing this thread
Total: 1 (members: 0, guests: 1)


