Builds Shipwreck (4 Viewers)

This site may earn a commission from merchant affiliate
links, including eBay, Amazon, Skimlinks, and others.

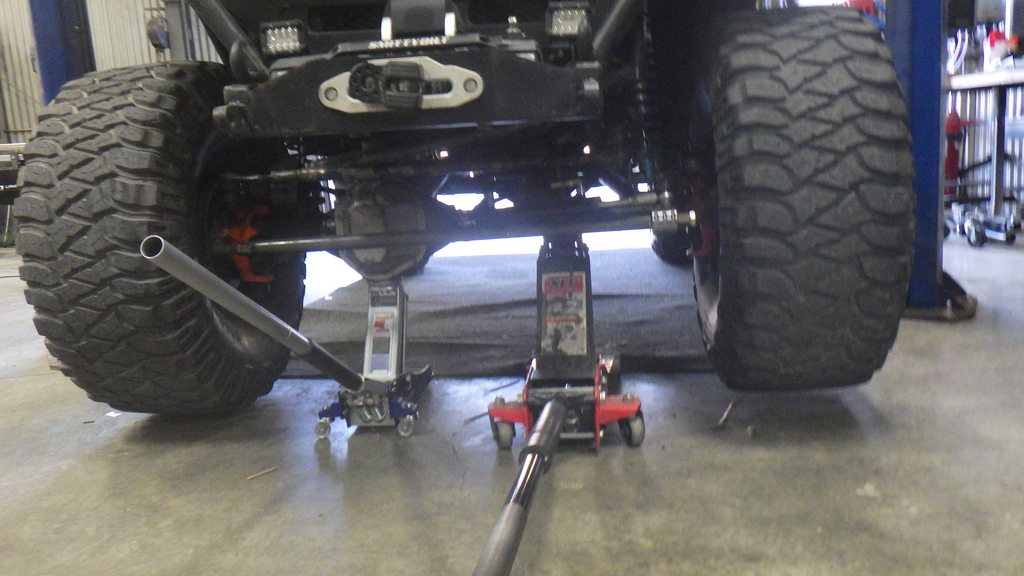
In honor of my void-every-warranty policy, I present a brand new borgeson joint
54x1vrIh.jpg

then tap over the washer to fit the curve
yqNAANFh.jpg

x2KS26Nh.jpg

finish welding the washers on
HzmFsy8h.jpg

and installed with plenty of loc-tite... just so I have to really fight it to get it apart when the trailgear hydraulic assist arrives next week
JsJFyYih.jpg


for the inevitable question of why wait until now for the steering assist - it's how I build stuff.... do the stuff that is time consuming and if I need to save money (usual story) I save the 'additions' for later. I still want to put a selectable locker in the front - but haven't the funds or decided whether or not to regear first... in that same vein, I'd like to do a 4:1 conversion on the dana 300.... that probably will be the next, major upgrade. With the HA I can avoid pulling the lunchbox locker for a little longer.
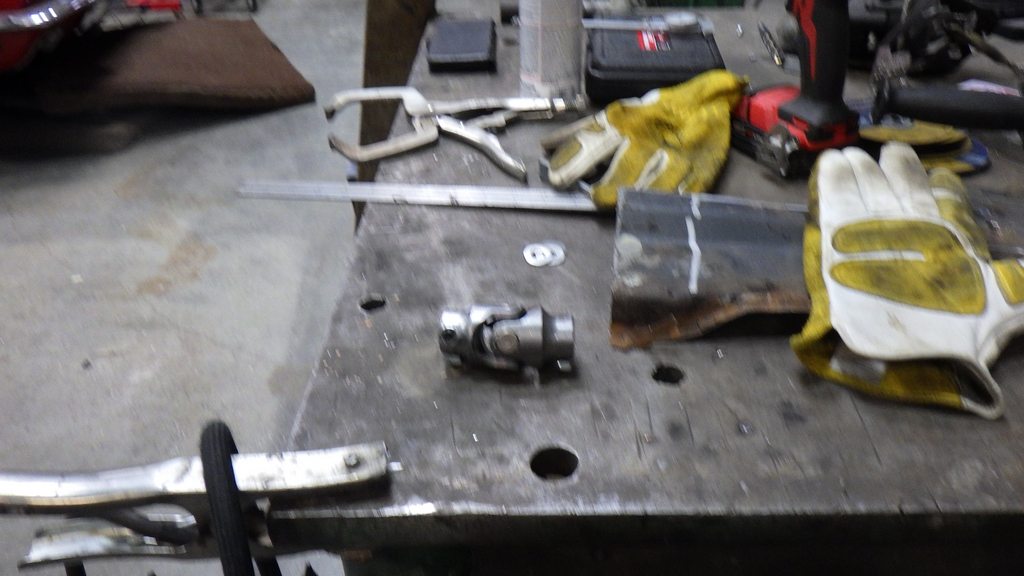
in other news, I started disassembly of my various cs130s... pretty sure this one was off my H3 Hummer - overcharged badly but only had 1/8th of a mile on it (anyone want to guess why I avoid Powermaster?)
uNooyBzh.jpg

ctXxud5h.jpg

the brushes are brand new....
p4zbBZyh.jpg

as does the rotor
80df8CDh.jpg

the stator got crispy - those wires should be copper colored not crispy black
mvwiXw3h.jpg

what the stator should look like
PRXzTwsh.jpg

next up steal the toaster oven and heat the case to get the stator out... but that's for another day, thanks for looking
 
the video I'm kind of using (I'll be sure to point out where I've departed from it)
it's also about $180 without the alternator or cables.

The list of what's coming next:
1) hydra-assist
2) much larger power steering cooler
3) welder
4) selectable locking front differential
5) 4:1 gear conversion - been wanting to do this for awhile however, getting the parts or having the money has been a challenge

I don't think I'm going to change the axle gear ratio - I like the strength of the 4.56s, thus the 4:1 should resolve the crawl speed. Luigi was not thrilled at bouncing on the trail so slowing stuff down makes sense from that perspective. As far as the cooler, I've had trouble with overheating the power steering pump if the front end is locked and I'm not on snow...

If I run the Rubicon again with this, I'm taking more time off so I don't have to trailer it... for some reason that bugs me most about the entire adventure.
 
Part 1 of the welder series
as you know, I had the parts for a 200 amp CS130 alternator
mvwiXw3h.jpg

this didn't look terrible except the stator was cooked - brushes looked new
p4zbBZyh.jpg

the rotor looks new too
80df8CDh.jpg

the new stator
PRXzTwsh.jpg

to get the stator out, simply head the housing with a torch to at least 220
ktZB3bch.jpg

when you reassemble, use the rear housing as the 'press' the other reason to do this is so your field wires go through the case.
gXgy3P1h.jpg

it's at this point that you need to think where you want those wires to exit (you can rotate the stator)
for mine, I want it to come out about where the rectifier/regulator plug exits
0bzM1R9h.jpg

got a boatload of parts of the last several days. I'm still missing the coolers, transient voltage suppressor, and the voltage regulator... no big deal, I'm also trying to find some parallel connectors and I still need to build a box to house all of this... the next installment will be that.
 
time to start on this as well
WttqoRGh.jpg

WBWZHtqh.jpg

Uz6qdL5h.jpg

part of my day was this
2FrMyxZh.jpg

and I admit I'm working on getting to the comfort level to disassemble and tap the box
JyCXvUfh.jpg

did drill and tap the clamp
oU64t6lh.jpg

and ugh
not sure why the grill isn't lined up anymore...
Tw1045Oh.jpg

I did set the system to draining - and hopefully that will contain the mess that's coming next
 
well... game on
ghgYYtch.jpg

mental note again... this pan leaks
XQRuIoWh.jpg

pilot holes drilled... there are blank space so maybe it's right
UNtwn9ih.jpg

then drilled and tapped twice (first with a taper tap and then with a bottom tap)
iN5Y2URh.jpg

aforementioned homemade bottom tap
VO1iaSVh.jpg

so fun fact, there are supposed to be 2 sizes of balls here... there aren't... but before I measured I spent a minute trying to determine a visual difference
90iKDN3h.jpg

success?
eTm082t.jpg

it even turns
0i72VnWh.jpg


so here's the deal, a complete system is about $2500. That includes a new steering gear. Of course, that isn't a Scout 2 gear - that adds at least another thousand (presuming you can find one that is rebuildable).... so $3500 for a basic system without pump. I have about $425 in this. Was it worth the fear? hopefully.
and I could have saved about $100 if I had pieced it together rather then buying the trailgear kit... with that said, rams - there are two kind, rebuildable and not very rebuildable. The key is whether or not the cap screws onto the end of the ram.... sealed (read no screwed on end) are about $80 instead of $190. .
 
drove it, that was interesting
[VIDEO]
I knew the travel on the cross shaft was 6" but, according to the trailgear website, dana 44 needed 8" travel. It trumped my thought....
FUPCAHzh.jpg

nope, needed the 6" one. With that said, I may have just decided to put this ram on my Blazer so it's a no harm no foul (and was what got me to order the 8" one)
ah well, the new one will be here next week I'm sure... by then I should be deep in the welder
 
doors on
p6SYCqYh.jpg

unox2MKh.jpg

then pull the steering box.... fudgelsticks... well, what I said did start with an f
I thought I might be missing a bearing. maybe? but somehow a bearing got jammed on the worm gear and carnage ensued
EdP9bDWh.jpg

DxJ1Jhoh.jpg

the inside of the other bit doesn't look any better.... but at least I got the holes bored correctly.... winning? yeah, no
I also got the 6" assist. This is a lot better... of course, without a steering box, it ain't much good
XwpHRBkh.jpg

MSuEligh.jpg


so at some point in the near future, I'm going to have to deep dive interchangeability of parts. maybe I'll get lucky (nope) and the hydraulic bit interchanges with something else.
Learnin'
 
Call Readhead and see what they say
Thanks for that.
It's going to American Steering in Indio (north of Palm Springs, I had to look it up). Not cheap but I'm confident he can repair it - the hard part is the broken parts, and he does Scout stuff (and has the parts). Granted, it won't even be there until Monday - but since I'm going to be at SEMA all next week, it's not a huge deal at all. Not cheap, but after my talk with him, I think I'm on the right path. Probably a power steering pump upgrade in my future though too....
 
time to mark this doneish
shiney rebuilt box. I'm so satisfied with my experience with Advantage.
NQ4gSMXh.jpg

almost looks like it did before, just in grey
vUcPvyzh.jpg

J0HkT6Vh.jpg

GDPKLDth.jpg

it may seem weird to fill the PS pump while the cross shaft is disconnected but it was the best way I could get the ram bled
kNCyTFIh.jpg

then onto the welder.... need to build the box but I'm getting close on this as well
zTGCVjHh.jpg

0o7lC7ih.jpg

ud6M4krh.jpg
 
drove it a fair bit yesterday, my initial impression is it makes it less streetable. Before, my on-center was natural, now, it gets a degree or so 'off'..... which is interesting because the 'help' only really happens at the edges. I get get more 'help' on center with a higher-pressure pump but think I'll give it 1000 miles or so before I do any more upgrades on this. As an aside, I never needed a steering stabilizer...
 
Maybe I missed it, but are you running the welding alternator as a separate circuit from the rest of the truck? I’ve playing with the concept of doing an isolated circuit, but haven’t gotten past daydreaming yet.
you hit the nail squarely on the head as to why it's not installed yet. In my mind, it would be far better to use a shunt and take the alternator out of the system when welding. That's not how any of the other welders are designed - while it does take the field wire out of the equation (and gives the field full 12v for welding), the charge wire remains connected to the rest of the system.

Which leaves me 3 choices:
1) trust everyone else's experience to send it.
2) disconnect the system via a shunt basically, when you hit the switch, the vehicle runs solely on the batteries and the alternator only provides power to the plug or the welding leads. Benefit here, I could put a high frequency start circuit on the welding system to make it a lot easier to use (and yes, I know about how high frequency can easily damage electronics.... as I'm implying, none of this is 'easy' until it works - then the trolls will come out.
3) use the batteries as the overamp protection by running the charge wire all the way to the batteries... maybe in conjunction with that, put (aiigh, name of surge protection devices) in line.

so there you go, I'm at that decision point and haven't made that decision yet.
I have other projects in the background (boring ones) so while I ponder, I'm working on those
aforementioned boring project
DoGV2JOh.jpg

and also, slightly less boring project
iqKiHJfh.jpg
 
Last edited:
so waiting on stuff for other stuff, so back to this stuff
so the biggest issue at the Rubicon (beside not having welding rod) was not having 2 batteries. I designed it and ran it with 2 batteries for awhile... and now it's back...
VFS0yZQh.jpg

all the same except top posts and date (Optima Challenge gets me a great deal on batteries)
kYOb2jih.jpg

new/old batteries
IZdiPeLh.jpg

back to how it was built
TOwK6kCh.jpg

So here's the deal, I do not want the alternator having the shortest path for surges through the EFI. The 'fix' on this is put shock absorbers on the system... aka batteries. I'll run the power cable from the rectifier back to the batteries and let them absorb the surges that are part and parcel of the system design. While I'm at it, I'll add a battery kill switch in the system as well... though I don't think the issue will be shutting the system down through a short, rather frying everything via a surge..... ah the joys of this.

and to be clear, I could simply wire it so that I could disconnect the batteries from the system then put the 12v batteries in series.... but that's not how I'm doing it.
 
got the batteries mostly wired... see that terminal connector on the left?
dtaaKPyh.jpg

it disappeared.... spent an hour looking for it.
2CHPS3Eh.jpg

ah well, it'll be done tomorrow.

and that means I can now weld with my '40. Still putting the engine powered version on it, but with 2 batteries, I can weld
 

Users who are viewing this thread

Back
Top Bottom