Perform steps 1-3 first to inspect whether you have the access doors or not before ordering filters!!!
Did this little project this evening. Figured I'd write it up.
5 Easy steps:
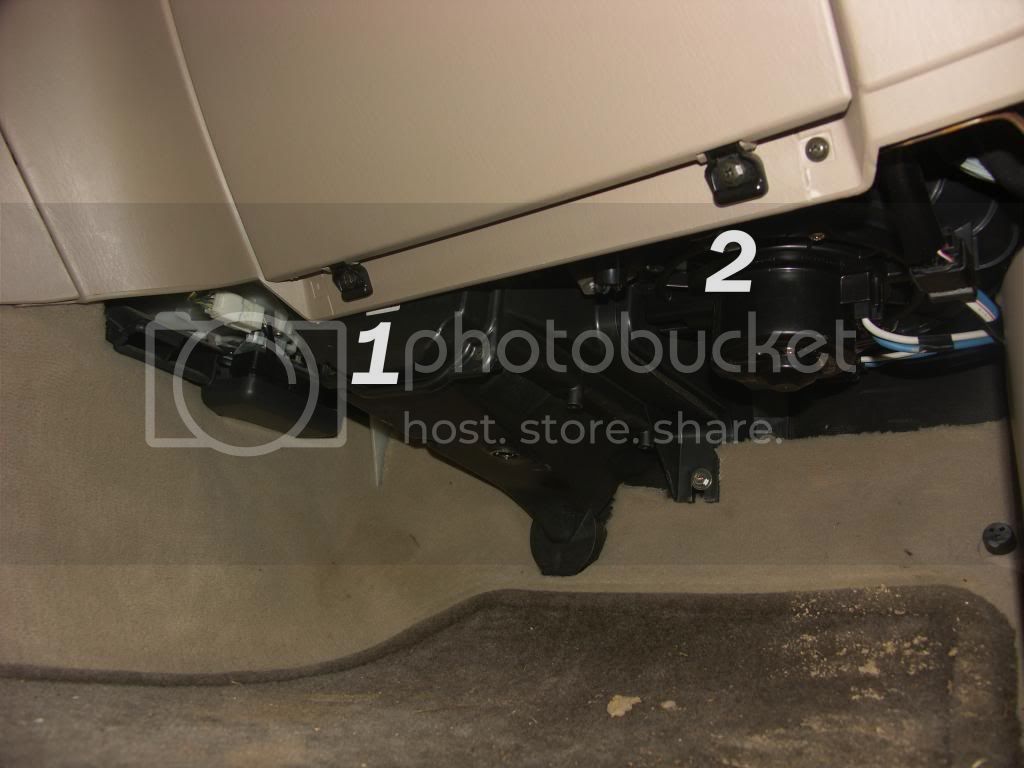
1. Remove glove box door by removing both screws at the bottom of the door.
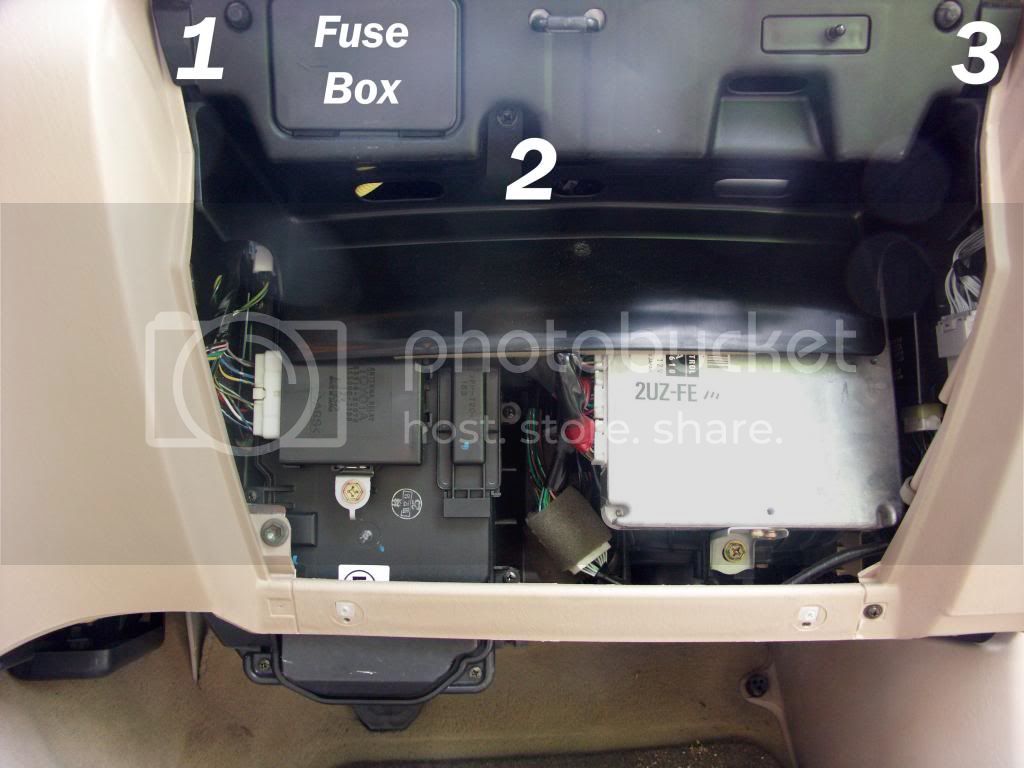
2. First pop the the little flap with a fuse/relay out of the black plastic shield in the upper portion of the glove box opening. Next push it back behind the shield through the opening. Next remove the 3 screws holding the shield in place. Don't pull this shield out yet!! Read step 3 first.
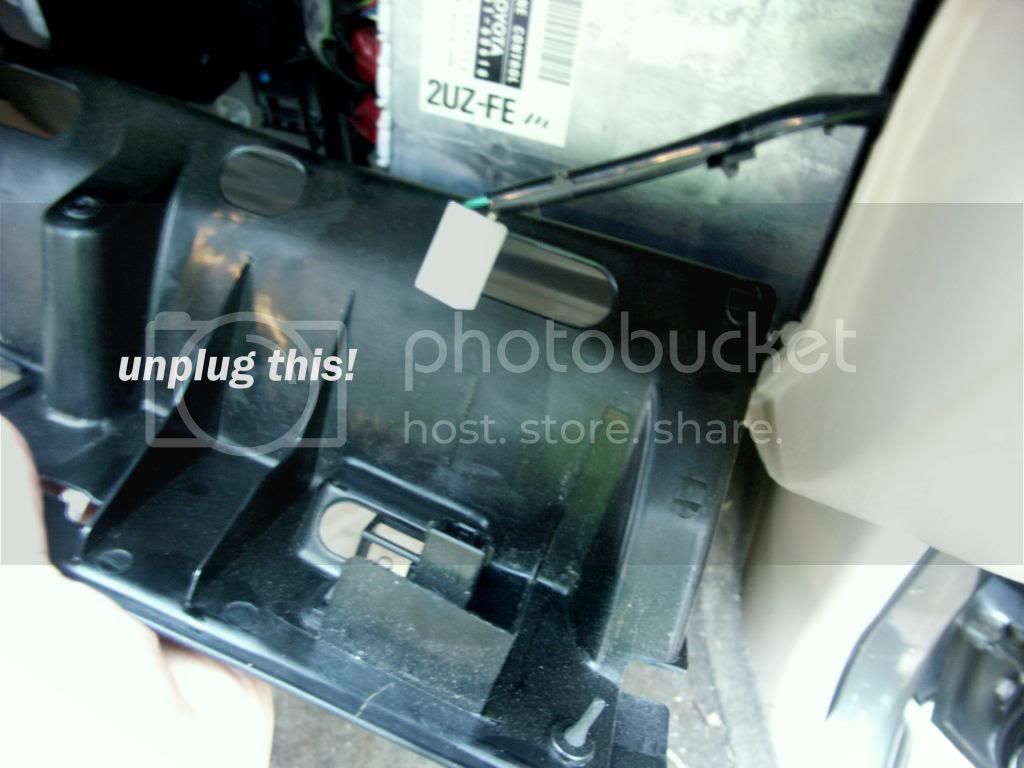
3. Gently pull the shield out. Be careful because the glove box light is still plugged into this part. It is located on the right side of the shield. Once it is pulled out slightly, unplug the bulb from the harness and now you can fully remove the part.
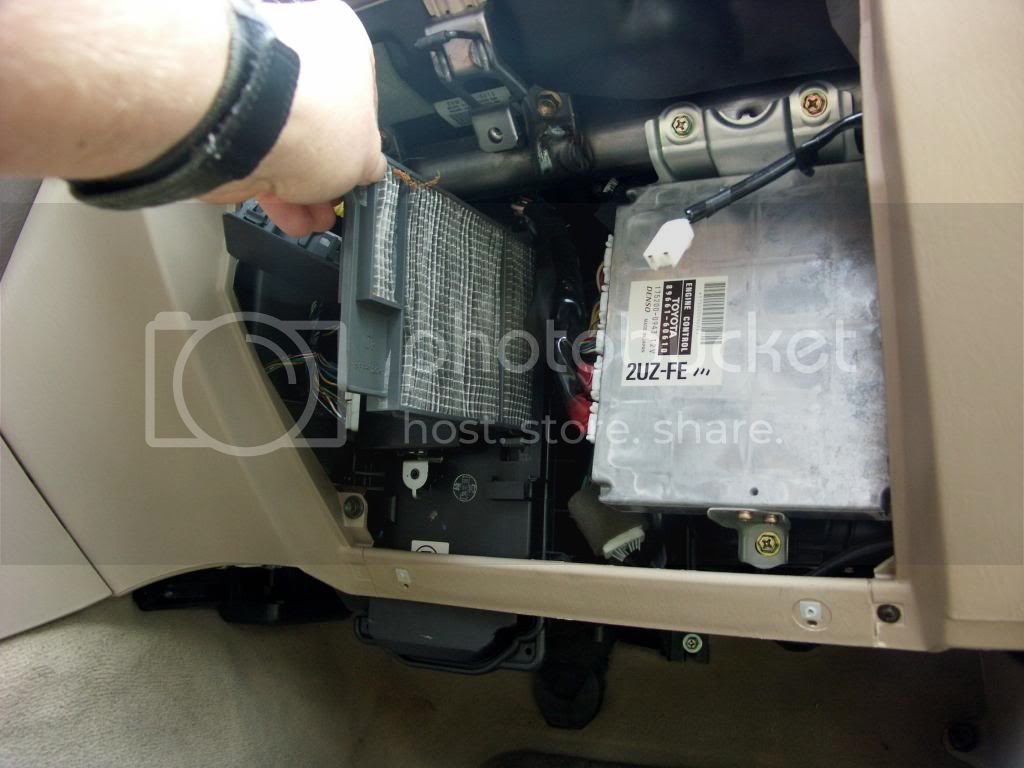
4. Now you can see the vertical cover where the air filters reside. The cover is about 5 inches tall and about 1 inch wide. It has 2 tabs on the upper portion of the cover. Squeeze these tabs towards each other and pull the cover off.
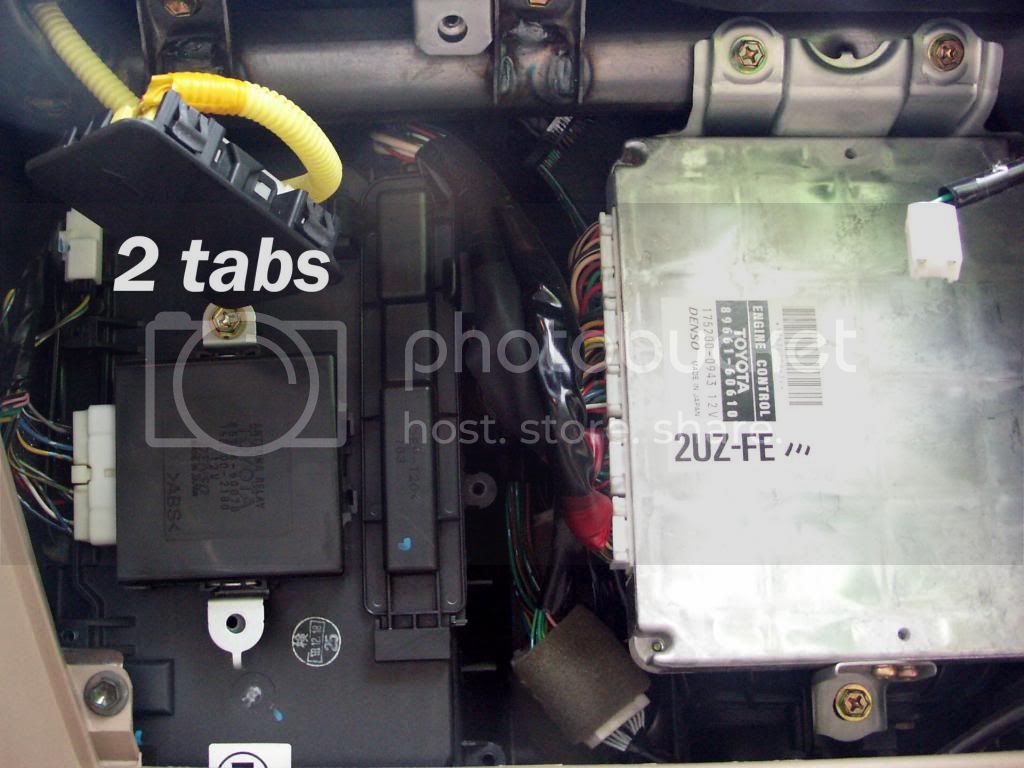
5. The filters are now exposed. They are stacked on top of each other. Pull the first filter out then lift the next filter up and pull out. Put new filters back in and reverse the procedure.
Parts needed:
2 Cabin air filters (Toyota PN 88568-60010 if you drop CDan a pm)
1 Phillips screw driver
Time needed:
No more than 15 minutes
Mechanical Difficulty:
EASY
-Tad
Did this little project this evening. Figured I'd write it up.
5 Easy steps:
1. Remove glove box door by removing both screws at the bottom of the door.

2. First pop the the little flap with a fuse/relay out of the black plastic shield in the upper portion of the glove box opening. Next push it back behind the shield through the opening. Next remove the 3 screws holding the shield in place. Don't pull this shield out yet!! Read step 3 first.

3. Gently pull the shield out. Be careful because the glove box light is still plugged into this part. It is located on the right side of the shield. Once it is pulled out slightly, unplug the bulb from the harness and now you can fully remove the part.

4. Now you can see the vertical cover where the air filters reside. The cover is about 5 inches tall and about 1 inch wide. It has 2 tabs on the upper portion of the cover. Squeeze these tabs towards each other and pull the cover off.

5. The filters are now exposed. They are stacked on top of each other. Pull the first filter out then lift the next filter up and pull out. Put new filters back in and reverse the procedure.

Parts needed:
2 Cabin air filters (Toyota PN 88568-60010 if you drop CDan a pm)
1 Phillips screw driver
Time needed:
No more than 15 minutes
Mechanical Difficulty:
EASY
-Tad
Last edited:


