JT's FJ40 build (6 Viewers)

This site may earn a commission from merchant affiliate
links, including eBay, Amazon, Skimlinks, and others.

This might help ....

image-2234474435.webp
 
Very nice build thread and insight to the cut and turn.
Are you planning to trim the rear panels or does the SOA give you enough room for those 37's?

It's pretty high, so I suppose the tires might fit in there without any trimming if the axle were in the stock location. We've moved the axle a bit towards the rear, though, so, as it sits now, there's no way.
 
With this much progress.. when is the goal "completion" date?…

At the onset, Georg advised me that putting a deadline on the build added unnecessary stress and took the fun away from the project.

It'll be done when it's done.
 
Truly impressive work! JT, it's evident a LOT of research has gone into what you're trying to accomplish....

Thanks, David.

This site is pretty amazing; there is a ton of information available. I've probably spent too much time trying to read it all, but I still don't really know what I'm trying to accomplish.
 
This might help ....

For the love of pizza...where was this last Thursday!

Just kidding....thanks for posting this, Georg.

I have only found a single image similar to this, and it was a computer drawn diagram in one of the tech links. This is far better.
For anyone interested in doing this for the first time, this picture is worth more than a thousand words.
 
At the onset, Georg advised me that putting a deadline on the build added unnecessary stress and took the fun away from the project.

It'll be done when it's done.

Agreed. I just wasn't sure if you were pushing to try to make an upcoming event.. If ya were ..we would try our best to make that happen for ya.

Hell I believe Jrob 's 40 was one of the fastest builds..atleast what i have ever seen. Ya may be on pace to break that record ; )
 
For the love of pizza...where was this last Thursday!

Just kidding....thanks for posting this, Georg.

I have only found a single image similar to this, and it was a computer drawn diagram in one of the tech links. This is far better.
For anyone interested in doing this for the first time, this picture is worth more than a thousand words.

Thx JT. That "display" is on our shop wall. We colored the factory weld in red to show it better, otherwise it's tough to see for a novice.
 
fountainhead said:
For the love of pizza...where was this last Thursday!

Just kidding....thanks for posting this, Georg.

I have only found a single image similar to this, and it was a computer drawn diagram in one of the tech links. This is far better.
For anyone interested in doing this for the first time, this picture is worth more than a thousand words.

Lol...
Georg, this would have really helped. From the looks of it, we dam near cut through it..I would think. However, we got it turned and I feel good about the weld. If we ever do another, it will be easier on us!!!
 
My initial build was quick but the whole rig took about 11/2 years to get to where it is. This should should take 5-6 months. Hopefully by GSMTR. We have been hitting it real hard during the holiday's, things will really slow down when school starts back.
 
JT has the plan well thought out. It is fairly easy and things seems to flow better when you have all the right parts and a good plan before you begin....that's something I did not do very well.
 
JT has the plan well thought out. It is fairly easy and things seems to flow better when you have all the right parts and a good plan before you begin....that's something I did not do very well.

That's because I was involved with your plans Jrob, JT told me to F off very early on...
 
Not saying that I didn't have help or a lot of good input,.....JT is doing everything!!!right from the start....and he reads a lot more than I did!!!!
 
Got the rear axle back together...

New shafts and wheel studs (these are a bit longer as well to account for the addition of the rotor):

IMG_20140102_183215.webp

Axle cleaned up and rebuilt diff installed (the wire wheel and I have gotten way too intimate):

IMG_20140102_195801.webp

Ruff Stuff diff cover:

IMG_20140102_195630.webp

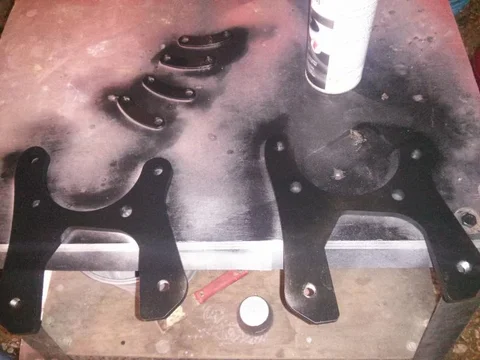
RDB brackets from Poser (from his 'kit'):

IMG_20140102_195519.webp

Rear calipers (pic shows the small tab ground off...for documentation sake as this issue has popped up in many threads):

IMG_20140102_204449.webp

IMG_20140102_183215.webp


IMG_20140102_195801.webp


IMG_20140102_195630.webp


IMG_20140102_195519.webp


IMG_20140102_204449.webp
 
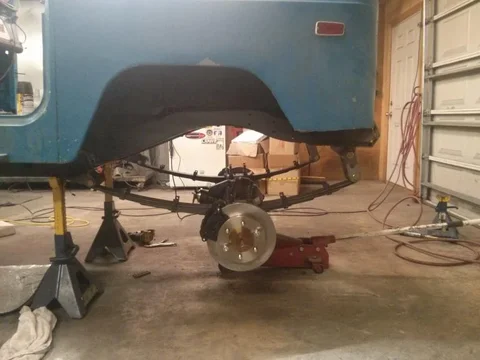
One more of it installed:

IMG_20140102_210131.webp

Jrob and Bodean got the rear brakes plumbed. Under the hood we got the intake cleaned up and reinstalled along with the new header. We also got the new clutch master, brake booster, and brake master installed.

I didn't get many pics because the phone died. Overall, though, a pretty productive evening.

IMG_20140102_210131.webp
 
Thanks...it's been fun.

The wheels are basic, black, 16", D window wheels from Summit...2.5" back spacing. The tires are 37" KM2's from Nolen. It's the setup that's on the front several posts back.
 

Users who are viewing this thread

Back
Top Bottom