JT's 88 4 Runner Build

This site may earn a commission from merchant affiliate
links, including eBay, Amazon, Skimlinks, and others.

Looking good. Defiantely going to be at EC4RJ in June. Once hte cage gets here I am going to be busting my ass to get everything in shape. I have everything fixed upgraded to the point that I need the cage to finalize things. It's gonna be fun :)
 
Somebody makes a cage ready to go into a 4R? I've seen the bolt-in cages with sleeves for the regular cab minis and have thought of going that route ... I dunno, I'd rather have a welded cage, but then I gotta cut the lid off my rig to weld it together! Anyway, thanks for the incentive, out to the shop!
 
There are a number of places that sell a weld together cage. I like the design of the 4xInnovations cage, so that is what I went with. You can weld any cage in without taking the roof off, you just have to plan ahead and tack it together, then break the tacks at the b-pillar and slide everything out, weld it, then slide it back in and weld the b-pillar stuff. Really not that bad.

I plan on doing a write-up and review of the cage when I get it. Hopefully it shows up in the next week or so since I have scheduled some vacation to weld it all up. You can take a closer look at EC4RJ if you like.
 
Thanks for the info on the cage. I'd really like to put one in my '85 since it's flirting with the Dark Side of the Force. I'm willing to cut the lid off and weld the cage in, but if I can avoid the extra work and expense, all the better. Hope to see you at the EC4RJ and your write-up. Thanks again!
 
Just got word that my cage should be here by this weekend. Time to get this project moving again :)
 
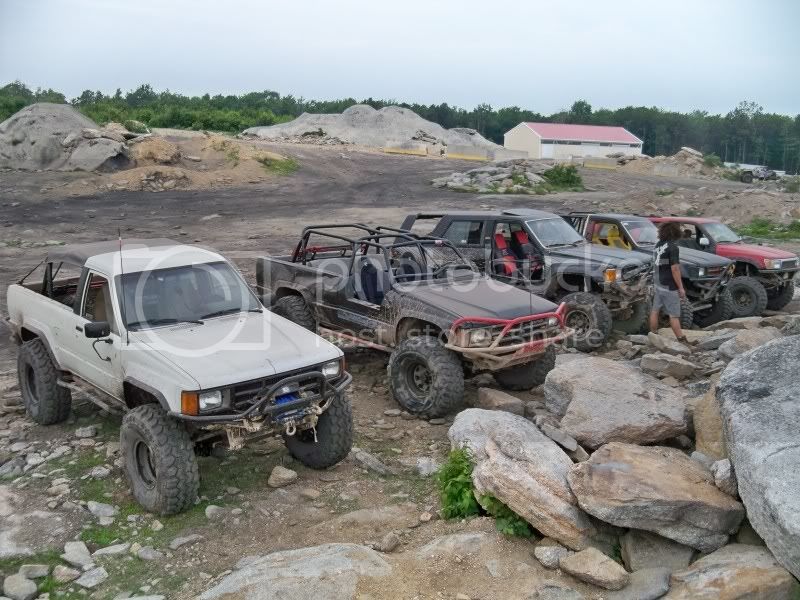
Here is what my 4 Runner looked like after I cut the top off from the roll.
DSCN2066.jpg

So I took Friday off to get this cage mostly knocked out. The cage kit is from 4xInnovations and is the passenger length DOM version. The kit arrived in 3 packages and looked like this once unwrapped.
DSCN2067.jpg

First thing you have to do is weld up the b-pillar since it is cut in half for shipping. An 8" long DOM slug is included with the kit and slips into the connection. I also drilled 4 plug weld holes in the b-pillar for added strength. I had a slight issue getting the slug all the way in on one side, but I trimmed it down and it all went together.
DSCN2068.jpg

I then went through and put the floor plates in and tacked the b-pillar into place. I did have to use a ratchet strap to close since it was a little wide at the bottom from welding and the tweaked body. I then tacked in the a-pillar tubes and front cross bar and center bar.
photo.jpg

DSCN2069.jpg

I decided not to install the rear portion of the kit like it is designed and retain the factory roll bar. I have cut down the rear bars to tie right into rear bar at the main node. I don't have pictures yet since I have three more tubes to install along with the gussets and dash bar and harness bar that I need to bend up yet.

Overall the kit is nice, but you definately need two people to do the install, I did it solo and it was a pain doing the a-pillar to b-pillar at times. Also some of the notches seamed to be off slightly for all of the tubes to fit together up front. To keep the notches tight at the b-pillar, I had to put heavy tacks at that joint and then use my hi-lift jack to spread the front part apart to get the cross bar in, but it is in and works. The other thing that I'm not a huge fan of is the height of the cage, it seems like it is very low up front, but that could be because I don't have a roof and that my seats may be a bit high. I will be building a sub-frame for the seats and lowering them at the same time so I have headroom.

I have the remaining tube to install then I am taking it to my cousins to do the final welding with a larger welder, then paint and wheeling at EC4RJ at the end of June.
 
Here are a couple more pictures of what I got done today, the dash bar and rear center bar. I am thinking about somehow tying the three rear bars together somehow, but haven't come up with it yet. I also need to install the two down bars from teh top of the cage to the dash bar.
DSCN2070.jpg

DSCN2071.jpg

DSCN2072.jpg

DSCN2073.jpg

DSCN2074.jpg

DSCN2075.jpg

DSCN2076.jpg

DSCN2077.jpg
 
Got a little more done today in between the kids naps. Bent up a harness bar and got two more gussets in for the back. Not much, but it is getting there.
DSCN2078.jpg

DSCN2079.jpg

And here is a close up of the dash bar, I will be installing two tubes between the dash bar and top bar in the coming week.
DSCN2080.jpg
 
You work how I work... In between naps and after bedtime!

Lookin good... Where's your new roof?

It's the only time to do it :D

Haven't gotten the new roof section yet, still waiting to hear back from the guy. Looking like I may run without one for a little while.
 
Gussets are done and the cage has the first coat of paint on it. I still need to do the X behind the seats and lower the seats a little. Colin likes it too and has plenty of head room. Wheeling it this weekend, so I have a few more things to get done including tying the cage into the frame.
photo1.jpg

photo_2.jpg
 
Only picture I have from this past weekends wheeling. Everything worked well and nothing broke.
4RunneratRausch.jpg
 
Here are some quick pictures from our run at Rausch Creek on September 4, 2010. Had a blast.
IMG_8906.jpg

IMG_8377.jpg

IMG_8545.jpg

IMG_8321.jpg

IMG_8295.jpg
 
Nice front flex :p

Looks like a fun time JT, sorry I missed ya at the pig run but maybe on the next trip to PA!

Yep, 3 wheeled it a good bit that day since we ran mostly blacks and a red :grinpimp:

I would have liked to make it to the Pig Run, but we were at the beach. Let me know the next time you are planning on making it up, we defiantely need to catch up. Family doing good?
 
My family is doing well. Three kids: four, two, and three months in age is a dominating phenomena sometimes ;) Wish you all well!

My hilux spit a hub a few feet off the trail in the NE property, trail F*, sheared the pins and studs like they were made of butter. Must have been loose from the previous day's wheeling but we had fun. 30 seconds into the first trail of the day on Sat :bang:

*remember to nut and bolt your rig prior to each use :rolleyes:
 
Quick update on this build. I have been working on building a FJ60/62 front axle to go in intsead of a mini truck axle. I will be using IFS hub bodies to widen it out to about 61.5" to match the Tacoma rear axle. Here is the axle with redone spring perches and truss along with the RuffStuff diff cover I will be using.
FJ60axle.jpg

DiffCover.jpg

And just in case I don't like the Toyota axles, here are another set that I will be working on :D
Dana60.jpg

14Bolt.jpg
 
Should be fun, hoping to have the Land Crusier axle done in the next few weeks minus the short side inner which I need to purchase along with doing the steering with heim joints. I got the axle as just a housing and I have all of the other parts to assemble it off of my 85 mini truck axle. I may cut the Dana 60 down to bolt in usng the standard Toyota axle spring width so that would be a bit easier.
 

Users who are viewing this thread

Back
Top Bottom