I can make LPB box sides

This site may earn a commission from merchant affiliate
links, including eBay, Amazon, Skimlinks, and others.

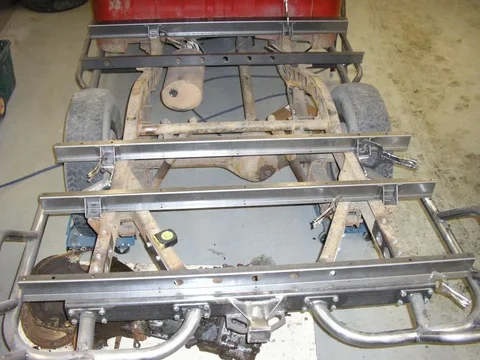
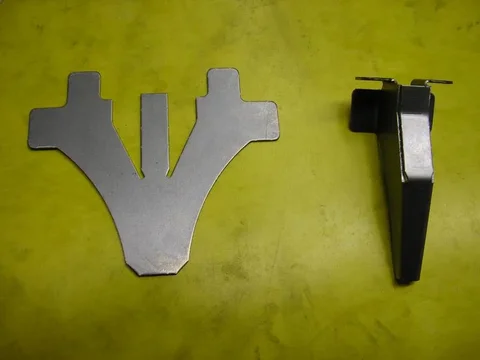
So you'll have to trust me (;)) because I have no pictures. I made the brackets that weld to the bed floor cross members today. These are the brackets that sit on the rubber bushings and the bolts pass through to fasten the bed to the frame. They are 10 Ga.


:meh:


It's a lot more fun with pictures isn't it?


.
 
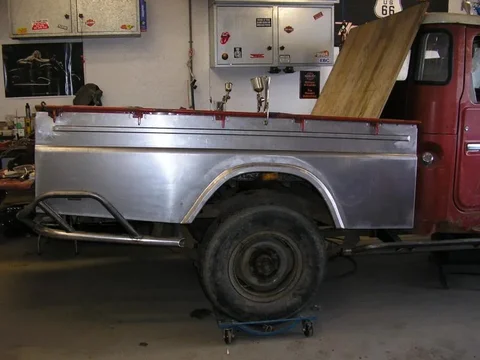
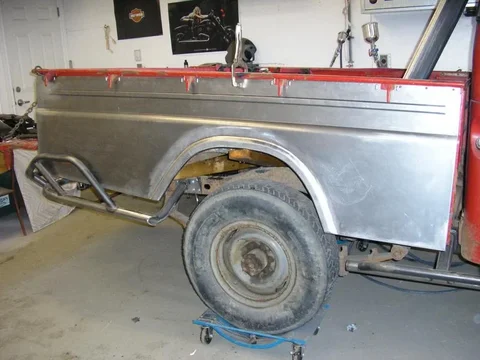
Some teaser shots

P1010028_3.webp

P1010026_4.webp

P1010027_4.webp
P1010026_4.webp
P1010027_4.webp
P1010028_3.webp
 
more...
P1010029.webp
P1010029.webp
 
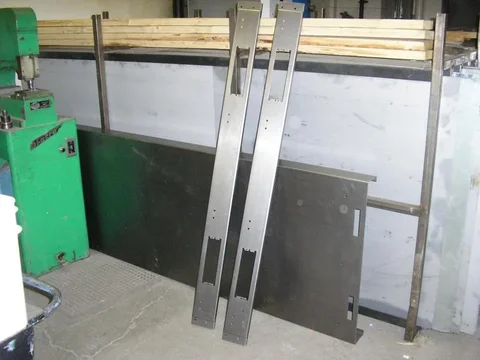
I ordered a set of these box sides as soon as Kevin said he was going to make them.Today we met and the new sides are here.

Kevin is a craftsman.These panels are well built and look great.Great quality! I copied the pics above with some of my own on the drivers side and it looks like it will be an excellent fit.

You can see that my sides have issues but that problem is solved. My biggest challenge will be making the rest of the truck look this good.

Thanks again Kevin. :cheers:
Sides.webp
sides1.webp
Sides2.webp
 
That is going to be a beautiful rig oldFJ40
 
Progress

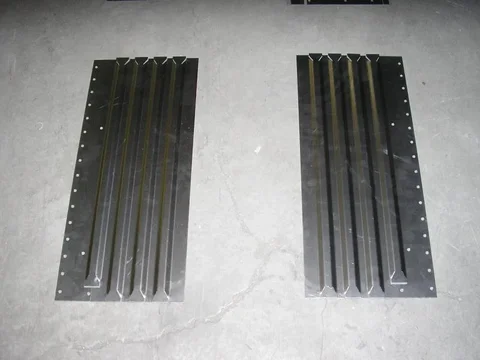
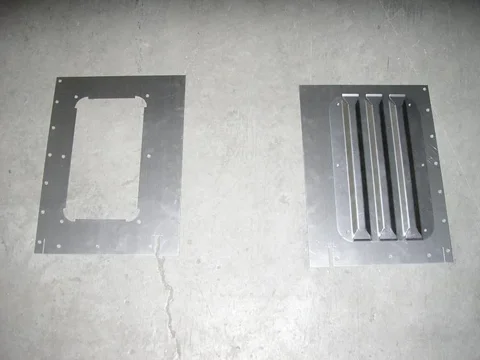
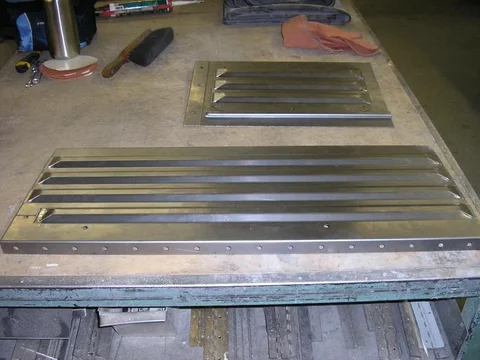
They are not done yet but here are the front and rear corner sections of floor. The string of holes down the outside edges will be a flange bent down. The holes are pre-drilled for welding as a spot weld (plug weld, rosette weld) to the side panels.
P1010001_23.webp
P1010002_23.webp
P1010003_21.webp
P1010001_23.webp
P1010002_23.webp
P1010003_21.webp
 
In the foreground is the right rear corner section of floor. Its not welded yet but otherwise done. The string of holes is to plug weld to the side panels.
P1010001_24.webp

This is the tailgate end
P1010003_22.webp

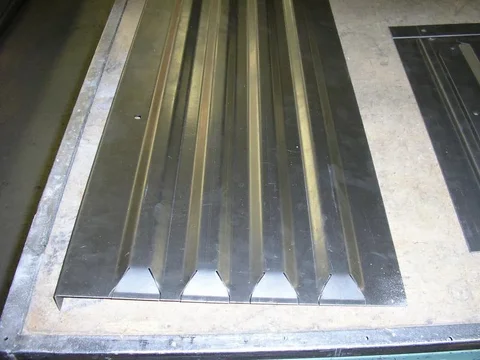
This is the end of the panel that abuts the wheel hump. To reduce the warpage from welding all of the slits the full length I shortened the part by 2.5" and will weld a strip on that includes the three holes to bolt through the wheel hump and crossmember underneath.
P1010002_24.webp
P1010001_24.webp
P1010002_24.webp
P1010003_22.webp
 
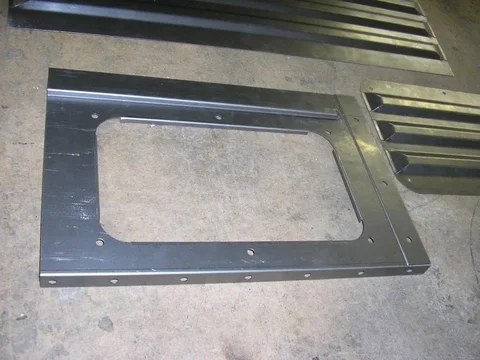
This then would be the front left corner floor section and cover. It is also not welded yet. There will be flanges added in the corners of the cutout and the rib end will be welded and buffed. I will also add captured nuts to bolt down the cover. The three holes are for the front end of the wheel hump and crossmember underneath.
P1010005_17.webp

P1010007_12.webp

P1010004_17.webp
P1010004_17.webp
P1010005_17.webp
P1010007_12.webp
 
I made a couple of sets - lefts and rights obviously
P1010008_11.webp

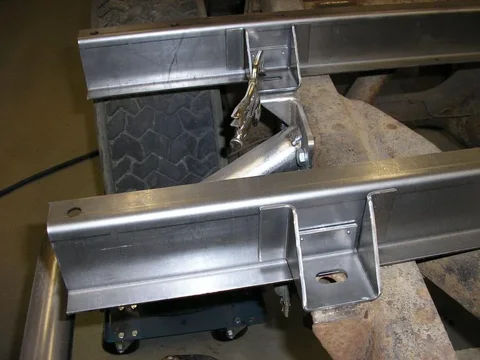
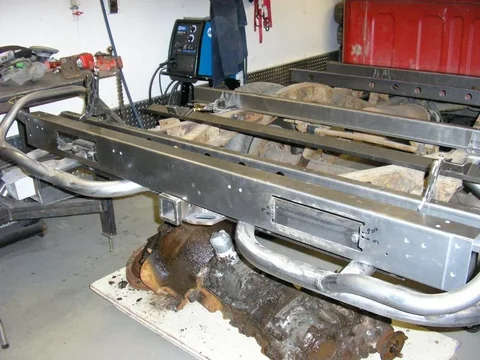
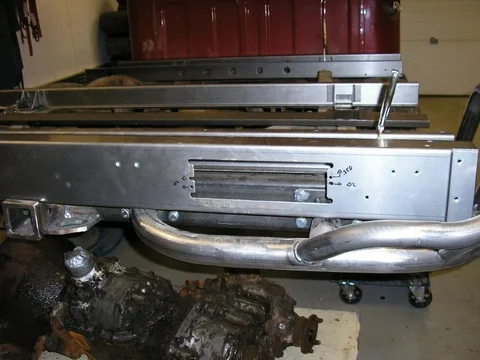
Took a set of cross-members home to test fit and double check. Here are the frame mounting brackets I mentioned a while back.
P1010011_7.webp

P1010010_8.webp
P1010010_8.webp
P1010008_11.webp
P1010011_7.webp
 
A couple shots of the cross-members. The rear valence and the two hat channels over the arch in the frame are not shown - because I haven't made them yet :D
P1010013_8.webp

P1010012_8.webp
P1010012_8.webp
P1010013_8.webp
 
Unbelievable, excellent work :cool:

BTW, what is the current lead time looking like for a fully assembled tailgate (minus hooks, letters and latches of course)
 
Last edited:
Unbelievable, excellent work :cool:

BTW, what is the current lead time looking like for a fully assembled tailgate (minus hooks, letters and latches of course)

I should be able to do the hooks now also - three weeks should be enough time with my current workload. Three or four hinge?


:rolleyes: ....
....Kevin you need new tyres ;)

There's lots of life left in those re-treads... ;)
 
Man that is some nice work...looking forward to you tackling your brother's simpler 40 :beer:
 
more parts prototyped...

The rearmost cross member (not the rear valence with the tail lights) has a different mounting bracket. This one is made of 1/4" plate and welded to the crossmember facing forward. In this pic you are looking rearward at the right hand side mount and can partially see the tail light cutout at bottom right.
P1010020_5.webp
Today I fabbed up an exact copy of the bracket in all dimensions. Made 14 of them, though I messed up one of the holes and got 13 good ones.
P1010001_25.webp
Here it is clamped in position on my frame. My frame has been altered but the hole in it is in the stock location.
P1010017_6.webp
P1010020_5.webp
P1010001_25.webp
P1010017_6.webp
 
more

I measured up my original then programed and punched out a couple of four hinge rear valences.
P1010003_23.webp
I formed them up and added captured M6 nuts for the hinges and the rear corner post (the thing your tailgate chain attaches to). FYI the large pan behind the valences is JIG to hold the floor cross members and the rear valences in position when I spot weld the center floor section on. That will assure the proper location of the mounts when the bed is eventually set on a frame.
P1010008_12.webp
Here is a close up of the tail light cutouts. The factory original has the lights recessed in an embossed depression but I can't do that so these are just flat. Notice the hole for the reflector just above the light cutout.
P1010009_11.webp
P1010003_23.webp
P1010008_12.webp
P1010009_11.webp
 
Here is the original embossed/ recessed tail light I mentioned. I just don't have a tool to press that in so mine will be flat at least for now...
P1010026_5.webp
Here I test fit my tail light. The holes for the bolts to mount it are off slightly but this is a prototype and any future ones will line up. Incidentally, I will be making three hinge versions as well as valences to suit the other tail light designs. Or custom for that matter :).
P1010021_5.webp
With the lens set in place...
P1010022_5.webp
P1010026_5.webp
P1010021_5.webp
P1010022_5.webp
 
So mine will be a surface mount affair rather than recessed a half inch. In this pic the lens is not tightened down, or the light for that matter.
P1010023_5.webp
Here I set the rear valence in approximate position so I could stand back and admire it. Man, I can't wait till I can assemble the whole thing.
P1010024_5.webp
Note the ends of the valence are offset inward. That is to let the rear post overlap and still be flush. Also you can just make out the captured nuts in the hinge holes and end holes.
P1010025_5.webp
P1010023_5.webp
P1010024_5.webp
P1010025_5.webp
 
Last part today

I also laid out and punched/ formed up the bed hooks. I wasn't sure I could do these but I am pleasantly surprised at the outcome. They still need the front seam welded and a back put on but you can recognize the shape easily. I'm thinking I will zinc plate these because I, or you, will never get them coated inside. I will leave a small hole like the original in the bottom for moisture drainage.
P1010006_14.webp

P1010010_9.webp

P1010005_18.webp
P1010005_18.webp
P1010006_14.webp
P1010010_9.webp
 

Users who are viewing this thread

Back
Top Bottom