Navigation
Install the app
How to install the app on iOS
Follow along with the video below to see how to install our site as a web app on your home screen.
Note: This feature may not be available in some browsers.
More options
Style variation
You are using an out of date browser. It may not display this or other websites correctly.
You should upgrade or use an alternative browser.
You should upgrade or use an alternative browser.
I can make LPB box sides
- Thread starter Awl_TEQ
- Start date
This site may earn a commission from merchant affiliate
links, including eBay, Amazon, Skimlinks, and others.
More options
Who Replied?Awl_TEQ
Supporting Vendor
- Thread starter
- #102
Bent up the cross members and the front corner parts on the 10' Amada (Got the replacement right 'Z' axis drive motor and encoder in on Monday  )
)
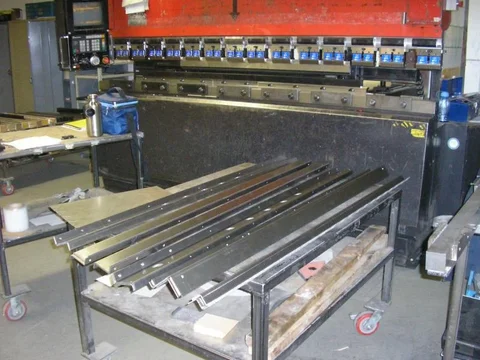
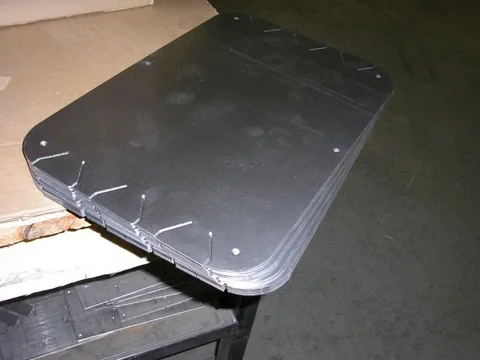
Here are nearly three sets of cross members. Starting at right: Front wall top Z-channel, and then mounts 1 thru 5. These are slightly (0.014") thicker than the factory original. Original is 13 Ga, I am using 12 Ga (because we don't stock 13 Ga.) They are faithful reproductions of the (my) original bed. I did however add holes on the bottom flanges to locate the parts in a jig when spot welding the floor to them.
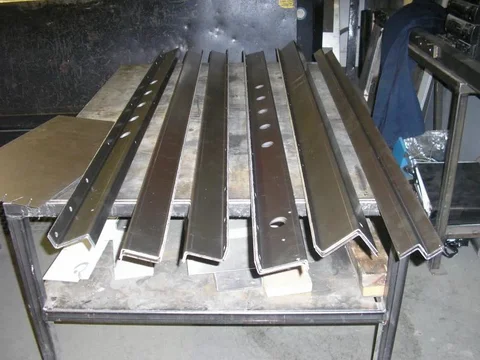
These are the front corner parts. The channel is where the front wall joins to the side. I call the channel the "front wall end channel". The angle under the channel is what I call the front corner post. The bed side panel wraps around this angle and is spot welded to it on two sides (not in this photo, this is just a dry fit).


 )
) 
Here are nearly three sets of cross members. Starting at right: Front wall top Z-channel, and then mounts 1 thru 5. These are slightly (0.014") thicker than the factory original. Original is 13 Ga, I am using 12 Ga (because we don't stock 13 Ga.) They are faithful reproductions of the (my) original bed. I did however add holes on the bottom flanges to locate the parts in a jig when spot welding the floor to them.

These are the front corner parts. The channel is where the front wall joins to the side. I call the channel the "front wall end channel". The angle under the channel is what I call the front corner post. The bed side panel wraps around this angle and is spot welded to it on two sides (not in this photo, this is just a dry fit).

Awl_TEQ
Supporting Vendor
- Thread starter
- #103
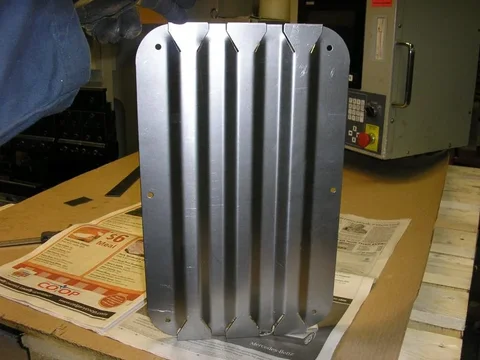
Here I am holding the front wall Z channel in approximate position. Note where the side panel rib ends - I think it stops there because the corner post is welded there - the same thing happens in the back where the rear corner post is welded to the side panel. Also, this side panel is for a local member who doesn't want the headache rack mounting holes, hence no holes.
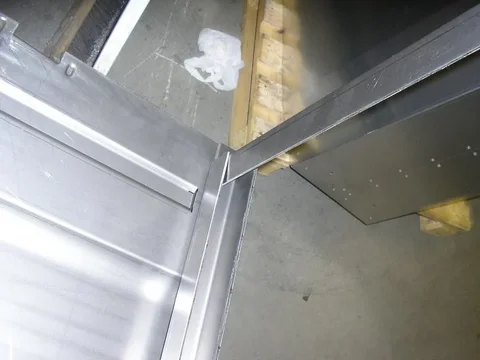
Another view

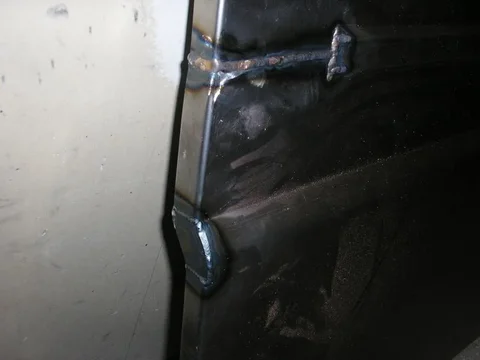
Here you can see my technique for accurately assembling the three parts that meet in the corner. These are called "half-shears". It's a bump similar to the dimples in the side panels only it is much more defined and exactly 0.125" in diameter. What I do is punch a half-shear in one part and a 0.130" through hole in the mating part when the parts are on the turret punch.
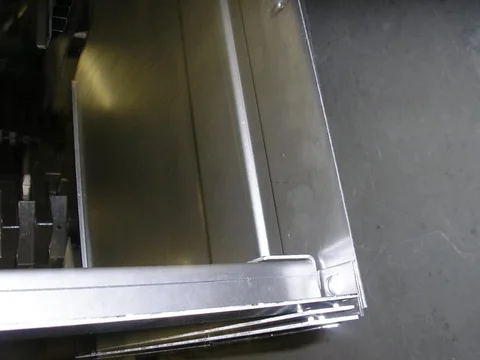


Another view

Here you can see my technique for accurately assembling the three parts that meet in the corner. These are called "half-shears". It's a bump similar to the dimples in the side panels only it is much more defined and exactly 0.125" in diameter. What I do is punch a half-shear in one part and a 0.130" through hole in the mating part when the parts are on the turret punch.

You are a true craftsman!!
Bear
SILVER Star
And it looks like you're somebody's favorite Daddy.
Good work, Dad, on both counts.
Good work, Dad, on both counts.
....think Toyota becomes a problem when you built better cars than they do 
great job Awl_TEQ

Cheers
Peter
great job Awl_TEQ


Cheers
Peter
fjwagon
SILVER Star
Whitey,
Can you please post the sides of your bed? Does it have the Dimples near the hooks like Kevin's Bed?
Can you please post the sides of your bed? Does it have the Dimples near the hooks like Kevin's Bed?
Kevin, I have mint bed sides,tailgate, but no floor or back panel. I had a flat bed with the sides removable. So now I am building a stock truck and would love to have a factory looking bed floor.Hopefully you will be doing the floor as well. I will definately be interested in the bed supports and back panel so put me down for a set of supports and the back panel. Again very nice work,this will make a lot of 45 lwb owners happy...Whitey
I'm trying to imagine how Toyoda would have bent the sheet metal in the early 60's to make these beds.
I doubt they had the computer controlled machine that Awl_Teq has.
Did someone mention that you were going to start making roofs once you get caught up with the LWB and the SWB bed orders?

....think Toyota becomes a problem when you built better cars than they do
great job Awl_TEQ
Cheers
Peter
I doubt they had the computer controlled machine that Awl_Teq has.
Did someone mention that you were going to start making roofs once you get caught up with the LWB and the SWB bed orders?
Awl_TEQ
Supporting Vendor
- Thread starter
- #110
I'm trying to imagine how Toyoda would have bent the sheet metal in the early 60's to make these beds.
I doubt they had the computer controlled machine that Awl_Teq has.
Did someone mention that you were going to start making roofs once you get caught up with the LWB and the SWB bed orders?

They made them with brute force and a one hit tool that took a flat blank and stamped out a finished part.
No comment.

Chamba
Too long. Too short. Juuust right: the 43
OK Kevin, you make the bodies for FJ45s, and I'll ship over all the HJ47 frames I can find. I reckon there would be a market for them if the cost could be less-than the Icon. Just think of the potential: a ready-made shell made entirely out of steel, with a Toyota title, then the customer can put any drive-train and suspension in it they want. Let's see how long it takes to really piss Toyota off.
Josh
Josh
Chamba
Too long. Too short. Juuust right: the 43
I couldn't agree with you more. Besides, your craftsmanship leaves the Toyoda boys for dead.
Josh
Josh
Chamba
Too long. Too short. Juuust right: the 43
I agree- that's how the Japs came up with the F engine and Toyoda Jeep. They took an existing design and 'copied' it whilst making it better. It seems to me that is exactly what you are doing; turnabout certainly is fairplay. I just wish I could fit in a pickup so I could buy one of your beds
Josh
Josh
Awl_TEQ
Supporting Vendor
- Thread starter
- #116
Floor
Made three main floor sections at work today (well, after work really).
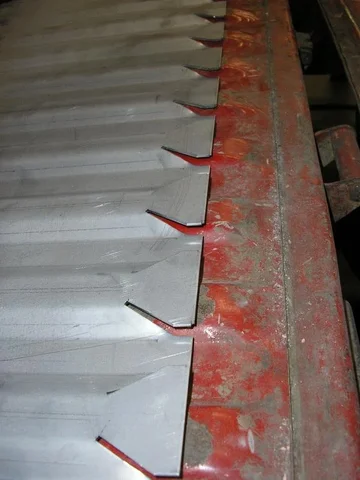
Loaded the tools, programmed the press break and practiced on a 12" length of the floor profile. I originally planned to only verify the programming but then once I had everything set up it made ore sense just to do it. The 12" sample came out the right width so I got a buddy to help me bend up three full length floors. Takes about 25 mins each with 60 bends each plus the rib ends.


All this and rebuilding 2 8274's.
You have amazing craftmanship there.
You have amazing craftmanship there.
Similar threads
Users who are viewing this thread
Total: 1 (members: 0, guests: 1)


