Pskhaat
Tourer
Quick little writeup on changing a broken lug. I had a lug nut `freeze' on me one day a few weeks back. For the life of me I could not get this lug nut off. I eventually had to go have it broken off `professionally.' I am of the assumption from that experience that dirt and/or other material mysteriously found their way into my lug nut during a flat tire change.
The 100 series' lugs are 14mm and though only 5 lugs are present, it represents almost 12% increase in total cross-sectional lug area than the 6 lugs on an 80 series. No rhetoric there, but let's just say that 14mm lug is a tough job to break.
This process is NOT difficult, though my unfamiliarity with modern semi-floating axles had me initially believe I would have to pull the axle to get the studs out. This is however not the case and is at most a 2 hour job. 1-2
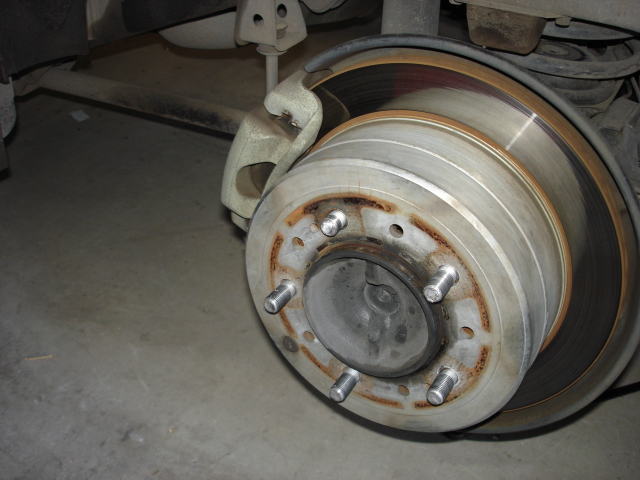
1. Remove the wheel & tire. Here is a quick shot of my lug that needs changing at 11 o'clock.

2. Remove the brake caliper assembly and pads. The caliper itself does not of course need to be removed from the brake line and can be tied up against the axle housing or shock. This obviously is a good times to check the condition of the pads and change them if necessary.
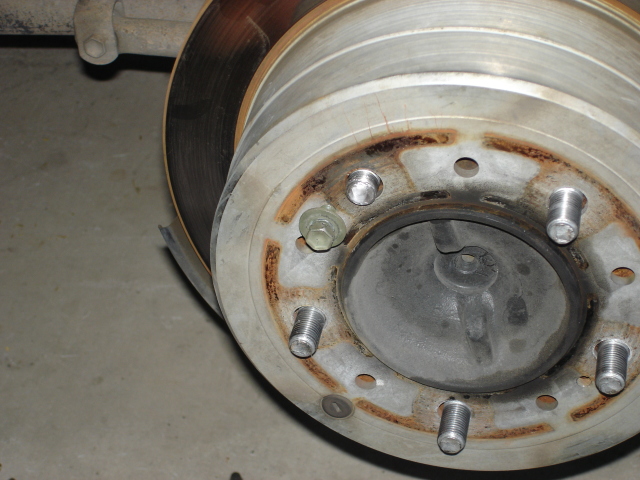
3. Back off the rotor. There are two threaded holes in the rotor where you turn in two bolts that press against the axle flange and slowly `pull' the rotor off.
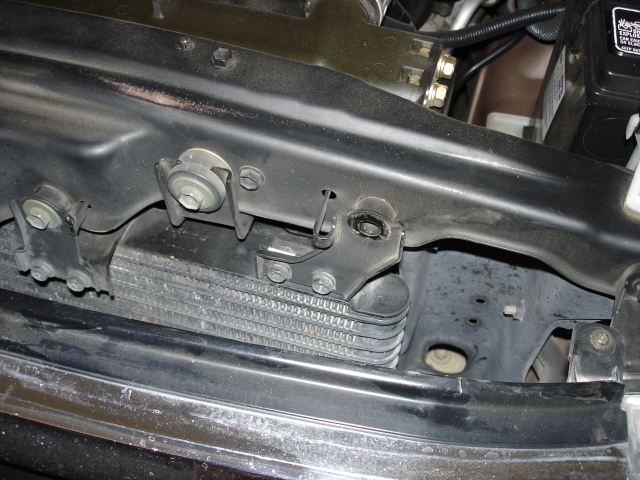
Of course the bolts that I sourced for this were not of the correct thread pitch so I had to poach them from elsewhere on the truck. This was the fastest and easiest bolt for me to get. It's a hack, but it works:
Just return the bolts to their rightful place afterwards. The rotor should back off quite easily.
4. Pound IN the old lug. I used a BFH, then a really BFH, then got the mad out and pounded the original BFH again until I noticed you really don't get a good angle nor strike with one of them. Pull out a Little FH (standard nail hammer) and it worked like a charm, allows you to make directed blows.
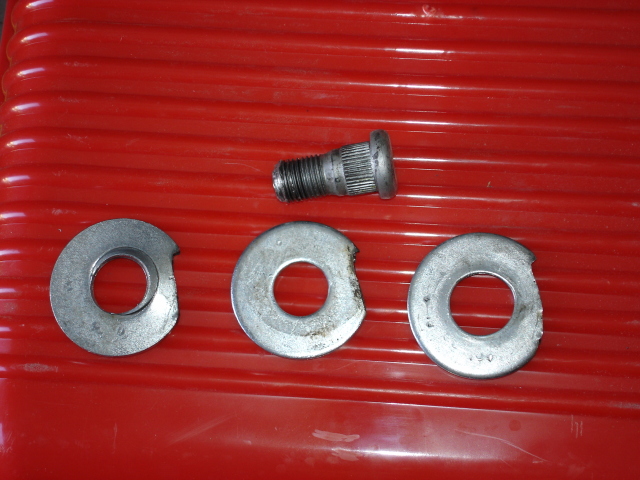
5. Torque in new lug. I used the method of positioning the new lug in back of the flange where the now-empty hole is from the old lug. On the outside of the flange I placed three washers and then a 21mm lug nut. Tighten and torque the new nut on the lug, as it tightens it pulls the lug into position in the axle flange. You need the washers/spacers as the threads don't go all the way to the base of the new lug.
Me, being me, got washers that were too large in diameter to fit between the lug center and the hub, so I just threw the grinder at them.
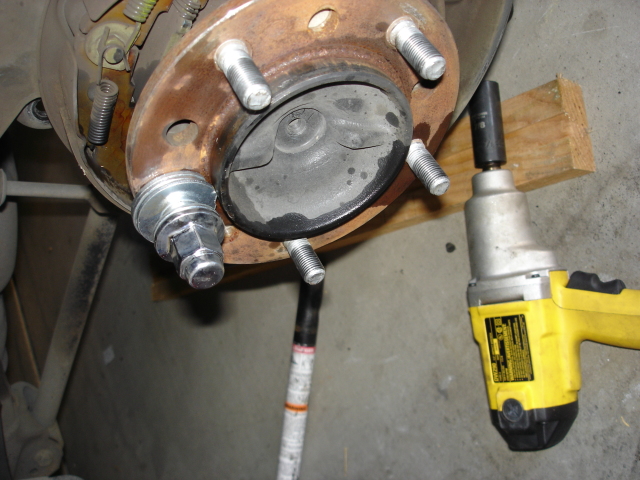
Okay, after that, I apply a light oil to the lug & SLOWLY tighten the nut on the lug, often loosening the nut to ensure you're not seizing anything and to periodically check how things are going. I used a low torque impact wrench as it made this work significantly easier.
Well, voila that's are there is. The completed work:
6. Once the lug is seated, put the rotor back on. It needs to be pushed back on the axle flange a ways further than it initially appears when positioned on the axle flange, ensure it seats all the way back. Use a wood drift and lightly tap the rotor back into its original position.
7. Reinstall caliper assembly and pads.
8. Replace the wheel and you're good to go.
With grinding, this still was under 2 hours.
The 100 series' lugs are 14mm and though only 5 lugs are present, it represents almost 12% increase in total cross-sectional lug area than the 6 lugs on an 80 series. No rhetoric there, but let's just say that 14mm lug is a tough job to break.
This process is NOT difficult, though my unfamiliarity with modern semi-floating axles had me initially believe I would have to pull the axle to get the studs out. This is however not the case and is at most a 2 hour job. 1-2
1. Remove the wheel & tire. Here is a quick shot of my lug that needs changing at 11 o'clock.
2. Remove the brake caliper assembly and pads. The caliper itself does not of course need to be removed from the brake line and can be tied up against the axle housing or shock. This obviously is a good times to check the condition of the pads and change them if necessary.
3. Back off the rotor. There are two threaded holes in the rotor where you turn in two bolts that press against the axle flange and slowly `pull' the rotor off.
Of course the bolts that I sourced for this were not of the correct thread pitch so I had to poach them from elsewhere on the truck. This was the fastest and easiest bolt for me to get. It's a hack, but it works:
Just return the bolts to their rightful place afterwards. The rotor should back off quite easily.
4. Pound IN the old lug. I used a BFH, then a really BFH, then got the mad out and pounded the original BFH again until I noticed you really don't get a good angle nor strike with one of them. Pull out a Little FH (standard nail hammer) and it worked like a charm, allows you to make directed blows.
5. Torque in new lug. I used the method of positioning the new lug in back of the flange where the now-empty hole is from the old lug. On the outside of the flange I placed three washers and then a 21mm lug nut. Tighten and torque the new nut on the lug, as it tightens it pulls the lug into position in the axle flange. You need the washers/spacers as the threads don't go all the way to the base of the new lug.
Me, being me, got washers that were too large in diameter to fit between the lug center and the hub, so I just threw the grinder at them.
Okay, after that, I apply a light oil to the lug & SLOWLY tighten the nut on the lug, often loosening the nut to ensure you're not seizing anything and to periodically check how things are going. I used a low torque impact wrench as it made this work significantly easier.
Well, voila that's are there is. The completed work:
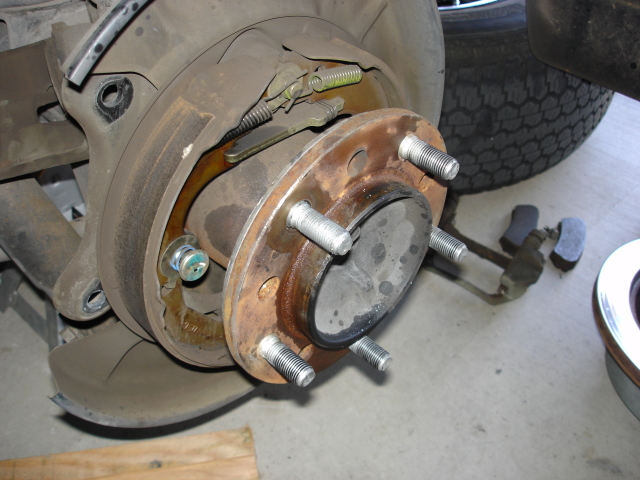
6. Once the lug is seated, put the rotor back on. It needs to be pushed back on the axle flange a ways further than it initially appears when positioned on the axle flange, ensure it seats all the way back. Use a wood drift and lightly tap the rotor back into its original position.
7. Reinstall caliper assembly and pads.
8. Replace the wheel and you're good to go.
With grinding, this still was under 2 hours.
Last edited:

