FJ60 Header Replacement and Trollhole Carb Install

This site may earn a commission from merchant affiliate
links, including eBay, Amazon, Skimlinks, and others.

Joined
Jan 27, 2013
Threads
4
Messages
23
Location
Ventura, CA
IMG_0251.webp
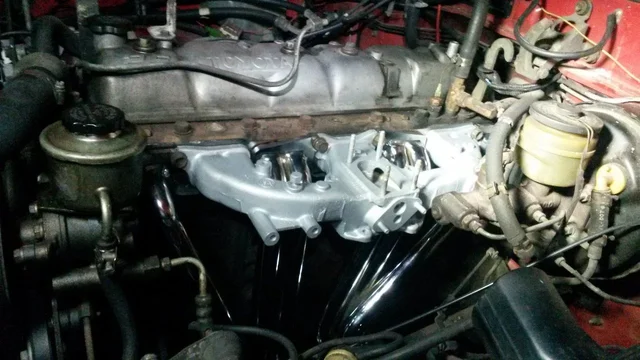
My 60 is nice and clean for 350,000 miles, but has a bad exhaust leak. Guessing I’ve also got a bit of a vacuum leak at the manifold as well. From the later photos you can see how badly it needs the headers. Oh and while I’m putting in the new headers I might as well try out a Trollhole Carb. This will be the biggest job I've done myself on the 60 so feel free to point out mistakes or add advice. Using the FSMs and the search function to get me through the job.

Ordered:

Headers: Mark's Offroad

Gasket: Mark's Offroad, was thinking about remflex, but I'll be having the manifold resurfaced anyway so hopefully the other gasket will hold up better (the Remflex that is on it now is badly delaminated.)

Carb: Trollhole

New vacuum lines all around, including PCV hoses and valve

Outsourcing the following, if anyone has reccomendations near Ventura let me know:

Resurfacing Manifold and shaving header to a machine shop

Exhaust from header back to an exhaust shop, not sure if I can find someone to work on my Florida registered (military) desmogged 60 in CA, so may have to borrow a friend who can weld. Or drive it to Nevada with open headers and earplugs...


Day 1: Removal of parts- took me about 2 hours including time to wait for penetrating oil on a stuck bolt.

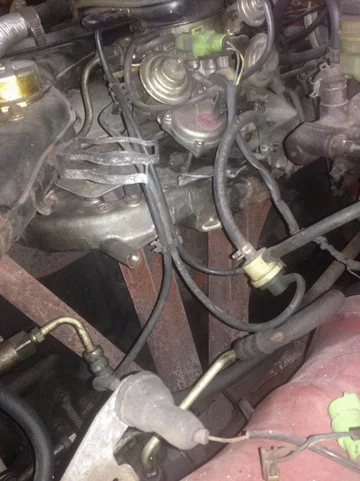
#1: Pictures to help remember where everything goes, could be helpful to someone else as well. Also labeling the hoses when I remove them.
IMG_0254.webp IMG_0253.webp
#2 Air box removed, all lines to air box tagged.

#3 All carb vacuum lines, solenoid, mechanical linkage for throttle and cable for choke were detached and tagged. Carb was then removed from insulator plate (four nuts hold it to four studs that come up through the insulator plate from the manifold). Carb is going to be set aside for apossible future rebuild after I get up and running with the Trollhole.

#4: Insulator plate removed from manifold, two 12mm bolts, and one more vacuum hose attached to the insulator. One of the bolts was stuck real good, had to use an extractor socket, will have to order a new bolt.

#5. With the insulator plate off, it was not too difficult to get to the bolts and nuts holding the manifold and headers on. Only the header hangs from the outermost bolts, so to start I loosened all the others, (four bolts and two studs with nuts in the center). These weren’t too difficult for me, I guess they weren’t over-torqued last time. Finally two more lines will need to be removed from the manifold, then it can be lifted out.

#6. Manifold out and ready to clean before a thorough inspection for cracks and warping
IMG_0258.webp IMG_0260.webp
That's where I'l leave it for now.
 
Day 2: Cleaning

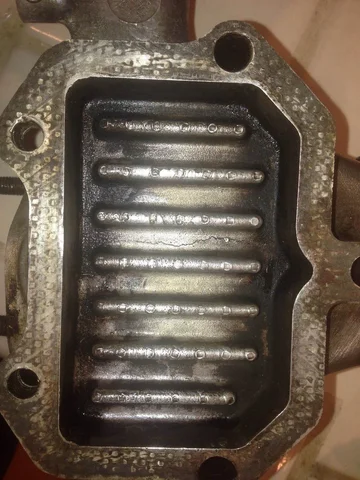
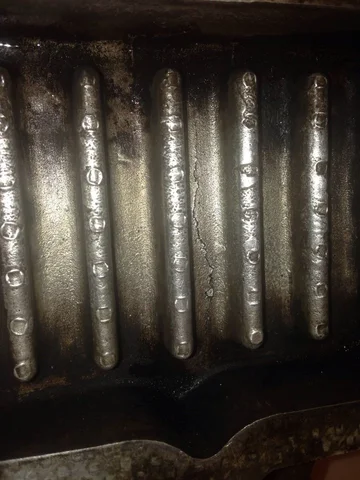
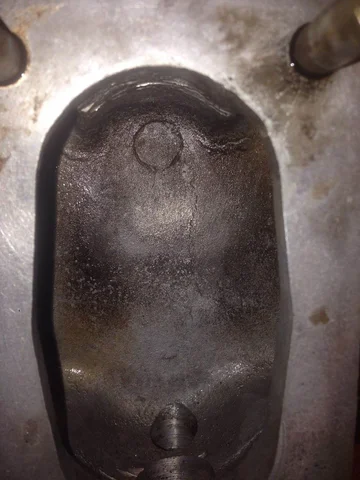
Spent an hour cleaning the manifold and assorted fittings. Just used Dawn, water, and Scotchbrite/ toothbrush. Once all the grease was off I could see a crack on the bottom of the manifold. And sure enough, on a closer look, a hairline crack was just barely visible on the inside surface under the carb as well :( The mating surface looks clean and very straight when checking with a straightedge, although there are a few very shallow scratches on the center intake.


I'm guessing it is weldable and I can probably have it done at whatever machine shop does the resurfacing (still looking for recommendations near Ventura). I'll have to add a block off plate or heat riser before I re-install, there was nothing there when I removed.
 
Also, if you look at the front edge of the hole for the carb in the last picture, you'll notice that it's a bit rough and pitted. Will that cause any issues? It's not on the surface the carb spacer mates to, rather on the side of the hole parallel to the engine block.
 
I haven't desmogged mine yet but I am really close, I tore it apart last night. Ip and found a crack in my intake manifold. Hopefully that is the problem. I will be watching your work. I have a header that is just waiting for me to install. I am having a conundrum weather to Desmog and run the header or try to keep smog working along with the header or not Desmog at all. A real crossroads...
 
Thanks, Hopefully it will be helpful. There are a ton of resources on this forum.

Day #3: Spent over an hour with a dremel and a cutoff wheel (need to get a grinder) cutting the exhaust where it was welded to the rusted out header. Then was able to pull the header out. Had to angle it just right to get it past the power steering pump bracket.

Cleaned the airbox, planning to repaint the top, probably just with rustoleum.

I also got a recommendation for Speedy's machine shop in Oxnard, who said they could weld the manifold when they resurface it. Planning to bring them the manifold and headers after I pick up the headers.

Finally just got the shipping notification from Trollhole, carb is on the way!
 
Good to meet you yesterday.:)

If you are willing to make the drive, I have a really good muffler shop I have been using since 1987, but he's another 35 miles east of me. LMK
 
So today was like Christmas. Went by the machine shop to pick up my repaired and resurfaced manifold and headers. Then came home to find this waiting on my doorstep a day early:

20150128_175401.webp 20150128_180907.webp

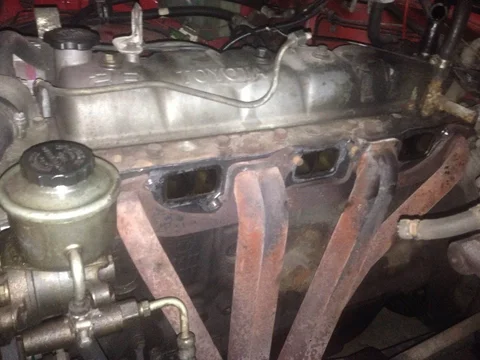
I decided to go ahead and get to work. Here's the ports with everything removed:

20150128_180506.webp

Started by laying out the sockets I'd need to get the header and manifold on and then copper-coated the exhaust ports.

20150128_181505.webp

I did the same to both sides of the gasket and the header surface and then loosely hung the gasket and headers from the center studs and started the end bolts to keep things stable:

20150128_182332.webp
 
I then hung the manifold from the center studs and started the rest of the bolts:

20150128_182939.webp

As you can see, in one spot the manifold and the header were not quite level. I had been confused about the "half washers" people were talking about, but once I saw the problem right in front of my face it was fairly easy to figure out. Found a washer of the right thickness, put it in the vice and cut it in half with a hacksaw then used a file to de-bur it before using it as a shim on the header side as pictured:

20150128_190857.webp 20150128_191050.webp

I then torqued the bolts down in the order from the FSM: starting with the studs then basically working out in a clockwise spiral to the outer bolts. Torqued to 36 ft-lbs for the ones I could get my torque wrench on, and used those to gauge the hand feel for the end bolts that I couldn't. Once it was snugged down, I took a peek from all angles to verify that none of the other bolts needed the half washer trick then mounted the carb insulator:
20150128_193159.webp

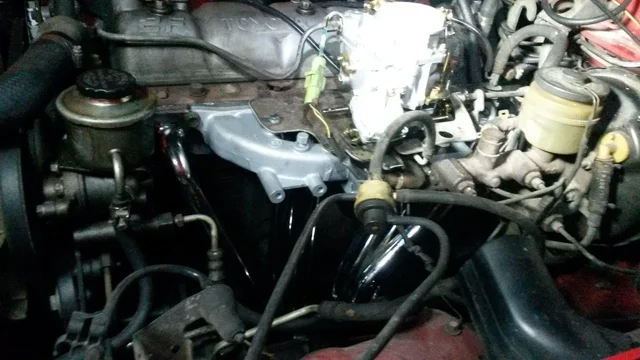
The Trollhole Carb was next and hooked up the throttle linkage and the choke cable. I had to cut the bead off the end of the choke cable and just use the set screw provided with the new carb because for some reason the bead wasn't quite the right size, it looked a little bent out of shape. kept the cover on during the install so I wouldn't accidentally drop anything down there:

20150128_201110.webp
 
I then connected the vac advance from the distributor to the single valve cover side port (replaced the old line with new 3mm tube). I cut the plug off the stock carb, double checked which wire had 12v then connected the plug to the new carb. Then I connected the fuel line:

20150128_210739.webp

The hard line coming off the firewall comes from the charcoal canister, there's nowhere to run it on this carb, so I just capped it. There is also no provision for the fuel cutoff on the trollhole, correct? I didn't have the A/C idle up hoked up before, so not going to now unless I run into problems when summer rolls around. Hooked up the drivers side VCV, the two 5 mil lines went to the same places they used to go, the carb insulator hard line and the purge hardline below the brake booster. Port x goes to the air cleaner, and port s is supposed to go to BSV1, but both nipples are broken off on both BSVs- neither was in use before I pulled the carb and with the Trollhole there is nothing to route the other ports to (would go to EGR R port on stock carb?)? Going to have to read up on what it does and if I need it on this install or if I can cap port S:

20150128_213958.webp

The passenger's side VCV, no picture sorry: port s was connected to the same fitting that the brake booster line plugs into on the manifold. Port Z was connected to the distributor cap, Port X was connected to the same line via a t fitting. Finally port Y will go to the passenger side of the air cleaner lid. Already mentioned the vac advance line goes to the single port on the valve cover side of the carb, and the HAC is capped. The only other Vac line here was also replaced, the vent from the distributor cap to the firewall.

While I was in there I changed out the PCV valve and grommet, as well as the fuel filter. The PCV breather line was badly cracked so I'll have to get a new one. Finally I switched the lines on the charcoal canister as I was having the issue with the fuel tank not venting properly.

Started it, but without knowing for sure what I need to do with BSV1 I didn't want to run it long enough to set the idle. Plus, it was getting late and the new header does not line up with the exhaust anymore, very loud and very satisfying but I don't want the neighbors to hate me. Has anyone used the flex exhaust sections? Wondering if I can put one on there temporarily with clamps so I don't have to drive to the muffler shop with open headers.

Questions I will be looking up, will post the answers once I find them unless someone else beats me to it:

1. No fuel cutoff on Trollhole: just leave it disconnected?

2. BSVs are broken, do I need them when desmogged with the Trollhole and no HAC? if not can I just cap port S on the Driver side VCV? If I do need BSV1, port B should go to port S on the VCV, but where should port a go?

3. Confirm that I can just cap the hardline coming off the firewall under the throttle linkage (comes from Charcoal Canister?)

4. See if I can find an inexpensive section of exhaust flex tubing that will let me set the idle, etc.. and get me to the exhaust shop to connect it properly without alarming all the neighbors.

5. Find/order a new PCV breather hose.


Once I do that I'll be taking it down to the base where I'll be able to borrow feeler gauges and a timing light to do a proper tune up. Since I've done all this other work I may as well try my hand at valves and timing.
 
Great thread. Thanks, you are giving me the confidence to do the same thing on my rig.
 
Figured out the answers to some of my own questions, #2 still bothers me

Questions I will be looking up, will post the answers once I find them unless someone else beats me to it:

1. No fuel cutoff on Trollhole: just leave it disconnected?

Correct, pulling the hose out

2. BSVs are broken, do I need them when desmogged with the Trollhole and no HAC? if not can I just cap port S on the Driver side VCV? If I do need BSV1, port B should go to port S on the VCV, but where should port a go?

This one is still troubling me a bit. The common suggestion with the Trollhole is to just cap everything related to the evap, which seems to be the only real option. The VCV needs ported vacuum to Port S to open it and allow the vapor into the carb spacer only when not idling. Even if I had the BVSV, I'd need a ported vacuum source to control the valve. If we hook it up to manifold vacuum, it will constantly be pulling vapor from the tank. I'm going to try out capping it for now and see if I get any fumes or tank pressurization issues.

3. Confirm that I can just cap the hardline coming off the firewall under the throttle linkage (comes from Charcoal Canister?)

Part of the Evap system, getting capped, see #2, turns out 40' of 3mm hose was way overkill with this carb.

4. See if I can find an inexpensive section of exhaust flex tubing that will let me set the idle, etc.. and get me to the exhaust shop to connect it properly without alarming all the neighbors.

Found exactly that at O'Reilly: $12 should get me an clamped flex-exhaust connection from the header to existing system that will last long enough to get it tuned. Suppose I ought to learn to weld someday.

5. Find/order a new PCV breather hose.


5/8" 90 degree heater hose, may break down with the oil, but it was cheap.
 
Capped all the Evap circuit this morning, and fired it up. 3/4 turn of the idle screw to bring the idle up to 700 (don't have a tach, just using the dash one for now). At full choke, fast idle was correct, and was pulling 20+" hg vacuum (hooked up to the brake booster port). At normal idle, however, it was a bit rough and only pulling 14-15" hg. I didn't have the gauge hooked up with the old carb so really don't have a baseline, any ideas on the culprit?
 
Decided to cap the other manifold vac lines to check and see where my issue might be. Capped PCV and the diztributor vent vcv and came right to a perfect idle at 19" hg! I'lll be replacing the PCV hose with OEM, grommet and valve are new.

Pulled the VCV and checked it according to the emissions manual, when I put vacuum on the S port it just pulls right through from all the other ports. No problem I thought, I'll just switch it with the evap one I just pulled out, turns out that one is bad too.Guess I'll have to source a new one. is there a major issue with just running the distributor vent to the air cleaner?
 
I haven't desmogged mine yet but I am really close, I tore it apart last night. Ip and found a crack in my intake manifold. Hopefully that is the problem. I will be watching your work. I have a header that is just waiting for me to install. I am having a conundrum weather to Desmog and run the header or try to keep smog working along with the header or not Desmog at all. A real crossroads...
@bdynamic - I am in the area if you need reference for the desmog.
 
Uh @Jeffs60, just wanted to confirm that you are doing thing "legally" seeing as you are in CA according to your location.
 
In post #1 he mentions the rig is registered in Florida, FWIW
 
That's correct, I'm military stationed in CA for now, but still a legal FL resident and the FJ60 is registered there as an antique vehicle so I don't have to worry about inspections.

I fixed the vac leaks that were causing my issues by replacing the PCV hose and just routing the distributor cap vent to the air box until I get another VCV. Set the timing to 10 degrees, then buttoned everything up and took her for a test drive. It pulls great through the whole RPM range, and is idling smoother than it ever has in the 12 years I've owned it. All that's left is getting my temporary clamp on exhaust section replaced something more permanent and it'll be running better than it ever has for me.

20150130_195912.webp 20150130_195936.webp

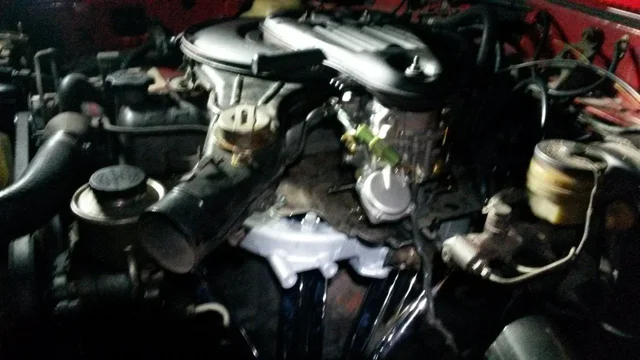
Everything sure looks a lot simpler under there now. Part of that is because the number of vac lines is even lower than it was with the previous desmog. Part of it is because tackling this job has let me learn a lot about the Cruiser that I didn't know. I recommend taking this job on yourself on if you have the time, regardless of your experience. The resources here are great, and the FSM is helpful as well, and I'll be more confident taking on other jobs like this in the future now that this one is under my belt.
 

Users who are viewing this thread

Back
Top Bottom