Darasick's Build/Rebuild Thread...

This site may earn a commission from merchant affiliate
links, including eBay, Amazon, Skimlinks, and others.

darasick said:
. I just matched the 10 awg wire that was supplied with the pump.

That 10 awg, might be good enough for a short run, but when your talking these long cables. You need to be concerned with.voltage drop across them. If ya google it you can find some charts showing the amps needed, 12v, and lengths. To determin awg. See what the compressor draws under load with only the stock 10 directly to a battery. And match that amp for your length. :):)

Thanks Cody Sent from my iPhone using IH8MUD
 
looking good:clap:

would run at least #4 in not #2 to the compressor:)

the way ya going there won`t be anything left on the cruiser to do with your boy --- but:steer: :lol:

I think 4 awg will be the way to go, but we'll see when I know the draw. If I keep breaking things, we'll always have something to do!:hillbilly:

That 10 awg, might be good enough for a short run, but when your talking these long cables. You need to be concerned with.voltage drop across them. If ya google it you can find some charts showing the amps needed, 12v, and lengths. To determin awg. See what the compressor draws under load with only the stock 10 directly to a battery. And match that amp for your length. :):)

Thanks Cody Sent from my iPhone using IH8MUD

Will do bud, as soon as I can get my hands on a DC ammeter.
 
Justin, that's my attitude everytime I walk in to the garage. I put everything in 2 categories: broke / leaking stuff that NEEDS immediate attention and broke / leaking stuff that will stay that way until it moves to the first category. :D
 
Some progress... So I traded my Hellas for this Safari Snorkel and finished mounting it today. Also removed the factory antenna, and will be filling the hole when i paint it next year. Firestik makes an FM antenna and it will go on the back bumper. It should be in next week. Should see some more activity here in prep for SCC.

image-1073662061.webp
 
Last edited:
Some progress... So I traded my Hellas for this Safari Snorkel and finished mounting it today. Also removed the factory antenna, and will be filling the hole when i paint it next year. Firestik makes an FM antenna and it will go on the back bumper. It should be in next week. Should see some more activity here in prep for SCC.

Looking good bud, will be following those updates :)
 
Looks good ! How tough was it drilling all those holes in your sheet metal? Did you have to seal up the drain hole in the factory air box.
 
I haven't addressed any sealing yet. There is also a clamp inside the fender well that is impossible to get a wrench on that I will have to address as well. The whole thing will have to be dismantled for paint and I plan on getting everything sealed up then.
 
Finished up installing the new Budbuilt DragLink and Tie Rod with new OEM rod ends for both. Still have to align it, but that'll come later. Second picture is the OE DragLink and the sleeved Budbuilt one.

image-598077187.webp


image-1410973006.webp
 
So thats where the handle of my high lift jack disappeared to :D. I've bent stock steering components with small tires, Cant image the stress the 37" are putting on thr front end of the 80.
 
So thats where the handle of my high lift jack disappeared to :D. I've bent stock steering components with small tires, Cant image the stress the 37" are putting on thr front end of the 80.

:lol::lol: It's about the same OD as a Hi-Lift handle, but it almost weighs the same as the entire jack! I think I bent the drag link on a rock because the front diff has some rash and a ding on it. I'm sure the tires didn't help.

I'll be firing up the welder soon to burn in some diff protection and finish off the back bumper. You are the one to blame for this sickness, I just thought I would remind you!::hillbilly: More updates to come as the weeks go by...
 
Finished up installing the new Budbuilt DragLink and Tie Rod with new OEM rod ends for both. Still have to align it, but that'll come later. Second picture is the OE DragLink and the sleeved Budbuilt one.

Looks very stout nice addition indeed :) I've seen a few folks hammering them on trees to straighten them out so the could get their turning radius back on the trail. Would certainly give you peace of mind knowing you took away another weak link :)
 
Yea hopefully I've isolated the weak link to the TRE's. I'll be carry the old ones as spares, but not looking forward to changing those out on the trail!

Can anyone tell me what I was doing in this pic? I think I was hallucinating last night when I saw the picture this morning...:rolleyes::lol:

image-571600881.webp
 
Trying to make a spare shock body out of PVC?? :bang:

Almost... Actually a highly technical technique to mock up for remote reservoir shocks. :grinpimp:

Going to go with Radflo's and needed to see where the RR was going to go. I've been advised to mimmick a piggyback set up due to the real estate available, so I have to spec it out when I place my order.
 
And here I thought you were reengineering the KYB's with a homemade reservoir, LOL :D that's going to be nice.
 
I've been advised

Hope their smarter than this....
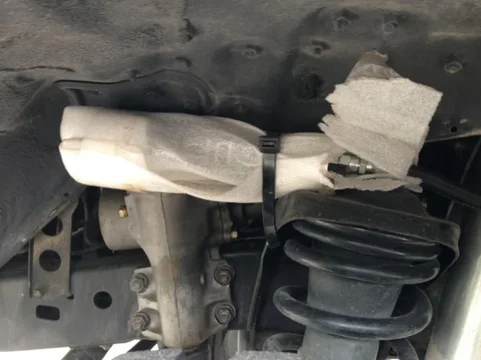
image-3448386923.webp

Original, based on many mock up sessions, I had planned to weld a Poly bracket to the coil tower, but it doesn't leave enough room to remove the gearbox behind, without finagling.

Considering my luck with gearboxes, decided better to cut a ring the diameter of the top of coil tower, utilizes the existing attachment points, and weld the mount to the ring.

Mount in discussion.
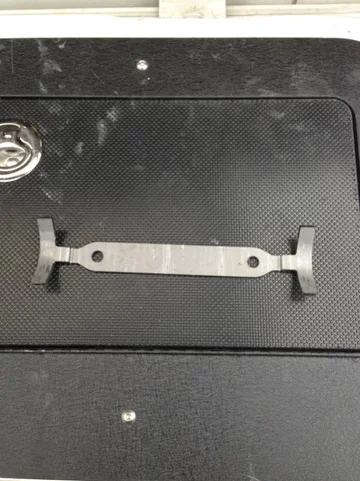
image-1718998450.webp

Easy removal, WHEN need arises and easy access to the adjusters.

Another option would be to order the resi assembly long enough to be capable of mounting on the front of the frame rail.
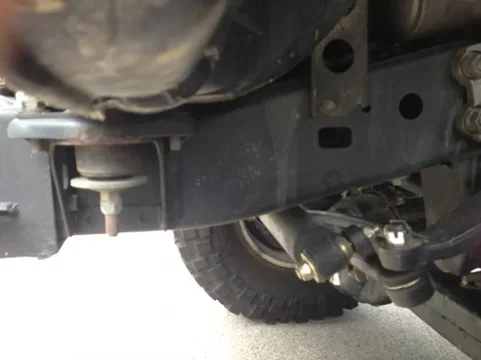
image-1153993272.webp

Or if a tube bumper and bling is your thing,

image-3601835875.webp

I'd rather run sans resi than to mount up front, but it would provide cooling....just not sure how much at 3mph.

Either of the above could run inside the engine bay, for a clean look, along the inner fender, with a straight fitting exiting the upper shock body, or be secured along edge of inner fender outside engine bay, out of harms way.

That said, the semi-piggyback method would be how I'd re-order.

image-3448386923.webp


image-1718998450.webp


image-1153993272.webp


image-3601835875.webp
 
I see someone is snooping! Nice work on that coil tower mount! I'm not a fan of the bling options and I wanted to keep the reservoir out of the engine bay due to the heat under the hood. After playing with the PVC last night, the semi-piggyback solution that you suggested is the way to go. It looks like 2.75" from the top of the shock body is where it should reside.

Tonight I will pull all of the articulation measurements again and shoot Glenn an email with what I would like to do.
 

Users who are viewing this thread

Back
Top Bottom