
So after about a year of day dreaming I have finally decided to take a stab at my beloved 1987 Landcruiser I named Betty, as in Betty White for obvious reasons. The journey started like most; I found myself constantly searching through craigslist ads on an empty pocket. I had been drooling over the idea of owning the very same truck my father had during my years as a child. I'll keep it short and sweet as to avoid a sob story but A LOT of my fondest memories involved that Blue turned Green FJ60. As much as it pains me to say, the fate of that cruiser was to be donated.
Fast Forward about 10 years, its 2016 and those endless hours on CL finally led me to that one Ad that stuck to me like flies on sh** . Only problem is that I was and still am a broke college student, but I was adamant on taking that 400 mile journey to pick up that White cruiser we all happily know as Betty. So I asked my good friend if he could lend me the money for my dream, without hesitation he agreed, and so it began. I borrowed my fathers work truck without his knowledge of the true distance I was going to bring this non running 30 year old car back home, so with the U-Haul trailer hooked up, and 3 of my buddies buckled in we set off.
12 hours later and were back in San Francisco, I had no space at my home so the very same friend who lent me the money (Which I paid back) allowed me to park this behemoth in his yard. This is where it spent almost a year waiting for me to finally dive in and see what I was working with. I knew that with the 1000 dollar price tag that their would be some issues but luckily rust wasn't one of them.
About a month ago I finally decided to bring it home and start wrenching on it.
 [/URL][/IMG]

So As You Can See, this is currently how she sits. I have already begun tearing her down to assess the engine and determine its salvageability. Excuse the damage on the rear quarter panel.

Luckily the whole front end is intact and free of any dents and cancerous rust, only small amounts of surface rust is visible, but I plan to repaint it white so all of that is just superficial.

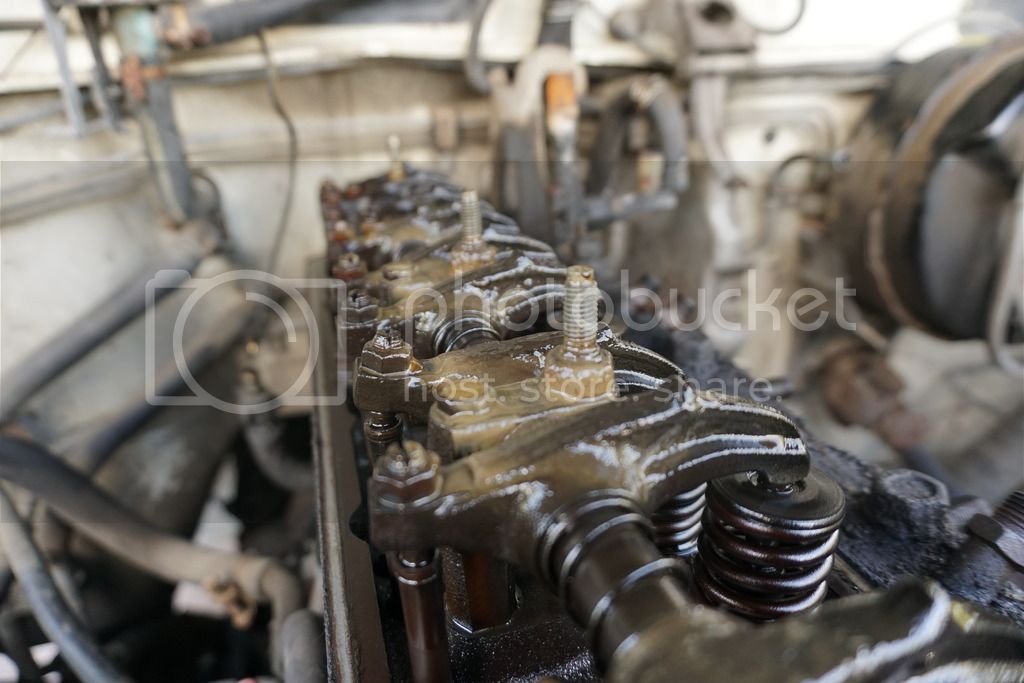
And last but not least, for the ladies, this 6 foot 1 stallion is yours truly. Working on Betty White loosening the rocker assembly with my makeshift breaker bar.

Steps are finally being taken to get this beast on the road, with parking spots limited on my block the sooner I get Betty road worthy the better.
I am constantly taking pictures of the progress and Ill do my best to keep this thread alive, just remember Im a college student with a full time job so bear with me - Jeff
Fast Forward about 10 years, its 2016 and those endless hours on CL finally led me to that one Ad that stuck to me like flies on sh** . Only problem is that I was and still am a broke college student, but I was adamant on taking that 400 mile journey to pick up that White cruiser we all happily know as Betty. So I asked my good friend if he could lend me the money for my dream, without hesitation he agreed, and so it began. I borrowed my fathers work truck without his knowledge of the true distance I was going to bring this non running 30 year old car back home, so with the U-Haul trailer hooked up, and 3 of my buddies buckled in we set off.
12 hours later and were back in San Francisco, I had no space at my home so the very same friend who lent me the money (Which I paid back) allowed me to park this behemoth in his yard. This is where it spent almost a year waiting for me to finally dive in and see what I was working with. I knew that with the 1000 dollar price tag that their would be some issues but luckily rust wasn't one of them.
About a month ago I finally decided to bring it home and start wrenching on it.
So As You Can See, this is currently how she sits. I have already begun tearing her down to assess the engine and determine its salvageability. Excuse the damage on the rear quarter panel.
Luckily the whole front end is intact and free of any dents and cancerous rust, only small amounts of surface rust is visible, but I plan to repaint it white so all of that is just superficial.
And last but not least, for the ladies, this 6 foot 1 stallion is yours truly. Working on Betty White loosening the rocker assembly with my makeshift breaker bar.
Steps are finally being taken to get this beast on the road, with parking spots limited on my block the sooner I get Betty road worthy the better.
I am constantly taking pictures of the progress and Ill do my best to keep this thread alive, just remember Im a college student with a full time job so bear with me - Jeff


 Look what I found after removing the thermostat housing and draining the coolant.


 .
.


