Navigation
Install the app
How to install the app on iOS
Follow along with the video below to see how to install our site as a web app on your home screen.
Note: This feature may not be available in some browsers.
More options
Style variation
You are using an out of date browser. It may not display this or other websites correctly.
You should upgrade or use an alternative browser.
You should upgrade or use an alternative browser.
Cheap, easy, almost bolt in seat upgrade, 2002 Rodeo Seats
- Thread starter pimpm3
- Start date
This site may earn a commission from merchant affiliate
links, including eBay, Amazon, Skimlinks, and others.
More options
Who Replied?How does the top half of the new rear seat latch into the mechanism on each side? Also will you be able to fold the seat flat now?
Looks great BTW
Zack
I can't multi- quote on the iPad app, see below...
I attached a metal rod the same diameter as the stock toyota one to the back of the seat. It attaches the same way the OEM Toyota one does with the lever on each side. It works out great so that you can fold it flat to extend the cargo space.
I worked on it some this morning but I only had a little time before work, I will take some more pictures tommorow.
......
- Thread starter
- #25
Sorry for the delay on updates. I have been working on the truck and have not had a chance to post lately. I normally post when I am working during down time, and I just got done with a five day off cycle. Anyway on to the updates...
The brackets that mount the seat backs to the factory Cruiser latches is basically a thick metal rod that is the same diameter as the factory piece. I bent the rod into a s or z shape and welded it to two small rectangular brackets. I attached the brackets to the back of the Rodeo seats and tacked them while in the car. I then took them up and welded them up solid outside the Cruiser.
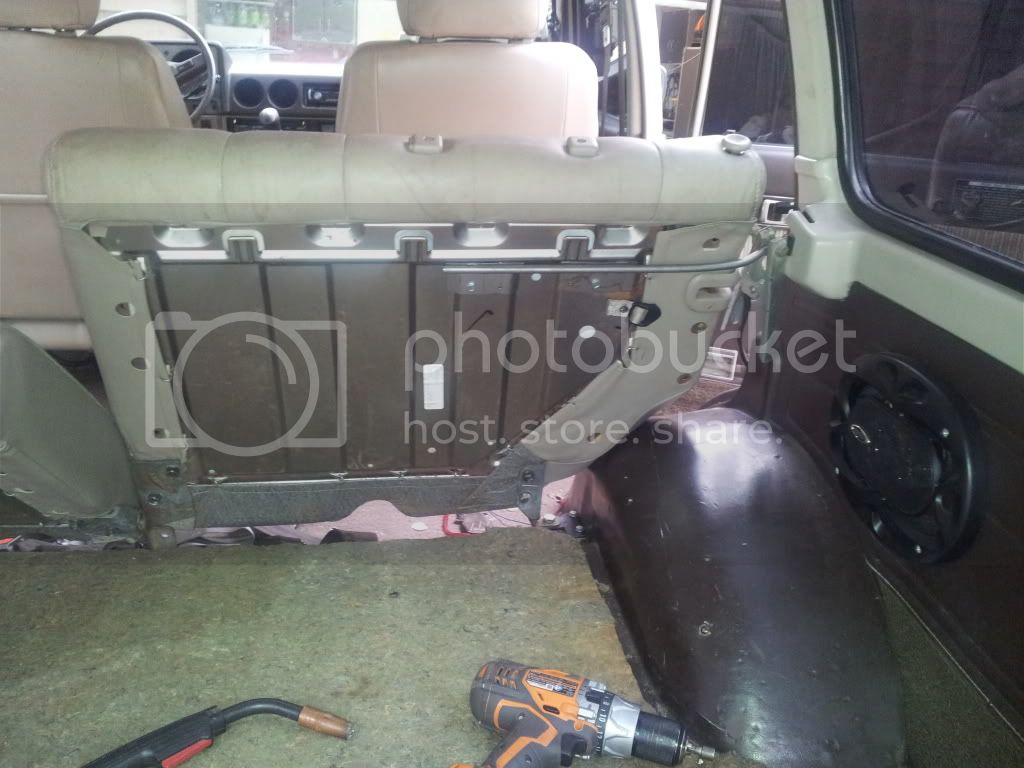
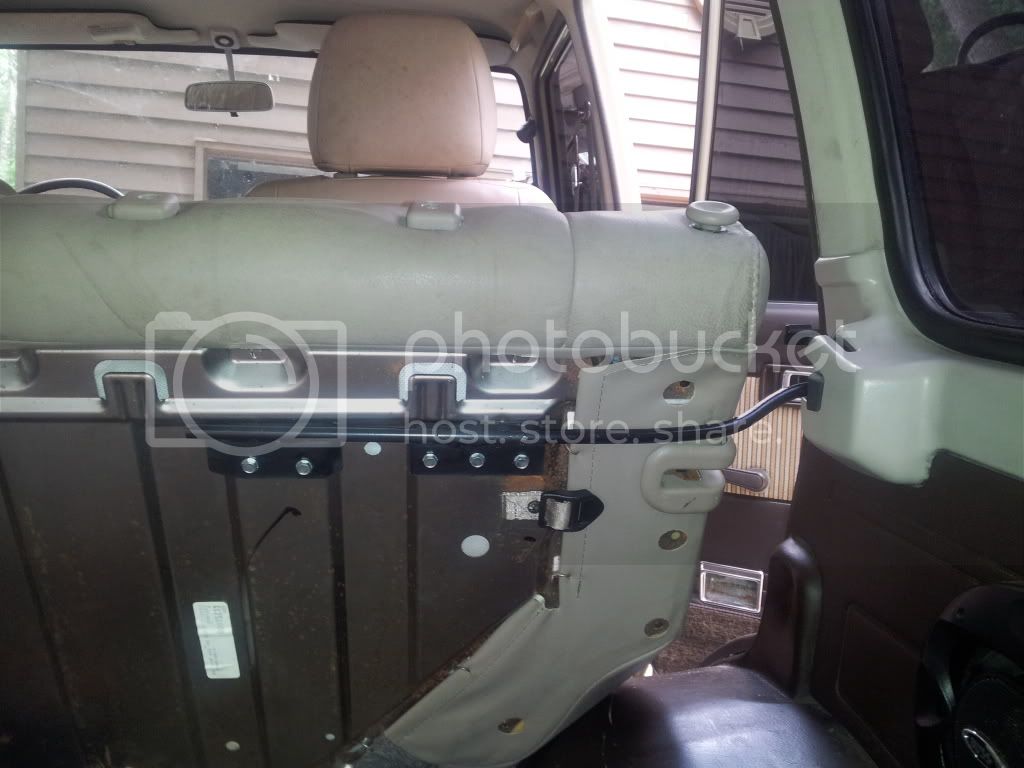
The brackets that mount the seat backs to the factory Cruiser latches is basically a thick metal rod that is the same diameter as the factory piece. I bent the rod into a s or z shape and welded it to two small rectangular brackets. I attached the brackets to the back of the Rodeo seats and tacked them while in the car. I then took them up and welded them up solid outside the Cruiser.
- Thread starter
- #26
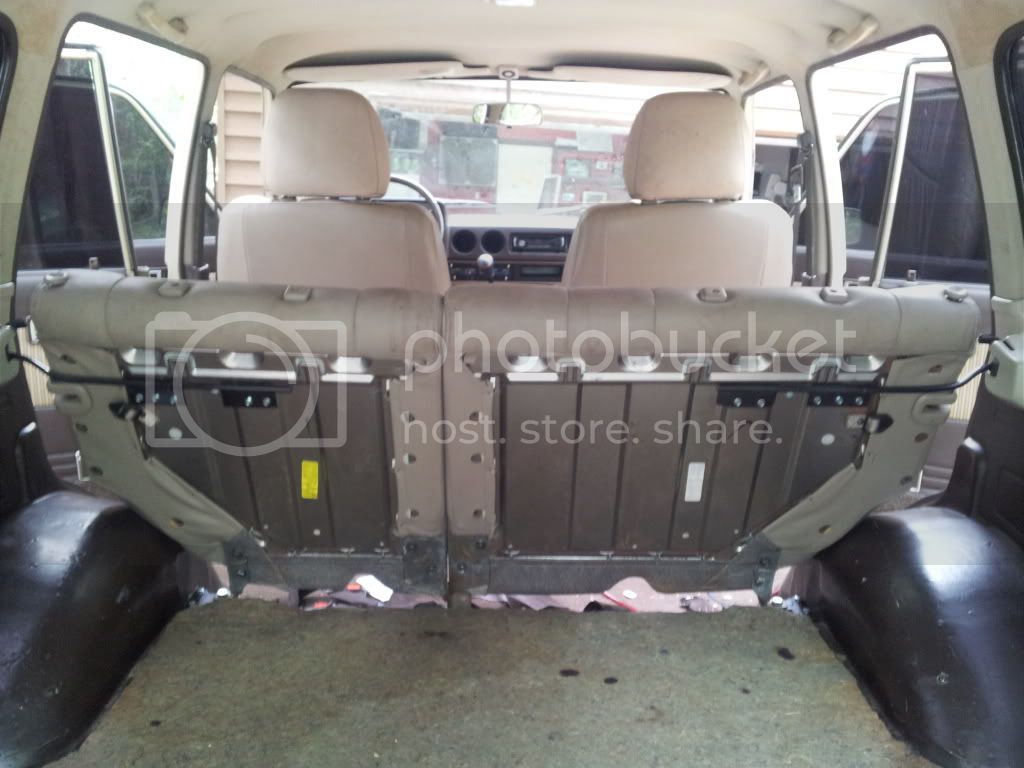
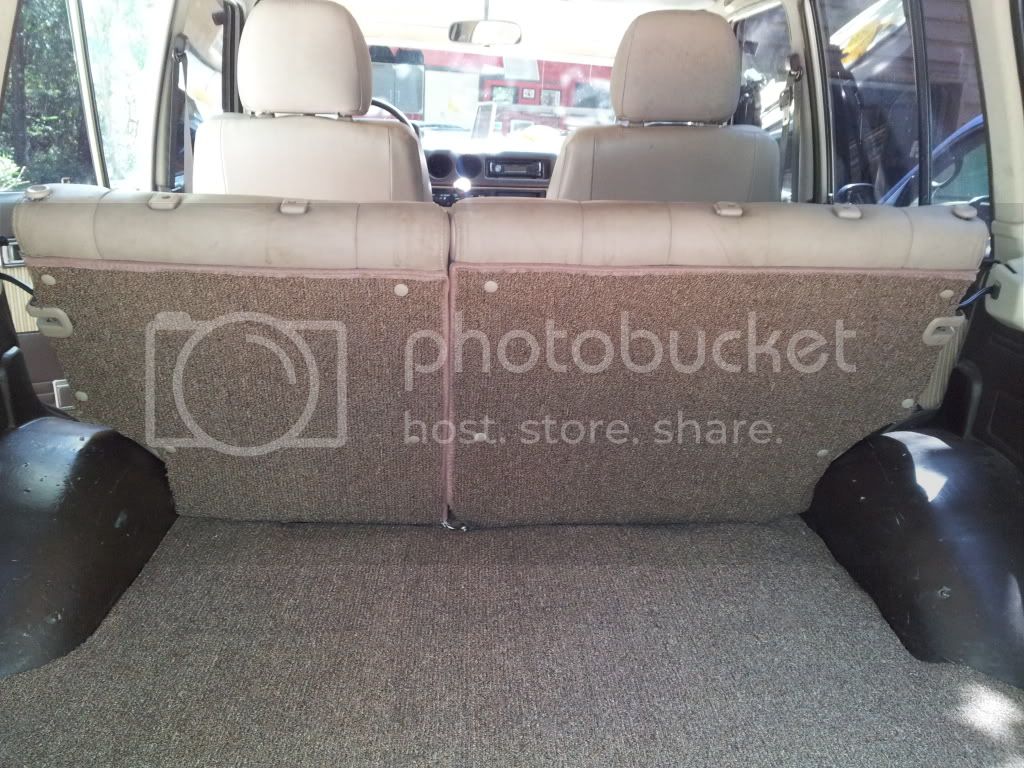
You may notice that the Rodeo seats are a little narrower then the Cruiser's seats. There is approximatly a 2 inch gap on either side, but it looks fine IMHO.
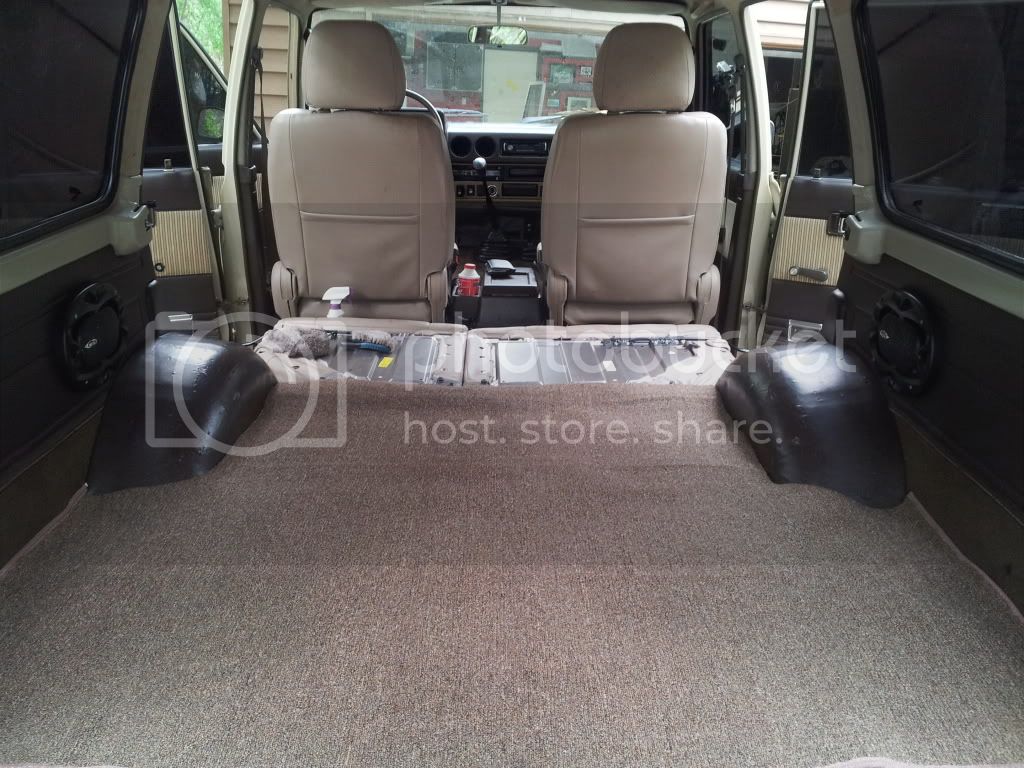
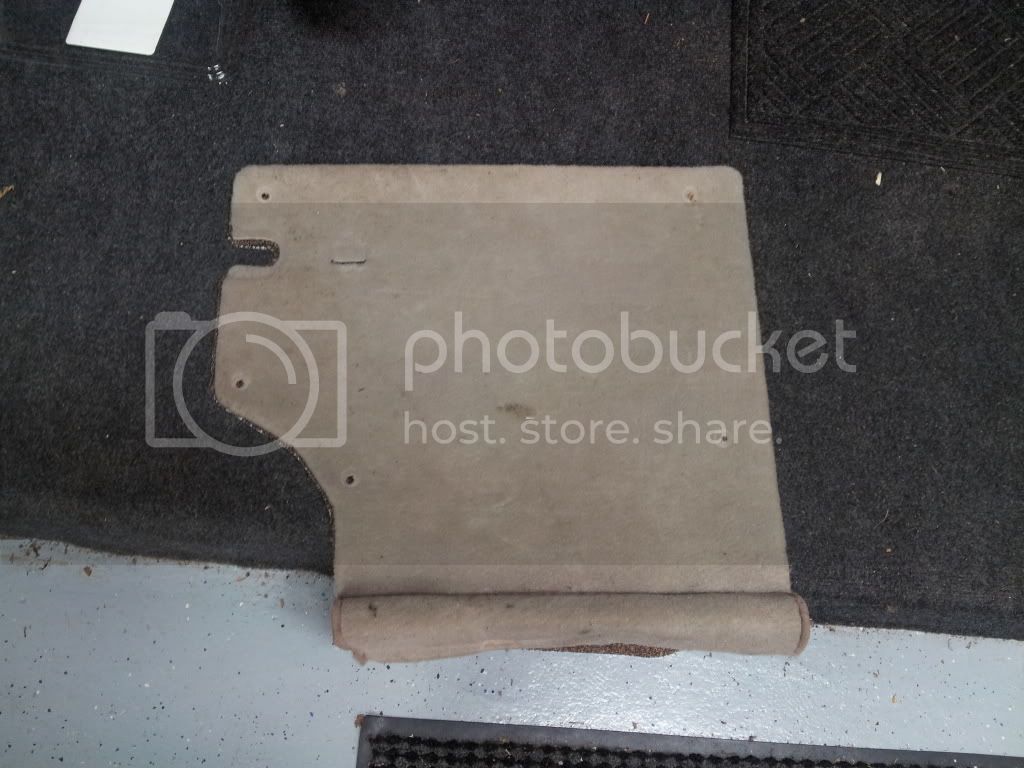
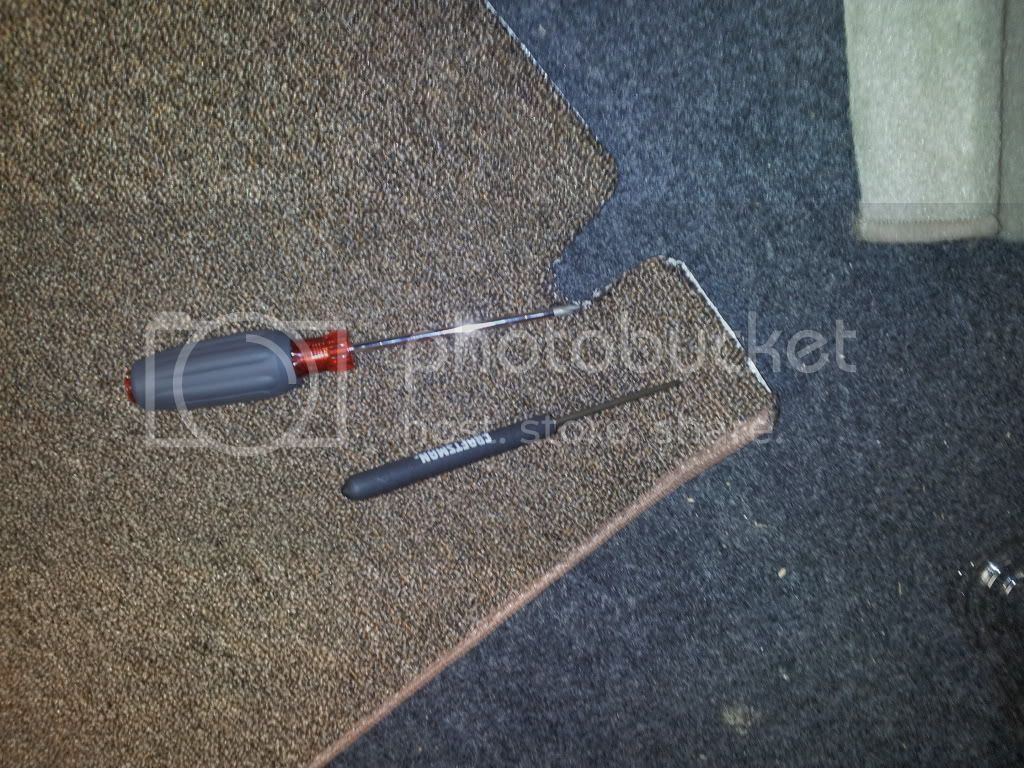
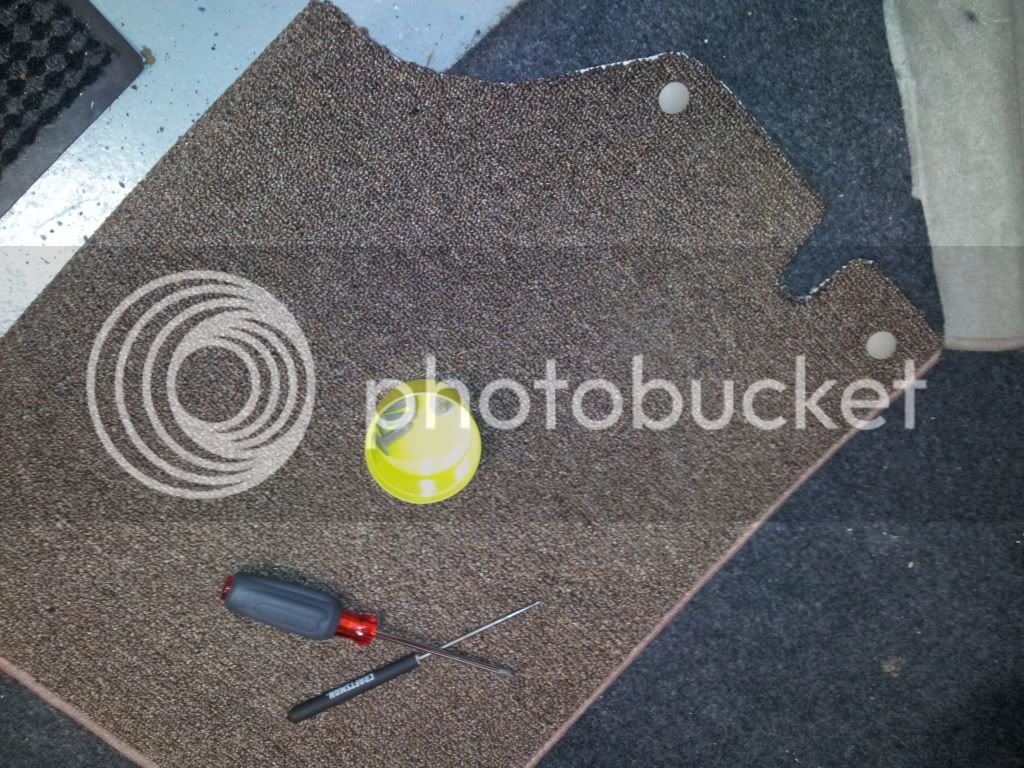
While I was working in the back of the truck I took the time to replace my wore out trunk carpet. I went to Lowes and bought a rug for $20.00. I put it on the ground and traced the outline of my old carpet. I then used some tin snips to cut it to shape.
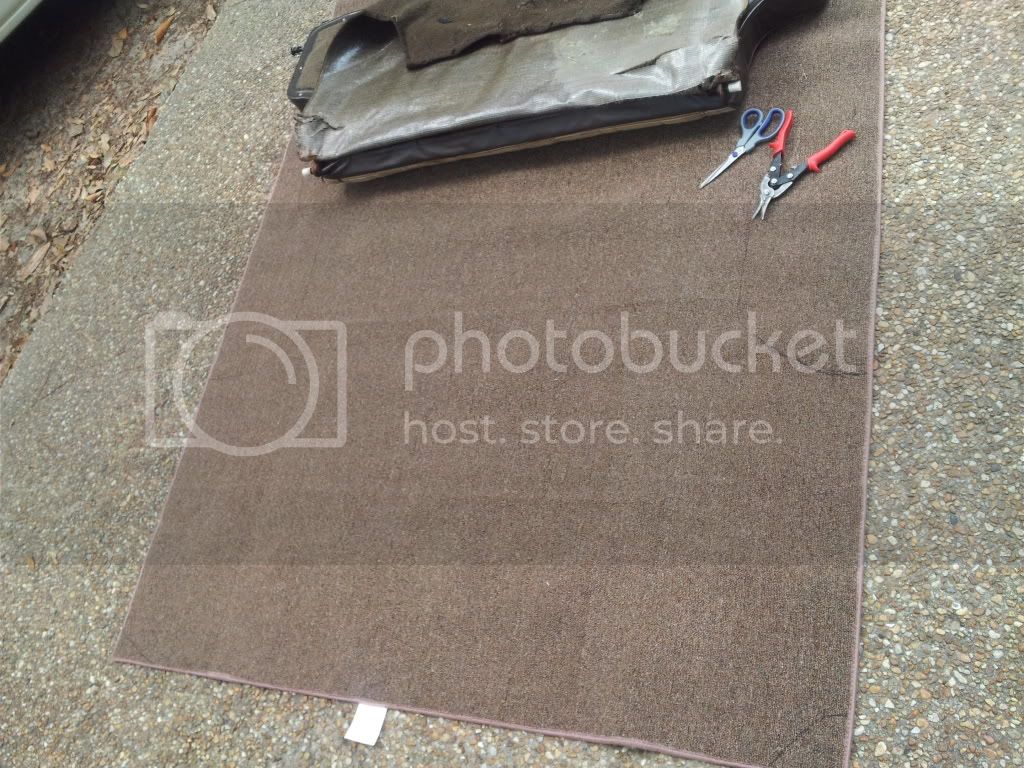
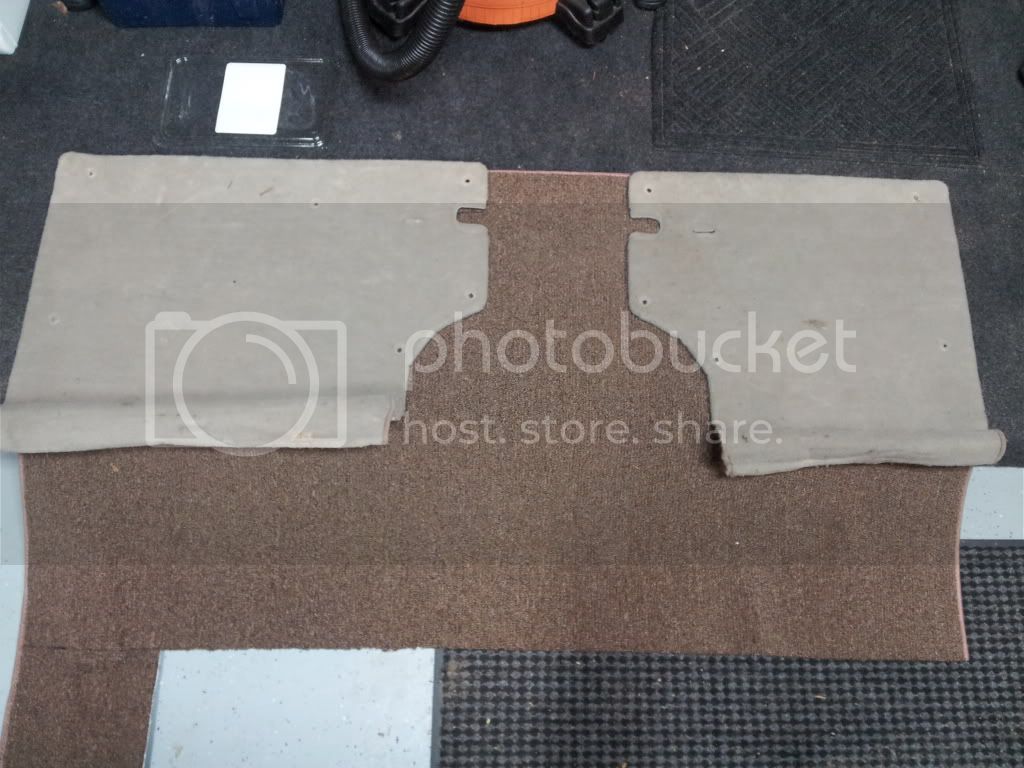
I did the same thing with the left over rug and the stock Rodeo seat back trim.
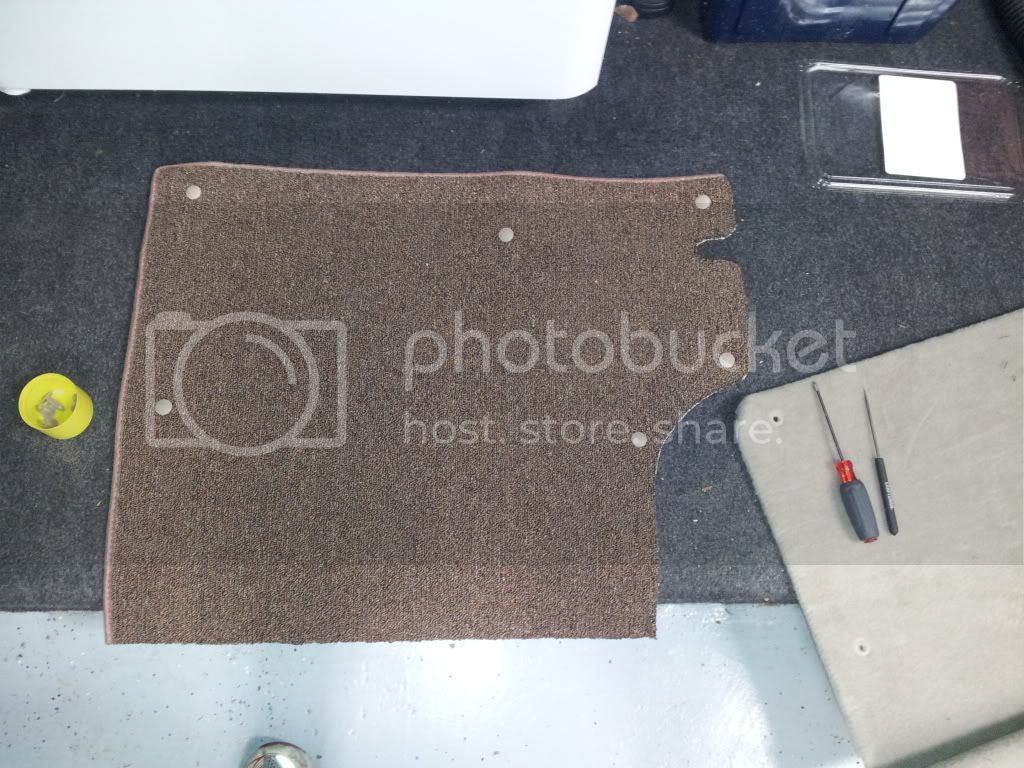
I used an ice pick and a screw driver to punch holes for the stock plastic clips.
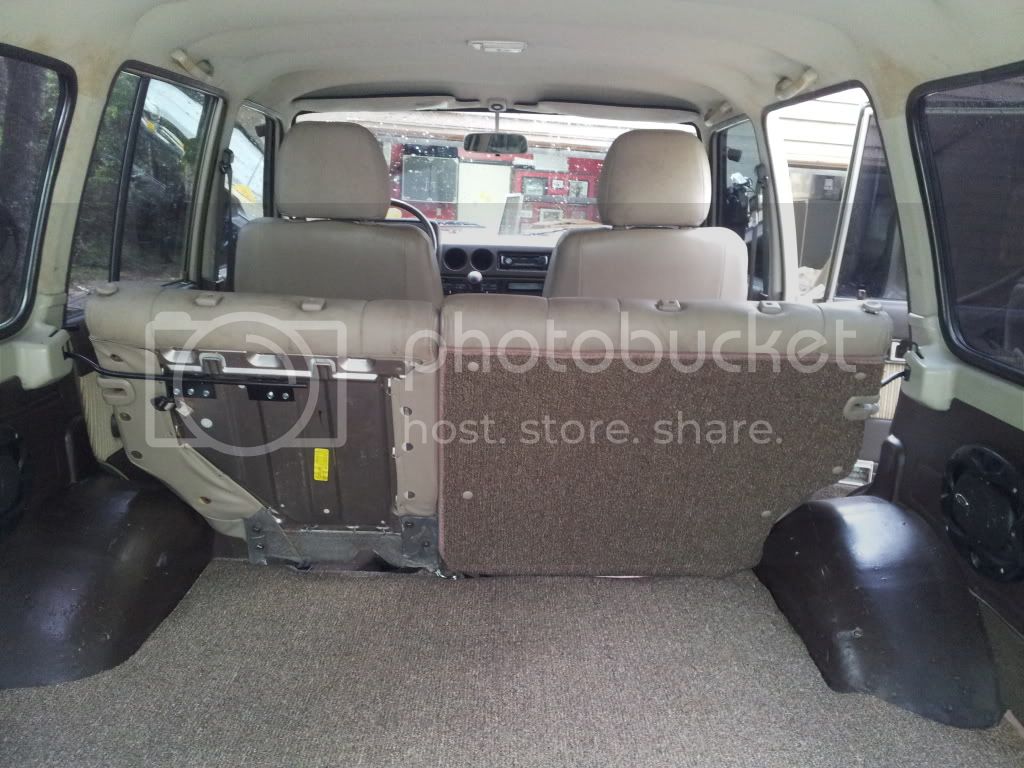
While I was working in the back of the truck I took the time to replace my wore out trunk carpet. I went to Lowes and bought a rug for $20.00. I put it on the ground and traced the outline of my old carpet. I then used some tin snips to cut it to shape.
I did the same thing with the left over rug and the stock Rodeo seat back trim.
I used an ice pick and a screw driver to punch holes for the stock plastic clips.
- Joined
- Sep 9, 2004
- Threads
- 200
- Messages
- 12,529
- Location
- Boise - Idaho
- Website
- www.snlandcruisers.com
Looks pretty good, especially the color for your brown interior.
The only comment I have is the back is a little low. Taller than stock but not much. My complaint about stock seats (had some restuffed ones) is that the back is to low. On long drives my upper back and shoulders wasn't all that happy.
Cheers
The only comment I have is the back is a little low. Taller than stock but not much. My complaint about stock seats (had some restuffed ones) is that the back is to low. On long drives my upper back and shoulders wasn't all that happy.
Cheers
- Thread starter
- #29
The seats are taller then the stock rears by about an inch. I had the stock bottom seat in for awhile and the rears from the Rodeo would not fold flat with it in place. I am still working on the bottoms and I am hoping that I can keep the ability to fold the seat. It is looking like it should still fold flat but at the moment I still have some work to do.
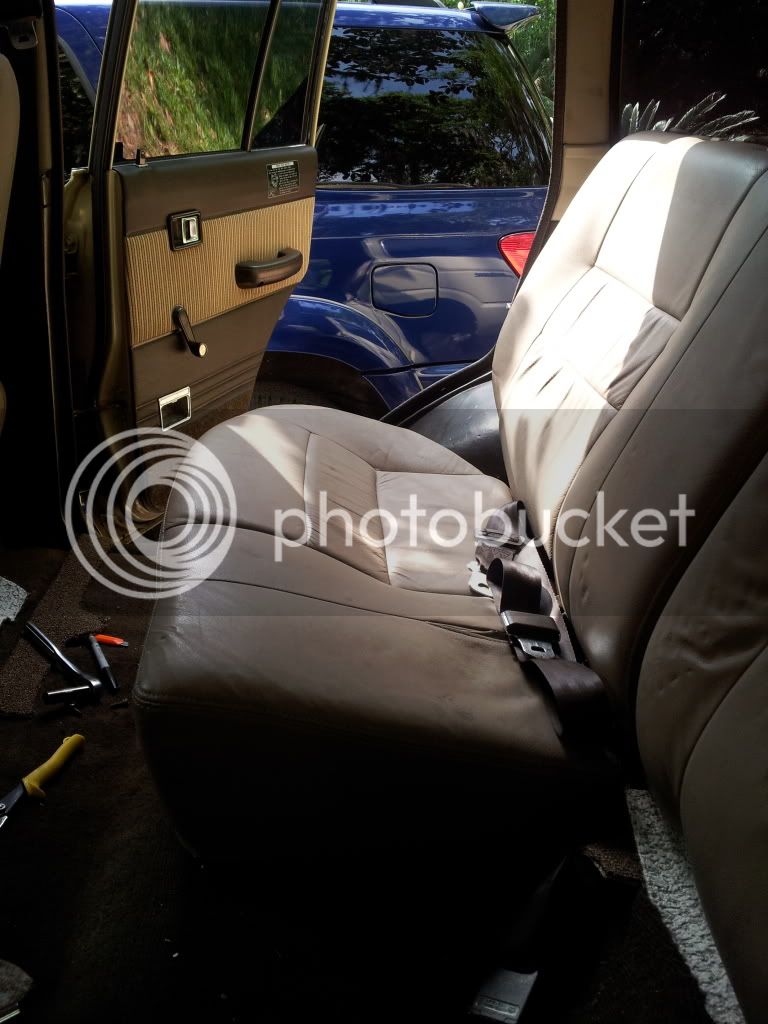
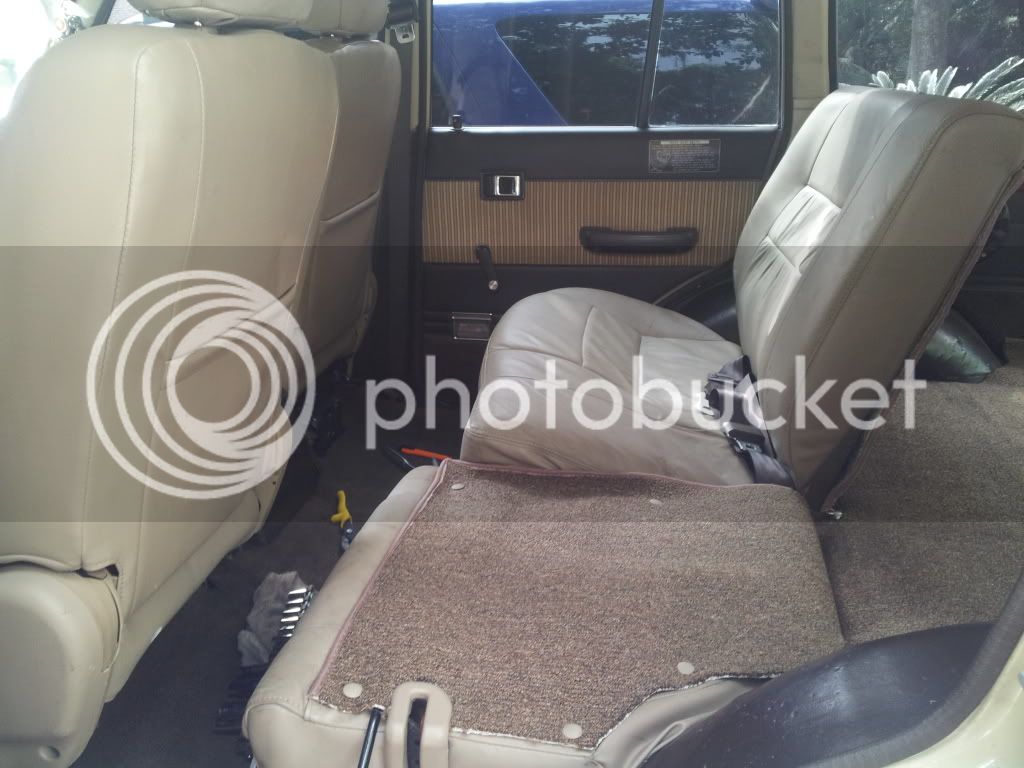
So far the rears have been pretty easy to install. I had to make three small brackets in addition to the rods that hold the rear seat backs. So far everything has bolted into the stock Cruiser attachment points so I can go back to stock easily.
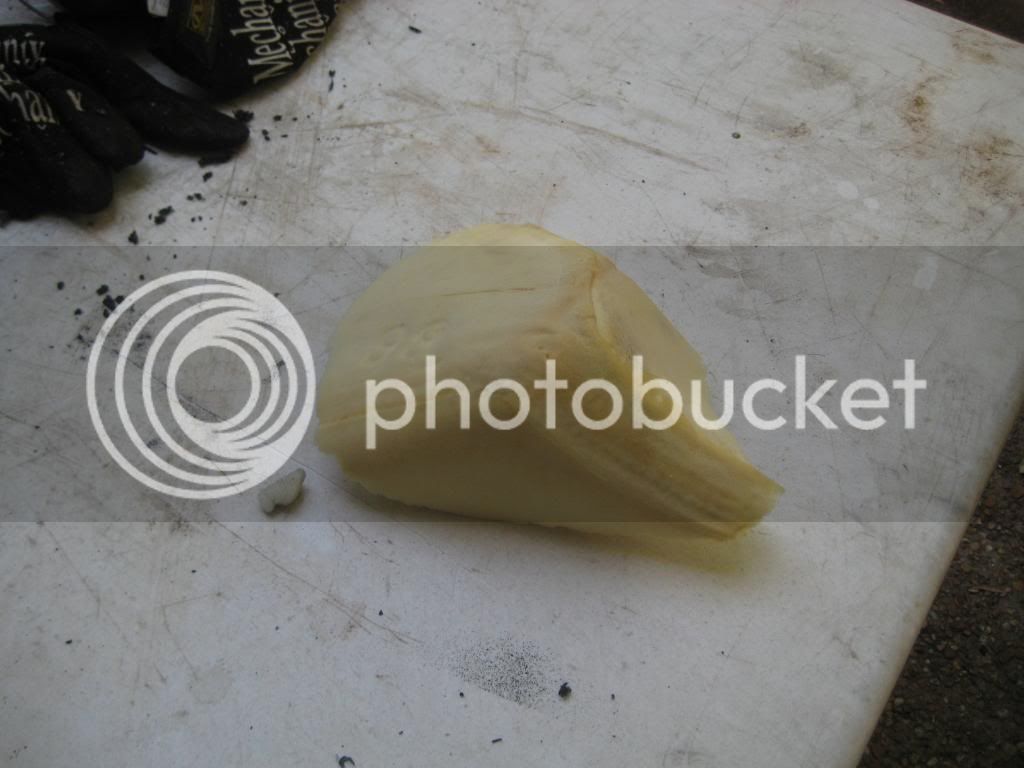
The seat bottom in the back has been the most labor intensive part of the install to this point. I had to trim a small portion of foam from the edge to get the contour to fit the cruiser wheel well. I also had to cut out a small piece of plastic from the bottom. It is coming along nicely and I hope to have it finished soon.
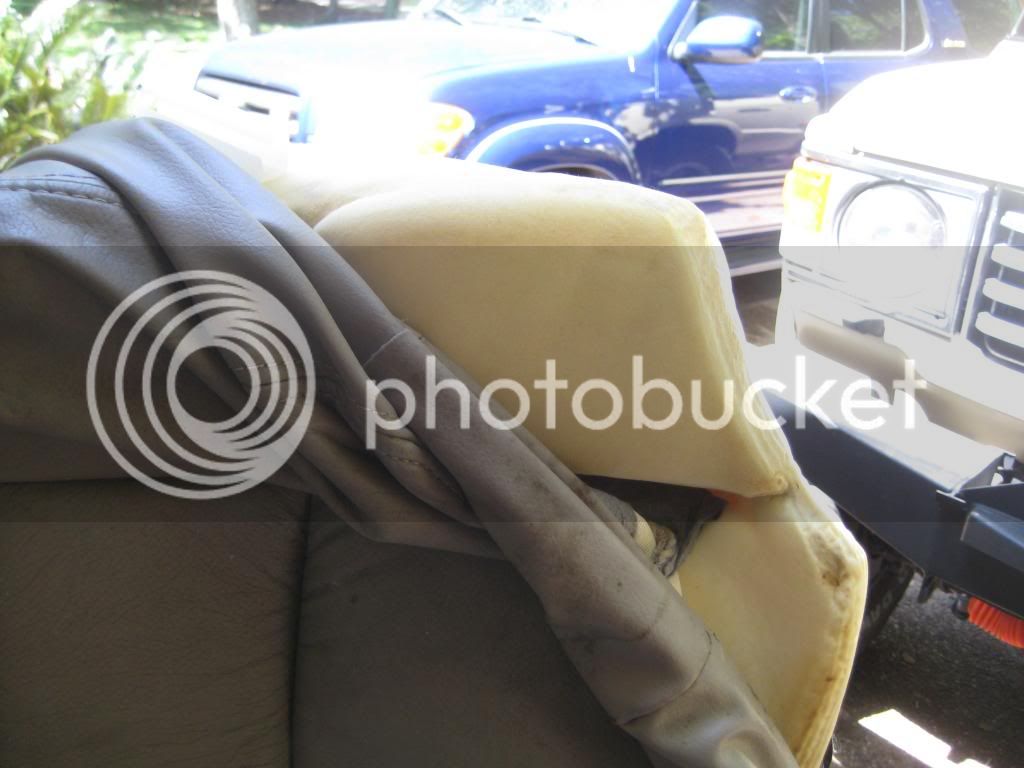

Notice the edge of the seat where it butts up to the fender liner. I am not 100% happy with this. Once I get the other seat in the truck I will look into cutting and sewing the upholstery tight right here.
I have been thinking about the door panels and have a pretty good idea how to make them match the seats for cheap. I will keep you all posted.
Speaking of cheap I have roughly $140 in the entire interior upgrade at this point. The seats were $100.00, the rug was $21.00, I spent $13.00 on weldable steel at Lowes, $6.00 on two trailer connectors and I bought roughly $3.00 worth of bolts / washers / etc...
So far the rears have been pretty easy to install. I had to make three small brackets in addition to the rods that hold the rear seat backs. So far everything has bolted into the stock Cruiser attachment points so I can go back to stock easily.
The seat bottom in the back has been the most labor intensive part of the install to this point. I had to trim a small portion of foam from the edge to get the contour to fit the cruiser wheel well. I also had to cut out a small piece of plastic from the bottom. It is coming along nicely and I hope to have it finished soon.
Notice the edge of the seat where it butts up to the fender liner. I am not 100% happy with this. Once I get the other seat in the truck I will look into cutting and sewing the upholstery tight right here.
I have been thinking about the door panels and have a pretty good idea how to make them match the seats for cheap. I will keep you all posted.
Speaking of cheap I have roughly $140 in the entire interior upgrade at this point. The seats were $100.00, the rug was $21.00, I spent $13.00 on weldable steel at Lowes, $6.00 on two trailer connectors and I bought roughly $3.00 worth of bolts / washers / etc...
Last edited:
Looks awesome! Did the seat portion of the rear bench use the stock flip down hinge? Have you tried to see if it will lay flat? It looks like they're bolted in.....I love the idea of a spilt bench....
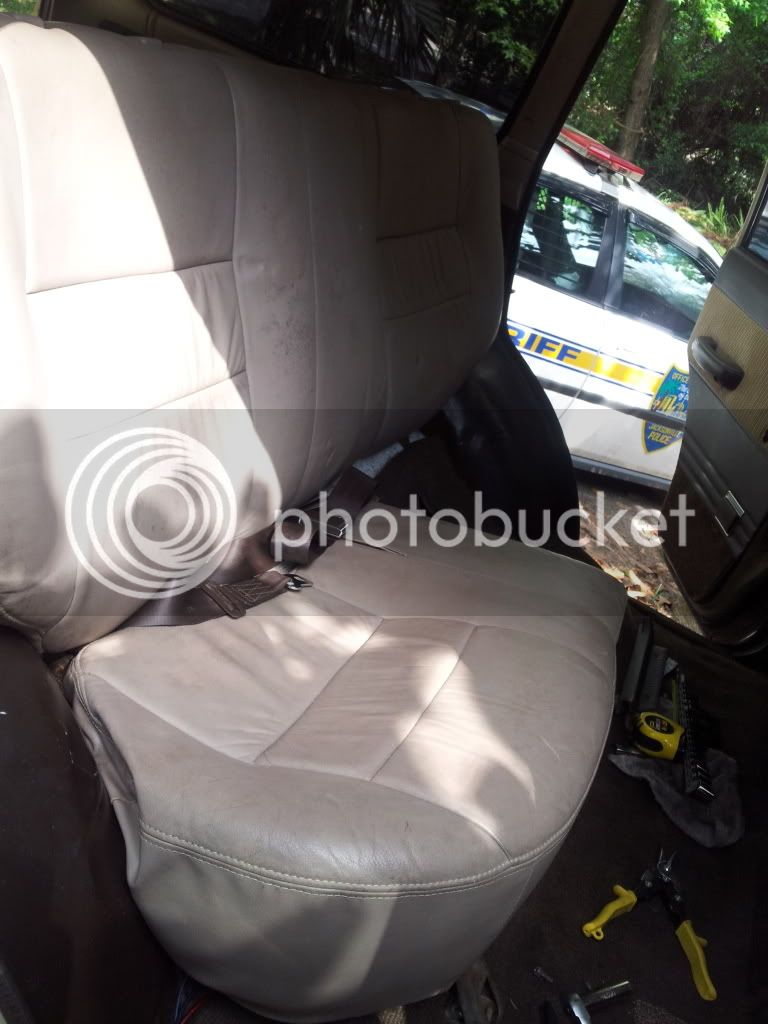
I see the "sherriff" has arrived to question you about your "shady dealings" and to look at your glock! When you tell him the seats were only $100 he's gonna know you're lying- and probably guilty of "other" crimes!! 
You've done a great job there.
You've done a great job there.
- Thread starter
- #32
I see the "sherriff" has arrived to question you about your "shady dealings" and to look at your glock! When you tell him the seats were only $100 he's gonna know you're lying- and probably guilty of "other" crimes!!
I hope not...
Thats actually my daily driver

Its a great perk having a take home car, with free gas. (so what if I have to help an ocassional motorist off duty)...
- Thread starter
- #33
Looks awesome! Did the seat portion of the rear bench use the stock flip down hinge? Have you tried to see if it will lay flat? It looks like they're bolted in.....I love the idea of a spilt bench....
I initially planed to use the stock hinge, however I didn't want to damage any of the stock cruiser parts in case I decided to go back to stock. The hinge in the picture is the stock Rodeo piece. It does allow the seat to flip forward but it has a little tab that limits its movement. The tab has a date with my grinder in the near future so I will have to wait and see if flipping forward option will work 100%. Wose case the bottom can be easily removed with a 13mm socket.
Updates on back seat?
Wondering if you've had any time to finish that, and if the seats when folded flat are able to clear the front seats, etc.
Been loving this, and been looking for a Rodeo/Passport that has a tan leather interior at the yards.
Glenn in Tucson
Wondering if you've had any time to finish that, and if the seats when folded flat are able to clear the front seats, etc.
Been loving this, and been looking for a Rodeo/Passport that has a tan leather interior at the yards.
Glenn in Tucson
2001 Rodeo works as well - install report
Got the front pair installed. I would recommend that whatever donor vehicle you pull it out of, get the connector for the power seat if it has one. I thought they were both manual, much to my surprise when I got them home. I fabbed up a temp power cable froma 12v connector to the cig lighter and a couple of spade ends. I don't want or need to adjust it all that often, but I can plug it in if I so desire.
Using a step-bit, I wallowed out the tabs - I had to bend the front set down a little to match the LC mounting, but that was the extent of mods. Used the original 14mm bolts front and rear - you will need a box end wrench for the rear two - I didn't have enough room to ge a socket. Plenty of clearance for the rear heater and tool kit, btw.
Note when wallowing out the holes - put some sort of shield (cardboard worked) or you will have hot little bits of metal attempting to melt into your seat. The set I got are fabric, so after the first one, I learned to put something in the way. No terrible damage, and its underneath, so who cares....but only on the one side underneath.")
It does change the entry angle to the LC a bit (5'10 and I still walloped my skull on the door frame first time) but the headroom is fine once you're in. It does sit a bit higher, probably even more than you would think due to saggy 30 year old seats. Wife like the passenger seat. I'll have to fab up brackets for the rear set split bench, but thats probably next weekend.
Had to move my ammo can console over a lit to allow for the seat belt on the passenger side, but not so much as to interfere with the brake handle. All in all, a pretty easy mod.
Search for Rodeo/Amigo/Passport in the salvage yards as they appear to all be the same setup. YMMV.
Glenn in Tucson
Got the front pair installed. I would recommend that whatever donor vehicle you pull it out of, get the connector for the power seat if it has one. I thought they were both manual, much to my surprise when I got them home. I fabbed up a temp power cable froma 12v connector to the cig lighter and a couple of spade ends. I don't want or need to adjust it all that often, but I can plug it in if I so desire.
Using a step-bit, I wallowed out the tabs - I had to bend the front set down a little to match the LC mounting, but that was the extent of mods. Used the original 14mm bolts front and rear - you will need a box end wrench for the rear two - I didn't have enough room to ge a socket. Plenty of clearance for the rear heater and tool kit, btw.
Note when wallowing out the holes - put some sort of shield (cardboard worked) or you will have hot little bits of metal attempting to melt into your seat. The set I got are fabric, so after the first one, I learned to put something in the way. No terrible damage, and its underneath, so who cares....but only on the one side underneath.
It does change the entry angle to the LC a bit (5'10 and I still walloped my skull on the door frame first time) but the headroom is fine once you're in. It does sit a bit higher, probably even more than you would think due to saggy 30 year old seats. Wife like the passenger seat. I'll have to fab up brackets for the rear set split bench, but thats probably next weekend.
Had to move my ammo can console over a lit to allow for the seat belt on the passenger side, but not so much as to interfere with the brake handle. All in all, a pretty easy mod.
Search for Rodeo/Amigo/Passport in the salvage yards as they appear to all be the same setup. YMMV.
Glenn in Tucson
Brackets,pls?
Wondering if we could get some pics of the bracket adapters for the bottom? I saw the picture of the brackets you fabbed up for the seat top, as well as the rail, but nothing on how you attached the seat bottoms to the original mount spot.
If you could be so kind, that would be great.
Glenn in Tucson (1/2 done with this conversion)
Off Duty
SILVER Star
I hope not...
Thats actually my daily driver
Its a great perk having a take home car, with free gas. (so what if I have to help an ocassional motorist off duty)...
Yes, it most certainly is.
Gave mine up several years ago, thus the "off duty"
Now I just let the gubment buy my fuel at the end of the year

Dang nice job you did there. Thanks for the write up.
Stay safe.
LandBruiser69
It feels good to be lost in the right direction.
AWESOME!!! I LOVE SEAT EXCHANGES!!! Good work man!!
Similar threads
Users who are viewing this thread
Total: 1 (members: 0, guests: 1)