Beginning the rear bumper build; may need some help... (1 Viewer)

This site may earn a commission from merchant affiliate
links, including eBay, Amazon, Skimlinks, and others.

Bumper installed! Got some new toys from fourrunner as well! Time to weld the swingouts
IMG_2948.jpg
IMG_2947.jpg
IMG_2950.jpg
 
Fourrunner has good stuff, his rear bumper kit went together on my 62 easy as pie and the metal is excellent to weld on with all of the laser cuts.
 
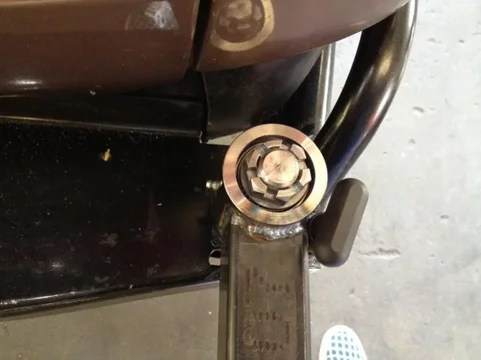
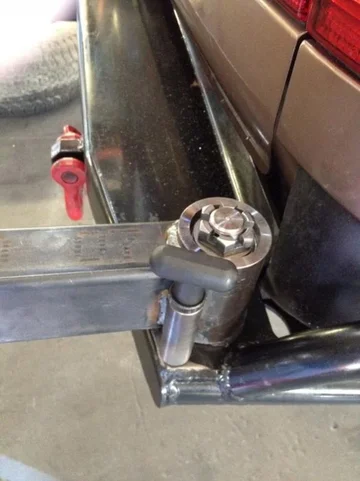
Did you install the spindle below the roll pin level?
I have this same spindle and am about to install it.
I had to cut an angle in the sleeve, and I have to cut a little angle at the bottom of the spindle because my bumper is tapered in, did you have to do that?
Any pics if the spindle from the inside of the bumper?
Pics of how you latch the carrier closed?
Thanks,
J
 
My first welding project completed. Also added an oem license plate holder, camping light and 7 pin rv plug. How do my welds look? Also added locking pins to keep the swingouts opened and closed. Going to add a high lift mount and a shovel mount to the spare tire side. So far spent about $350 on parts to build the two sides. Worth the learning experience.

image-3680641889.jpg


image-3259318452.jpg


image-1124976937.jpg


image-2356598074.jpg


image-1250979046.jpg


image-115900634.jpg


image-1554414138.jpg


image-3893151627.jpg
image-3680641889.jpg
image-3259318452.jpg
image-1124976937.jpg
image-2356598074.jpg
image-1250979046.jpg
image-115900634.jpg
image-3893151627.jpg
image-1554414138.jpg
 
Last edited:
Great work

Great project. Next time clean your surface area when welding gmaw. So you have less porosity that brown stuff, and splotchy beads. Make sure your regulator is running 15-30cfh depending on position.
Great work!
 
Pics of the other mount please. Also, what did you use as a rattle bumper for each side, cutting board material?
 

Users who are viewing this thread

Back
Top Bottom