
-
North American Clubhouses - East RegionCA.ON- SOTEC CA.ON- Upper Canada Land Cruisers CA.QC- Club TORQ CA.QC- Quebec Cruisers AL- DixieLand Cruisers AL- Hot South Cruisers FL- Florida Land Cruiser Association FL- Northwest Florida Toyota 4WD FL- Tampa Bay Land Cruiser Association GA- Pavement Pounders GA- Georgia Cruisers GA/FL/AL- Red Hills Land Cruiser Club GA- YOTA IL- Windy City Land Cruisers IN- Hoosier Cruisers IN- Indiana Land Cruisers KY- Kentucky Landcruiser MA/NH- Yankee Toys MI- Lake Michigan Land Cruisers MS- CottonLand Cruisers NC- Olde North State Cruisers NJ- Garden State Land Cruisers NY/CT/MA- FJNortheasters NY- Gotham City Land Cruisers OH- The Buckeye Birfield Syndicate PA- Keystone Cruisers PA- Steel City Land Cruiser Club SC: Land Cruisers: Charleston SC- Palmetto State Land Cruiser Association SC- Upstate Cruisers SC- Swamp Fox Land Cruisers SC- Low Country Land Cruisers TN- Appalachia Cruisers TN- Bluff City Cruisers TN- STLCA VA- Bay to Blue Ridge Cruisers VA- COVA CRUISERS VA/DC/MD- Capital Land Cruiser Club VA/NC- Mid-Atlantic TLCA VA- Star City Land Cruisers VT/NH/MA/ME Acadian Overlanders WI- Land Cruiser Legends WV- Mountaineer Cruisers
-
North American Clubhouses - Central RegionCA.AB- Oil Country Cruisers CA.AB- Rocky Mountain Land Cruiser Association CA.AB- Toyota Ghost Wheelers AR- Razorback Land Cruisers AR/MO- Ozark Mountain Cruisers CO- BookCliff Cruisers CO- Colorado Land Cruisers CO- Derailed Cruisers CO- Rising Sun 4WD Club CO/WY- Horsetooth 4 Wheelers Cruiser Club IA- Tall Corn Cruisers KS/MO- Tornado Alley Cruisers LA- Bayou State Land Cruisers LA- Louisiana Land Krewesers MO- Gateway Cruisers MT- 406 Cruisers MT- Big Sky Cruisers NE- Flat Land Cruisers NM- High Desert Cruisers OK- Green Country Cruisers SD- Dakota Territory Cruisers TX- Alamo City Land Cruisers TX- Bayou City Land Cruisers TX- Lone Star Land Cruisers TX- Lone Star Land Cruisers - Austin Chapter TX- The White Trash of the Elwood Chapter TX- Toyota Trail Riders
-
North American Clubhouses - West RegionCA.BC- Coastal Cruisers CA.BC- Okanagan-Similkameen Land Cruisers CA.BC- Peace Canyon Toyota Swamp Donkeys CA.BC- Calgary Chapter: Swamp Donkeys
CA.BC- Vancouver Island Cruisers AZ- Copper State Cruisers CA- Beach-n-Toys CA- Central Coast Land Cruisers CA- Central Valley Crawlers CA- Gold Country Cruisers CA- Inland Empire Cruisers CA- L.A. County Trailcrew CA- Mountain Transit Authority CA- Pacific Mountain Cruisers CA- San Diego Cruisers CA - Santa Cruz Land Cruisers CA- SoCal 80's CA- Southern California Land Cruisers CA- Toyotally Awesome Cruisers HI- Hawaiian Island Land Cruisers ID- Treasure Valley Land Cruisers NV- Battle Born Cruisers of Northern Nevada NV- Southern Nevada Land Cruisers OR/CA- Jefferson State Cruisers OR- Cascade Cruisers OR- Central Oregon Cruisers OR- Portland Metro Cruisers UT- Red Rock Cruiser Club UT- Wasatch Cruisers WA- Central Washington Cruisers WA- North Sound Cruisers WA- South Sound Cruisers WA- Spokane Land Cruisers
Navigation
Install the app
How to install the app on iOS
Follow along with the video below to see how to install our site as a web app on your home screen.
Note: This feature may not be available in some browsers.
More options
Style variation
You are using an out of date browser. It may not display this or other websites correctly.
You should upgrade or use an alternative browser.
You should upgrade or use an alternative browser.
Against my better judgment.... A bj70 project
- Thread starter Gsb15
- Start date
This site may earn a commission from merchant affiliate
links, including eBay, Amazon, Skimlinks, and others.
- Thread starter
- #42
hell, I've gotten a few months out of a beer can and a couple hose clamps.
Step it up to a soup can if you want it to last longer.
Haha. Exactly
- Thread starter
- #43
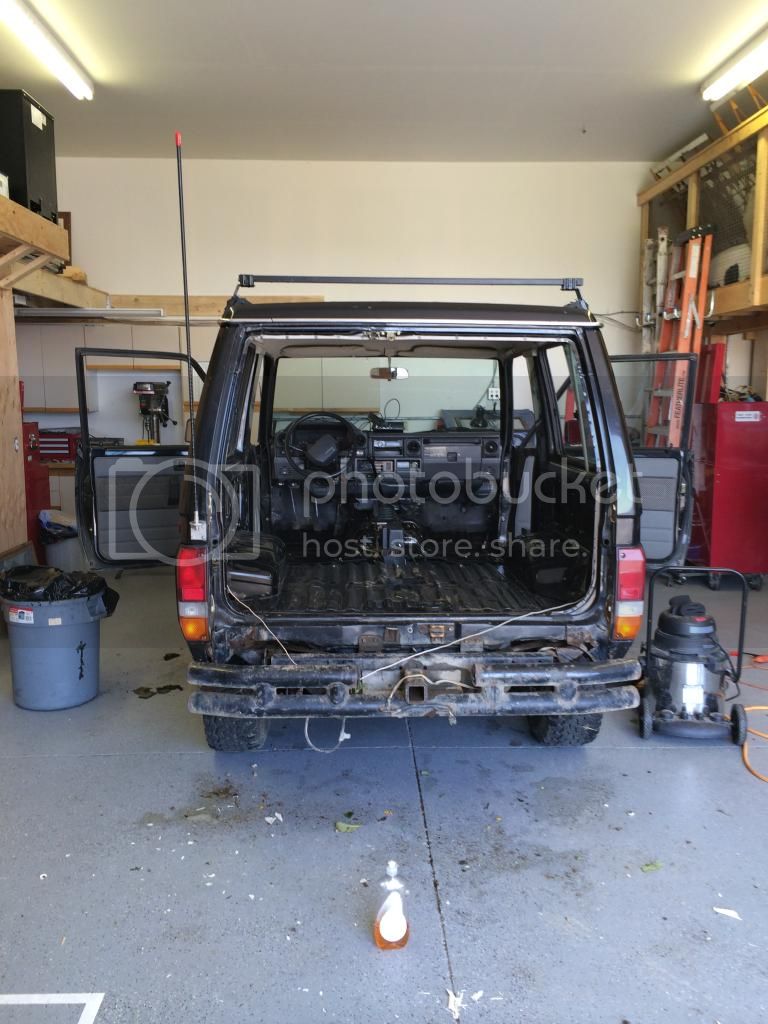
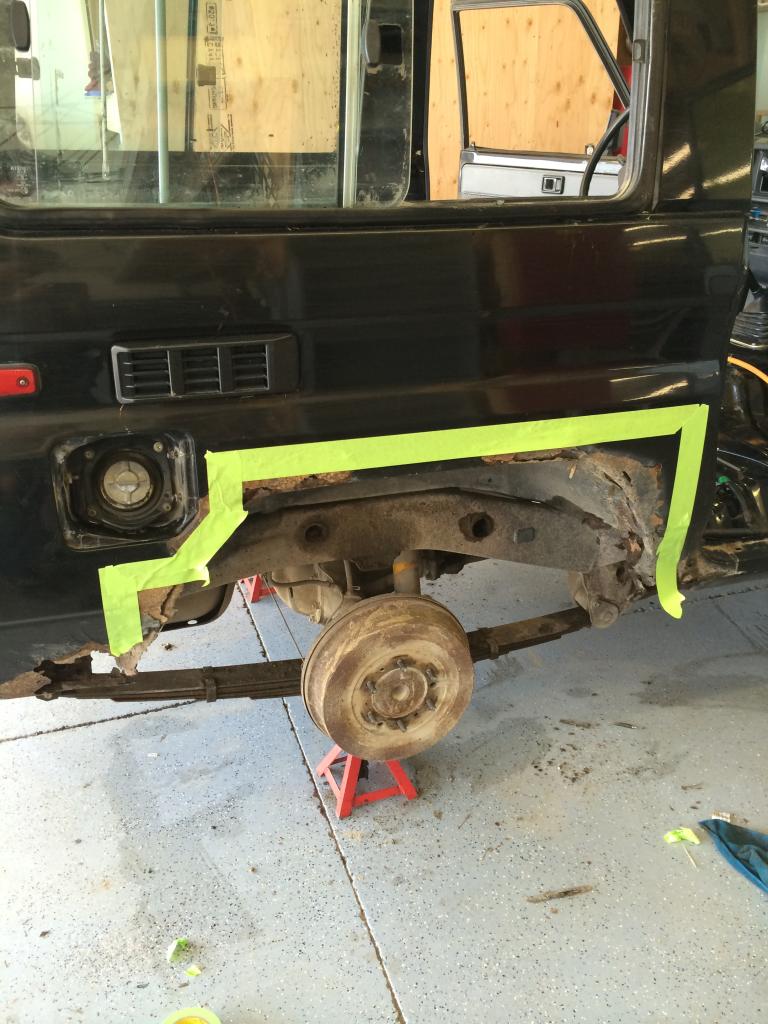
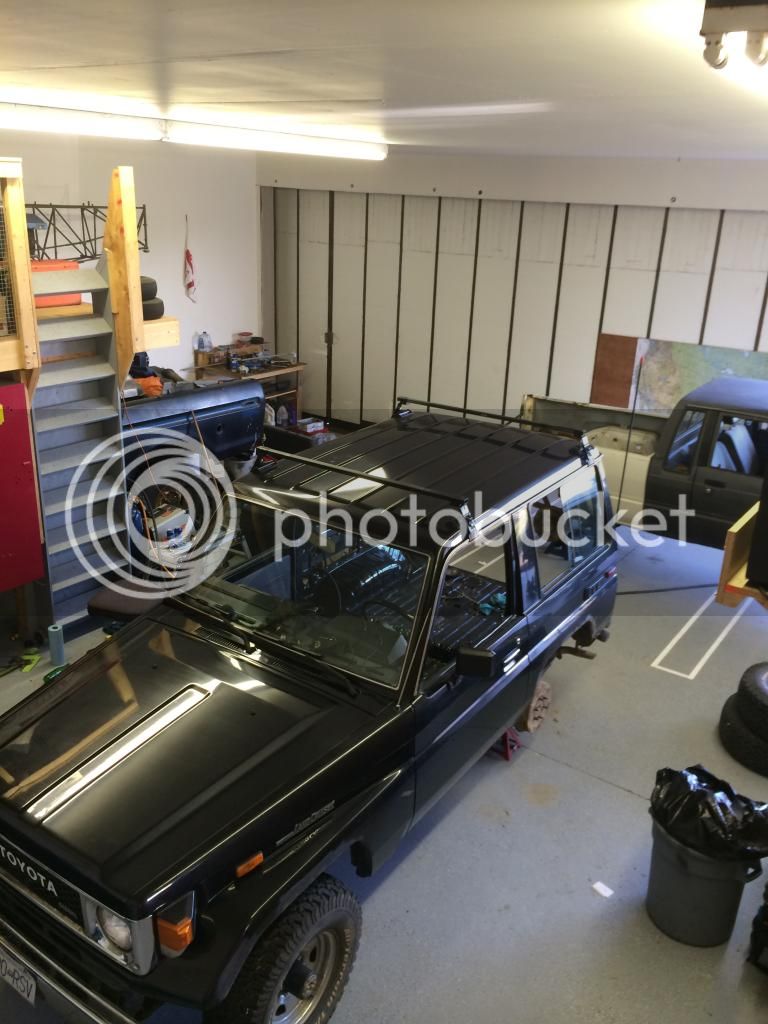
So it begins... This morning I put the truck in the shop to start the rust work. I stripped out all the interior, seats carpet, seat belts etc. then removed the rear doors to get them out of the way.
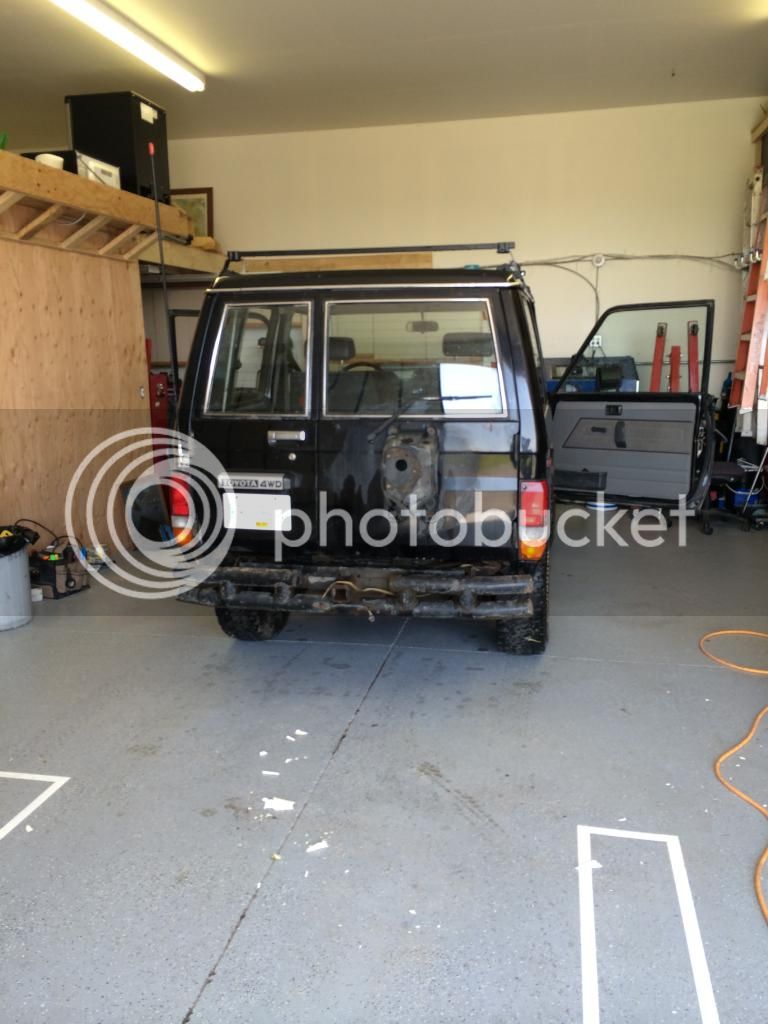
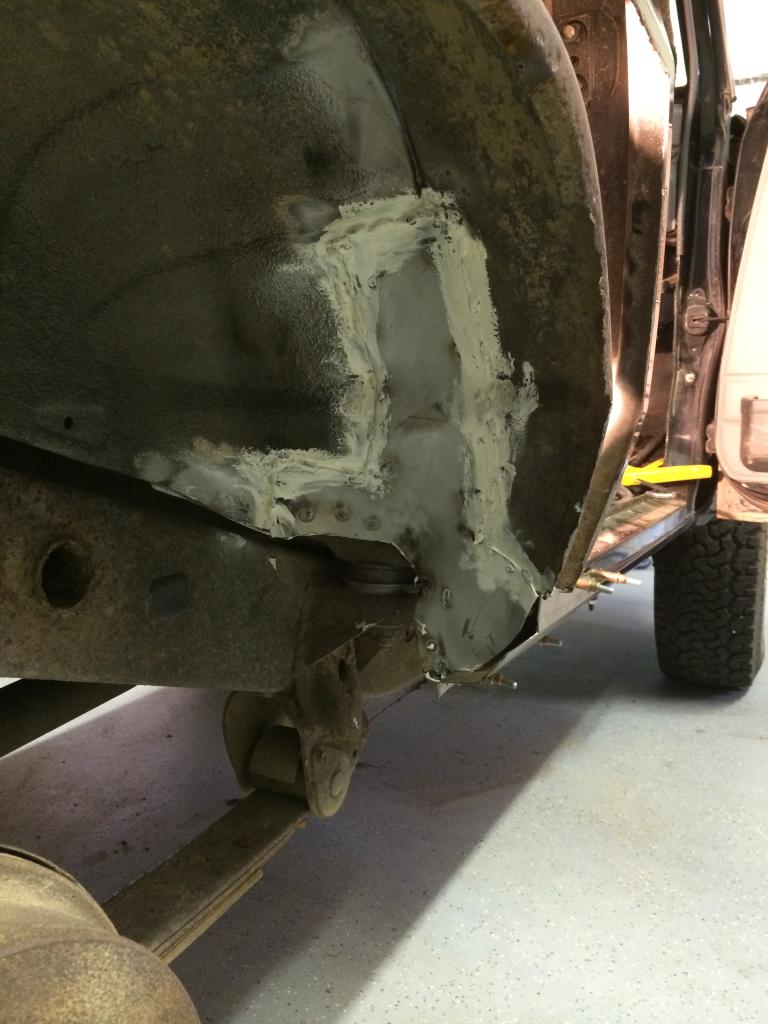
Then gave it a good cleaning of the floors, scrapped off all the old skunky insulation, and assessed the rust.
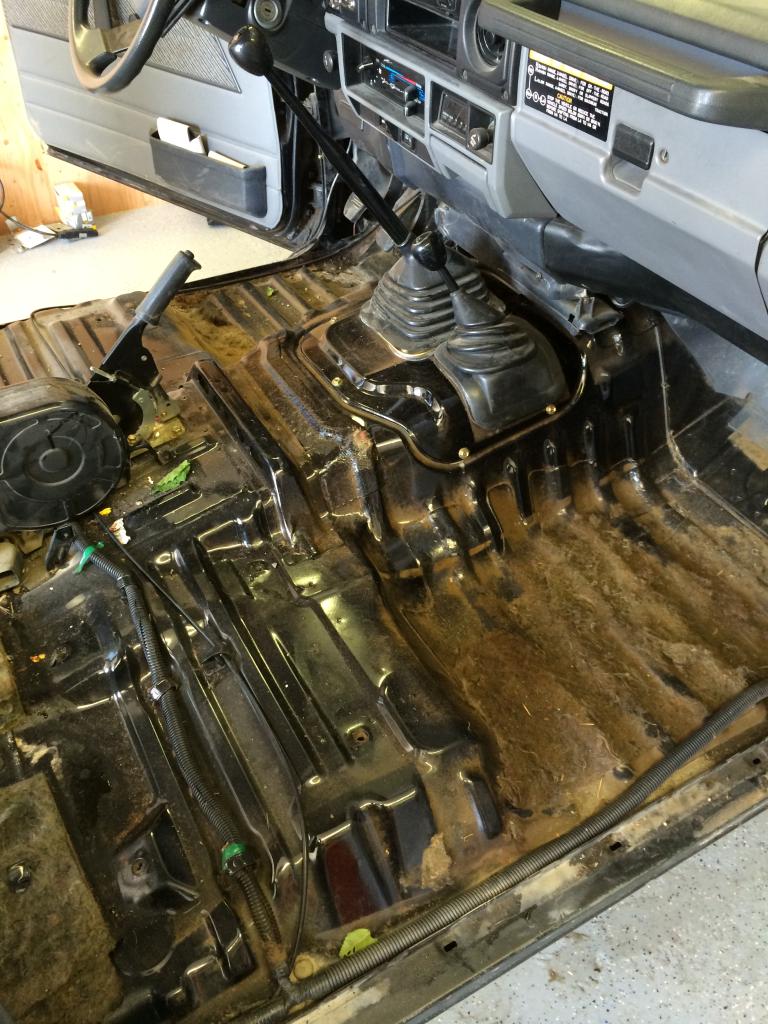

The floor isn't too bad, there's a couple holes right in some of the corners, and one bigger one on the drivers side behind the front seat.
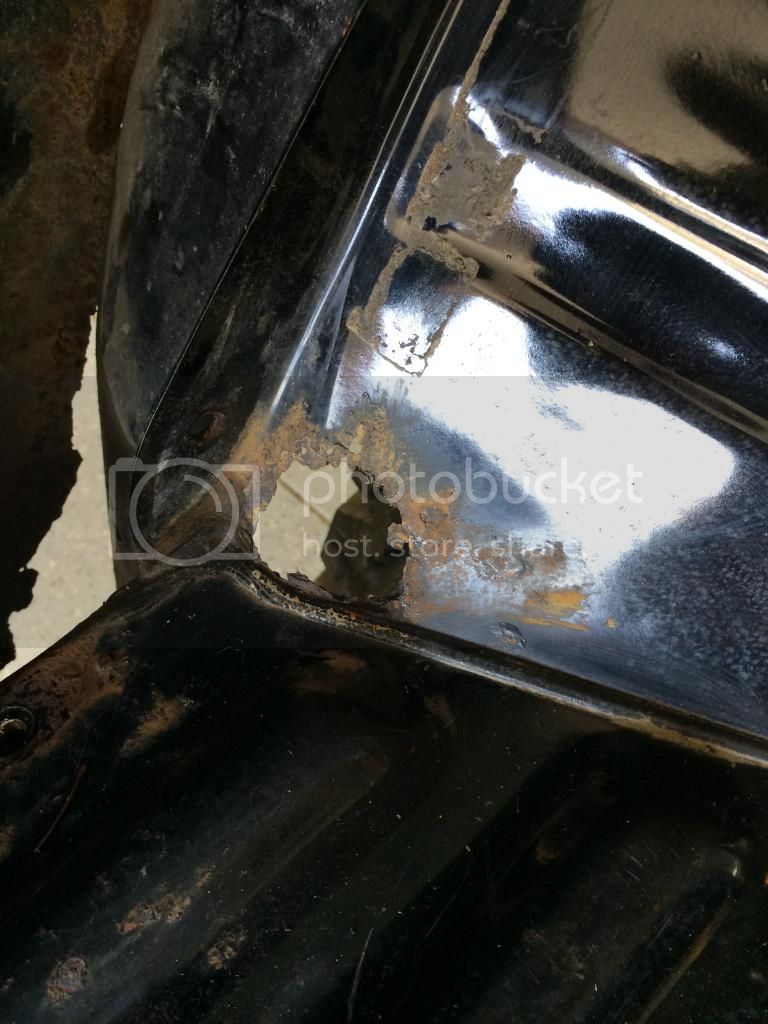
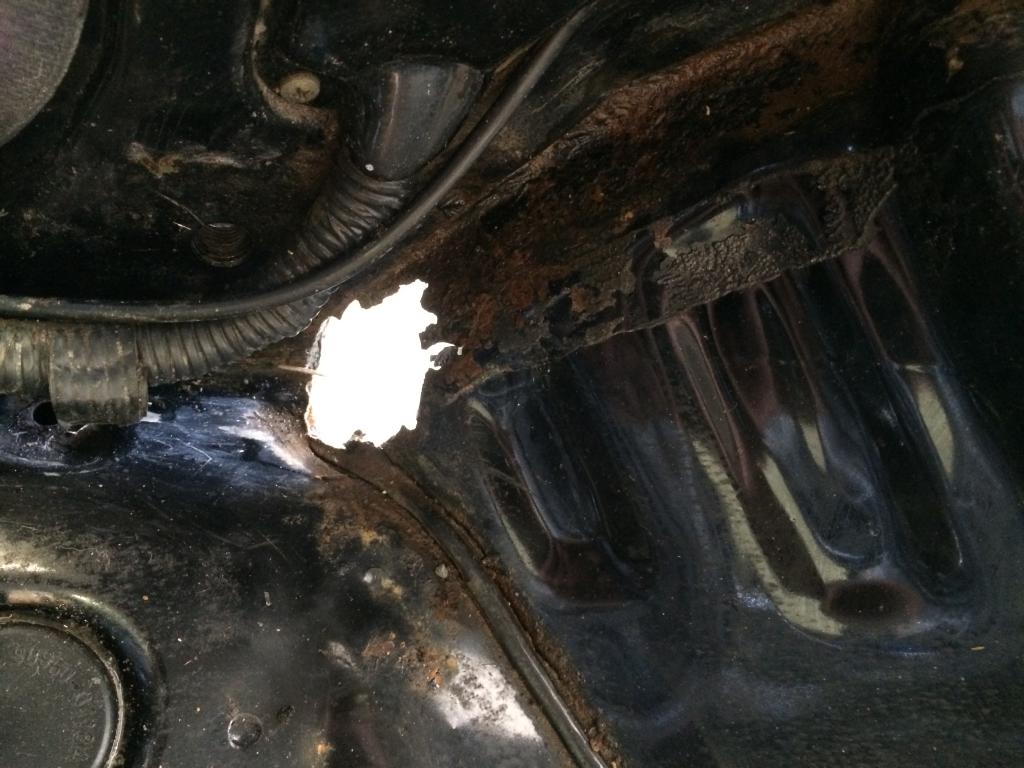
I figured I'd start with the side that was worse first, made the cuts for the outer skin, and then just wire wheeled the rust on the inside and stared at it for a while trying to refine my plan. I'll have something to think about while I'm working tomorrow anyway.


Atta boy!
Remember to use weld through primer and seam sealer. I see all these rust repair threads and far too often people don't prime inners and seams properly.
So how's the Ford (Cummins) doing these days? Looks like its not in the hanger anymore.
Remember to use weld through primer and seam sealer. I see all these rust repair threads and far too often people don't prime inners and seams properly.
So how's the Ford (Cummins) doing these days? Looks like its not in the hanger anymore.
- Thread starter
- #46
Atta boy!
Remember to use weld through primer and seam sealer. I see all these rust repair threads and far too often people don't prime inners and seams properly.
So how's the Ford (Cummins) doing these days? Looks like its not in the hanger anymore.
I'm defiantly gonna go all out on the rust paint and seam sealer, I'm gonna try and snag some of the stuff we use at work.
The ford is good actually, I ran it for the first time yesterday, still a lot of loose ends bit I just wanted it to make a bit of noise. It's still in the hanger in the same spot, the cruiser is taking up the cessna's spot while it's gone for a month

looking good. you can get a little tiny spot sandblaster at princess auto for 20 bucks that is handy for the hard to reach places that you can't get a wire wheel into.
X2 on the weld through primer.
In the words of my bodywork teacher "cut an extra inch or two off when dealing with rust" ... he also swore by overlaying the metal instead of buttwelding but I guess its up to you! Get ready for a million little tack welds and remember to go slow so you don't end up with a lot of warping.
Using the brake at work or did you buy one?
Nice work man. I'll be following this. I have to say this sort of work on BJ70 is not a bad investment of time. These things are getting rare and desirable. And yours is certainly one of the more recoverable ones.
- Thread starter
- #50
Nice work man. I'll be following this. I have to say this sort of work on BJ70 is not a bad investment of time. These things are getting rare and desirable. And yours is certainly one of the more recoverable ones.
Thanks, that's pretty much what I figured before I bought it. As painful as this kinda work is
- Thread starter
- #51
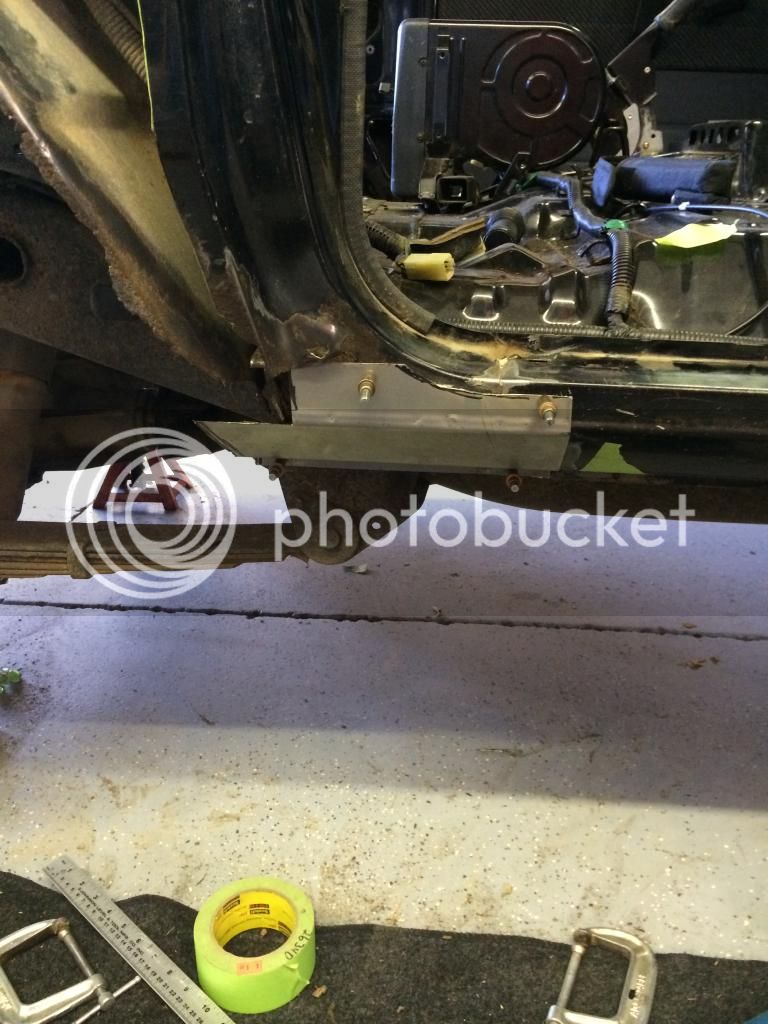
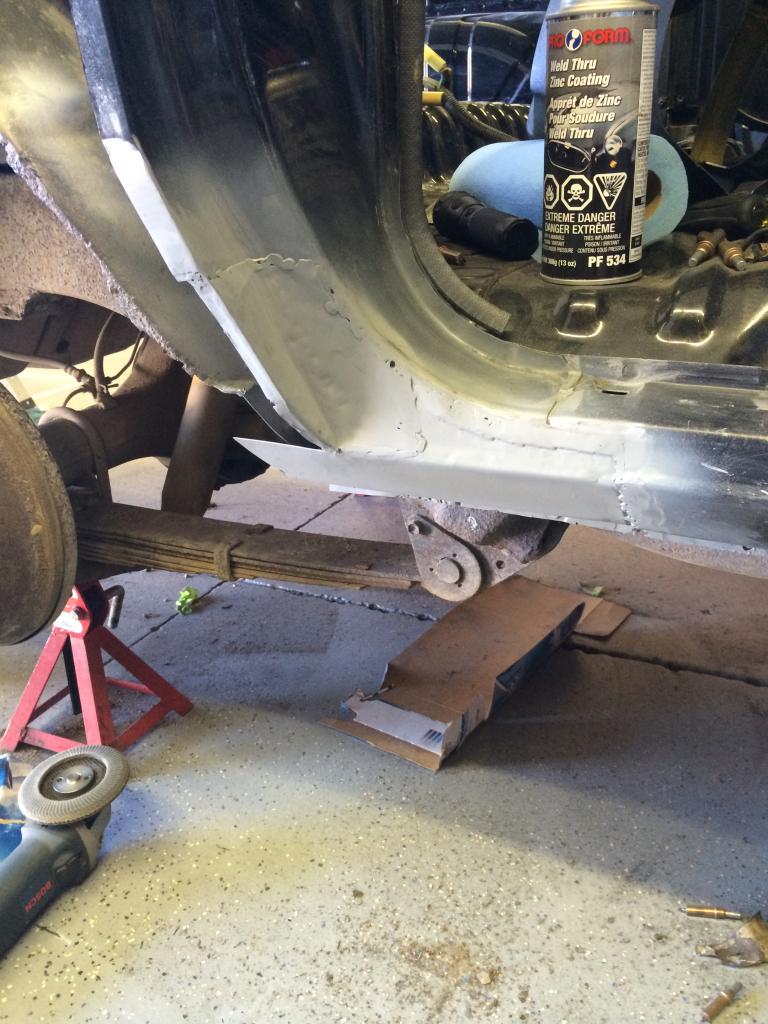
Didn't get a whole lot done today after work, but I did start making the r/h rocker panel. Pretty pleased with how it turned out so far.
The hardest part is trying to decide how far I want to cut out of the sub structure, everything looks a little rusty, but I can't exactly cut the whole truck out, so at some point I gotta transition to old metal.
As the project goes on I feel I'm gonna get a little less picky.
The hardest part is trying to decide how far I want to cut out of the sub structure, everything looks a little rusty, but I can't exactly cut the whole truck out, so at some point I gotta transition to old metal.
As the project goes on I feel I'm gonna get a little less picky.


I use to be hard core on the edge fitment of panels....Overlay is good you just have to create a lower lip area to attach...
Watching the guys on some show and they glued a small strip of sheet metal behing, If I had really well built panels that is the way I would go, less head and warping..
Like Cam said, primer and seam sealer are your friends.. Saw a nice HJ60 the other day and talked to the guy, turns out it was one of the first 60 full restortion frame on I did over ten years ago... the rear dog leg and quarters looked as good as new, all the sheet metal I did held up, due mostly to seam sealer..
- Thread starter
- #53
I bought a flanging tool from princess auto, should do the job at least. The last few times I've done body work I did all butt welds, defiantly don't want to do it that way again.I use to be hard core on the edge fitment of panels....Overlay is good you just have to create a lower lip area to attach...
When I did the body on my 40 I punched the flange joints for spot welds. I used coated metal, and weld through primer. I sure hope
it lasts. You've got a job ahead of you. Good looking so far.
it lasts. You've got a job ahead of you. Good looking so far.
- Thread starter
- #55
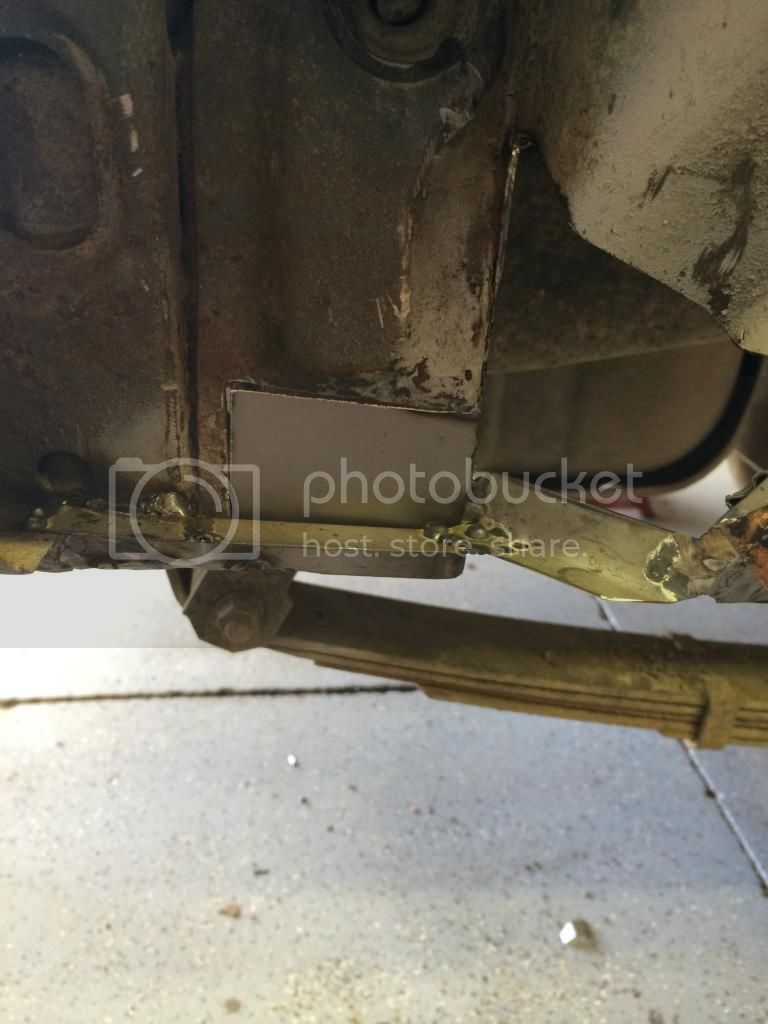
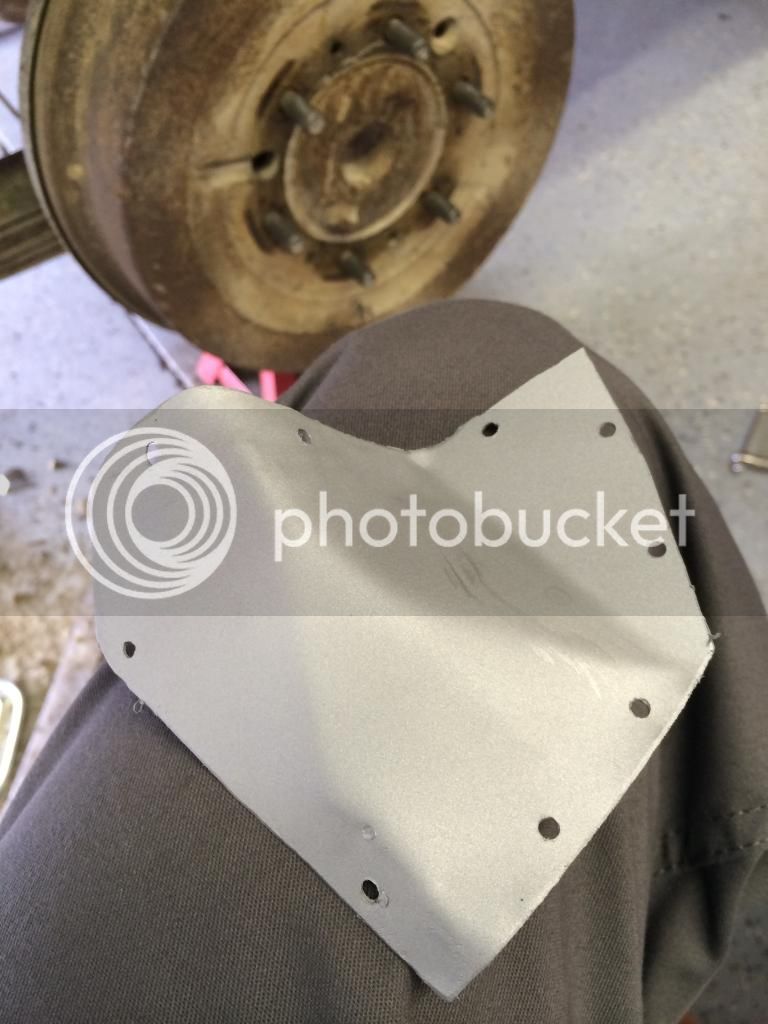
Made a little more progress, made up the big ugly patch I was dreading on the inside of the wheel well, although I bought the wrong seam sealer for that part, so I will have to re do it. The stuff I got doesn't really harden apparently.
Then i welded in the rocker panel patch, and made up a small patch to join that to the door frame. It's slow going so far but this was also the worst part of the job.
It all turned out alright in my opinion, the sealing was pretty ugly but it'll all get painted over
I'm hoping stuff will get a little straighter and my welds a bit better as I get back into the body work groove.

Then i welded in the rocker panel patch, and made up a small patch to join that to the door frame. It's slow going so far but this was also the worst part of the job.

It all turned out alright in my opinion, the sealing was pretty ugly but it'll all get painted over
I'm hoping stuff will get a little straighter and my welds a bit better as I get back into the body work groove.
ya.. you need to hit it with a sander a little bit more... to level out the welds. Door jams are no place for bondo...
Looks good to me. I'll have to come check it out some day.
- Thread starter
- #58
There's a couple spots I could probably hit more, but for the most part I overlapped it and have already ground it down to the level of the higher sheet, and I don't want to grind through the new metal. A Little filler should be alright, Nothing contacts there. Plus it's the door jam and I don't really care how it looksya.. you need to hit it with a sander a little bit more... to level out the welds. Door jams are no place for bondo...
 I'll probably try a little harder where it's visible.
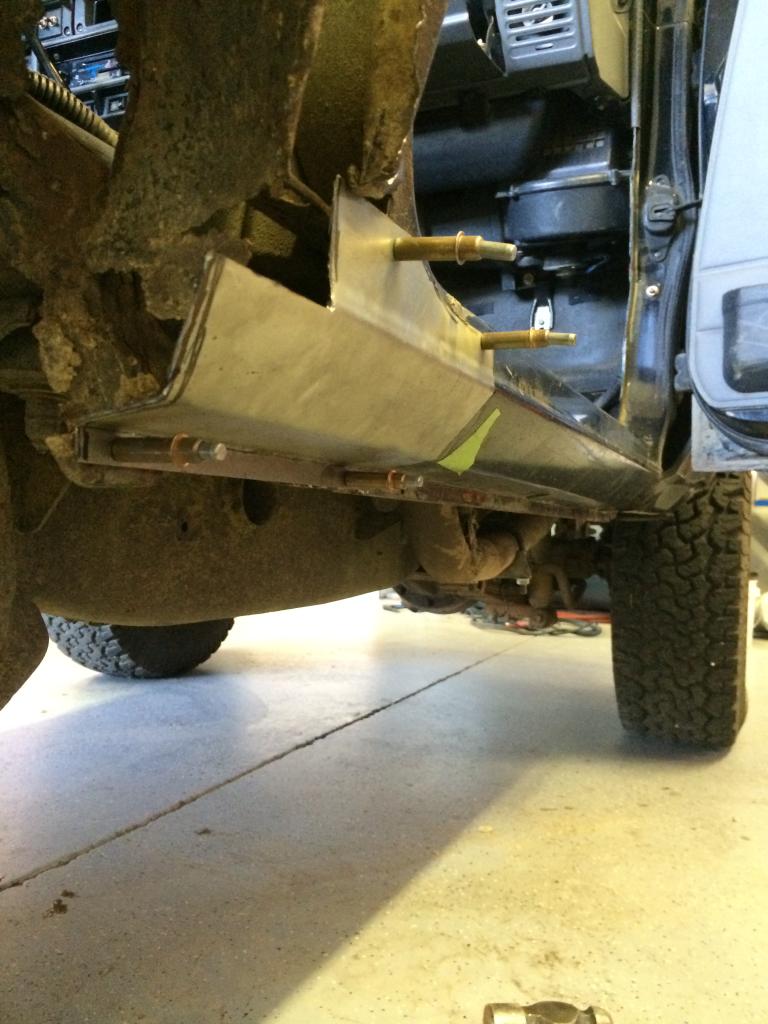
I got a bit more done the other day. Started on the fender lip repairs. I was gonna buy a shrinker stretcher, but kms didn't have the cheap one in stock, and I didn't want to spend $350 on the nice one. So I had to just make small cuts to bend then angle instead.


Right on. I had to rebuild that lip on my 60as well. Nice thing is once its all together you can access it from the inside (at least on a 60) and lather it up with that waxy rust preventer goop.
- Thread starter
- #60
Made some good progress today, I got to the shop at about 8 and left around 7.
I had to finish up the backside of the rear quarter before I could move on to the outside. which involved making 5 differnt small parts.
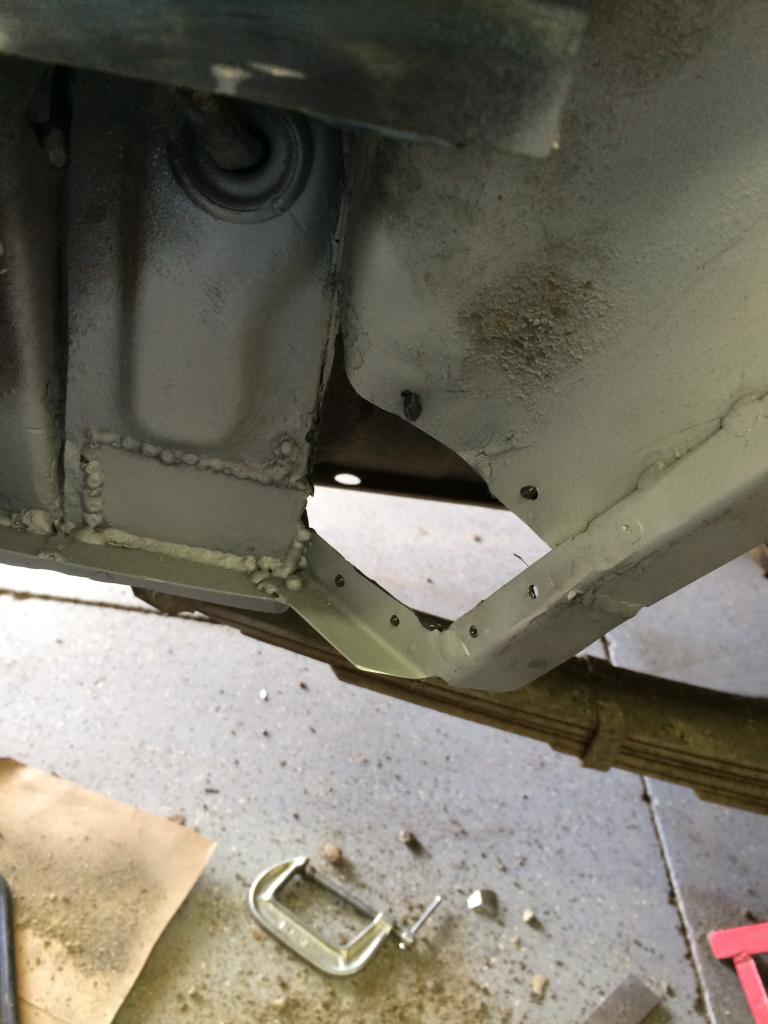
Apparently I didn't take a picture of it all finished up and sealed but you get the idea
I had to finish up the backside of the rear quarter before I could move on to the outside. which involved making 5 differnt small parts.


Apparently I didn't take a picture of it all finished up and sealed but you get the idea