A South African BJ40 rebuild into a FJ40 (2 Viewers)

This site may earn a commission from merchant affiliate
links, including eBay, Amazon, Skimlinks, and others.

if you need a 2F alternator I have a couple stock Toyota units out in the garage - would be happy to send you one.

Thanks for the offer Alan - I'll be sure to let you know if I don'tcome right here.
 
I will be in Jhb in 3 weeks, and might be able to bring stuff. However, with the new SAA weight limits and the stuff I am already bringing is in excess, an alternator will definitely put me over.

Thanks as well - but I'm sure I'll come right eventually, also it'd be a schlepp lugging an alternator around as luggage :eek:
 
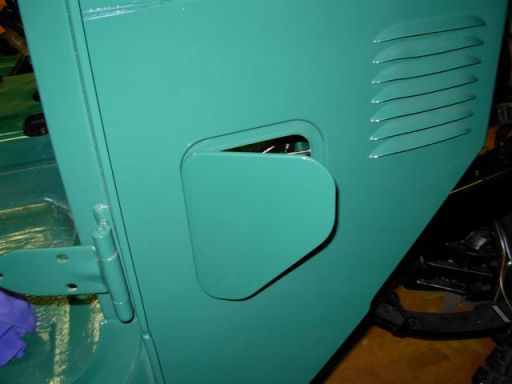
Great work - it looks super!!! Would love to hear the story on the rear wheel wells (the before pics were interesting in an unflattering way). Like your remedy though.
:beer:.

The original wheel wells were cut by PO in Brisbane to suit a set of fibreglass wheelarch extensions that were for some perculiar reason were curved. I took of the fibreglass extensions as I have a set of flexiflares that I plan to fit and the curves just looked "yech" so I had my mate at the body shop return them as close as possible to original, and once the flexiflares are fitted the corners of the wheel well won't look as sharp.
 
Update;-

Minor hiccup - Ive had a problem locating a suitable alternator. The search continues.

Keith,

I have a spare alternator. Don't know how much of a flap it will be to airfreight from LLW, but we can work that out. Let me know if interested.

I think you are way ahead of me now. Should be seeing some blue paint at the panel beater's this week, but I'm too busy to go look. I hate it when work gets in the way of my hobbies :D

Dan
 
Update

I managed to get one good alternator rebuilt from the parts of 4 Alternators.
Located and installed a two belt crank pulley for the 60 series PS

60 series PS mounted
dscn0483_s.jpg


The reinforcing (anti crush) bracket for PS rack
dscn0492_s.jpg


Alternator and two belt crank pulley
dscn0485_s.jpg


New master cylinder and vacuum booster installed
dscn0490_s.jpg


It broke my heart to cut a huge hole in the freshly painted rear panel for the long range tank filler
dscn0493_s.jpg
dscn0494_s.jpg


Due to the unavailability of most replacement weatherstrip and rubber seals it was necessary for me to cut my own from 3mm rubber sheet.
dscn0498_s.jpg
dscn0504_s.jpg


Mounted the overhauled Aisin carb
dscn0501_s.jpg


Fitment of the kick vents (Zimbabwe Air Conditioning) after installing the self cut rubber weather strip
dscn0505_s.jpg
dscn0507_s.jpg


Main tank filler
dscn0503_s.jpg


More updates to follow as work progresses.
 
Nice work :clap::clap:
 
BTW my other truck is a FZJ105 (rigid front axle) 4500 EFI

Fitted with:-
Alloy Roof rack
Roof top tent
4" lifted suspension
45mm bore Tough dog adjustable shocks
80W solar panel
1 x 90AH Cranking Battery
2 x 10⁵AH Aux Batteries
40ltr freezer on roller slide
39ltr fridge fixed mount
roller drawer packing system
Factory lockers fr and rr
VHF radio
Garmi 276C GPS
2 x chassis mount 35ltr water tanks
1 x 100ltr Main fuel tank
1 x 180ltr Aux fuel tank
On board Aircon pump air compressor
rear air springs
dual rear wheel and hilift jack carrier
TJM Alloy front bar with 2 x Lightforce spots
roof rack mount side awning
T-Max 12500lb winch
It's official IH8you. :flipoff2:
The 105 is pretty much my new dream rig.
 
Update

This is the current state of the progress on the BJ-FJ rebuild

At one point I became disillusioned with the progress because I was putting in hours and hours of work, but visibly the progress was not tangible

Needless to say a few weeks later and the progress is now at last tangible and visible. :bounce::bounce2:
dscn0536_s.jpg
dscn0537_s.jpg


dscn0538_s.jpg
dscn0539_s~0.jpg


dscn0541_s.jpg
dscn0540_s.jpg


dscn0542_s.jpg
dscn0543_s.jpg
 
Thanks

Like I said - at some stages its hard to stay focussed and motivated cos you put in hours of work that just isnt visible

But its progessing nicely, I am hoping to get all the glass in by the end of Aug, (then I'll be in Europe on business for 3 weeks) and after that I should hopefully only have the headers and exhaust as the remaining major work - all the rest will be trimmings and finishes.

My targeted completion date is end Sept to mid Oct, but it's not cast in stone
 
man you started with a really clean truck... lots of guys trucks are not that nice after they get done working on them.... :)

I know what you mean about doing weeks of work that you can not see... :) I am painting and putting body together now and every day is exciting :)
 
Well Done!

I love the incredibly neat wall mounted tool arrangement in that one photo.

Look forward to more reports...

Max

PS: Nice to see a 40 series getting all this attention in South Africa. I was born and raised in Cape Town...
 
Thanks Max

You may not know, but there are probably only about fifteen original 40 series Cruza's in South Africa, because Toyota South Africa never imported the 40, only the 45, so they are extremely scarce.

Fortunately most of the 45 parts fit the 40 but some other parts like brakes and body were unique and are just not available and have to be imported either from US or Aus. Also the B and 3B diesels were never available here so local diesel engine parts are non existant.
 
UPDATE

Getting the two drag links (tie rods) ready to be welded together -the big rod is from the 60 series and the smaller is the standard 40 tierod
dscn0545_s.jpg
dscn0544_s.jpg


Installed th first of the two battery brackets.
dscn0547_s.jpg
dscn0546_s.jpg


Made up the two brackets for the bucket seats and installed the bucket seats.
dscn0548_s.jpg
dscn0549_s.jpg

dscn0551_s.jpg


Had a new choke cable made up and installed it

Have also completed some modifications to the steering column in preperation for welding in the extended intermediate shaft and universal joint.
 
Update - Power Steering

I hit a snag with the power steering installation, I was following the instal done here by "Pablocruise"

The standard 60s TRE that has the mount for the steering damper has a left hand thread, and the 40s TRE on the steering knuckle is also a left hand thread - so there would be no adjustability :doh:

This is a left hand thread

dscn0562_s.jpg


This side of the 40s relay rod is also Left hand thread.
Notice where the 60's and 40's relay rods were spliced and welded together

dscn0553_s.jpg


I resolved this by using the 60s opposite side TRE, but then I had to make up a bracket to clamp to the relay rod for the mounting of the RTC damper.

dscn0554_s.jpg


I had all new hoses made up for the power steering pump and box, because the old ones were a little bit too short. At present there is no cooler attached, this is because it is still being made up.

dscn0555_s.jpg
dscn0560-s.jpg


This is the extended intermediate shaft

dscn0557_s.jpg


The additional UJ that was installed at the end of the 40's steering column

dscn0559_s.jpg


The finished installation

dscn0552_s.jpg
dscn0561_s.jpg
 
ooo that looks nice..
 

Users who are viewing this thread

Back
Top Bottom