look great. how much are they?
Navigation
Install the app
How to install the app on iOS
Follow along with the video below to see how to install our site as a web app on your home screen.
Note: This feature may not be available in some browsers.
More options
Style variation
You are using an out of date browser. It may not display this or other websites correctly.
You should upgrade or use an alternative browser.
You should upgrade or use an alternative browser.
Builds A few mods from 7-25-06 (1 Viewer)
- Thread starter Corey
- Start date
This site may earn a commission from merchant affiliate
links, including eBay, Amazon, Skimlinks, and others.
More options
Who Replied?- Thread starter
- #122
Thanks.
Got them direct from Chaos Fab for $650 which included shipping.
There are a few others out there, but I felt these were the best, and quite a few others like them too.
Got them direct from Chaos Fab for $650 which included shipping.
There are a few others out there, but I felt these were the best, and quite a few others like them too.
thanks for the info. have not lifted yet. but good to know this
awesome thread and great documentation, don't let those pic links die corey!! 
on the fridge slide- if I understand you correctly, you don't want to mount front-to-back b/c of unsupported weight from your short drawer box?
The AO/Engel fridge slide is really heavy duty. (I have one) and even if the ends are hanging over your stow box, it will not flex or be a problem. Bolt to your box and it will be solid. Just an idea for ya'")
on the fridge slide- if I understand you correctly, you don't want to mount front-to-back b/c of unsupported weight from your short drawer box?
The AO/Engel fridge slide is really heavy duty. (I have one) and even if the ends are hanging over your stow box, it will not flex or be a problem. Bolt to your box and it will be solid. Just an idea for ya'
- Thread starter
- #125
Thanks guy's.
I can let the Engel metal slide hang over, but I need to know the length of the whole slide when in the folded position.
Can you measure yours?
Also I need to set my fridge in the skinny way front to back and see if it will even fit that way when the door is shut.
Someone mentioned to me that the handles may contact the rear door and also the back of the passenger seat back.
- Thread starter
- #127
28.5" may be to much.
Here are the dimensions of mine when it was still in the old rig.
http://www.pnw4runners.com/cargobox/box_size1.jpg
I have 21" front to back.
Here are the dimensions of mine when it was still in the old rig.
http://www.pnw4runners.com/cargobox/box_size1.jpg
I have 21" front to back.
- Thread starter
- #129
Total Chaos update
Just a quick update on the Total Chaos upper control arms.
Drove home from work two days in a row, and the rig is a different well behaved animal at highway speeds.
Not a super huge difference, but I no longer wander around, so I do not have to keep making course directions.
Before it was like sailing the Queen Mary at freeway speeds sometimes.
Now it tracks a lot straighter.
Ride is still not perfectly smooth, but that can chalked up to the aggressive tread pattern of the Dick Cepek Mountaincat tires.
If you are lifted and experiencing the wandering syndrome, I would recommend looking into these.
- Thread starter
- #130
Dual battery kit installed 10-6-2007
Dual battery kits are cool, and high on many an off roaders list of modifications to do.
With it you can safely start your vehicle should you accidentally run down your main battery.
This mod also goes towards the "Expedition" type of rig I am building.
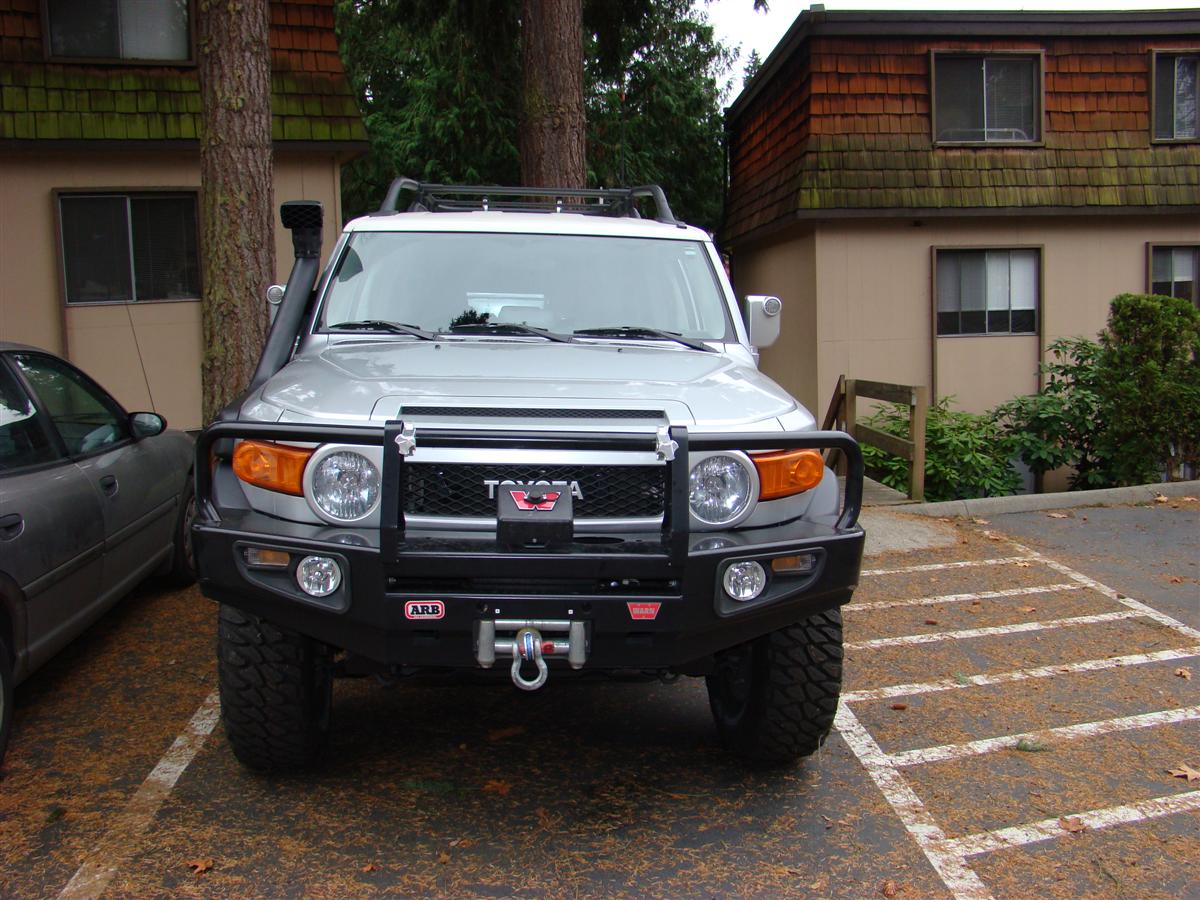
A few more mods such as the Safari snorkel and perhaps a roof top tent, and a new rear bumper will round out my rig for the look/setup I am trying to achieve here.
I had my local Cartoys do the install on this, as the Clifford battery backup alarm was in the way, and I needed them to move it to keep it under my warranty with them.
I had asked them a few weeks back if they have installed dual battery kits before, and indeed they had.
They had one of their best installers on this today.
He ran into one snag which was not his fault.
The Painless provided switch is to big to fit into the dash switch blanks.
I had forgotten that Wayne had procured a smaller three way switch to go into the switch blank in the lower console.
I suggested to the installer that he could drill a hole in my drivers side air vent panel.
He was able to do that, but had to turn the switch sideways.
There was not enough room with the shape of the switch in the back to have the handle operate in the up/down position, so it now operate back and forth, left/right.
For kicks I called up my local Toyota dealer to see how much one of these vent panels go for, and it is a shocking $149 or so.
I may in the future buy a new one, and then get a switch like Wayne's and mount the switch and LEDs down below in the lower console like he did.
But it really does not look to shabby where it is now.
I just may decide that it is not worth the $150 to move the switch.
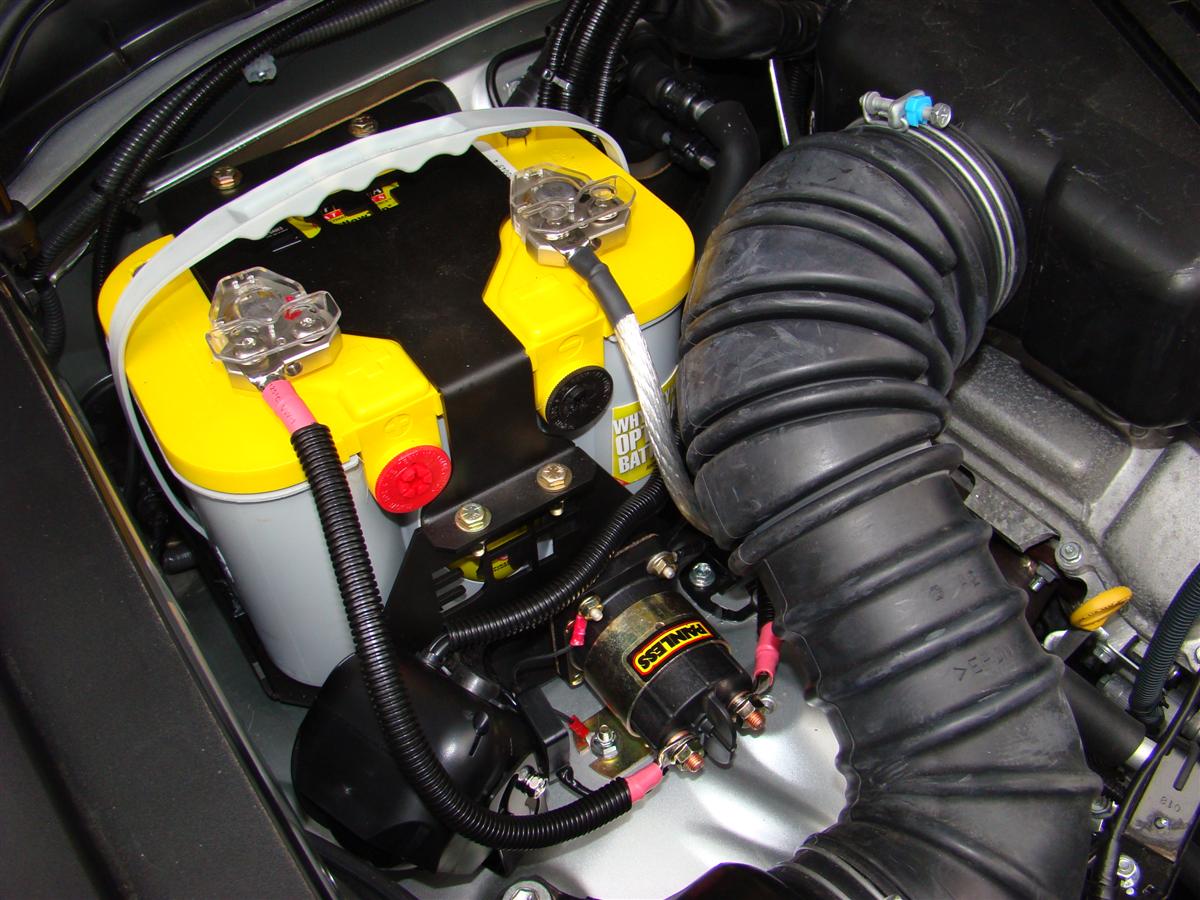
Pictures one, two, and three show the stock battery with the new positive wire coming off it it, and the other two pictures show the new Optima battery, the Painless solenoid, and the Bluetorch Fabworks battery tray.


Picture four shows the six bolts with the heads in the fenderwell with the threads pointing up.
The two at the rear of the tire and the two in front of them about one foot are the 5/16th bolts holding the battery box down.
The two up front above the Old Man Emu coil assembly are 1/4" bolts used to hold the solenoid to the fenderwell.

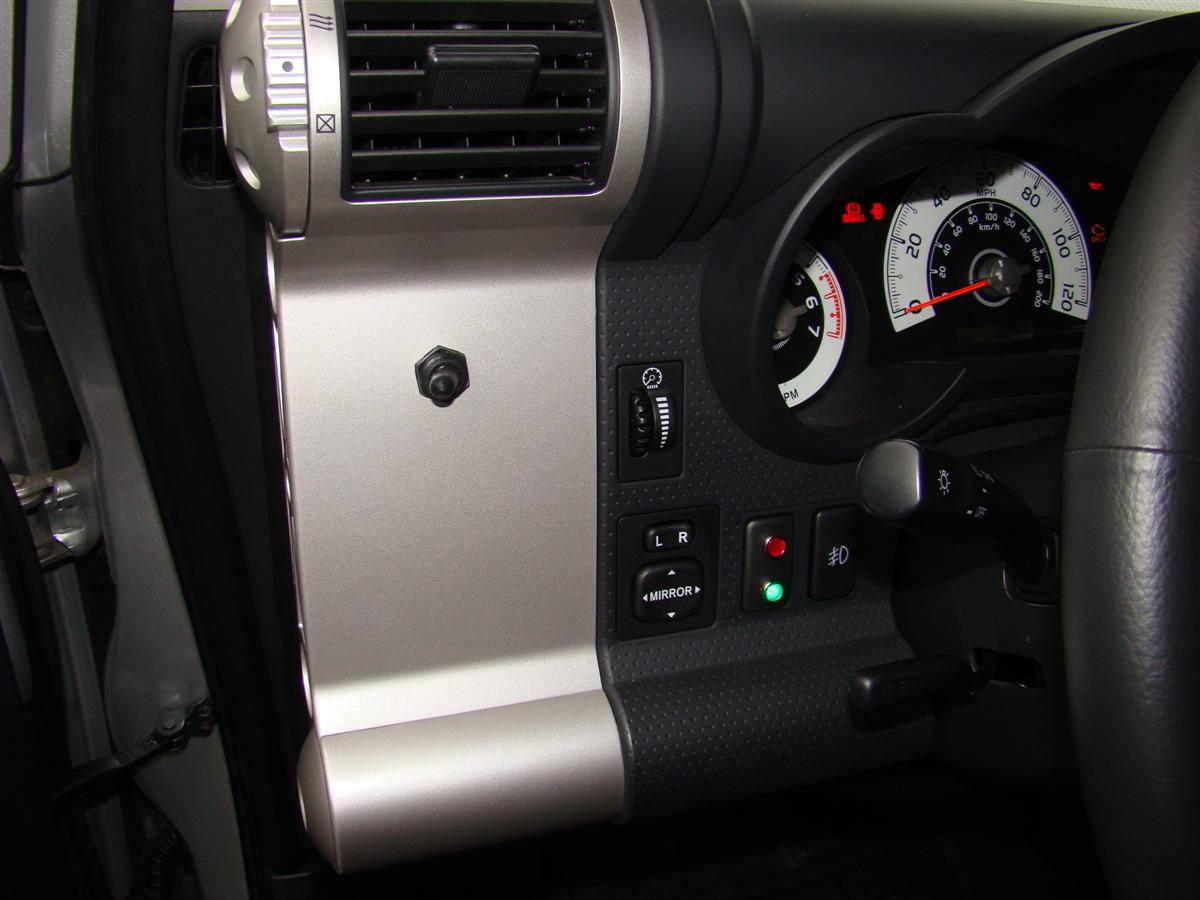
Picture five shows my alarm LED moved to the new location to the left of the rear diff lock switch.
Previously the LED was up on the dash between the mirror adjusters and the for lamp switch.

Picture six shows the red and green LEDs now mounted where the alarm LED use to be.
Picture six also shows the switch in its centered position.
This manes the main battery is only used for vehicle operation.
The solenoid is not activated, and the auxiliary battery is not being charged.
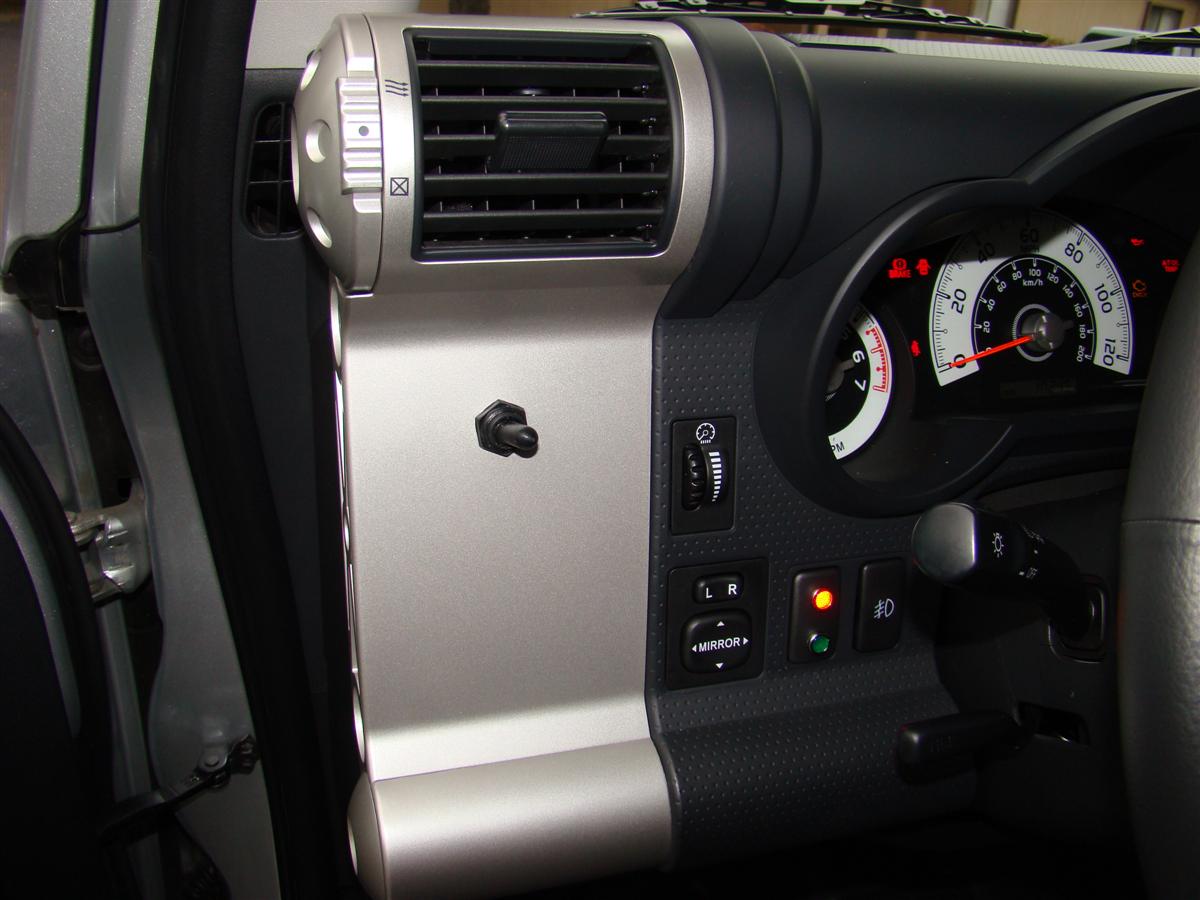
Picture seven shows the switch in the green light position.
The main and auxiliary batteries are connected for charging and starting, and the green light is illuminated when the key is in the on position.
The green light will not activate when the key is in the off position.
You would use this position to start your vehicle if you drained the main battery.
For example, winching with your engine off, running your stereo to serenade your friends with the engine off, or using a fridge/freezer such as like the ARB one I have, and you drained your main battery.
If that happens, you would flip the switch from the center position (main battery only connected) to the green light or the red light position, and you would then be able to crank over your engine to start the vehicle and charge the main battery.
Picture eight shows the switch in the red light position.
The main and auxiliary batteries are connected together and the red light is illuminated at all times regardless of the ignition switch position.


This will come in so handy when I am out camping running the ARB fridge for a few days.
If I accidentally drain the main battery, I will be able to have a way to start the vehicle and then charge back up the main battery.
Here are some additional pictures I grabbed off the websites below.
The box before being modified by Wayne, and a Yellow Top battery by Optima


The Painless dual battery kit showing all of the parts laid out

Parts used:
Bluetorch Fabworks battery tray
http://bluetorchfab.com/store/product_info.php?products_id=1
The box has been modified by member KD7NAC_07FJ (Wayne) by welding on a plate in the rear that follows the contour of the FJ Cruisers fenderwell, and thus giving it a more secure mounting by running those bolts above the rear of the tire as seen in picture four.
Painless 250 Amp Dual Battery Current Control System
http://www.painlessperformance.com/webcatalog/largeview.php?SearchField=40102
Bought from Jegs
http://www.jegs.com/webapp/wcs/stores/servlet/product_10001_10002_20324_-1
Optima Yellow Top model D34_78
http://www.optimabatteries.com/optima_products/yellowtop.php
Do an Internet search to find the best price.
I got an excellent deal on mine at my local Cartoys stereo shop.
Dual battery kits are cool, and high on many an off roaders list of modifications to do.
With it you can safely start your vehicle should you accidentally run down your main battery.
This mod also goes towards the "Expedition" type of rig I am building.
A few more mods such as the Safari snorkel and perhaps a roof top tent, and a new rear bumper will round out my rig for the look/setup I am trying to achieve here.
I had my local Cartoys do the install on this, as the Clifford battery backup alarm was in the way, and I needed them to move it to keep it under my warranty with them.
I had asked them a few weeks back if they have installed dual battery kits before, and indeed they had.
They had one of their best installers on this today.
He ran into one snag which was not his fault.
The Painless provided switch is to big to fit into the dash switch blanks.
I had forgotten that Wayne had procured a smaller three way switch to go into the switch blank in the lower console.
I suggested to the installer that he could drill a hole in my drivers side air vent panel.
He was able to do that, but had to turn the switch sideways.
There was not enough room with the shape of the switch in the back to have the handle operate in the up/down position, so it now operate back and forth, left/right.
For kicks I called up my local Toyota dealer to see how much one of these vent panels go for, and it is a shocking $149 or so.
I may in the future buy a new one, and then get a switch like Wayne's and mount the switch and LEDs down below in the lower console like he did.
But it really does not look to shabby where it is now.
I just may decide that it is not worth the $150 to move the switch.
Pictures one, two, and three show the stock battery with the new positive wire coming off it it, and the other two pictures show the new Optima battery, the Painless solenoid, and the Bluetorch Fabworks battery tray.
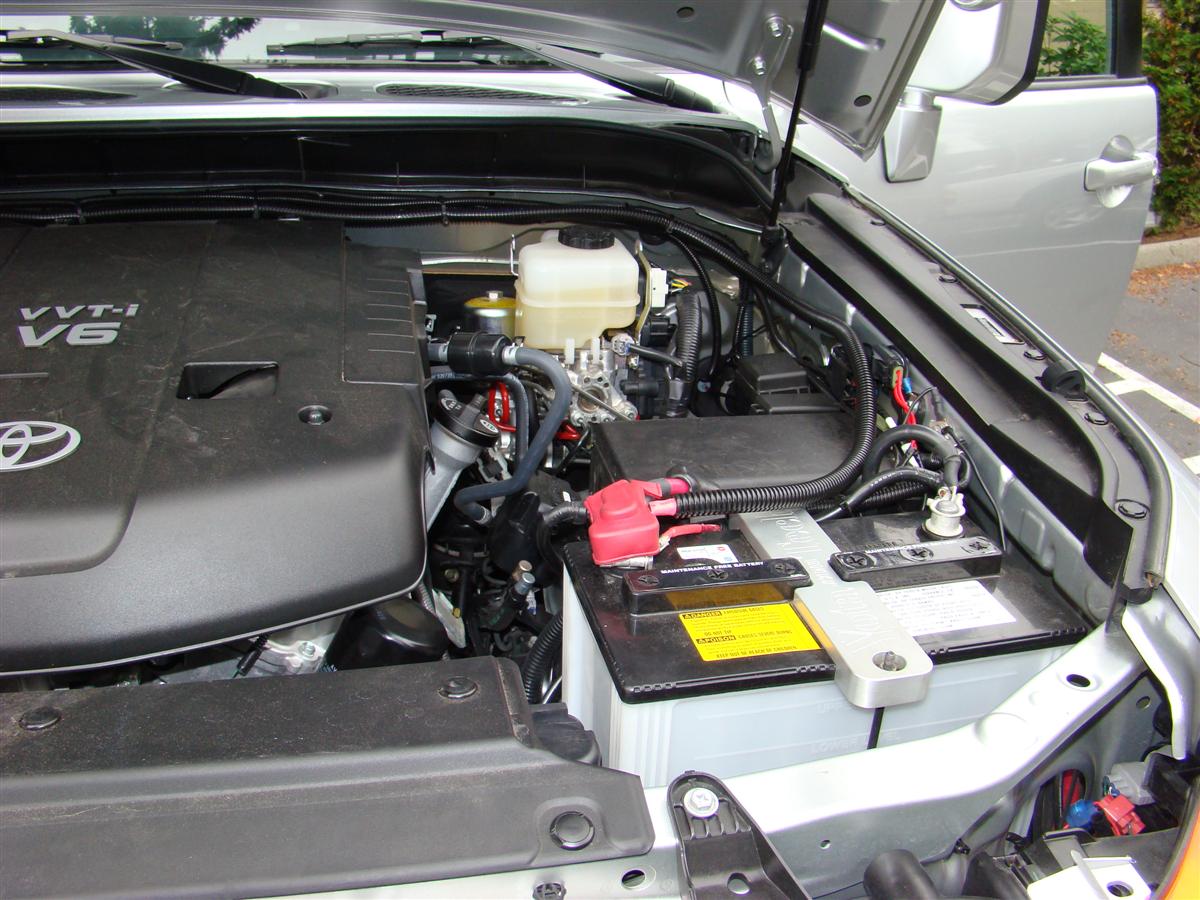

Picture four shows the six bolts with the heads in the fenderwell with the threads pointing up.
The two at the rear of the tire and the two in front of them about one foot are the 5/16th bolts holding the battery box down.
The two up front above the Old Man Emu coil assembly are 1/4" bolts used to hold the solenoid to the fenderwell.

Picture five shows my alarm LED moved to the new location to the left of the rear diff lock switch.
Previously the LED was up on the dash between the mirror adjusters and the for lamp switch.

Picture six shows the red and green LEDs now mounted where the alarm LED use to be.
Picture six also shows the switch in its centered position.
This manes the main battery is only used for vehicle operation.
The solenoid is not activated, and the auxiliary battery is not being charged.
Picture seven shows the switch in the green light position.
The main and auxiliary batteries are connected for charging and starting, and the green light is illuminated when the key is in the on position.
The green light will not activate when the key is in the off position.
You would use this position to start your vehicle if you drained the main battery.
For example, winching with your engine off, running your stereo to serenade your friends with the engine off, or using a fridge/freezer such as like the ARB one I have, and you drained your main battery.
If that happens, you would flip the switch from the center position (main battery only connected) to the green light or the red light position, and you would then be able to crank over your engine to start the vehicle and charge the main battery.
Picture eight shows the switch in the red light position.
The main and auxiliary batteries are connected together and the red light is illuminated at all times regardless of the ignition switch position.

This will come in so handy when I am out camping running the ARB fridge for a few days.
If I accidentally drain the main battery, I will be able to have a way to start the vehicle and then charge back up the main battery.
Here are some additional pictures I grabbed off the websites below.
The box before being modified by Wayne, and a Yellow Top battery by Optima
The Painless dual battery kit showing all of the parts laid out
Parts used:
Bluetorch Fabworks battery tray
http://bluetorchfab.com/store/product_info.php?products_id=1
The box has been modified by member KD7NAC_07FJ (Wayne) by welding on a plate in the rear that follows the contour of the FJ Cruisers fenderwell, and thus giving it a more secure mounting by running those bolts above the rear of the tire as seen in picture four.
Painless 250 Amp Dual Battery Current Control System
http://www.painlessperformance.com/webcatalog/largeview.php?SearchField=40102
Bought from Jegs
http://www.jegs.com/webapp/wcs/stores/servlet/product_10001_10002_20324_-1
Optima Yellow Top model D34_78
http://www.optimabatteries.com/optima_products/yellowtop.php
Do an Internet search to find the best price.
I got an excellent deal on mine at my local Cartoys stereo shop.
Nice job Corey,I will be doing the same install some day. It's Hunting Season down here in Florida.I just finished fridge slider for my Engel Frig. Now I can see what I want to get out of the frig. I can still use the back seats. Can't wait for Kaymar rear bumper though.
- Thread starter
- #132
Thanks Gary.
I am liking the Kaymar too, and warming up a tad to the tire swingout.
Just a small update.
I had not put in the ARB fridge since adding the new fire extinguisher next to the Powertank.
Put the fridge in today for the upcoming Fall Colors Run this Saturday.
I was not sure if it was going to squeeze in or not, but it fits in OK.
Tight fit back there for sure, and will still look into rotating that fridge one day 90 degrees to the right.

- Thread starter
- #134
Springtail M-Packs installed 11-10-2007
The M-Packs and rack is in from the group buy I got in on awhile back.
Anyone interested in installing these into other rigs besides FJ Cruisers and Jeeps should contact Springtail Solutions.
All URLs will be at the bottom here.
The kit allows you to mount a rack on the rear of the FJs door, and that rack will then let you mount bags of different sizes and configurations to it.
They use the military Molle strap system, something I was not really familiar with until I saw the thread put up by the vendor on fjcruiserforums.com's site.
I suspect it is some type of setup my favorite Sci-Fi show StarGate SG1 uses on their uniforms they wear too.
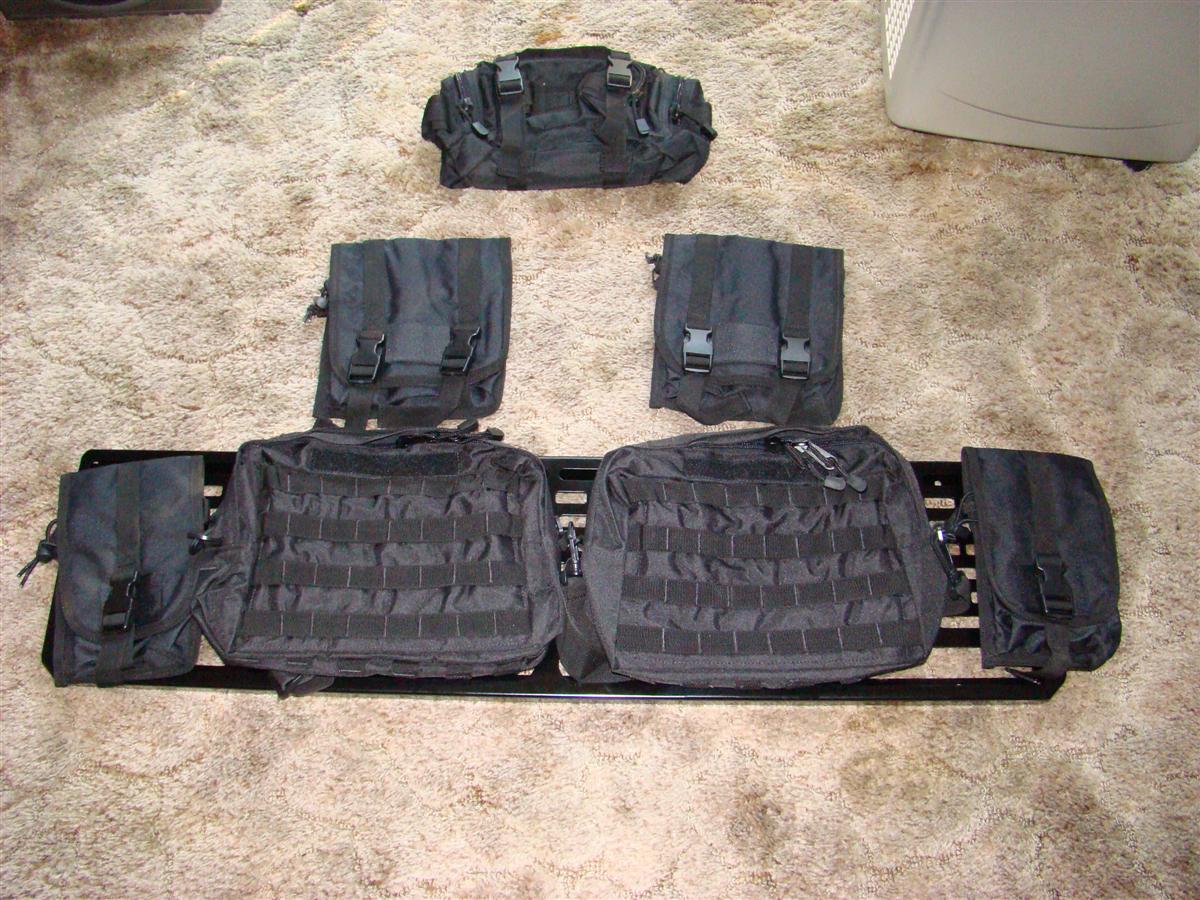
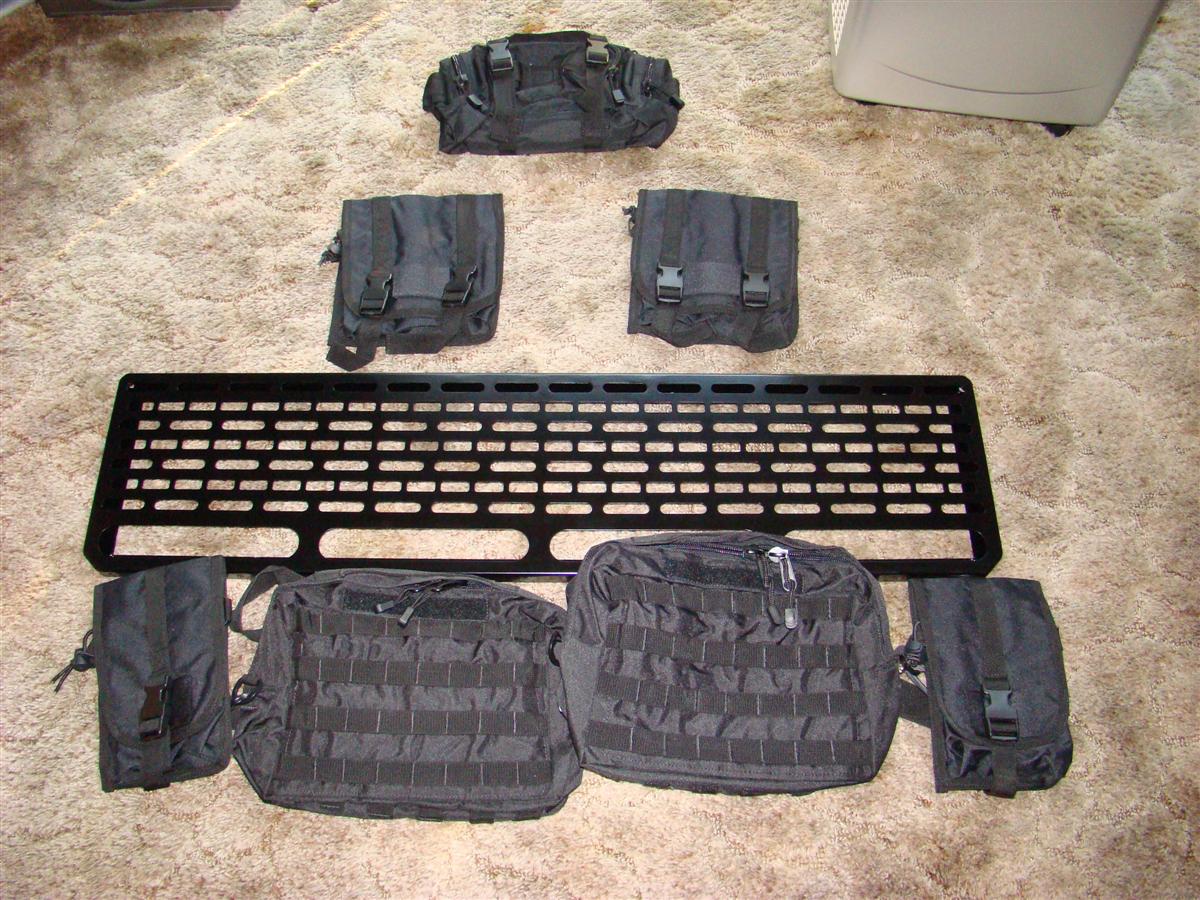
Here are the parts laid out, the rack, then the bags.
The bag at the very top of the pictures goes into the compartment in the right rear.
Those with the factory subwoofer would not be able to put that bag there, as the subwoofer occupies that space.
The two big bags and the smaller ones with the two straps mount to the M-Pack rack.
The smaller one strap packs go into the front door pockets for a perfect fit.


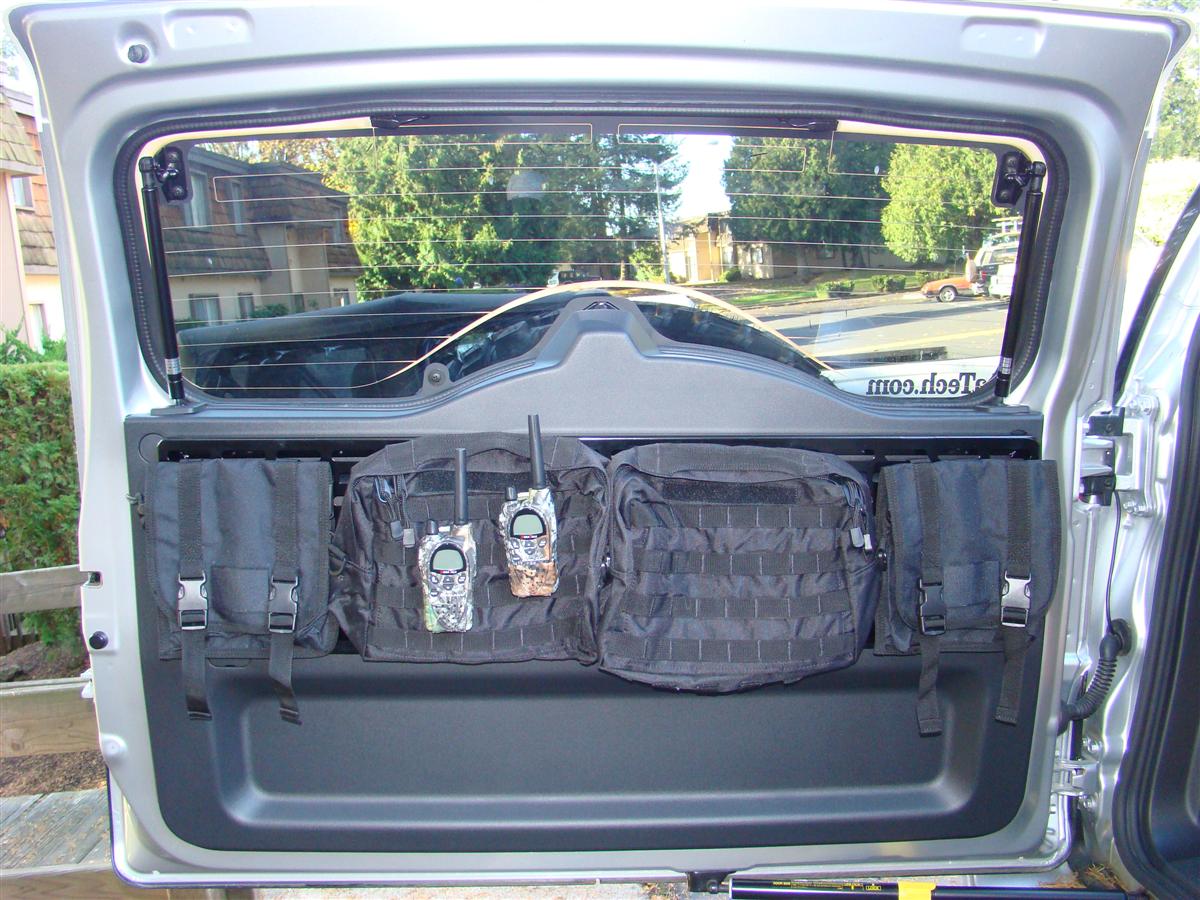
The next set of pictures shows:
Rack mounted to the rear door
Pack in the rear right hand side compartment
Packs in the front door
Packs mounted to the rack


I have a lot of filling to do on these packs still.
The front two packs in the doors each house a Boeing first aid kit I received at work as an award for something I did
Before the first aid kits sat in the front pockets and shifted around a lot.
With them stuffed into the Molle packs there is no movement now, it is a nice tight fit.
The mounting of the packs and what you carry possibilities are endless, and using your imagination I am sure you might find a way to bring along the kitchen sink on your next overland travel, camping trip, or 4wheeling trip.
Springtail Solutions/M-Pack
Installation instructions for the rack
Installing the Molle packs onto the rack
At the main URL for Springtail are more photos and an FAQ that explains what the Molle system is.
Next mods coming up:
Safari snorkel
Focal 6.5 components for the front doors and the tweeters will go up in the dash, new rear Focal speakers, and an Alpine 4x100 watt amp to power it all.
Not going with a subwoofer yet, I want to hear how this sounds first.
Thanks, next mod is complete.Sweet setup ya got there.

The M-Packs and rack is in from the group buy I got in on awhile back.
Anyone interested in installing these into other rigs besides FJ Cruisers and Jeeps should contact Springtail Solutions.
All URLs will be at the bottom here.
The kit allows you to mount a rack on the rear of the FJs door, and that rack will then let you mount bags of different sizes and configurations to it.
They use the military Molle strap system, something I was not really familiar with until I saw the thread put up by the vendor on fjcruiserforums.com's site.
I suspect it is some type of setup my favorite Sci-Fi show StarGate SG1 uses on their uniforms they wear too.
Here are the parts laid out, the rack, then the bags.
The bag at the very top of the pictures goes into the compartment in the right rear.
Those with the factory subwoofer would not be able to put that bag there, as the subwoofer occupies that space.
The two big bags and the smaller ones with the two straps mount to the M-Pack rack.
The smaller one strap packs go into the front door pockets for a perfect fit.
The next set of pictures shows:
Rack mounted to the rear door
Pack in the rear right hand side compartment
Packs in the front door
Packs mounted to the rack


I have a lot of filling to do on these packs still.
The front two packs in the doors each house a Boeing first aid kit I received at work as an award for something I did
Before the first aid kits sat in the front pockets and shifted around a lot.
With them stuffed into the Molle packs there is no movement now, it is a nice tight fit.
The mounting of the packs and what you carry possibilities are endless, and using your imagination I am sure you might find a way to bring along the kitchen sink on your next overland travel, camping trip, or 4wheeling trip.
Springtail Solutions/M-Pack
Installation instructions for the rack
Installing the Molle packs onto the rack
At the main URL for Springtail are more photos and an FAQ that explains what the Molle system is.
Next mods coming up:
Safari snorkel
Focal 6.5 components for the front doors and the tweeters will go up in the dash, new rear Focal speakers, and an Alpine 4x100 watt amp to power it all.
Not going with a subwoofer yet, I want to hear how this sounds first.
NICE!
Corey, your rig is awesome. I was trying to keep up with ya there for a while (without a great deal of success) and the final nail just got driven into the coffin. I just bought a Rubicon so my modding time is going to have to be divided between the 2 rigs, which probably means two cool rigs, but neither of them will ever be WHOA rigs.
You have the best built thread on the site man, keep it up.
(Isn't Tahuya in your neck of the woods somewhere? I hear some FJs and Jeeps are heading up for a run next weekend. You going?)
- Thread starter
- #136
Thanks for the comps Brick.
Sounds like you have some nice rigs in your stable.
Yes, here is a thread by an old Yota member who now has a nice yellow Rubicon.
http://www.yotatech.com/f15/wash-state-tahuya-nov-17th-128941/
They are going next weekend.
Next weekend I am getting new speakers and an amp installed, so I will be tied up.
- Thread starter
- #137
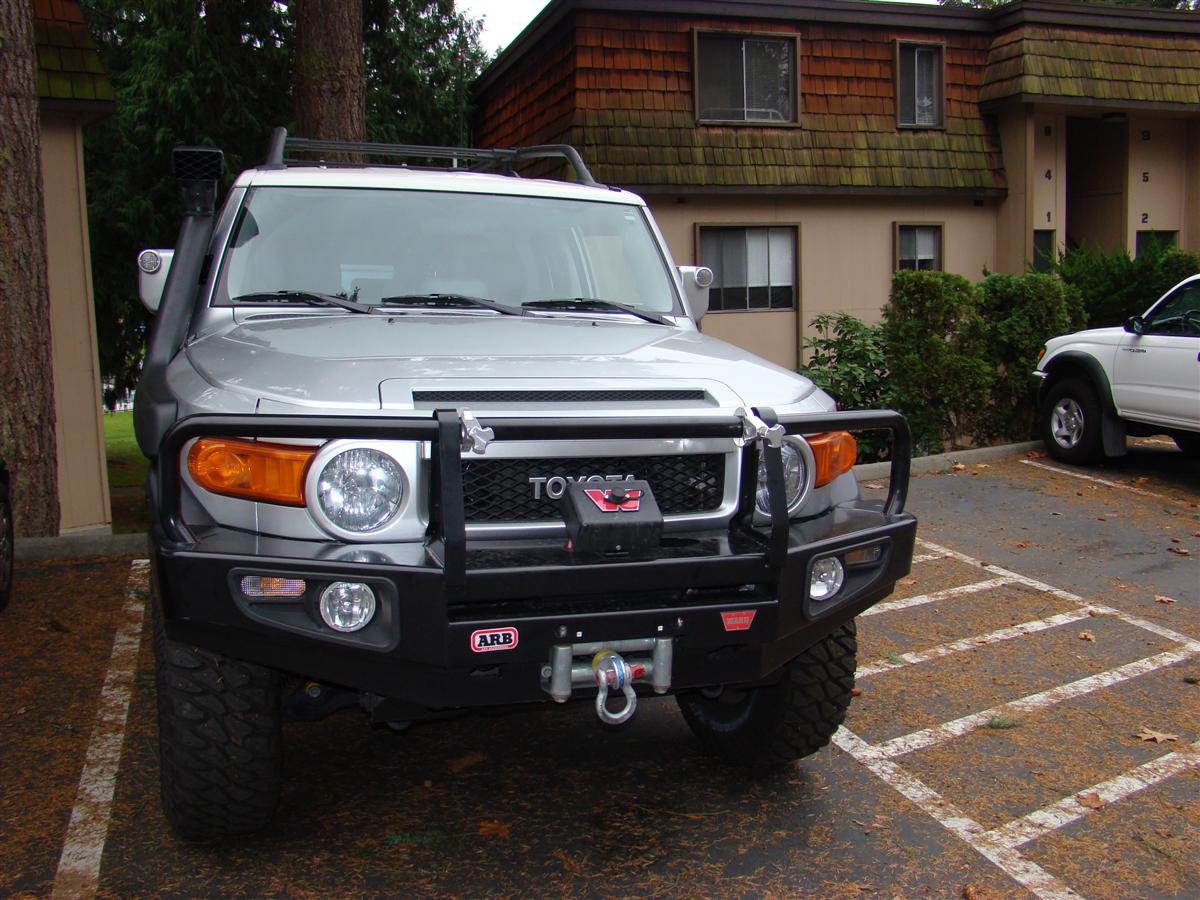
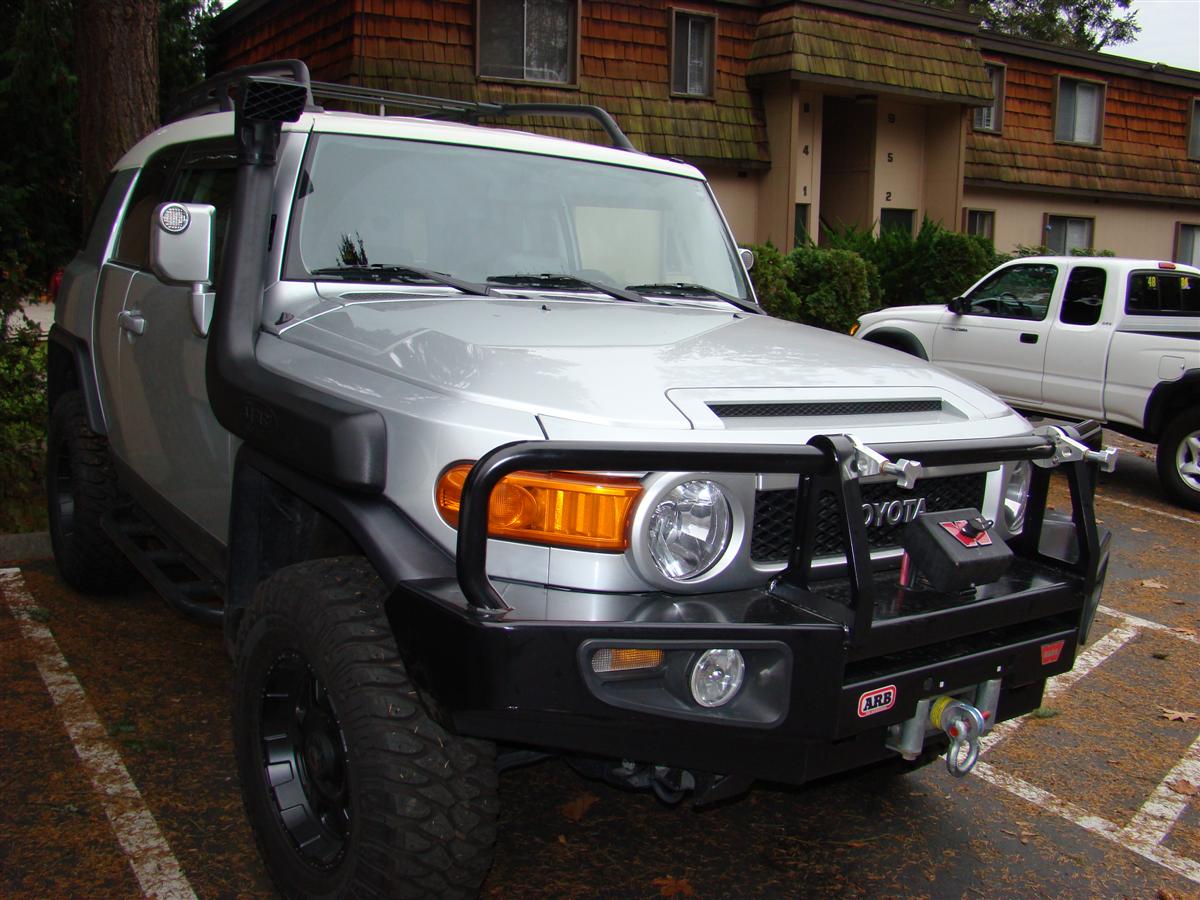
Safari snorkel installed 11-14-2007
I was lucky enough to be one of three who got their snorkels air freighted in on October the 17th ahead of the big shipment of 80 coming in via ocean container.
The 80 snorkels arrived today down at ARB when I was there, so there are going to be some happy FJ Cruiser owners tonight!
I got my snorkel for one main reason, dust control.
I am not into water crossings, but I may encounter some in some of my future overland expeditions.
Up where I go now, it can be very dusty in the summer time when you are following a group of several rigs.
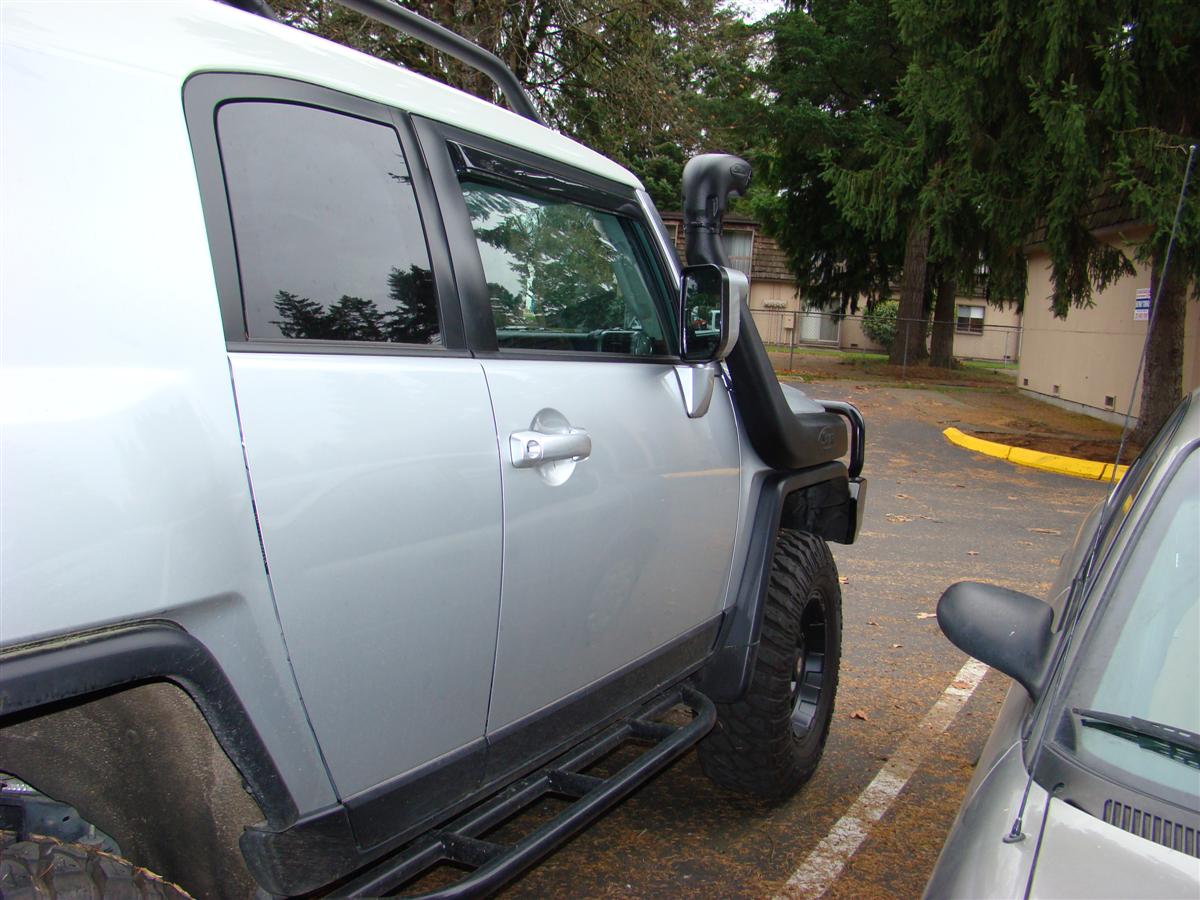
So dusty you can not see more than 15 feet in front of you sometimes, so the addition of the snorkel is an extra piece of mind keeping that air filtered better than where it enters the stock intake down in the wheel well.
We also test fitted a 7" pre-cleaner, and it will clear the pillar, but it will need an adaptor to fit the snorkel opening at the top when you take the regular intake off.
The tubes are the same size, so they will not mate since the pre-cleaner will not slip over the snorkel tube like the head does.
I am sure someone soon will figure out what size adaptor to get from a plumbing supply house.
The pre-cleaners too will cut down on your power, they do not breathe as well as the regular head.
I would only run one if I was going to be in dust/dirt for a very long time.
Here are a few pictures, not the best as it is already getting dark here.
The material is top notch, very high quality.
Bring on the dust!


Parts used
Safari snorkel part # SS410HF
http://www.safarisnorkel.com/snorkel/ss410hf/ss410hf.htm
Installation instructions
http://www.safarisnorkel.com/guides/TOYOTA/ss410hf/ss410hf.htm
I was lucky enough to be one of three who got their snorkels air freighted in on October the 17th ahead of the big shipment of 80 coming in via ocean container.
The 80 snorkels arrived today down at ARB when I was there, so there are going to be some happy FJ Cruiser owners tonight!
I got my snorkel for one main reason, dust control.
I am not into water crossings, but I may encounter some in some of my future overland expeditions.
Up where I go now, it can be very dusty in the summer time when you are following a group of several rigs.
So dusty you can not see more than 15 feet in front of you sometimes, so the addition of the snorkel is an extra piece of mind keeping that air filtered better than where it enters the stock intake down in the wheel well.
We also test fitted a 7" pre-cleaner, and it will clear the pillar, but it will need an adaptor to fit the snorkel opening at the top when you take the regular intake off.
The tubes are the same size, so they will not mate since the pre-cleaner will not slip over the snorkel tube like the head does.
I am sure someone soon will figure out what size adaptor to get from a plumbing supply house.
The pre-cleaners too will cut down on your power, they do not breathe as well as the regular head.
I would only run one if I was going to be in dust/dirt for a very long time.
Here are a few pictures, not the best as it is already getting dark here.
The material is top notch, very high quality.
Bring on the dust!

Parts used
Safari snorkel part # SS410HF
http://www.safarisnorkel.com/snorkel/ss410hf/ss410hf.htm
Installation instructions
http://www.safarisnorkel.com/guides/TOYOTA/ss410hf/ss410hf.htm
- Thread starter
- #138
Phase II audio system installed 11-17-2007
The first phase was to remove the factory headunit detailed earlier in this thread back at the end of March 2007.
The second phase consists of getting rid of the junk factory speakers and going with better ones that let the real music come through, and also an amplifier to power the speakers in all their glory.
The following components were installed stealth, you can not tell they are there.
1. Focal 165V2 6.5" component speakers with tweeters.
The Focals replaced the factory 6x9s in the doors, and the tweeters replaced the factory speakers up in the dash.
The shop made custom plates that matched the factory ones to hold them in the cavity of the door.
2. Infinity Kappa 3.27KF 3.5" speakers for the very rear in the cargo bay.
We were going to do Focal 4" speakers, but they were to deep to fit in there.
Plus the Kappas were close to $100 cheaper.
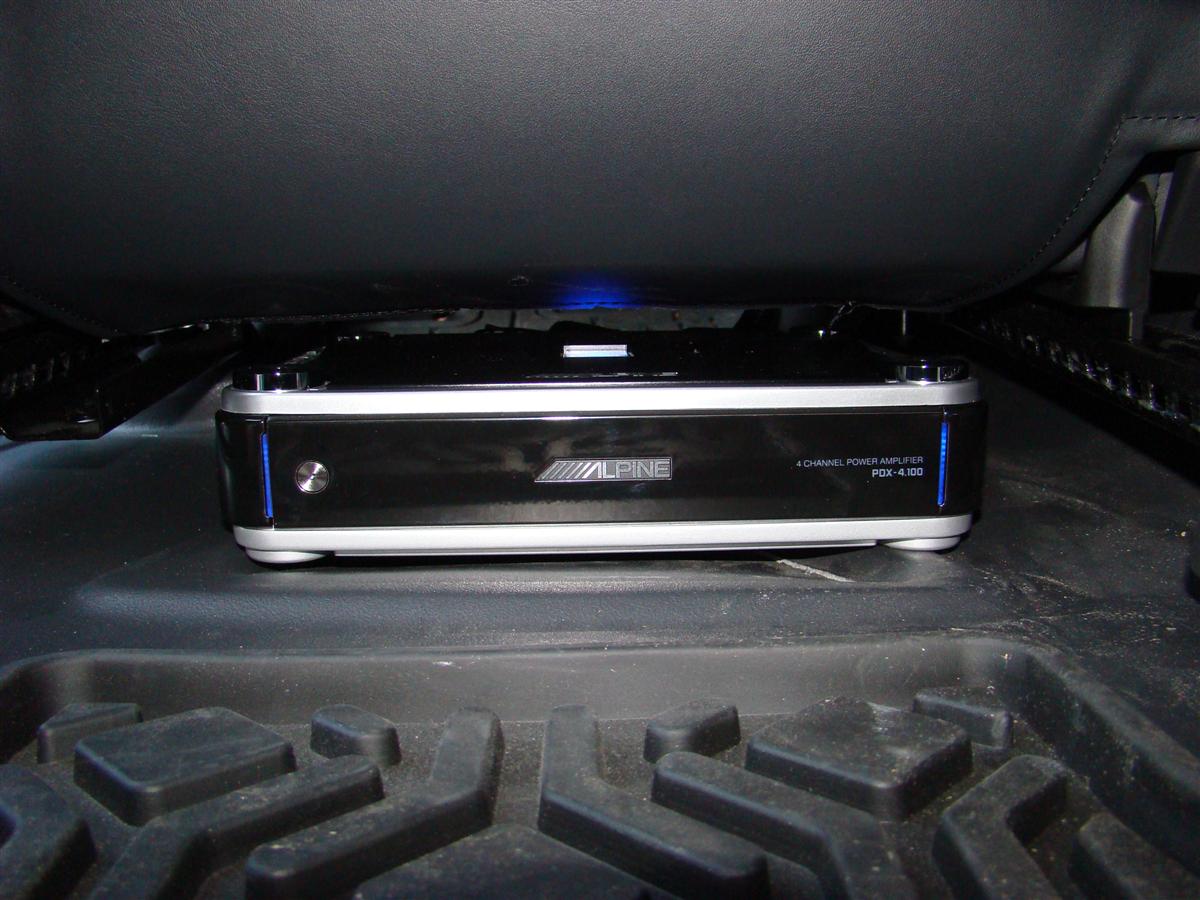
3. Alpine PDX-4.100 amp which is a four channel amp pushing out 100 watts each channel.
This is powering both sets of speakers.
4. Dynamat Xtreme two door kit to make the Focals sound even better.
Below are some pictures I pulled off the web of the components since all my gear you can not really see.


The sound is great, but I still have some tweaking to do with the equalizer on the headunit to fine tune it to the way I like it.
Phase III will consist of a JL Audio W6 10" woofer housed in a custom shop built fiberglass enclosure covered in black carpet, and another Alpine PDX amp, the 1.600 which pumps out 600 watts mono.
I need to see if I can move the ARB fridge first to the rear seat on the drivers side when it is in the down position to make room for the sub.
Links:
Focal 165V2 speakers
Infinity Kappa 3.27CF speakers
Alpine PDX-4.100 amplifier
Dynamat Xtreme two door kit
The first phase was to remove the factory headunit detailed earlier in this thread back at the end of March 2007.
The second phase consists of getting rid of the junk factory speakers and going with better ones that let the real music come through, and also an amplifier to power the speakers in all their glory.
The following components were installed stealth, you can not tell they are there.
1. Focal 165V2 6.5" component speakers with tweeters.
The Focals replaced the factory 6x9s in the doors, and the tweeters replaced the factory speakers up in the dash.
The shop made custom plates that matched the factory ones to hold them in the cavity of the door.
2. Infinity Kappa 3.27KF 3.5" speakers for the very rear in the cargo bay.
We were going to do Focal 4" speakers, but they were to deep to fit in there.
Plus the Kappas were close to $100 cheaper.
3. Alpine PDX-4.100 amp which is a four channel amp pushing out 100 watts each channel.
This is powering both sets of speakers.
4. Dynamat Xtreme two door kit to make the Focals sound even better.
Below are some pictures I pulled off the web of the components since all my gear you can not really see.
The sound is great, but I still have some tweaking to do with the equalizer on the headunit to fine tune it to the way I like it.
Phase III will consist of a JL Audio W6 10" woofer housed in a custom shop built fiberglass enclosure covered in black carpet, and another Alpine PDX amp, the 1.600 which pumps out 600 watts mono.
I need to see if I can move the ARB fridge first to the rear seat on the drivers side when it is in the down position to make room for the sub.
Links:
Focal 165V2 speakers
Infinity Kappa 3.27CF speakers
Alpine PDX-4.100 amplifier
Dynamat Xtreme two door kit
Cool, cool. Where did you mount the amp?
- Thread starter
- #140
Under the drivers seat.
The bass amp may fit on top, if not, it will go under the other one.

The bass amp may fit on top, if not, it will go under the other one.
Similar threads
Users who are viewing this thread
Total: 2 (members: 0, guests: 2)