Builds ?????????80 tm Build Input Requested (19 Viewers)

This site may earn a commission from merchant affiliate
links, including eBay, Amazon, Skimlinks, and others.

Allocated some lift time to fulfill obligations on the coil thread.

While there, and with the oversight of a more than qualified technician, bled all brakes before and after engaging the ABS on a lift.

No air, but no change in pedal feel, so all that's left is the ABS that could possibly be bad, and he's saying odds are its not (with the notation he's not an LC expert).

One thing that seemed odd, and reason for question.

While on the lift, no vehicle weight on tires, depressing the pedal, the front stops instantly, yet the rear continues to spin until a 1/4 way down the pedal.

At first, I thought the LSPV may have some bearing, but even fully engaged, it didn't change it.

Any clues.

Safety at its finest.
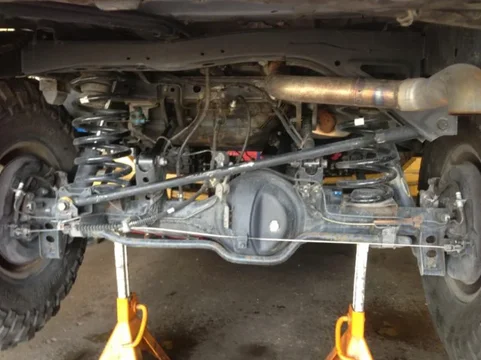


image-278268285.jpg

image-278268285.jpg
 
Allocated some lift time to fulfill obligations on the coil thread.

While there, and with the oversight of a more than qualified technician, bled all brakes before and after engaging the ABS on a lift.

No air, but no change in pedal feel, so all that's left is the ABS that could possibly be bad, and he's saying odds are its not (with the notation he's not an LC expert).

One thing that seemed odd, and reason for question.

While on the lift, no vehicle weight on tires, depressing the pedal, the front stops instantly, yet the rear continues to spin until a 1/4 way down the pedal.

At first, I thought the LSPV may have some bearing, but even fully engaged, it didn't change it.

Any clues.

Safety at its finest.


View attachment 765729

You don't want the rear brakes to lock up before the front does.
 
That sounds logical and assumed normal, to some degree.

Sucks to have invested the time, effort, and money replacing all components, only to have a crappier feel than before starting.
 
Have you tried to pressure bleed the brakes? I will never go back to pumping brakes again...

I bought a motive bleeder but you can do the same thing with a garden sprayer. It may even work better.

http://www.motiveproducts.com/
 
Haven't yet.

There's no air trapped anywhere, so believe them to be bled properly, but then again...

Will be discussing other bleeding procedures when I return to shop, though.
 
The reason I bring it up is because I've had three vehicles that I had spongy brakes on that once bled with the pressure bleeder made everything happy, a Subaru WRX, a Mitsubishi Evo, and a BMW M3.
 
Wonder what it is different with pressure bleeding that matters?

I can't see how there'd be a single N2O2 molecule in these lines and it does stop reasonably well (the arse end bucks up, but that ain't the brakes) yet the pedal feels sponger than the day I bought.
 
I have no clue, I just know that with the pressure bleeding it solved my issues. Residual valves, ABS pumps, and other brake system components can all hide air that you have a hard time getting out while pumping, especially if they are higher then the bleeder.
 
A local 80 buddy has a high end power bleeder at the import dealership he works at, but not the cap for Toyota, which is $70, if memory serves.

Going to ask if the part he said I'd need to buy for him to bleed there is specific to the commercial bleeder he has access to. If it is, then will probably go that route and either sell or keep for others to use.
 
Grab another Toyota cap and modify ;)
 
Grab another Toyota cap and modify ;)

They may laugh at that at a Benz dealer. Haha.

This was what he sent, via text.

image-1814971321.jpg

Looks like the suggested cap locks on, but not sure home much that matters at 25psi.

image-4230569807.jpg

Will have to wait a couple days. Running out of time getting my coil measurements. The J-O-B had drastically interfered with wrenching time, today. Haha.

image-1814971321.jpg


image-4230569807.jpg
 
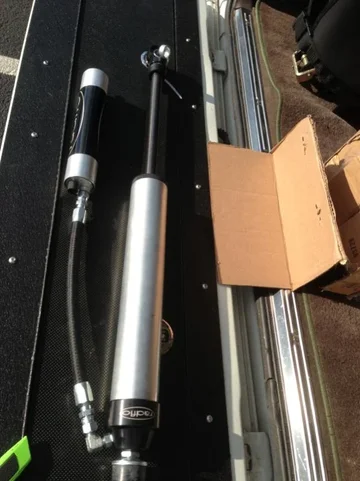
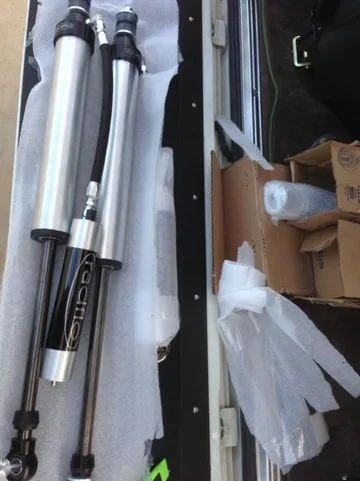
Yeah, a little excited. Unboxing between errands. Haha.

image-2021101896.jpg

No bearing on anything, but could compress the OME Ls very easily.

Ain't the case with these. Can't wait to get them on.

image-2021101896.jpg
 
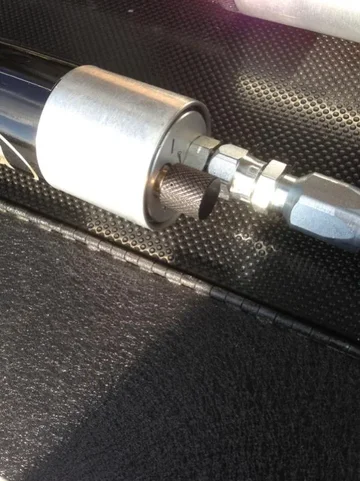
Made to miscalculations on the Radflo resi orientation/assemble hose length.

First, I forgot the comp adjusters were on the entry side. Not a huge deal, but the brackets made to bolt to the top of the coil tower won't work.

Second, the hoses aren't as pliable as the material (garden hose) I used to mock up, so coil tower brackets wouldn't have worked anyway.

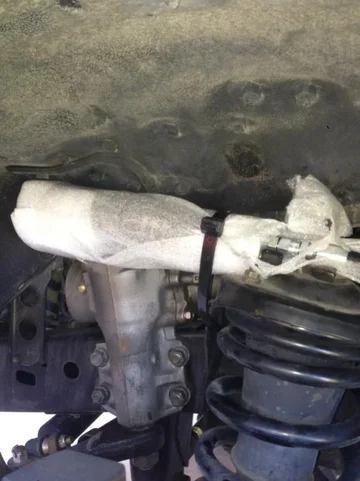
Temp fix until I can figured something else out for the rear is easy....,


image-748410210.jpg

Not sure what this leaves for the front and dobt have time to fully cycle to see how else it can orient to not hit the tire.

What I was mimicking.


image-2290836250.jpg

Lastly, and really a non-issue, but figured if post for posterity.

When submitting shock lengths, I measured and submitted the shorter of the two sides dimensions, based on knowing that conditions in the real world that'd replicate a full extension of either the front or rear suspension, will leave with greater concerns that coil tapping, but the DS does extended substantially more than passenger, so coils can become unseated.


image-944716917.jpg


image-1949224567.jpg

Rear is a non issue, since there's minimal variance between PS and DS, even without the sway attached, the coils stay seated.

image-1949224567.jpg


image-944716917.jpg


image-748410210.jpg


image-2290836250.jpg
 
Not hardcore, but have about 6 miles on, since these are currently my resi mounts.


image-3188710162.jpg


Went from the softest compression setting to the hardest, hit two identical miles and surprised at the profound difference between the two. Liking firmer much more, but will dial in, in time.

Has corrected the torque induced body roll (hahaha) and some of the overall body roll, but my hopes of not needing to further the sway bar upgrades have been dashed. (Not that I really thought shocks would cure, but was being overly optimistic, a change for me).

Have an impromptu ramp that I maxed out the Ls on quite some time ago that I'd like to run up, for fun and a quick visual comparison. Not sure how comfortable I feel with the zip tied resi's on the cross town journey, though.

Will formalize my errors on resi and hose orientation, along with shocks specs shortly, before I forget.

Hopefully can get time tomorrow to figure out the best means to secure, cause I'm kind of baffled right now. In my own defense, it's friggin' hot and humid here and a Monday, and I don't care for either.

image-3188710162.jpg
 
What were your compressed and extended lengths for the radflo shocks. Wish I had sometime to fit mine instead they are sitting on the floor at home. Got any more mounting pics for the res. I was amazed how big the res were when I opened up the boxes.
 
Same brake bleeder we use to bleed a clutch on a Mercedes manual auto box. Works a treat. Just make sure you have secured the tapered bung that goes into the fill point or you will have brake fluid every.
 
What were your compressed and extended lengths for the radflo shocks.
Rear 760mm (30") extended
450mm (17.75") compressed
290mm (12.25") shock travel

Front 768mm (30.23") extended
455mm (17.90") compressed
313mm (12.33") shock travel

Got any more mounting pics for the res. I was amazed how big the res were when I opened up the boxes.

There as big as a Fox shock body.

I knew what to expect having ran them on a previous build and mocked up numerous times over the course of the last year, using a piece of PVC pipe and cut garden hose.

Well, I miscalculated based on a few errors in judgement, one being the difference in a garden hoses and a resi hoses flexibility.

Have more coming on that, but what I'd intended to do on the front was fab a mount that would use the bolts from the bumps that attach trough top of coil tower, to mount the front, in a similar orientation to this.


image-4107010255.jpg


Which will still work.

The rears, however, are a different story.

I made greater miscalculations on those and have temped up resi mounts on the lower frame rail and the cross member. I have no option to locate then on the outside face of the frame rail, since a sway bar arm will be traveling there, so had to keep underneath.

I have a thread planned on what my next step is and how, once again, Glenn's customer service sets the bar for all others, but had an epiphany on using the rear sway bar frame attachment points for a fabbed bracket that I'm going to earnestly attempt before swapping to longer hoses.

More coming on all, with detailed lengths and specs in coming days.

image-4107010255.jpg
 

Users who are viewing this thread

Back
Top Bottom