Navigation
Install the app
How to install the app on iOS
Follow along with the video below to see how to install our site as a web app on your home screen.
Note: This feature may not be available in some browsers.
More options
Style variation
You are using an out of date browser. It may not display this or other websites correctly.
You should upgrade or use an alternative browser.
You should upgrade or use an alternative browser.
1978 LPB Teardown and Rebuild
- Thread starter Awl_TEQ
- Start date
This site may earn a commission from merchant affiliate
links, including eBay, Amazon, Skimlinks, and others.
More options
Who Replied?i was half kidding... but i want to see what kind of protection (the fancy round tube stuff) you put into it, and how you mount the rear lights. 
Well i can fix that. 
Awl_TEQ
Supporting Vendor
- Thread starter
- #66
A shot of my safety chain gusset template - copied off of another hitch.

Had to grind of the mess left by the PO on the bottom of the frame rails - He had some 1/2" flat bar welded on for his bumper. Note: grinding upside-down = not fun. Face shield or asbestos face required.

1/2" flat bar plug welded inside the tube to be drilled and tapped - grinding the plug weld flush


Had to grind of the mess left by the PO on the bottom of the frame rails - He had some 1/2" flat bar welded on for his bumper. Note: grinding upside-down = not fun. Face shield or asbestos face required.

1/2" flat bar plug welded inside the tube to be drilled and tapped - grinding the plug weld flush

that looks great. i would hate to rear end that. 
Nice work! And HEAVY DUTY too.
Awl_TEQ
Supporting Vendor
- Thread starter
- #73
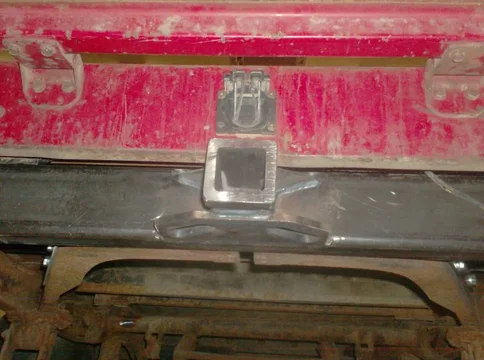
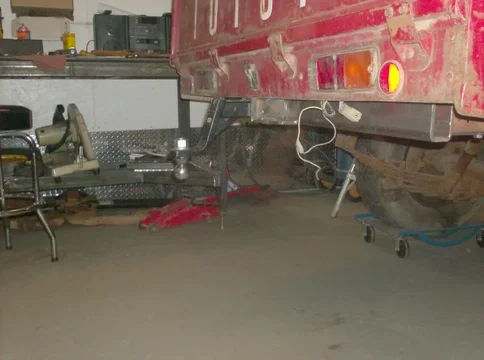
I set the bed back on the frame to see how it looked - the rear valence is touching the hitch sleeve but there are no rubber mounts in place at the moment. New mounts will lift the bed a half inch. I like how the hitch doesn't stick out much and is up quite high. I intend to make a matching trailer at some point and have the frame of the trailer at the same height.


That looks great. This has got to be one of the best builds right now. Keep up the good work.
Awl_TEQ
Supporting Vendor
- Thread starter
- #75
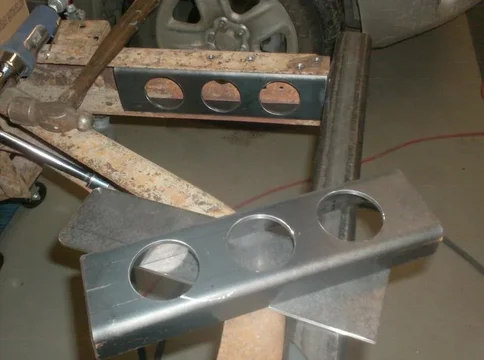
I need to make a bracket to accept the rearmost bed mount that used to hit the rear crossmember. I'll measure and then fab up something at work.

This view of the tube will be obscured by the rear bumper/ slider tube that will follow the bottom edge of the bed side.

Now I need to buy some round tube and borrow the tube bender again.


This view of the tube will be obscured by the rear bumper/ slider tube that will follow the bottom edge of the bed side.

Now I need to buy some round tube and borrow the tube bender again.

Love the bumper build so far. Are you going to fab a swing arm for a spare tire or continue to hang the tire in the factory location?
I'd like to get a rear bumper/tire carrier combo built with sliders, but I don't have the skills and haven't been able to figure out how to fab something that would accommodate the rear valance for mounting the tailgate hinges.
Other things on my long list includes an aux tank and a roll bar, bucket seats, center console...etc.
Keep up the good work.
merbesfield
SILVER Star
Nice bumper. Now move on to the rest of truck so I can get some motivation. 
Awl_TEQ
Supporting Vendor
- Thread starter
- #80
Got a little done last night and this afternoon.
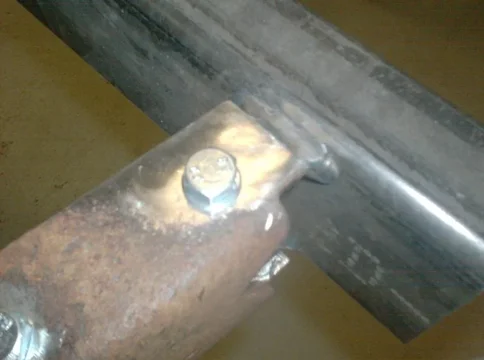
I need somewhere to bolt up my rear slider/ bumper so I got some 1/2" x 3" flat bar and welded four pieces inside the rear of the frame. They will serve to increase the thickness and get more threads when I drill and tap. I want all my armor to be removable for repairs or alterations so it will all bolt on.


Magnets hold the flat bar so it can be plug welded in place


I need somewhere to bolt up my rear slider/ bumper so I got some 1/2" x 3" flat bar and welded four pieces inside the rear of the frame. They will serve to increase the thickness and get more threads when I drill and tap. I want all my armor to be removable for repairs or alterations so it will all bolt on.


Magnets hold the flat bar so it can be plug welded in place

Similar threads
Users who are viewing this thread
Total: 1 (members: 0, guests: 1)


