
Sucks that you have to order more. You sharing is huge. Hope you can move the wrong set to someone that can use them.
Navigation
Install the app
How to install the app on iOS
Follow along with the video below to see how to install our site as a web app on your home screen.
Note: This feature may not be available in some browsers.
More options
You are using an out of date browser. It may not display this or other websites correctly.
You should upgrade or use an alternative browser.
You should upgrade or use an alternative browser.
Builds 1988 BJ74 “Number 1” (7 Viewers)
- Thread starter FJBen
- Start date
This site may earn a commission from merchant affiliate
links, including eBay, Amazon, Skimlinks, and others.
More options
Who Replied?Dropped off the valve seals from the Engine Australia kit. They are different from the seals that were put on from the previous shop's rebuild. My guess is that they sourced/used whatever they had available. They might have worked, I don't know, but we decided since I already had them in the kit, to put the seals that came in the kit on.
He was measuring the crank to big end bearing specs.

He also spent some time double checking the clearance on the spec and felt it was too tight. The specs he found in a book, (which he literally has books from the 20's) show that wrist pin clearance as 1 - 3 thousandths. He went back and changed it to 2 thousandths and said he liked that better. Felt 1 thousandths was a little tight. Good with me.
@Cowboy45 @ceylonfj40nut tagged you, the last couple of posts here could be valuable in your rebuild. This one I thought was very interesting given your big measuring post earlier.
Also in interesting news that I wouldn't have thought "that" much about. You can see on the above table he has the parts all sitting together. Pretty standard for most of us. He does that to make sure the temperatures are very close. It's a bigger deal in the winter where you might have some parts on a counter, some on the floor, some in a box, etc...and when measuring these close specs they can be off.
He was just dressing up the bushing on the con-rod and could feel the temp difference. He stated temperatures could affect measurements up to a 1/4 of a thousandth so he likes the make sure all the parts are as close in temperature as possible when measuring critical clearances out.
I don't know if or how much of a difference this would make, but it sure makes me feel better about his attention to detail. The term I've come to hear it called is temperature induced drift. It makes sense as we heat/cool things to get them to fit. I guess add this to a list of things I never would have thought of doing this myself.


Agree on getting things to temp before measurement. We did that as well.
FJBen
SILVER Star
- Thread starter
- #123
More cleanup work. Years of grime and grease on here. The clutch still seems to decent resistance so it's probably not 100% shot. I will need to test further on the vehicle to make sure.
Topped it off by a weekend ride at the lake with my other fun rig, the fat bike.


Topped it off by a weekend ride at the lake with my other fun rig, the fat bike.

FJBen
SILVER Star
- Thread starter
- #124
And as assumed, the Injection Pump is going to need a full rebuild. They are making sure they have all the parts needed but that is unfortunate.
One of the joys/dangers/pitfalls/Opportunity for improvement(insert buzz word) with old cruisers and especially old diesels is maintenance on items that haven't been looked at in a while. The injector pump being that big expensive one.
Unfortunately on this cruiser, it sat the better part of 4 years waiting to get rebuilt with fuel in it. Judging by what they told me about the injectors, I'm not surprised by the IP pump being all stuck and varnished up. I'm not sure it had ever been rebuilt, but basically there was no way it was going to run without getting this and the injectors fixed.
The shop was questioning if BioDiesel was used, to which I don't know the answer of that. Regardless...it needs a full rebuild.
I did get in contact with Engine Australia about the cam bearings. $37.10AUD for the right set. Not a big price issue at all, just another week or so to get it worked on again.

FJBen
SILVER Star
- Thread starter
- #126
Great weather weekend to get to work on the 74 for some more.
After hearing about my injectors and injector pump being gummed up with nasty fuel, I decided to drop the fuel tank and see what surprises I have there. It did not disappoint.
1st off, mine has an aftermarket tow hitch which made it really tight to get the tank out. I may have to take that off to put it back on.
2nd, it seems every single hose clamp was spun the wrong way and terrible to access.
3rd, dropping that fuel smelled like turpentine or something, not good at all.
The original "Land Cruiser" isn't really impressed with my Land Cruiser.
I also found the requisite "ammo" under the carpet along with a nasty shirt. I did get some Aussie coins as well.
The tank came down fairly quick, minus fussing with getting it around the tow hitch and fiddly lines. I also pulled the whole fuel line system to clean those out and replace any rubber hose. Any good sources on fuel line? Gates?
That looks and feels like molasses. I haven't seen diesel do that but no wonder the IP and injectors needed rebuilt. I had a diesel land cruiser before that sat for 15 years, and still started and right good on the original diesel!
The sender is rusted and no good. I will have to order a new one. This is BY FAR the worst rust on the whole vehicle.
The bottom of the inside of the tank looks gooey. Going to see if the radiator shop can boil this out before I go the self clean route.
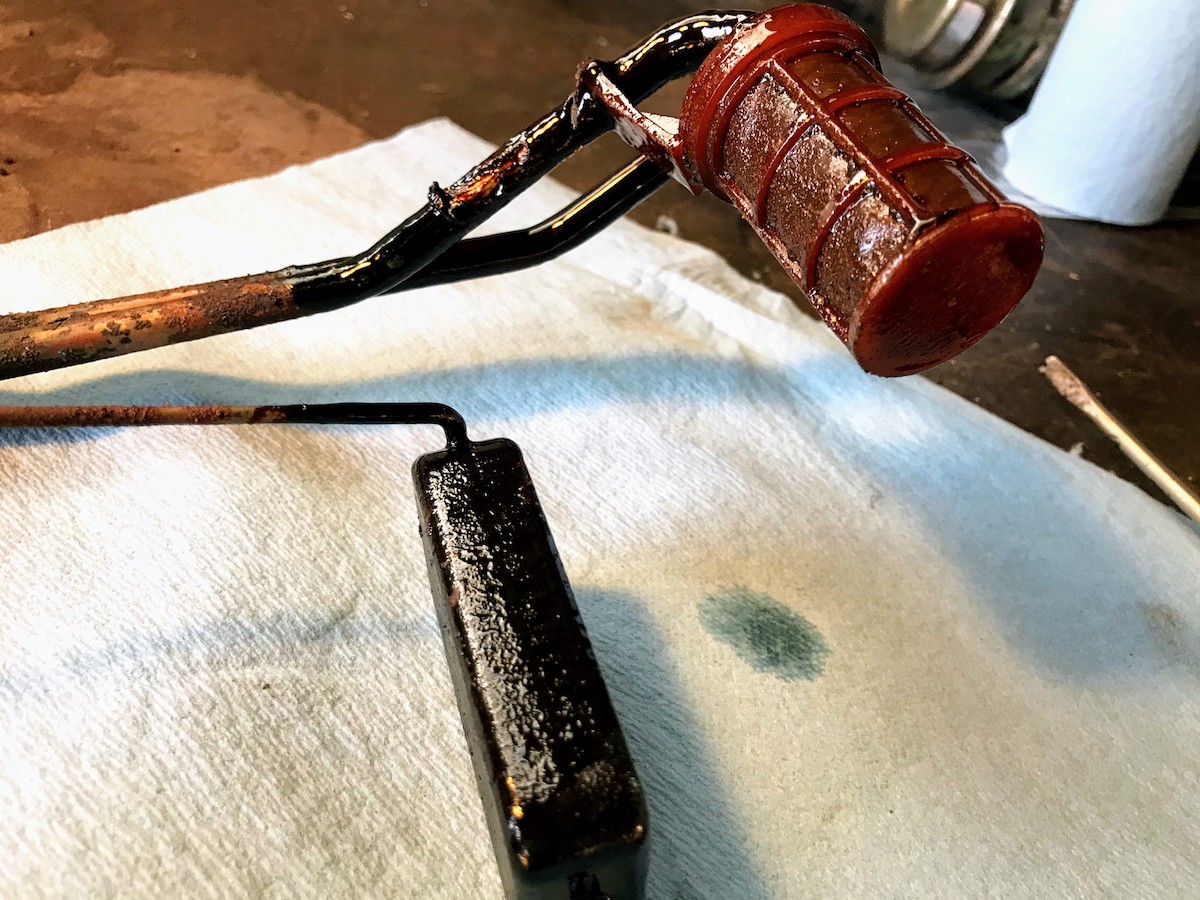
After some cleaning I got the lines looking good. Still need to soak the insides in carb cleaner to get that goo out of the bottom 2" of line.
After hearing about my injectors and injector pump being gummed up with nasty fuel, I decided to drop the fuel tank and see what surprises I have there. It did not disappoint.
1st off, mine has an aftermarket tow hitch which made it really tight to get the tank out. I may have to take that off to put it back on.
2nd, it seems every single hose clamp was spun the wrong way and terrible to access.
3rd, dropping that fuel smelled like turpentine or something, not good at all.
The original "Land Cruiser" isn't really impressed with my Land Cruiser.

I also found the requisite "ammo" under the carpet along with a nasty shirt. I did get some Aussie coins as well.

The tank came down fairly quick, minus fussing with getting it around the tow hitch and fiddly lines. I also pulled the whole fuel line system to clean those out and replace any rubber hose. Any good sources on fuel line? Gates?

That looks and feels like molasses. I haven't seen diesel do that but no wonder the IP and injectors needed rebuilt. I had a diesel land cruiser before that sat for 15 years, and still started and right good on the original diesel!
The sender is rusted and no good. I will have to order a new one. This is BY FAR the worst rust on the whole vehicle.

The bottom of the inside of the tank looks gooey. Going to see if the radiator shop can boil this out before I go the self clean route.

After some cleaning I got the lines looking good. Still need to soak the insides in carb cleaner to get that goo out of the bottom 2" of line.

FJBen
SILVER Star
- Thread starter
- #127
I also did the "first mod to 80 series" mod and removed the mudflaps. I had to remove the one side to get to the fuel filler hose, so I decided why not.
It looks like someone "fab'd" up some anti-inversion shackle stuff. Now would probably be the right time with the tank out, to replace the rear shackles with greasable ones. Any preference on shackles? Don't really want to break the bank here, plenty of other things to do that with...
And a glamour shot to keep me focused. My oldest asked is it done yet? Yeah, still waiting.

It looks like someone "fab'd" up some anti-inversion shackle stuff. Now would probably be the right time with the tank out, to replace the rear shackles with greasable ones. Any preference on shackles? Don't really want to break the bank here, plenty of other things to do that with...

And a glamour shot to keep me focused. My oldest asked is it done yet? Yeah, still waiting.

FYI - Some say keeping the mudflaps helps prevent rust in the quarters. May or may not. I leave mine on generally and remove them when I wheel.
Good luck with bringing it back to life! Looks like you are doing everything the right way and making good progress!
Peter
Good luck with bringing it back to life! Looks like you are doing everything the right way and making good progress!
Peter
FYI - Some say keeping the mudflaps helps prevent rust in the quarters. May or may not. I leave mine on generally and remove them when I wheel.
Good luck with bringing it back to life! Looks like you are doing everything the right way and making good progress!
Peter
Hello,
x2.
The mudflaps keep mud and other nasty (read: rust-inducing) stuff from reaching the frame and body.
Something to consider: back in the day, the mudflaps had LAND CRUISER in white. You may want to paint the lettering on yours.
Keep up the good work.
Juan
FJBen
SILVER Star
- Thread starter
- #130
FYI - Some say keeping the mudflaps helps prevent rust in the quarters. May or may not. I leave mine on generally and remove them when I wheel.
Good luck with bringing it back to life! Looks like you are doing everything the right way and making good progress!
Peter
thanks! Progress feels slow.
Yeah I was wondering how much they would protect. Pretty dry where I'm at, but rust still never sleeps.
Hello,
x2.
The mudflaps keep mud and other nasty (read: rust-inducing) stuff from reaching the frame and body.
Something to consider: back in the day, the mudflaps had LAND CRUISER in white. You may want to paint the lettering on yours.
Keep up the good work.
Juan
You guys are almost convincing me to put them back on. They are in pretty good shape. I thought the fronts weren't OEM, but maybe they are. I don't have a picture of the fronts but they look this.
the rears look alright. I'm not sure if the are completely OEM or a combination of OEM and aftermarket.


The fronts look like this with the cutouts. Not sure if they are OEM or not. This seems to be the only reference I have found to them.

The flares are aftermarket.
These are factory for the LX. Base models got the flat ones with the notched bottom.

I do not recall OEM flares appearing before the HZJ73 in 1990. The flaps for those integrate with the flare in the same manner as an 80 Series.
I borrowed this from Land Cruisers Direct. Thanks Steve.

FJBen
SILVER Star
- Thread starter
- #135
The flares are aftermarket.
Thats what I was kind of wondering. It didn't seem like a real elegant solution on the rear for sure and I couldn't find anything similar.
I know my flares are aftermarket, not sure the brand. My windshield frame is FRP so it's possible the flares are as well.
Very likely. They do make them. I have considered them but I resist drilling into my fenders and quarter panels. I really like the OEM flares but the cost is astronomical and figuring out how to get all the brackets in the right places makes my head hurt. I'd almost rather buy an HZJ73 to get them. 
FJBen
SILVER Star
- Thread starter
- #137
Cam bearings round 2.
So they showed up and I brought them to the machine shop. We opened them and he measured. They still don't fit.
#1 and #5 look like they are correct, they measure very close. 2,3, and 4 will not work. The oil holes don't appear to line up with the ones that were pulled out of the block.
So I looked and have found the OEM part, which I know I looked for before and it wasn't there so thats a little frustrating. The OEM shows this Taiho part I got as a substitution, and the markings on the bearings look like they are they same.
Does Taiho make OEM bearings? Did I get a bad set of bearings? Would you guys roll the dice and order the "OEM" set and hope it works? My next step is he said he could make brass cam bearings, but it won't be cheap so try and find some if you can.
Here are the specs I have from the machine shop measured with dial bore scope and micrometer. We also measured the "new" cam bearings with the ones that came out, and only 1 and 5 match up.

Last edited:
FJBen
SILVER Star
- Thread starter
- #138
More research.
It appears I may have found the right sized bearings. According to my measured sizes above, I was able to locate these. My 74 is a 10/88 mfg.
Cam Bearing Set Toyota B 3B 11B 13B 13BT 14B 14BT 1988/08-On
Part No: SH1428 STDJT
Cam bearing set Toyota B 3B 11B 13B 13BT 14B 14BT 1988/08-on housing bore ID 57.500mm 57.250mm 57.000mm 57.000mm 57.250mm C048L
57.500mm = 2.264"
57.250mm= 2.254"
57.000mm= 2.244"
I also found this picture online:
So it seems like these are the exact bearings I need...maybe. They don't state the ID on the bearings, and they also show that they fit a 14B/14BT, or 15 or .... I was under the impression that the 14B/14BT cam was different and wouldn't work in a 13B???
Now the other issue is, I can find that part number on partsouq, and they show it on the box for only 3B/14B.
1180256030 Is the OEM part number, and substitution is CO48L
The stamping on the OEM box is identical. Pretty sure Taiho makes toyota bearings.
I have the following bearings, and they don't fit.
Taiho:
BCTO700A STD = C040L cam Toyota 11B, 13B 13BT no measurements stated
BCTO700B STD = C028L cam Toyota 3B, 11B, 13B, 13BT 57.5-56mm
I'm going to try and get ahold of Taiho to figure out the measurements the bearings and go from there because there are some packaging issues or reasons for the same part number to only be printed on certain boxes.
It appears I may have found the right sized bearings. According to my measured sizes above, I was able to locate these. My 74 is a 10/88 mfg.
Cam Bearing Set Toyota B 3B 11B 13B 13BT 14B 14BT 1988/08-On
Part No: SH1428 STDJT
Cam bearing set Toyota B 3B 11B 13B 13BT 14B 14BT 1988/08-on housing bore ID 57.500mm 57.250mm 57.000mm 57.000mm 57.250mm C048L
57.500mm = 2.264"
57.250mm= 2.254"
57.000mm= 2.244"
I also found this picture online:

So it seems like these are the exact bearings I need...maybe. They don't state the ID on the bearings, and they also show that they fit a 14B/14BT, or 15 or .... I was under the impression that the 14B/14BT cam was different and wouldn't work in a 13B???
Now the other issue is, I can find that part number on partsouq, and they show it on the box for only 3B/14B.
1180256030 Is the OEM part number, and substitution is CO48L

The stamping on the OEM box is identical. Pretty sure Taiho makes toyota bearings.
I have the following bearings, and they don't fit.
Taiho:
BCTO700A STD = C040L cam Toyota 11B, 13B 13BT no measurements stated
BCTO700B STD = C028L cam Toyota 3B, 11B, 13B, 13BT 57.5-56mm
I'm going to try and get ahold of Taiho to figure out the measurements the bearings and go from there because there are some packaging issues or reasons for the same part number to only be printed on certain boxes.
Last edited:
FJBen
SILVER Star
- Thread starter
- #139
More info on cam bearing mystery. I believe the change coincides with later that 8/88 build dates on ALL of those blocks.
Here is a BJ74 with the 13BT to 1986
Bearing Set, Camshaft
Models: 13BT,3B..BJ7#
Prod Date: 11/1984-06/1986
Quantity Required: 1
11802-56020
Land Cruiser 86-8/88
Bearing Set, Camshaft
Models: 13BT,3B..BJ7#
Prod Date: 06/1986-08/1988
Quantity Required: 1
11802-56021
Land Cruiser BJ74 8/88 -
Bearing Set, Camshaft
Models: 13BT..BJ71,74
Prod Date: 08/1988-
Quantity Required: 1
11802-56021
Looked up a Toyota Dyna with a 14B.
Bearing Set, Camshaft
Models: B,11B,13BT,14B#,3B..BU6#,7#,8#,9#
Prod Date: 08/1988-08/1990
Quantity Required: 1
11802-56030
This is a toyota Dyna with a 15Bf.
Bearing Set, Camshaft
Models: 15B#,3B..BU10#,112,12#,13#,14#,162,172,182,202,212,222,297
Prod Date: 05/1995-05/1999
Quantity Required: 1
11802-56030
Same part number. I beginning to think the Cam bearings may be the same on late 8/88 13BT's on up. Obviously the Cam's aren't and a ton of other parts. Not sure where the disconnect is
Now on a Dyna with a 15BFTE, we get a different cam bearing part number.
Models: 15BFTE,1BZ#..BU400,410,420,430,BZU410
Prod Date: 08/1999-06/2004
Replace: 11802-58010
Quantity Required: 1
11802-56031
-56020 and -56021 are the same part. The latter is a supersession of the former. They are interchangeable.
Similar threads
Users who are viewing this thread
Total: 8 (members: 0, guests: 8)