- Joined
- Jul 3, 2012
- Threads
- 8
- Messages
- 640
- Location
- Baton Rouge, LA
- Website
- www.southernstylespeed.com
Hello everyone!
At the request of the guy that inspired me to begin truly building up the GX, BonnerBB, I'd like to take the time to introduce myself and some of the work Southern Style Speed has been doing.
We had been focused mainly on the IS and GS vehicle lineup, but when my wife BEGGED me to get rid of her GMC Envoy that had been plaguing us with electrical gremlins and a very strange oil disappearing act, I jumped at the chance to get her into a GX470.
Even though I'm currently addicted to horsepower and speed, there was a time, back in college, that I owned a single cab Z71. I always had a blast rootin up the backwoods and my wife and I got stuck more than once out there, if you know what I mean. Anyway, since we already owned an IS350, we had come accustomed to Lexus quality. We needed another vehicle that could haul people and tow whatever we threw at it, besides a gooseneck. The GX470 just seemed like a natural fit.
Because we had already started the business for the performance aspect of the IS and GS, we figured we could also fill some gaps in the GX aftermarket lineup too.
The goal for the truck was a semi-expedition rig. My wife wasnt completely crazy about the idea, but since she's a little "country" to begin with she said it was OK as long as it could go back to stock if she wished.
On to the pics!!
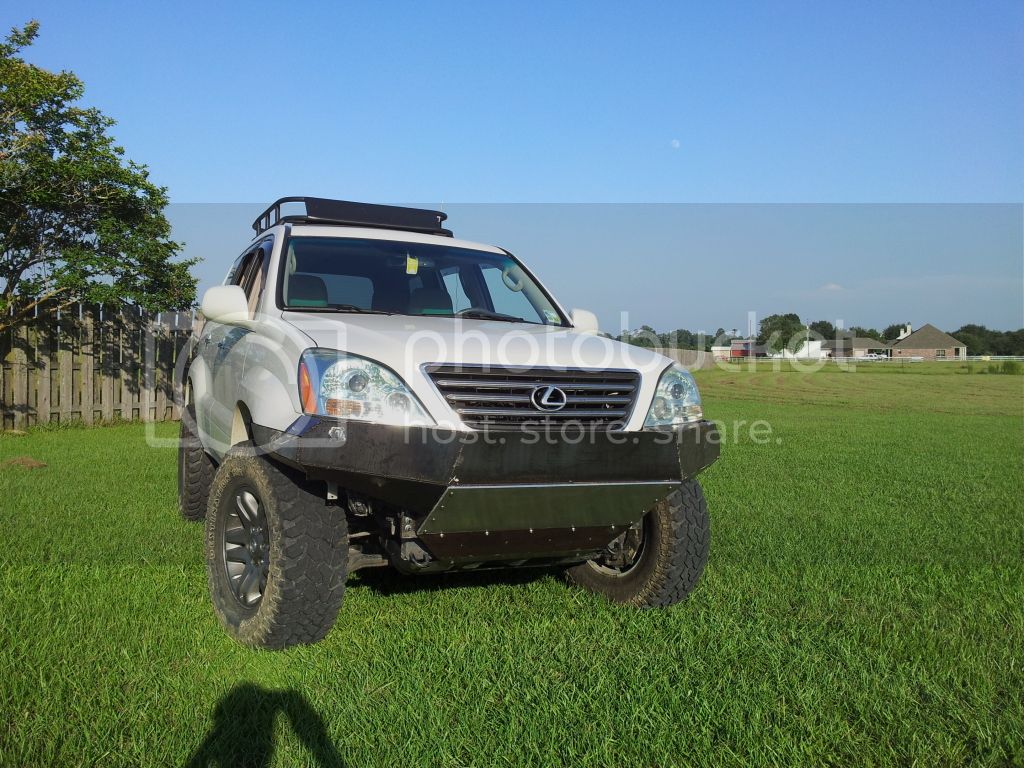
First thing she wanted was a new roof rack. After looking at all of the options that secured to the factory rails, she wasnt happy with any of them. She says, "Just build me something". Here's what I came up with. It's since been bed-linered. It's still just a first run prototype, and I'm not entirely happy with it, but she is.....so it stays.

here's a Preview of the 285's I got used for a smokin deal.

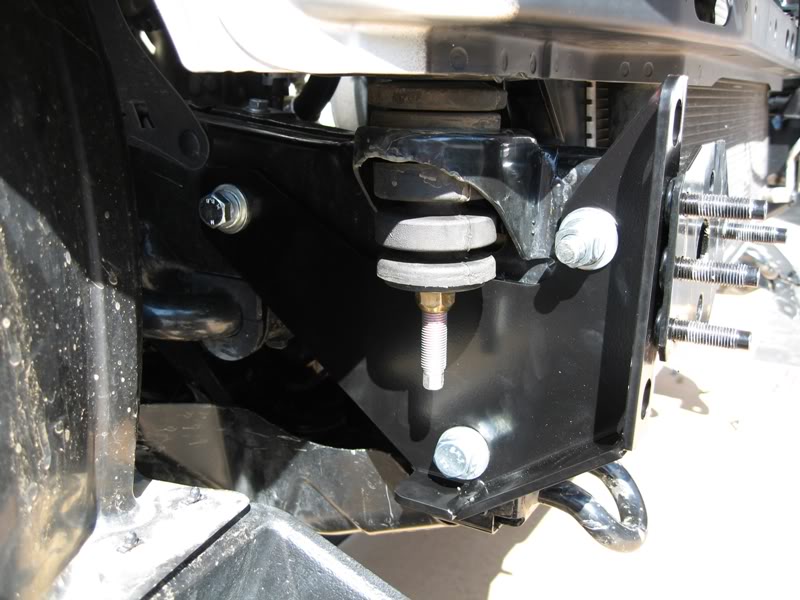
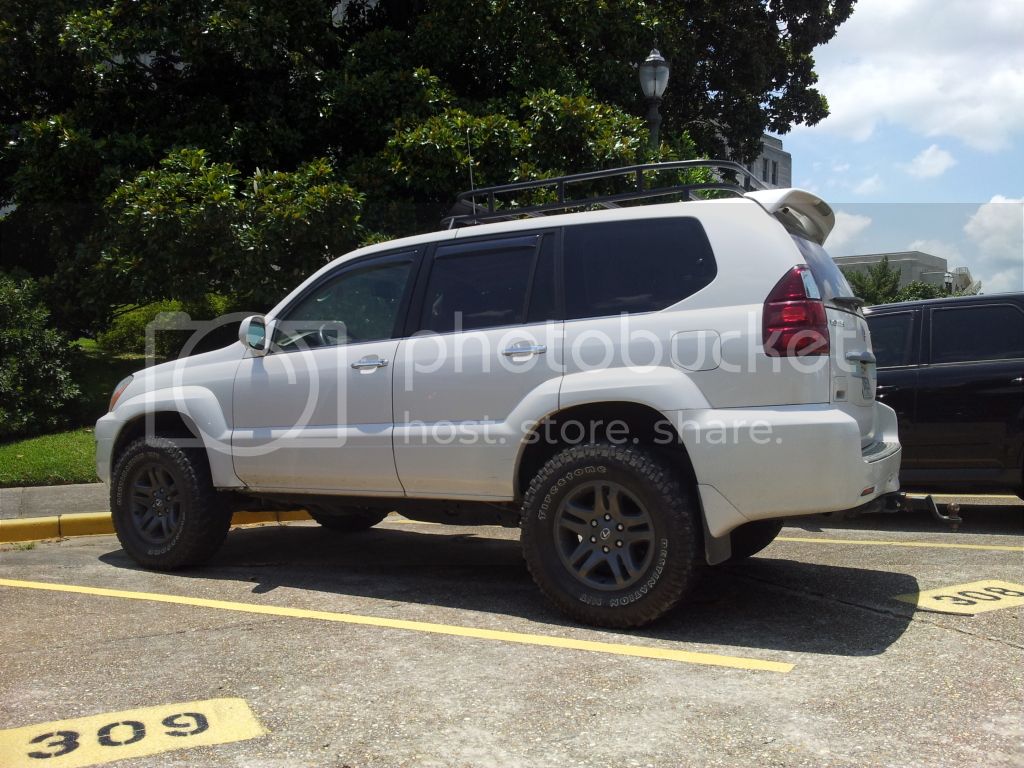
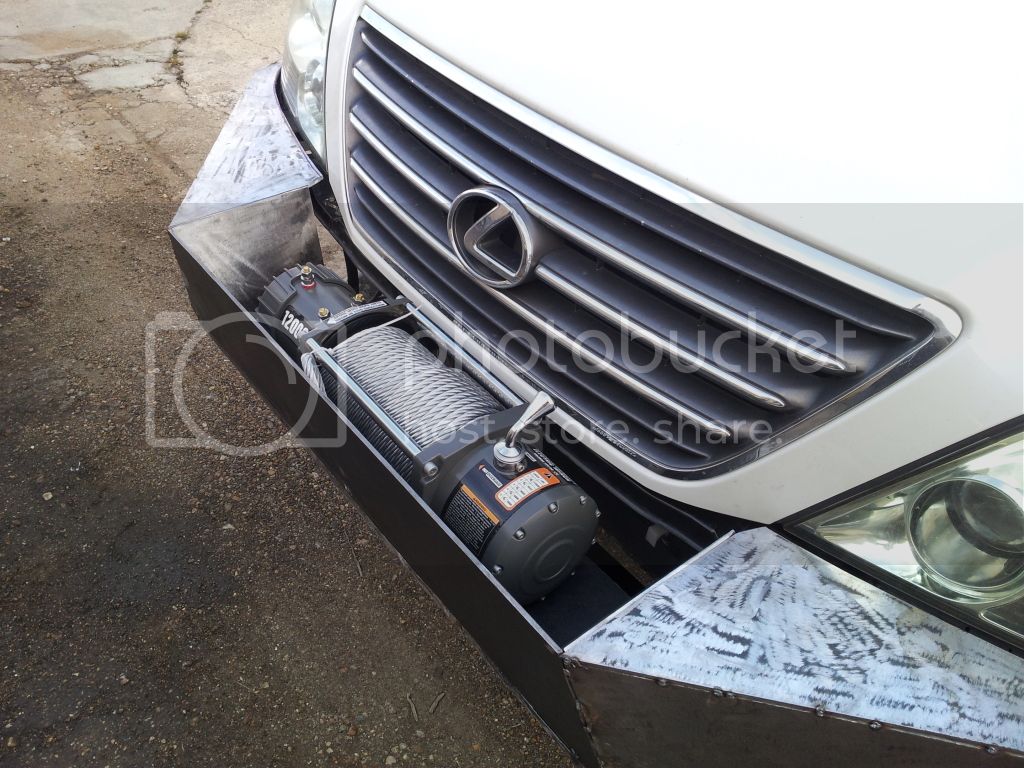
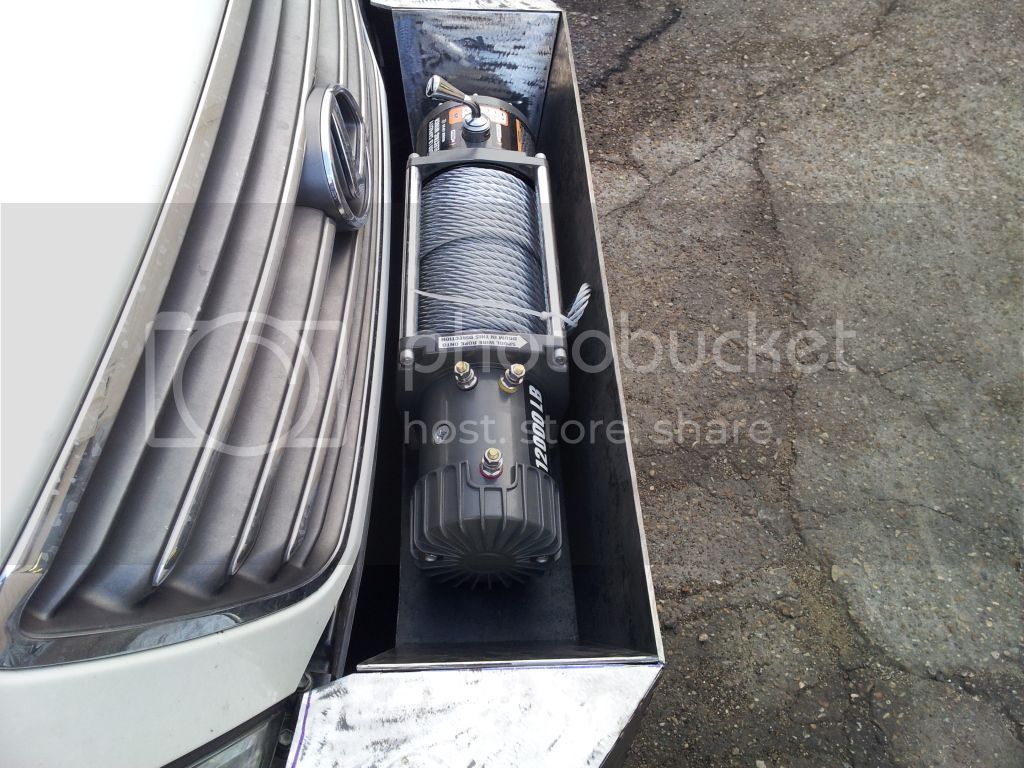
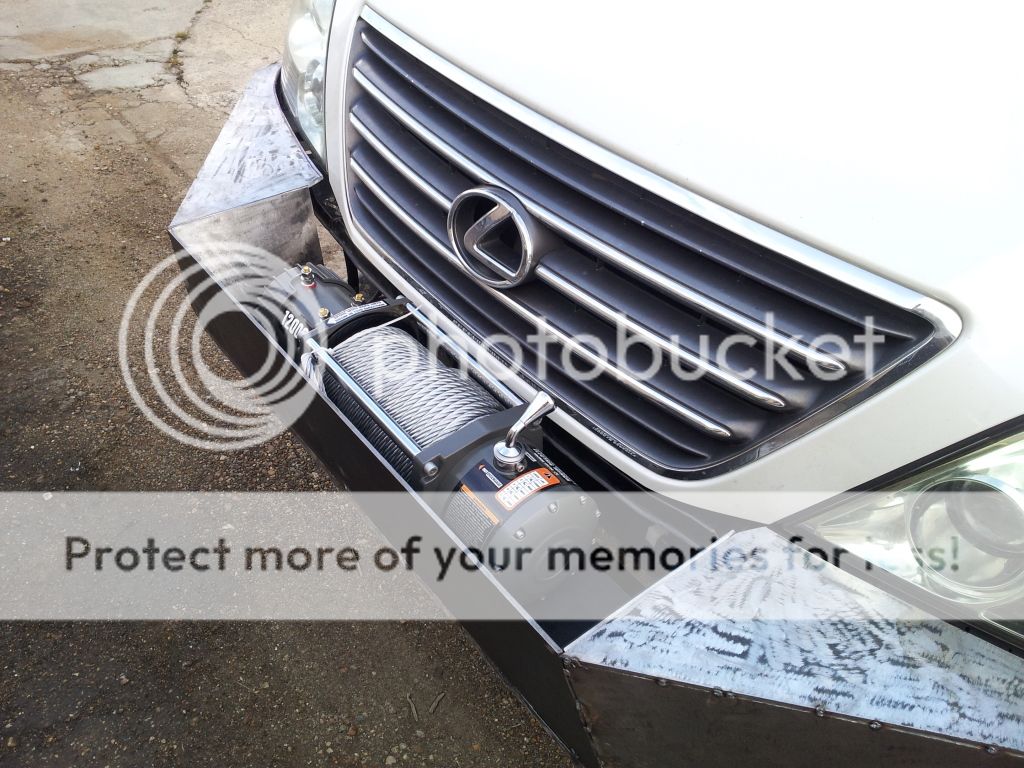
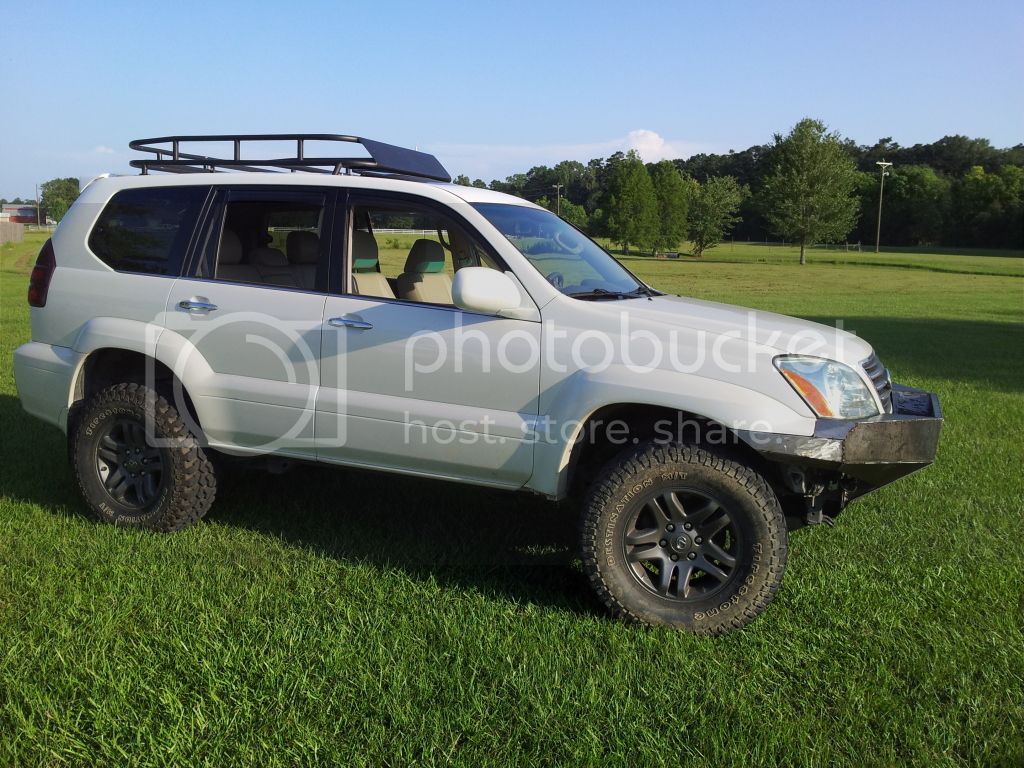
Here you can see that she decided on some OEM Tundra wheels painted a dark graphite. I also fabbed up some custom Lexus center caps. Because I knew that a full armor-plate bumper and 12,000 lb winch were in the future, we went ahead and upgraded the front coils to 650 lb Radflos and did the rear air bag trick. We are both pleasantly surprised with the ride quality and still low level of road noise. This is just a couple of days after the install and I hadnt finalized the front height. It was also necessary to remove the running boards so those 33's could fit.

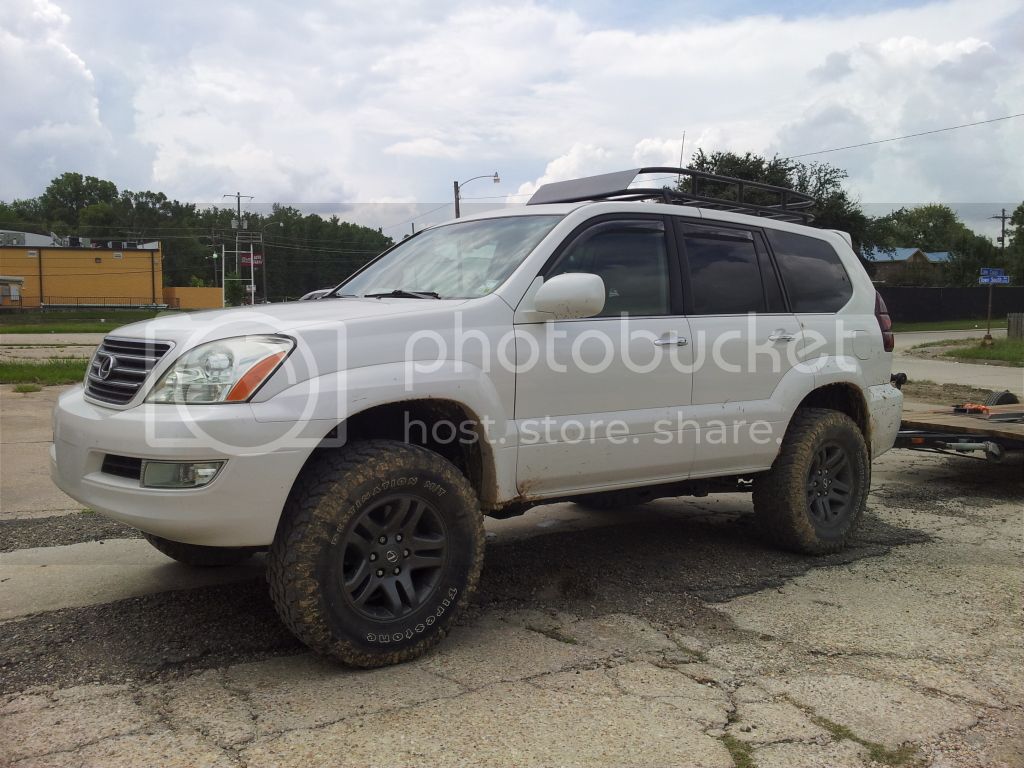
Here you can see the flat black roof rack, and a revised front ride height. This pic is right before we started the front bumper build. This was also the day after her first offroad adventure. We nearly got stuck because I forgot to disengage the traction control. Gotta remember that!
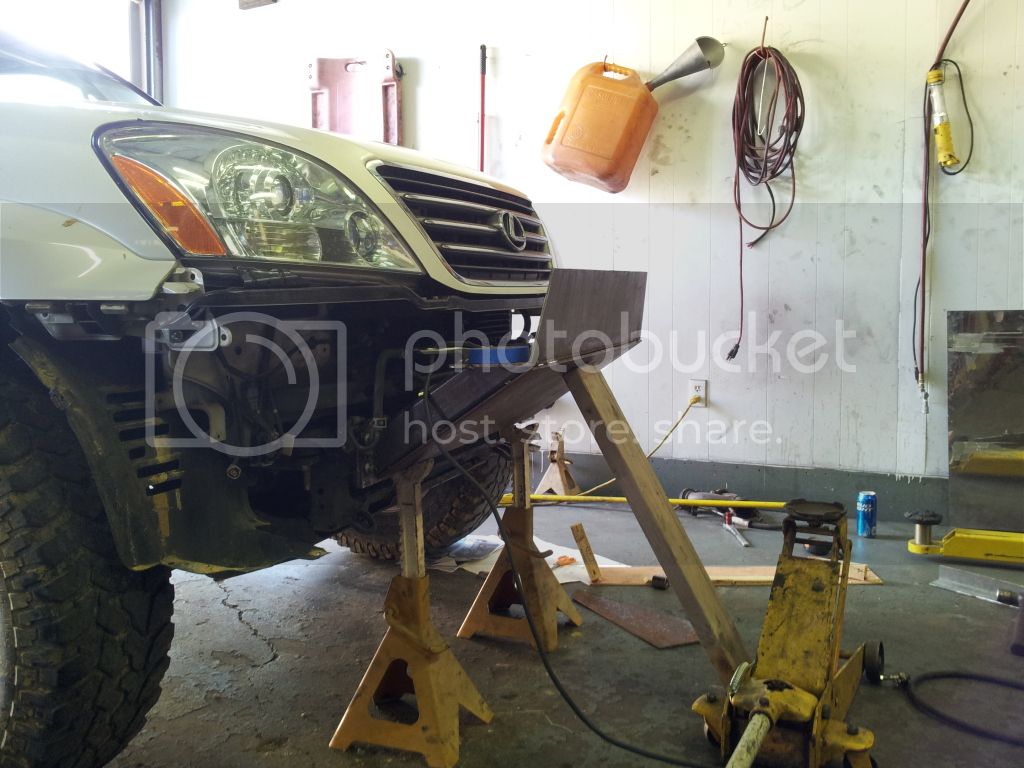
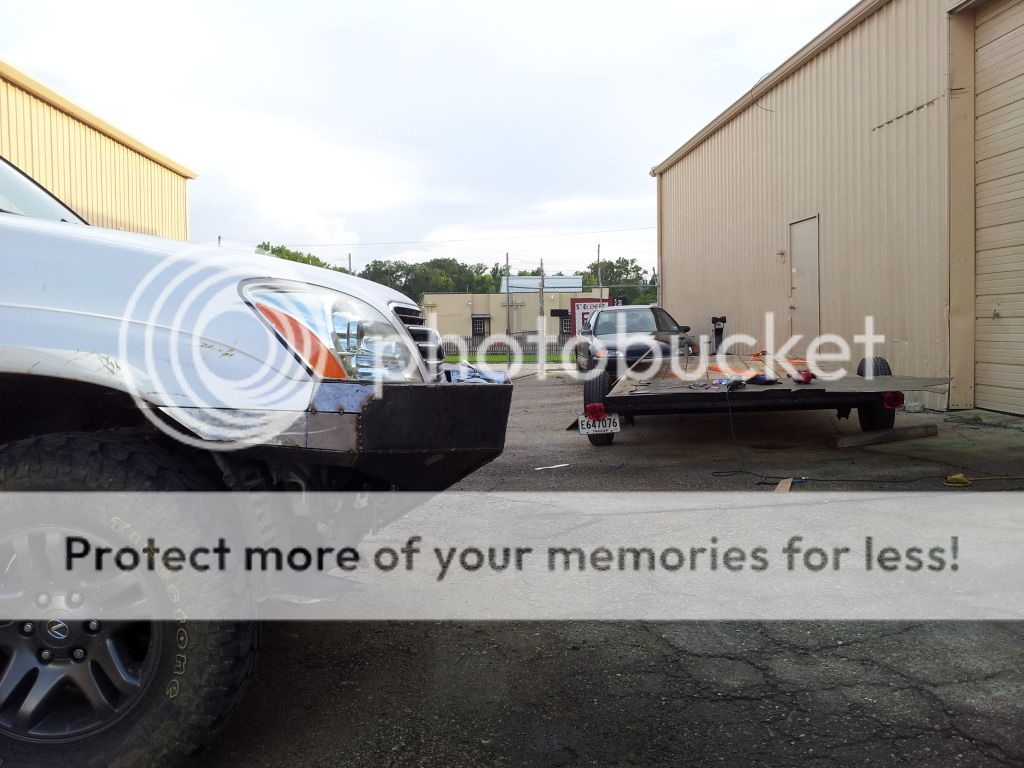
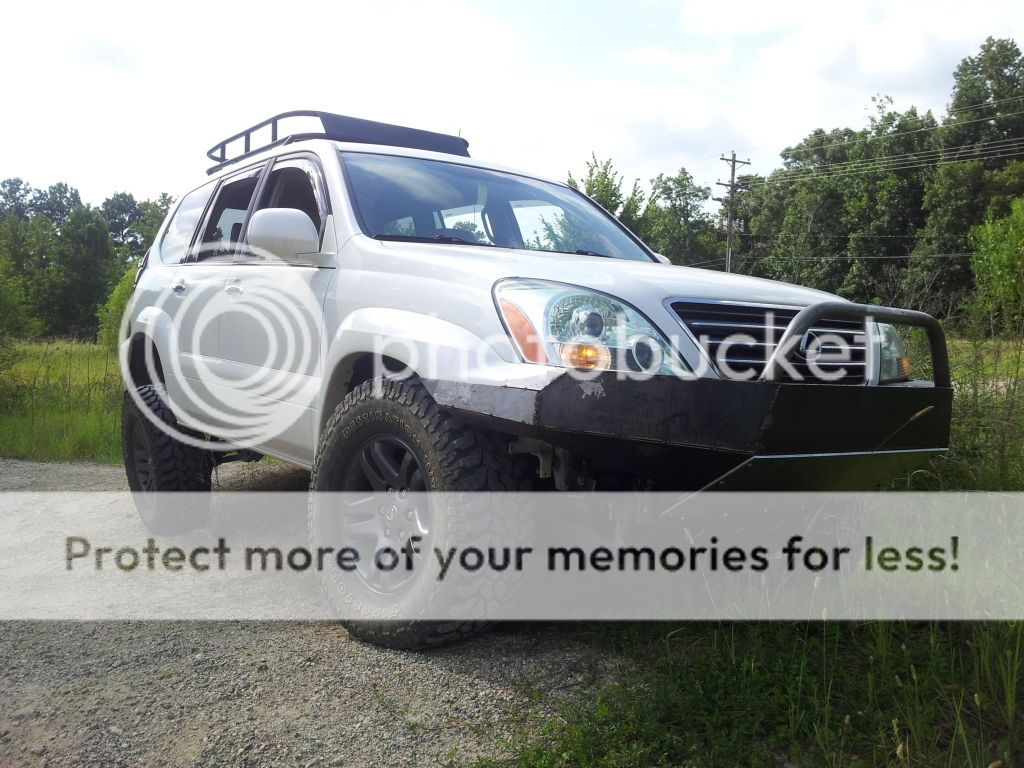
Here we are after day one of the bumper build. We actually got a little further than this but I forgot to take pictures. It really helped that I had built the bumper out of wood first. I got ribbed for weeks from my friends about the wooden bumper, but I knew it would be of great benefit to have template pieces ready to go.
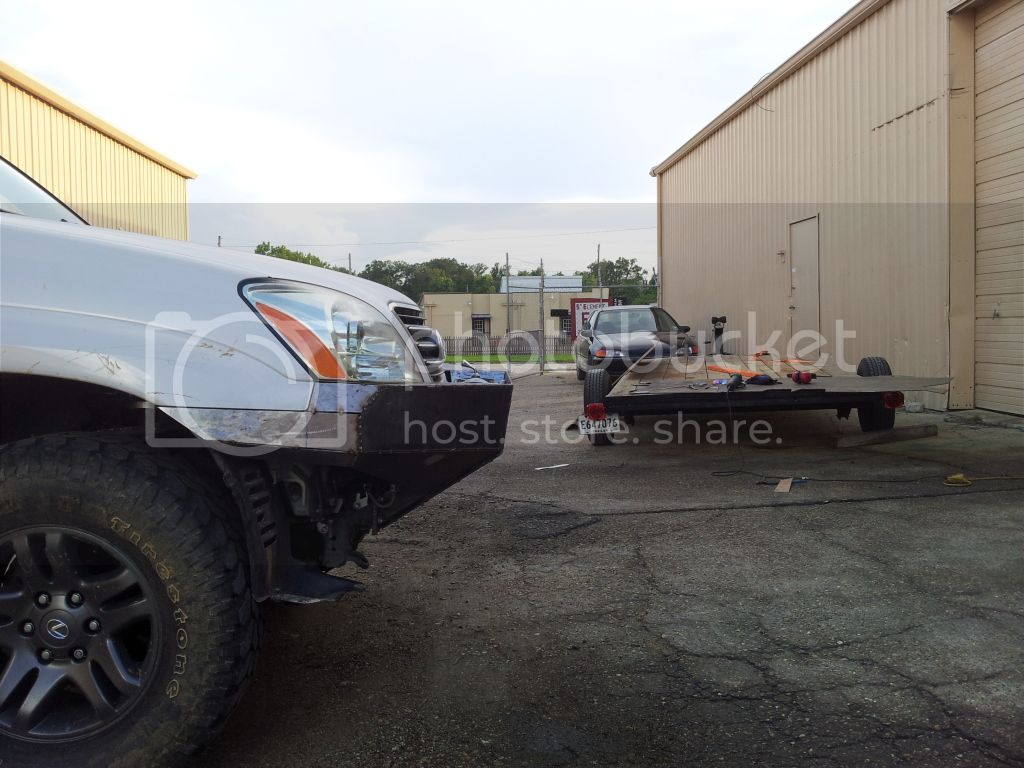
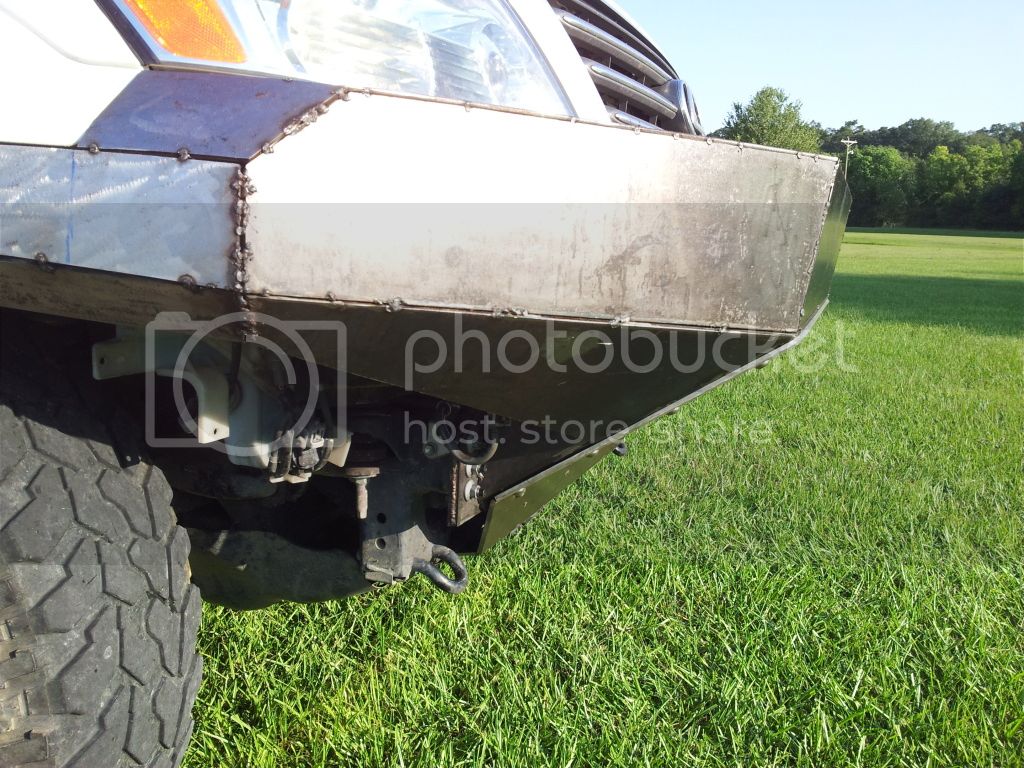
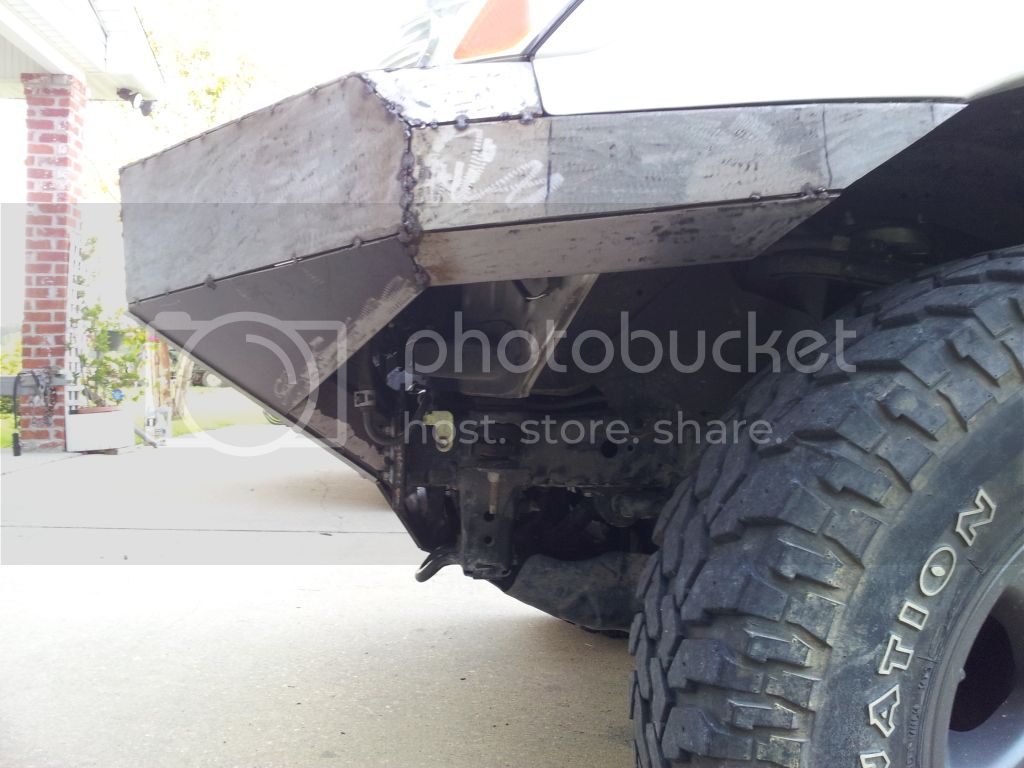
These remaining pics are of the completely tacked steel bumper as she currently sits. We just finished it up last night around 8 and theres still a lot more to do. I plan on adding a dom tubing hoop over the winch area as well as some shackle mounts. There will probably be additional tweaks and changes too, so please be forgiving.
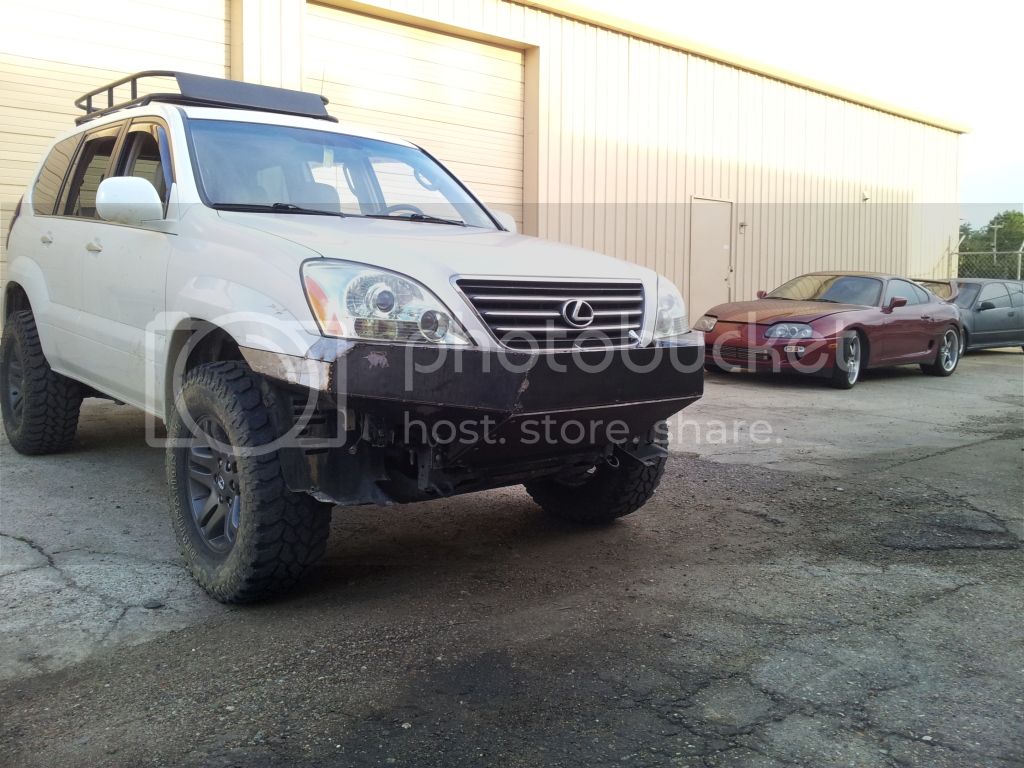
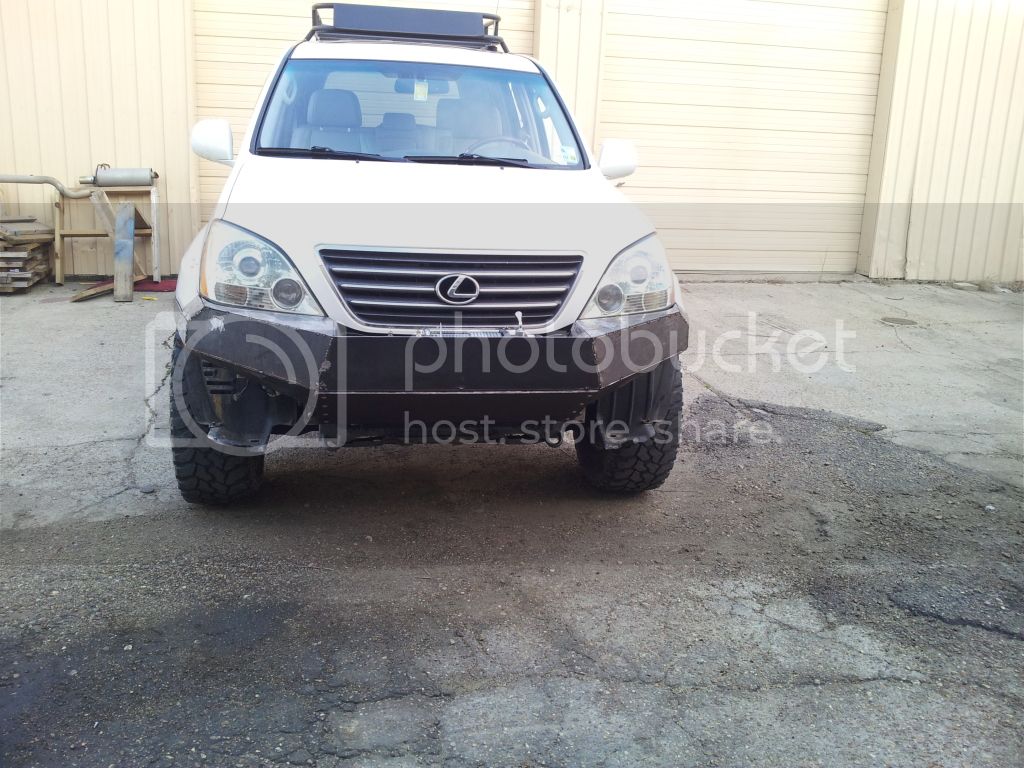
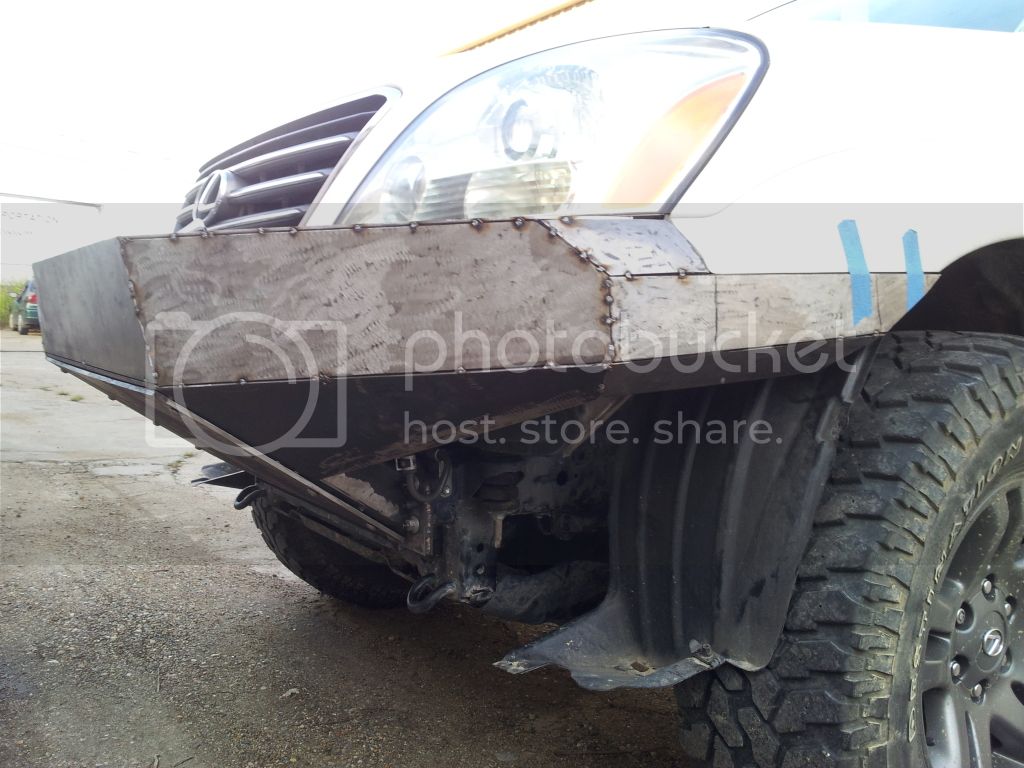
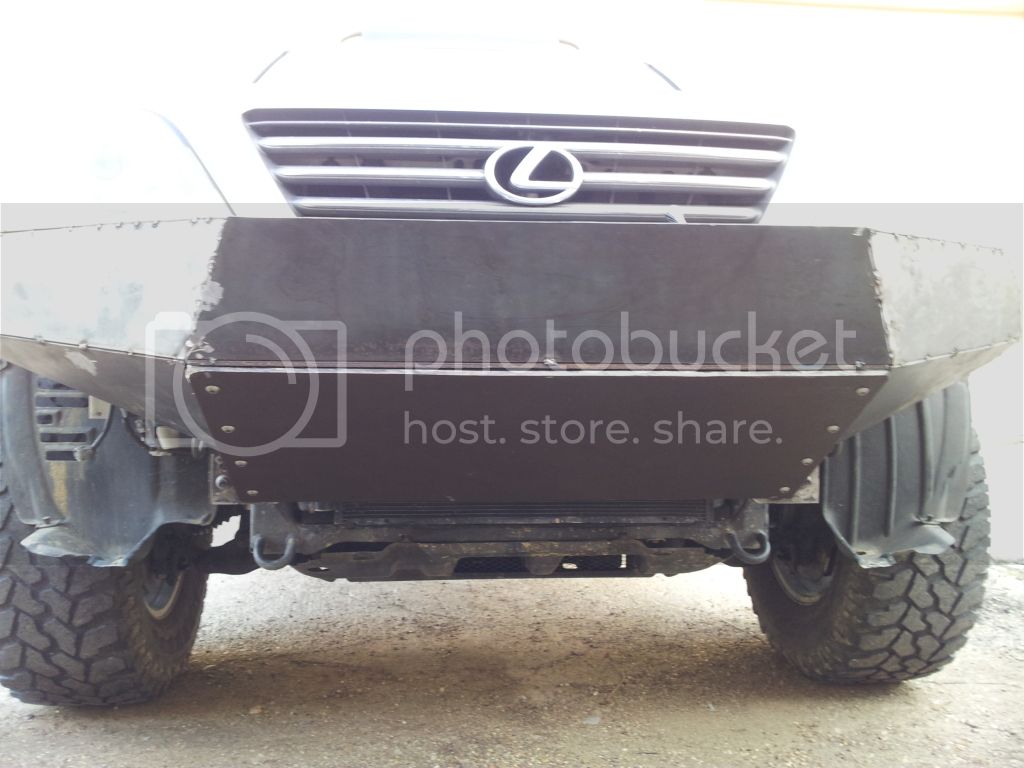
This bumper is completely bolt on with no other modifications other than trimming the fender liners. I can literally uninstall her OEM bumper, and have this new steel piece on and back to OEM in under 45 minutes. I think this will open up the market for those of us that wish to have a town and country look if you wish.
Still to be completed are the Trail gear rock sliders I've got sitting in my garage. I just havent found time to get them all welded together. We will probably end up doing something custom again for the GX as another product. Those 67" sliders will work but they obviously arent made for the GX.
Anyway, I hope you like the progress. I do plan on becoming a vendor on IH8mud.com, but havent done so yet, so lets keep business talk out of this thread for now. If you've got suggestions on how you think the bumper should look, I'm all ears. I think I'm going to try some sort of factory style hookup to the stock fog harness, I'm just not sure where and what style lights to use.
Lemme know what you think!!
At the request of the guy that inspired me to begin truly building up the GX, BonnerBB, I'd like to take the time to introduce myself and some of the work Southern Style Speed has been doing.
We had been focused mainly on the IS and GS vehicle lineup, but when my wife BEGGED me to get rid of her GMC Envoy that had been plaguing us with electrical gremlins and a very strange oil disappearing act, I jumped at the chance to get her into a GX470.
Even though I'm currently addicted to horsepower and speed, there was a time, back in college, that I owned a single cab Z71. I always had a blast rootin up the backwoods and my wife and I got stuck more than once out there, if you know what I mean. Anyway, since we already owned an IS350, we had come accustomed to Lexus quality. We needed another vehicle that could haul people and tow whatever we threw at it, besides a gooseneck. The GX470 just seemed like a natural fit.
Because we had already started the business for the performance aspect of the IS and GS, we figured we could also fill some gaps in the GX aftermarket lineup too.
The goal for the truck was a semi-expedition rig. My wife wasnt completely crazy about the idea, but since she's a little "country" to begin with she said it was OK as long as it could go back to stock if she wished.
On to the pics!!
First thing she wanted was a new roof rack. After looking at all of the options that secured to the factory rails, she wasnt happy with any of them. She says, "Just build me something". Here's what I came up with. It's since been bed-linered. It's still just a first run prototype, and I'm not entirely happy with it, but she is.....so it stays.

here's a Preview of the 285's I got used for a smokin deal.

Here you can see that she decided on some OEM Tundra wheels painted a dark graphite. I also fabbed up some custom Lexus center caps. Because I knew that a full armor-plate bumper and 12,000 lb winch were in the future, we went ahead and upgraded the front coils to 650 lb Radflos and did the rear air bag trick. We are both pleasantly surprised with the ride quality and still low level of road noise. This is just a couple of days after the install and I hadnt finalized the front height. It was also necessary to remove the running boards so those 33's could fit.


Here you can see the flat black roof rack, and a revised front ride height. This pic is right before we started the front bumper build. This was also the day after her first offroad adventure. We nearly got stuck because I forgot to disengage the traction control.
Gotta remember that!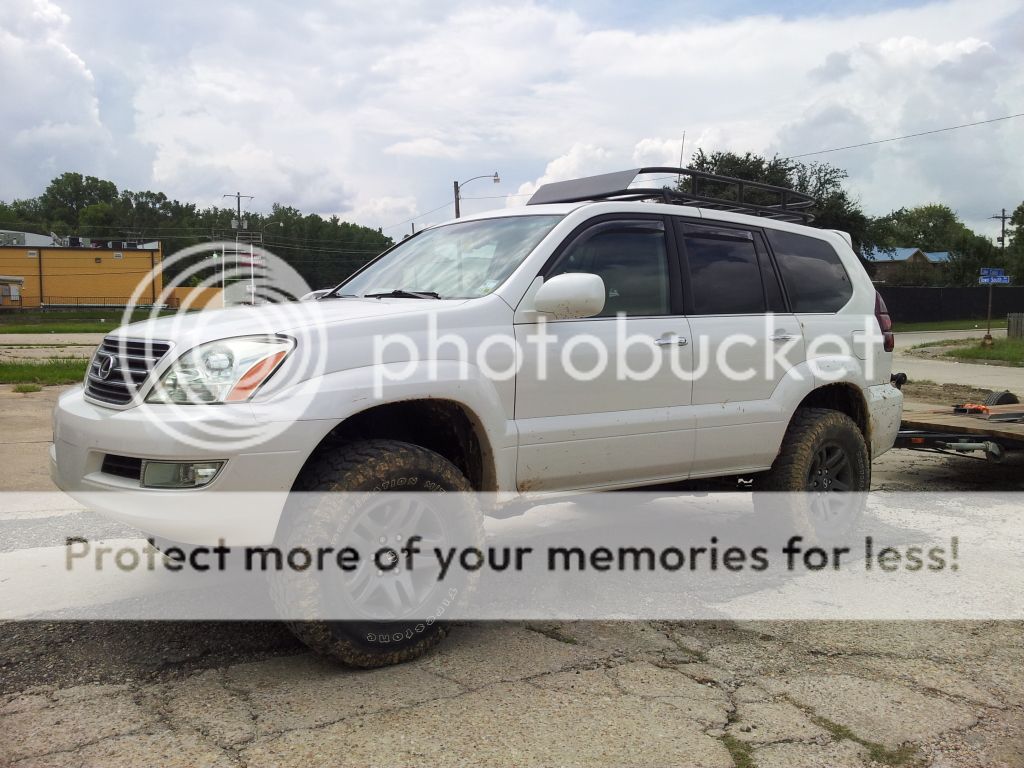
Here we are after day one of the bumper build. We actually got a little further than this but I forgot to take pictures. It really helped that I had built the bumper out of wood first. I got ribbed for weeks from my friends about the wooden bumper, but I knew it would be of great benefit to have template pieces ready to go.

These remaining pics are of the completely tacked steel bumper as she currently sits. We just finished it up last night around 8 and theres still a lot more to do. I plan on adding a dom tubing hoop over the winch area as well as some shackle mounts. There will probably be additional tweaks and changes too, so please be forgiving.


This bumper is completely bolt on with no other modifications other than trimming the fender liners. I can literally uninstall her OEM bumper, and have this new steel piece on and back to OEM in under 45 minutes. I think this will open up the market for those of us that wish to have a town and country look if you wish.
Still to be completed are the Trail gear rock sliders I've got sitting in my garage. I just havent found time to get them all welded together. We will probably end up doing something custom again for the GX as another product. Those 67" sliders will work but they obviously arent made for the GX.
Anyway, I hope you like the progress. I do plan on becoming a vendor on IH8mud.com, but havent done so yet, so lets keep business talk out of this thread for now. If you've got suggestions on how you think the bumper should look, I'm all ears. I think I'm going to try some sort of factory style hookup to the stock fog harness, I'm just not sure where and what style lights to use.
Lemme know what you think!!


 I think to accomodate, we're going to do an optical illusion of sorts. From the side, it will appear as though the body lines nearly meet, but from the overhead view it will be clear that the bumper will flex right past the OEM fender with mucho room to spare. That area is really ugly looking without anything covering it, and I just cant bare to have it fully exposed like some of the 4runner bumpers.