i love the idea for the shelf i think ill be doing that when i start my build . the trailer looks great keep up the good work
Navigation
Install the app
How to install the app on iOS
Follow along with the video below to see how to install our site as a web app on your home screen.
Note: This feature may not be available in some browsers.
More options
Style variation
You are using an out of date browser. It may not display this or other websites correctly.
You should upgrade or use an alternative browser.
You should upgrade or use an alternative browser.
Semi scratch built off road trailer project
- Thread starter macinsac
- Start date
This site may earn a commission from merchant affiliate
links, including eBay, Amazon, Skimlinks, and others.
More options
Who Replied?Box Rocket
SILVER Star
nice work on the shelves. Great idea! Fenders are looking great too.
- Thread starter
- #43
nice work on the shelves. Great idea! Fenders are looking great too.
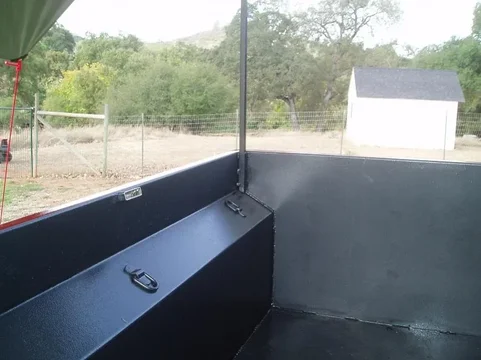
Thanks for the comments. My goal for the shelves was to make them sturdy, easy to store and easy to put up and take down. The “U” shaped aluminum around the edges really makes the ½” plywood stable. To hold the shelves in place, I drilled and glued two 5/16” dowels about a ½” long into the bottom of each shelve. These fit into the ends of the shelve brackets and keep them from sliding outward. The notches in the boards touching the tub, keep the shelves from moving side to side.
The fenders are now basically completed. I just need to do final prep work for painting and install the fender flares.
- Thread starter
- #44
The following pictures are the latest internal and external tie downs. I intend to use the internal ties for items that aren’t tall enough, for the out side tie downs to do any good. The external ties are mounted to the front “A” frame area. Not shown in the pictures is a triangle plate that will cover the frame. I am planning to use part of it to mount two propane tanks. I’m not sure what the rest of the space will be used for, but I knew if there were tie downs, I could find something useful to put there. I think when I reach camp; it will be a great place for the BBQ. In the future, I would like to build a tongue box in this same area, but that will be down the road after I take few trips.


very nice. and i like the shelf too !
Good idea on mounting locations on the sides. They're where they shouldn't interfere with things for the most part, while still be really helpful to keep things from shifting inside the bed.

- Thread starter
- #49
I went to DMV about a week ago with all my receipts and pictures to get it registered. It was a pretty simple process. When I was done, I had a VIN # and license plate. Only cost $20.00 for everything.
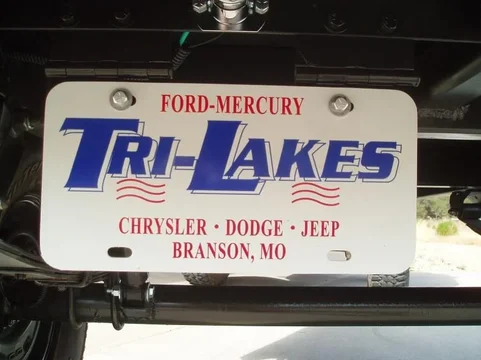
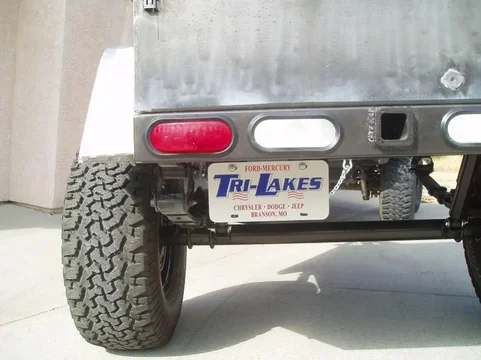
The following are pictures of how I mounted the license plate. I did not want it on the back, so I mounted it underneath on hinges. The first picture is from under and the next from behind the trailer.


The following are pictures of how I mounted the license plate. I did not want it on the back, so I mounted it underneath on hinges. The first picture is from under and the next from behind the trailer.


Last edited:
Updates?
Where are ya with this build?
Where are ya with this build?
- Thread starter
- #51
Where are ya with this build?
I just finished painting the tub. I need to bolt the fenders back on and also some minor items to complete. I will have several pictures to post over the next few days.
- Thread starter
- #52
I finally finished with what I’m calling phase 1. I have lots more ideas, but I want to get some trail time on it, before continuing the build. I had a little trouble with painting. Some bugs decided to land on the fenders. I decided that if I wait until it dries, I could wet sand and buff them out. Everything was going well, then I sanded through to bare metal, DOH!!!! So needless to say, I had to repaint the fenders.
The following are completed trailer pictures. I don’t know how to post more than three pictures at a time, so this will take a few posts.


The following are completed trailer pictures. I don’t know how to post more than three pictures at a time, so this will take a few posts.
- Thread starter
- #53
I wanted a storage device that I could keep in the trailer for camp supplies and be easy to access. I ended up purchasing some very inexpensive cabinets at Home Depot. I had to cut them down to make them fit in the tub. Then I had to figure out how to get them from the bottom of the tub, to the top edge, above the shelves. After much figuring, I decide to pivot the cabinets using two pieces of flatbar, with one lift assist shock on each end. After a little tinkering, they work great.


Genius! That is fantastic!!! Great looking trailer. I'm not sure about the wood tone and trim detail on the doors, but since the entire trailer looks so great, I'll let it slide! 
lol
I love it, nice 4 bar setup!
I love it, nice 4 bar setup!
- Thread starter
- #58
Here is what I came up with for an awning. I wanted something that would cover the trailer and plenty of additional space to stay out of the rain or sun. I used 5/8 and ¾ inch square tubing, along with a pair of pre-made tarp poles. It all breaks down to less than 6’ long to fit inside the tub. The tarp is 12’ X 20’.
First is the parts broken down and sitting on top of the cabinet.

Support tube for square pole to slide into.

Upright installed


First is the parts broken down and sitting on top of the cabinet.

Support tube for square pole to slide into.

Upright installed

So was your plan to park the jeep under the awning also? Nice setup!
Similar threads
Users who are viewing this thread
Total: 1 (members: 0, guests: 1)


