Scratch build 08 Rav4 hitch - lotsa pics

This site may earn a commission from merchant affiliate
links, including eBay, Amazon, Skimlinks, and others.

Awl_TEQ

Supporting Vendor
Joined
Aug 27, 2008
Threads
38
Messages
3,855
Location
Calgary Alberta
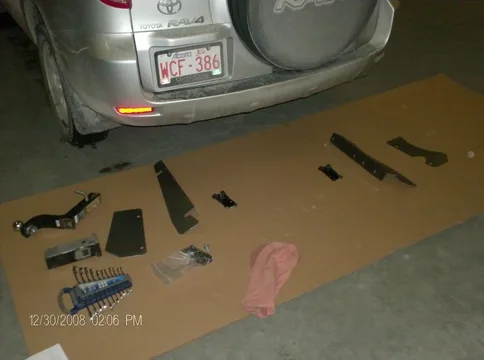
I purchased a cheap utility trailer to move parts of my 1978 FJ45 around during rebuilding it. Then we sold the wife's Sienna (that had a hitch). My Corolla has no hitch and no real capacity for towing so the wife's new Rav4 will get a hitch. The dealer sells them for around $1000.00 - way too much $$ for a hitch. I have access to tools and material required and figure I can make one from scratch for something like $50.00. That will cover the receiver sleeve, bolts and a plug and play wiring harness (The one for the Sienna was $30.00). I get scrap material from work for free (as long as it isn't too much at any one time :D)

Mudder member John E Davis put a factory hitch on his Rav4 and did a very good write up on the process on his family website with very good pictures. His write up shows the necessity of many contact points to spread the load around the unibody frame of the Rav. With the power of the late model Rav, 269Hp I think, one could twist and deform the structure pretty quickly. I will copy the general layout of the factory frame mostly because we all know Toyota makes good stuff.

Here is a poor shot of our 2008 Rav4, only two months old, at my place of employment. YES, I Do wash it. It had snowed quite a bit previously.
HPIM1829.webp

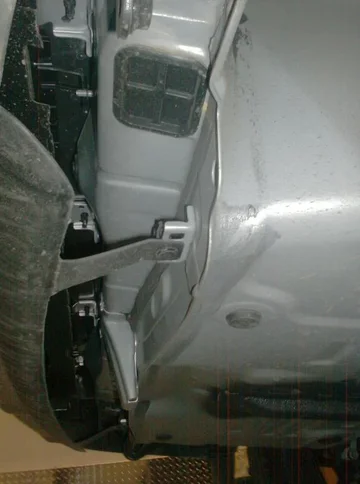
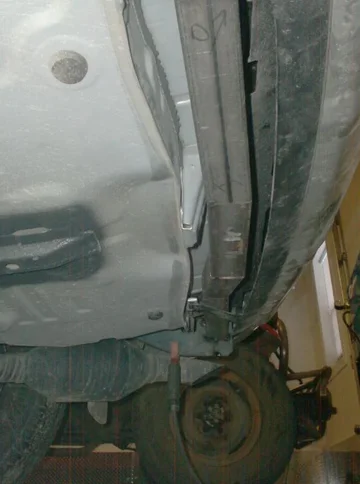
This is a photo of the left (drivers side) "frame rail". It looks to be a doubled 14 Ga. hat channel incorporated into the unibody. Notice the tie down for shipping and the bolts for that tie down. The rail has M12 x 1.25 metric captured nuts in four places. These will be the main anchor points for the bolt on hitch assembly I will make.
HPIM1580.webp

Here is the right (pass. side) frame rail. There is the added complication of the muffler/ tailpipe assembly on this side. Also there are only three nuts in the rail here.
HPIM1581.webp
HPIM1829.webp
HPIM1580.webp
HPIM1581.webp
 
More pictures...

There are also two captured nuts on the outside of each frame rail....
HPIM1895.webp

The right side anchor points straddle the muffler hanger....
HPIM1896.webp

Here is the 2" receiver sleeve I bought at Princess Auto for $8.00. Princess Auto is like Harbor Freight I guess. Cheap but functional stuff, not really professional grade products but they do the trick. I was playing with my blast cabinet, also from Princess Auto, hence the finish.
HPIM1897.webp
HPIM1895.webp
HPIM1896.webp
HPIM1897.webp
 
More...

This shot is showing the two rear bumper facia attachments, one center of picture and one background. You may be able to see there is no straight shot to run a length of 2" square tube across and keep it hidden above those attachments. The vertical tapered silver bit gets in the way and the sunken floor bows out to the rear. Whatever I end up doing, I want to make the hitch as hidden as feasible when standing 15' behind the vehicle.
HPIM1583.webp


This is where I'd like to run across from the two rails. I'll have to cut and weld two pieces of square tube so that they bow toward the rear and don't touch anything but the anchor points. Then I'll have to bring it down to where the receiver sleeve will be accessible.
HPIM1898.webp


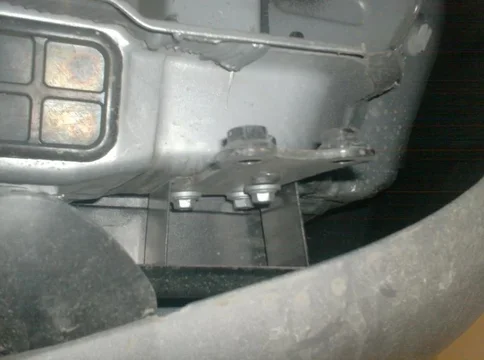
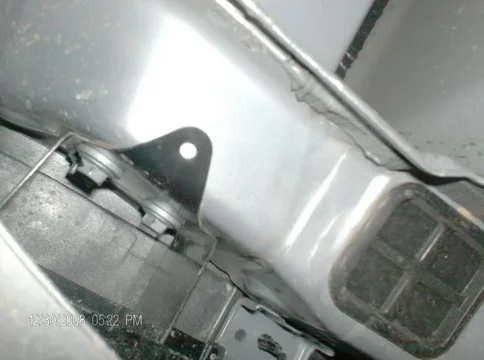
Another point of attachment is this black bracket with two nuts welded on it. It holds a steel energy absorption inner bumper that sits behind the painted facia. The three bolts holding it on are going to be used to anchor my setup. You are looking at the left side of the vehicle from underneath and the three bolts go into the end of the frame rail.

HPIM1585.webp
HPIM1583.webp
HPIM1898.webp
HPIM1585.webp
 
Starting fab

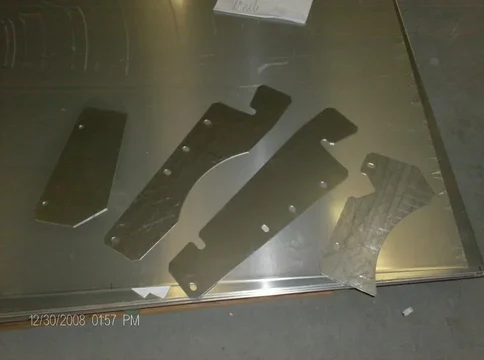
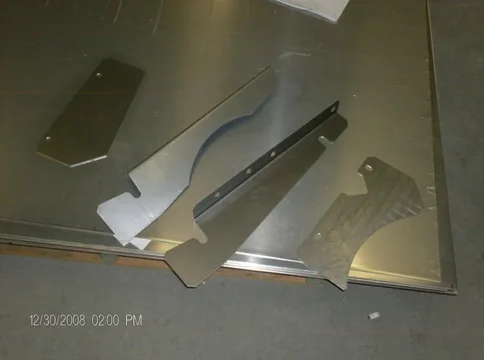
So the other day I dropped by work (the shop is shut down for the holidays) and made some test pieces to fine tune my design. I made them out of 14 Ga. steel because it is easier to work with than the 3/16" plate the final brackets will be fabbed from.

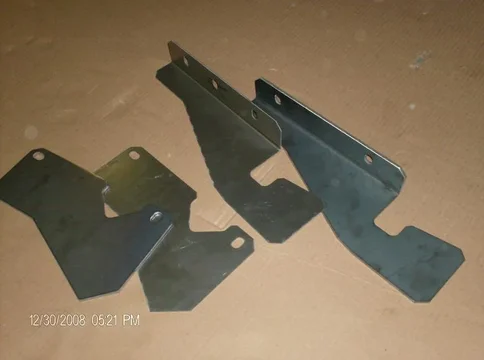
After a ton of measuring and a couple of cardboard templates I sat down and drew a CAD copy of the cardboard templates. Then I used SMP/IS software to write a G code CNC punch program....et Voila, steel copies of my cardboard. You can see now why I'd just as soon make it myself as buy it - the projects floating around in my head are endless, it's really a curse having all these tools and material at my fingertips, really........:o
HPIM1824.webp

Shaken out of the blank...
HPIM1826.webp

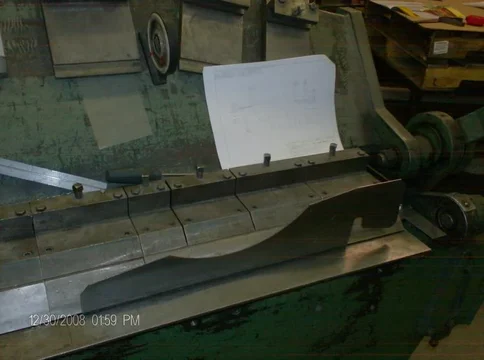
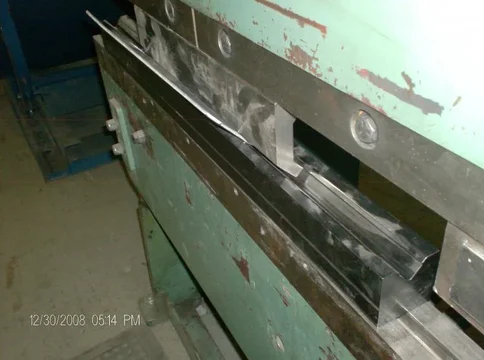
A quick bend on the hand brake
HPIM1827.webp
HPIM1824.webp
HPIM1826.webp
HPIM1827.webp
 
More pictures...

Here they are bent.....
HPIM1828.webp

My workspace. We have a two post automotive lift in another bay of the building but I'm not sure if my alarm code works over there - best not to test fate....
HPIM1832.webp

The left bracket test fit...
HPIM1834.webp
HPIM1828.webp
HPIM1832.webp
HPIM1834.webp
 
The side plate... bolt holes not quite right
HPIM1839.webp

The right bracket test fit... loosely fitted
HPIM1846.webp

The right hand side plate... a bit awkward
HPIM1847.webp
HPIM1839.webp
HPIM1846.webp
HPIM1847.webp
 
Design change

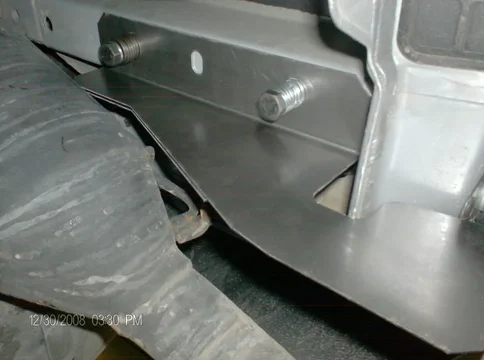
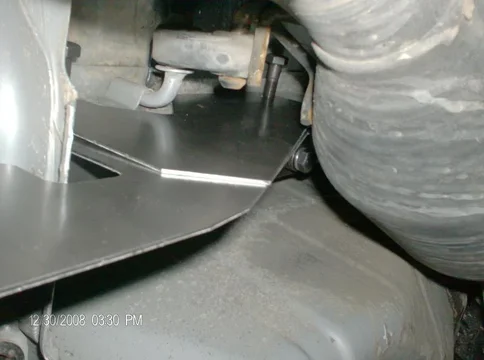
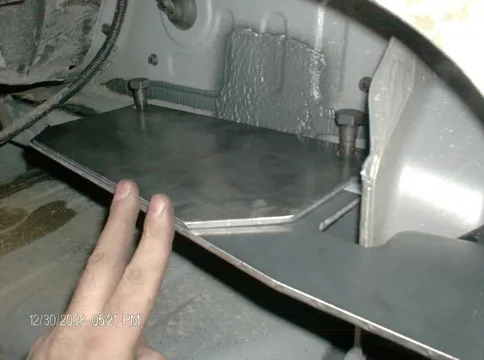
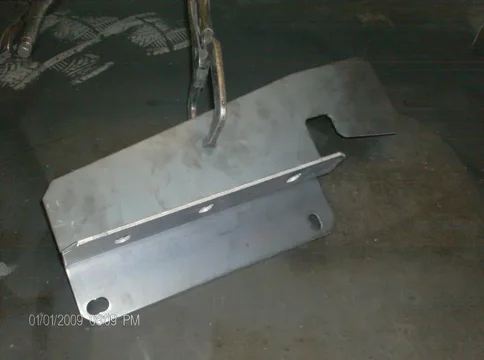
I changed the main brackets by shortening them and dropping the hole furthest forward on the frame rails. Here are the re-punched test pieces. I also tweaked the hole spacings and got rid of the radius cut to go over the muffler. A large radius is hard on the tools when punching the 3/16" thick material.
HPIM1848.webp

The reason I feel comfortable in shortening the main bracket and dropping the hole is this hitch. It came off of our Sienna van. I bought it from U-Haul, though they didn't make it. It fastened to the frame rails on the van with just three M12 bolts per side and had no auxiliary bracketry. My Rav hitch will have nine M12 and six M8 bolts and be spread over a larger area. I am not an engineer but I also won't be pulling a 40' trailer. :meh:
HPIM1899.webp
HPIM1900.webp
HPIM1848.webp
HPIM1899.webp
HPIM1900.webp
 
And another test fit

Left side...
HPIM1849.webp

Left side side...
HPIM1851.webp

Right side...
HPIM1852.webp
HPIM1849.webp
HPIM1851.webp
HPIM1852.webp
 
More test fit

Right side side plate test fit...
HPIM1853.webp


This new layout fit great so I altered the stretch-out of the formed brackets to work with 3/16" thick material and punched them out...
HPIM1856.webp

And bent them up... no hand brake here ;)
HPIM1858.webp
HPIM1853.webp
HPIM1856.webp
HPIM1858.webp
 
Test fit the final pieces

14 Ga vs 3/16" No reason for this photo really
HPIM1859.webp

Test fit of the 3/16 parts - left side
HPIM1860.webp
HPIM1861.webp
HPIM1859.webp
HPIM1860.webp
HPIM1861.webp
 
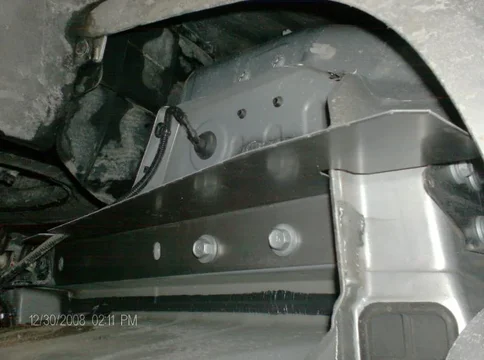
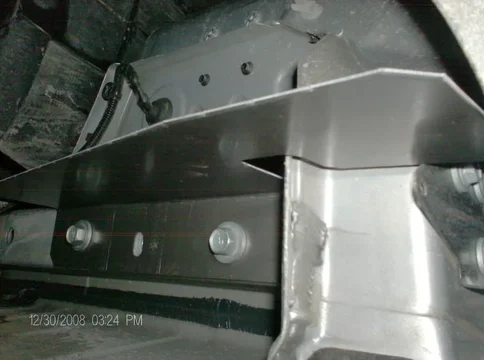
I had to remove both of the black brackets because they interfered with the 3/16" parts as they were thicker - they didn't interfere with the thinner test parts.
HPIM1841.webp


And I had to bend this tab that was attached to the black brackets to clear as well. The black brackets I believe are part of the mounting of the factory hitch. I think the nuts welded on them bolt to one of the many bits that come with the kit. I am going to use the three bolts that attach them to the frame to anchor my mounts as well. I may even chop off the end of them and weld them to my cross bar.
HPIM1862.webp
HPIM1841.webp
HPIM1862.webp
 
I ran out of time at work and brought the stuff home...

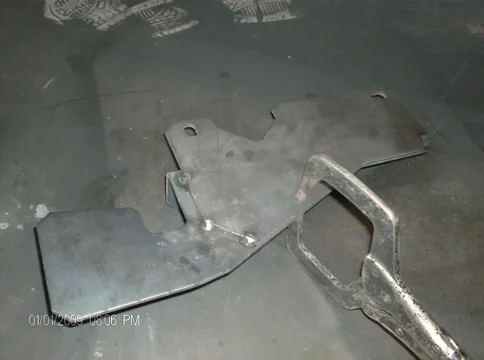
So today I tacked together the 2 piece main brackets...
HPIM1892.webp
HPIM1893.webp
HPIM1894.webp
HPIM1892.webp
HPIM1893.webp
HPIM1894.webp
 
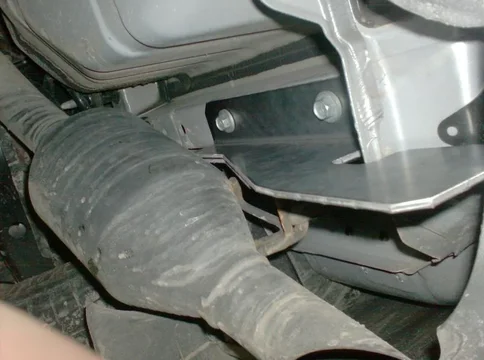
And bolted them in place in order to plan the next move.
HPIM1901.webp
HPIM1904.webp
HPIM1903.webp
HPIM1901.webp
HPIM1904.webp
HPIM1903.webp
 
Here is how I plan to run the tubing... tomorrow. It's late and the chop saw will wake the kids.
HPIM1907.webp
HPIM1909.webp
HPIM1911.webp
 
Man you sure have some detail in your thread. Looking forward to seeing the finished product. One question in Australia we have regulations on tow bars, do you fella's?
 
Oh, more than likely. But I doubt anyone will care about my little Rav. I've seen and been a part of many a hitch addition to farm trucks and even newer GM products. As long as I'm not selling them by the hundreds (or at all) and it looks well built and is sturdy I can't see an issue with the authorities.

As for detail - I've always been an attention to detail type guy. Shamelessly padding my post count as well. I figure anyone who wants to get info on the subject will appreciate the details. I can't guess what will help so I just throw it all in there. Woody likely curses every time I start a thread :lol::lol: and then goes and buys more Tera bites of memory :D
 
Kevin;

This is turning into an excellent thread for owners of the RAV4 trucklet. I don't know if you are a RAV4World member, so I started a thread there linking to this page:

RAV4World - :: View topic - Scratch Build '08 RAV4 receiver..... at IH8Mud.com

If you are not a member (I didn't see a R4W rear window sticker), please join and say hello. There are lots of interested RAV4 owners there, though I doubt that many would attempt such a challenging project as yours.

John Davies
Spokane WA
 
Lots done today...

Thank you John. I hope I help someone or even just entertain them. :o:lol::crybaby:


Though it doesn't look it, the main brackets I have made sit at an angle when mounted. They angle in at the bottom when viewed from the rear. This is due to the "frame rails" being tapered and my bracket following them.
HPIM1913.webp

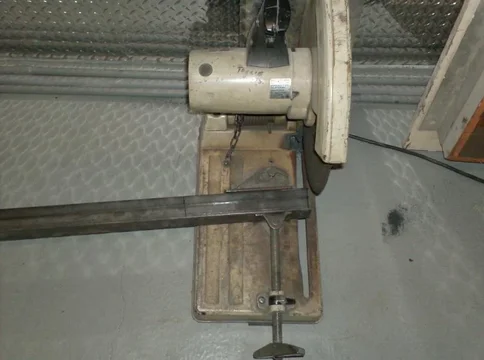
I'd rather use a horizontal band saw, but as I haven't got one.....
HPIM1914.webp

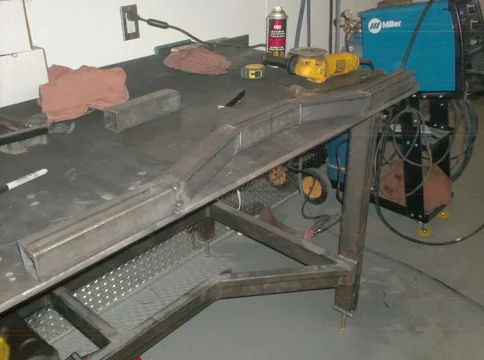
The two main brackets are 45" apart (inside to inside) when mounted. I will come in towards center 10" on each side. At the center I will have an 8" bit of tube to mount the sleeve to. That 8" piece will need to drop by 2 1/4" and move toward the rear 3/4" to clear the sunken floor and rearward bow of said floor.
I started by cutting two 10" tubes at an angle such that they will come off the main brackets straight and level across the vehicle. The other (towards center) end of those 10" tubes was cut at a slight angle to start the down and rearward bow of the drawbar. I tack welded those two lengths of tube to the straight edge of my work bench, 45" OD apart and the front side (with respect to the vehicle) down on the table. I then tacked an 8" length 2 1/4" back from the edge of the bench and spaced 3/4" up off the table surface. Now all I had to do was join the three pieces with two carefully cut lengths of tube.
HPIM1915.webp
HPIM1913.webp
HPIM1914.webp
HPIM1915.webp
 
Can't do a compound angle cut with a simple chop saw, so after a bit of grinding I tacked in the angled pieces good and solid so they won't snap apart...
HPIM1916.webp

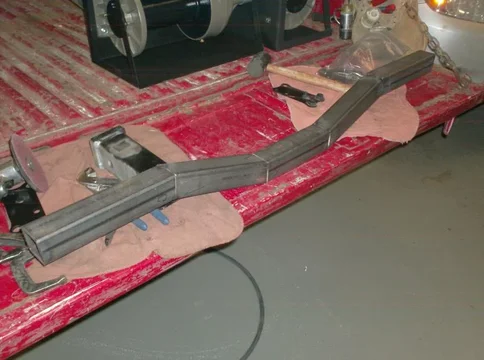
Then cut the draw bar loose from the table.....
HPIM1917.webp


And stuffed it into position... held up by just the plastic connector bits from the rear facia...
HPIM1919.webp
HPIM1916.webp
HPIM1917.webp
HPIM1919.webp
 
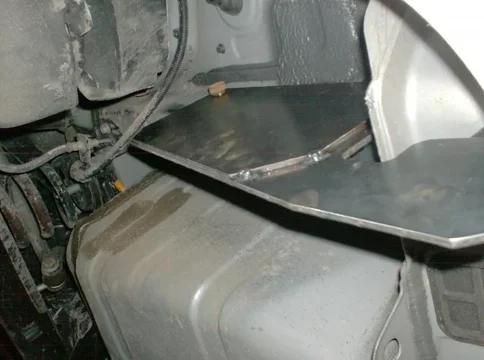
I put the Rav on stands - not that easy. It's hard to find a good spot for the stands with all the thin unibody everywhere. Eventually settled on the lower A arm right under the springs. Even that was not ideal but, once on, she was good and solid.
HPIM1923.webp

I tack welded the draw bar at each end by locating the bar in a position where it was not in contact with any part of the Rav and making both ends the same. The main brackets are actually identical in shape and hole patterns save for the muffler alterations on the right side. This allowed me to simply locate the draw bar at the same landing point at each end and be pretty sure it was straight. This is all that hangs below the facia (minus the sleeve of course).
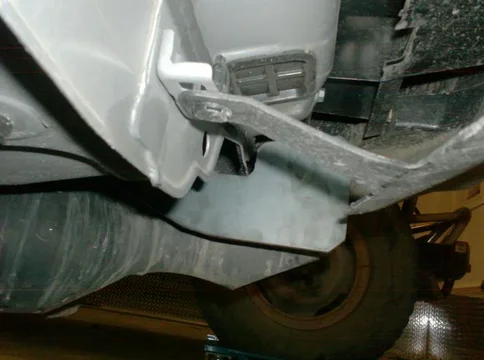
I also cut the "black brackets" in the appropriate spot and tacked them to the draw bar while everything was still bolted up.
HPIM1925.webp

Removed from the "trucklet" I welded everything solid... and added the sleeve.
HPIM1928.webp
HPIM1923.webp
HPIM1925.webp
HPIM1928.webp
 

Users who are viewing this thread

Back
Top Bottom