Project Duragoat: My 1974 FJ40 Build Thread (1 Viewer)

This site may earn a commission from merchant affiliate
links, including eBay, Amazon, Skimlinks, and others.

That's awesome Brian!!!!!!:cool:


Firing an engine up the first time open exhaust never gets old .......


Georg
 
Brian,

Sounds good! I have a question for you. I'm putting the same combo in my 55. How did the oilpan problem turn out. How much lift did you need for clearance, etc. Maybe a shot of your front motor mounts.

Thanks, Ron
 
B, was there ever any doubt that it would work the first time? Pretty cool stuff! Glad to help.

If anyone else needs some help wiring up their V8 swap, let me know.

I think I've got it pretty down pat...
 
Oil pan for 5.3 conversion

Brian,

Sounds good! I have a question for you. I'm putting the same combo in my 55. How did the oilpan problem turn out. How much lift did you need for clearance, etc. Maybe a shot of your front motor mounts.

Thanks, Ron

Hey Ron,

I have been doing quite a bit of research about the oil pan. I am pretty sure that the truck oil pan will not work unless you have 4 inch + lift or may be a spring over setup.

This is where i will likely get the new oil pan. GM Parts Direct: Your direct source for Genuine GM Parts

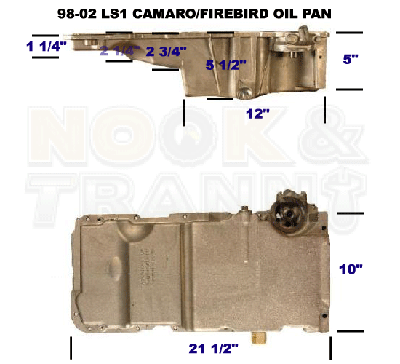
All the parts will probably total about $250 for the kit. it is from a 2002ish camaro. here are the PNs, oil pan, pickup tube, tray, dipstick, etc.

12628771
12558253
12558251
12551577
12551581
12557752

This is probably the best pic i found of the new pan. The stock truck oil pan is 8.5 inches tall at the so this one will probably save 3.5 inches over the stock truck pan.

The main problem is that under flex, the front drive shaft will likely contact the corner of the pan. So, getting the truck up with a little lift, and shortening the pan should do the trick.

OILPAN_FBODY400.gif


Here are some pics of what i am talking about.
this pic if from the perspective of the T-case front output flange.

View attachment 629670

View attachment 629671
OILPAN_FBODY400.gif
 
Last edited:
Brian,

That's the pan, that seems to be the only option. I'm useing an OME set of springs ( @ 3 inch lift ), but with the 55, I have a hood height problem also. I haven't bought the front motor mounts yet, which ones did you use.

Thanks again for all the information, Ron
 
Hey Ron.
Check out "lil' John" 's build up thread on here. We put a 6 liter in his pig with a very mild lift. No big deal.
Georg
 
Thanks Georg, just got reading about your blown 60, great job.

Brian, I thought they looked like AA's. I like your back mount, inspiring me to design my own. Now Georg, has me worrying about my power steering pump, hitting the box. I'm useing a 60 box also. Did you have any issues.
 
Last edited:
Thanks Georg, just got reading about your blown 60, great job.

Brian, I thought they looked like AA's. I like your back mount, inspiring me to design my own. Now Georg, has me worrying about my power steering pump, hitting the box. I'm useing a 60 box also. Did you have any issues.

Since I am using the Saginaw box, no issues at all, it was a tight fit for the steering shaft clearing the exh manifold and some ps pump lines. When I located the engine, I just pushed it as far to the driver side as possible before it hit the steering shaft.
 
:doh:, I forgot you're building a 40. You wouldn't be useing the 60 box! Well thanks for the good information and I'll be following along with you.
 
Radiator Install

Decided to go with the Champ, 3 row. found it online for 175. shipped total was 200.


Rad1.jpg

rad2.jpg

Slid it into the stock radiator support. crossing my fingers hoping all would line up.

rad3.jpg
Rad1.jpg
rad2.jpg
rad3.jpg
 
radiator Install

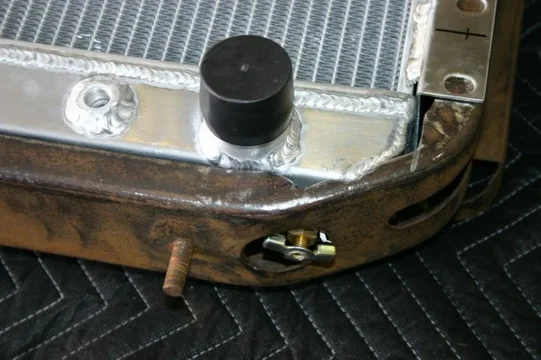
Of course, nothing is that easy. fan was blocking the lower port by just a bit.

rad4.jpg

Broke out the grinder and notched the lower rad support.
rad5.jpg

had to clean up the access hole for the drain valve, it was also clipping an edge.

rad6.jpg
rad4.jpg
rad5.jpg
rad6.jpg
 
Power steering hoses

After considering all the options, i decided to make my own lines. in retrospect it was quite easy once i got all the threads specs worked out. The GM ps pump was
M16x1.5 with o-ring. and the PS gear box was 11/16 x 18 the rest were AN6 hose fittings. Fittings are steel, and the hose is PS specific. I sourced from Aeroquip.

here are the parts i used.

ps1.jpg

ps2.jpg

ps3.jpg
ps1.jpg
ps2.jpg
ps3.jpg
 
power steering hoses

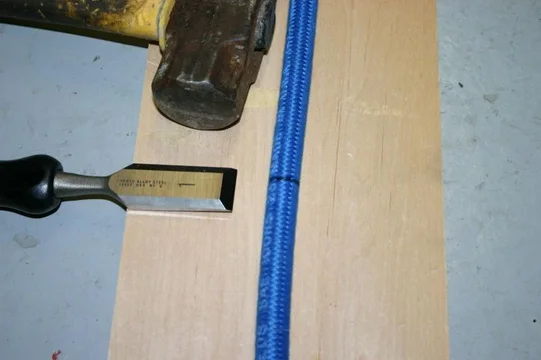
Get the sharpest chisel you can find, a hammer, and a block of wood.

ps4.jpg

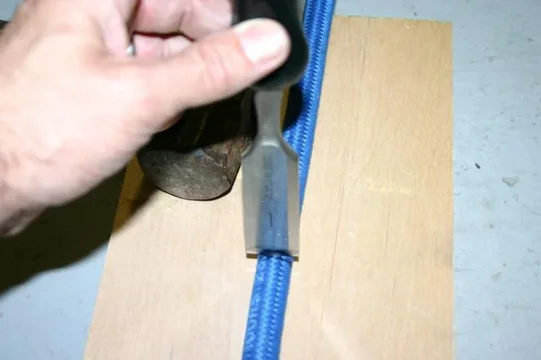
Took about 3 good whacks.

ps5.jpg

super clean cut.

ps6.jpg
ps4.jpg
ps5.jpg
ps6.jpg
 
power steering hoses

I didn't read the fine print, and could not get the hose in the hose end. turns out that there are left hand threads in the coupler on the hose side. once i figured that out, threaded right on, no problem.

i used std rubber PS return line hose for the return side.


ps7.jpg

ps8.jpg

ps9.jpg
ps7.jpg
ps8.jpg
ps9.jpg
 
Accelerator pedal

I had the guys at the wrecking yard pull the pedal bucket and accelerator cable from the truck when i go the donor engine. it was a pain in the butt for them to pull, but it was 25$ well spent.

acc1.jpg


Pic of the stock acc pedal configuration

acc2.jpg


i added a small plate to cover a hole in the firewall. re-sized to accommodate the acc cable

acc3.jpg
acc1.jpg
acc2.jpg
acc3.jpg
 
accelerator pedal

Stock GM acc cable attached.

acc4.jpg


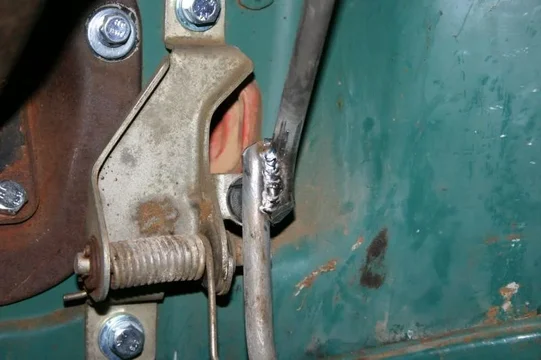
Cut off the pedal bar. had to heat it up a bit and twist it a bit to get it to line up.

acc5.jpg

Final Weld, like the rest of my welds, not pretty, but will hold.

acc10.jpg
acc4.jpg
acc5.jpg
acc10.jpg
 
accelerator pedal

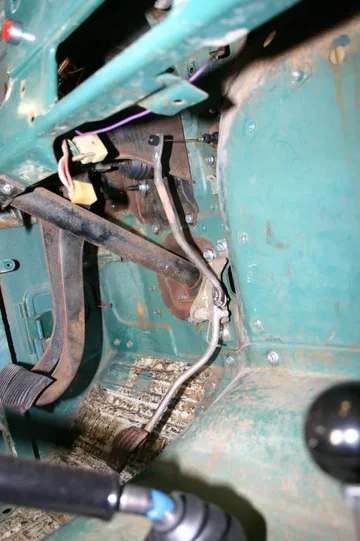
Final configuration. It feels really smooth, couldn't be happier with the way it feels. really smooth.


acc6.jpg
acc6.jpg
 

Users who are viewing this thread

Back
Top Bottom