
- Joined
- Apr 4, 2010
- Threads
- 4
- Messages
- 24
*I posted this over at ClubLexus, but will also post it here. Hope it helps someone else.
DIY 2005 Lexus GX470 installation of a Clarion NX702 with a Beat Sonic SLA-81 kit
*** THIS IS NOT A DEFINITIVE GUIDE, MERELY A REFERENCE POINT TO EASE THE INSTALLATION. USE AT YOUR OWN RISK. ***
So I purchased a 2005 Lexus GX470 without navigation and without the Levinson stereo upgrade. That means that it was only equipped with the factory six disc stereo with steering wheel controls. I wanted to have the ability to use the Bluetooth feature on our iPhone 5’s, use Pandora, play movies, navigate, and play mp3’s; so I chose Clarion. I have good success with this brand, so I chose them again.
There is only one real option for those that want to upgrade their factory stereos in the GX, and that is the Beat Sonic kit. The kit for my complete stock and base stereo was the SLA-81.

1. Shows the trim bracket as it came from Beat Sonic. It is darker than the factory pewter grey and is more of a matte black finish.

2. This is the Clarion NX702. Chose this over my original NX602, based partially on the fact that people had so much trouble with the 602, prior to the latest software upgrade.
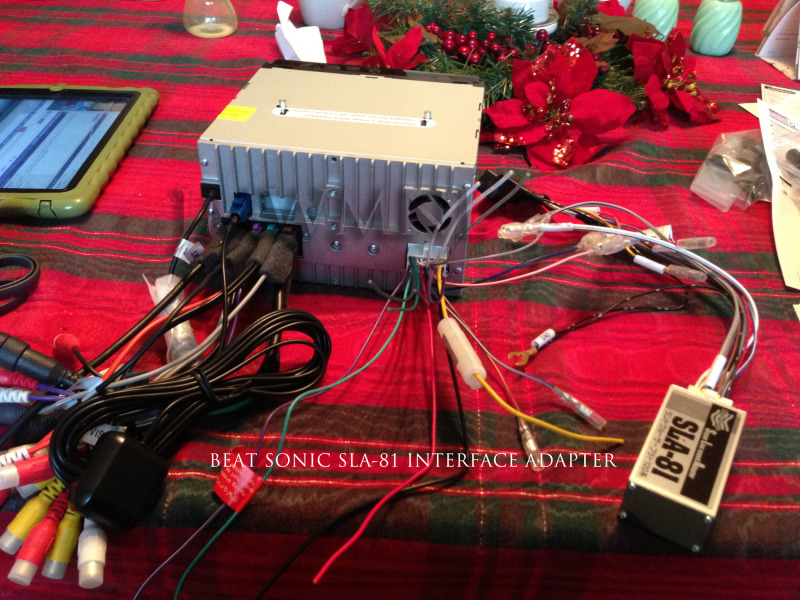
3. All the accessory plugs for Clarion add-ons are on the lower left of the unit, lower right is the Clarion harness, and the SLA-81 interface box and harness are on the far right. Sorry for the lovely red table cloth!

4. *** AT THIS TIME I WOULD PUT THE FACTORY STEREO IN SHIPMENT MODE (see photo 16), AND THEN DISCONNECT THE BATTERY.***
Starting from the center of the vehicle, slowly and gently pry up the center console wood trim in the direction of the arrows. You can use a small screw driver or plastic trim panel tool. Those are the only two pieces you will be removing from the center console. Remove the two Philips bolts on the vertical trim pieces to the dash.

5. Start at the bottom and slowly pry upward, BE MINDFUL OF THE CABLES! These are located behind the hazard switch and airbag light. The trim pulls straight outward after a point.

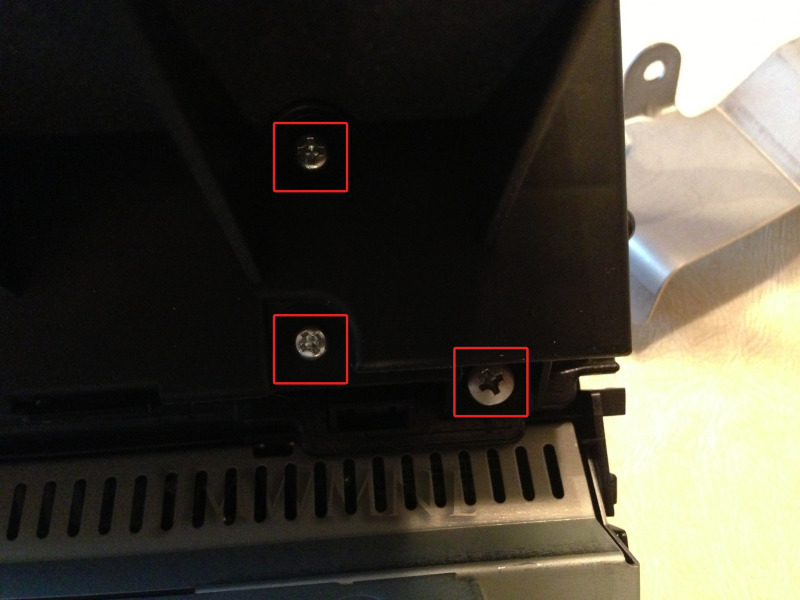
6. Once the vertical trim pieces are removed, you can see the cables that were attached to them. If I remember right, there are six (6) Philip head screws. (see picture 11) Work from the bottom up.

7. The ash tray and 12volt plug should be first to be removed. You will need to disconnect the wiring harnesses. Set it aside once completed.
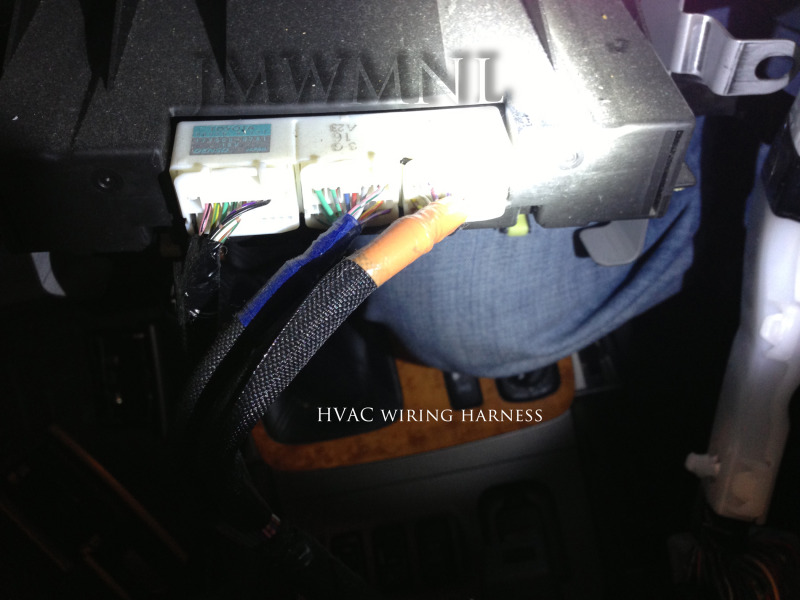
8. This is the wiring harness behind the HVAC unit. Again, disconnect them from the back. The HVAC, stereo and clock cluster will come out as one unit. I don’t have a picture of it, but the stereo harness is secured to the left (driver side) of the stereo. Remove the plastic keeper and it will give you more room to disconnect the rest of the harnesses on the back. The harness bundle kind of looks like a shepherd’s crook.

9. Shows the harnesses and how the clock cluster, stereo and HVAC all come out as one unit. The tan foam on the right side of the picture leads to the shepherd’s crook and plastic keeper on the side of the stereo for the harness.

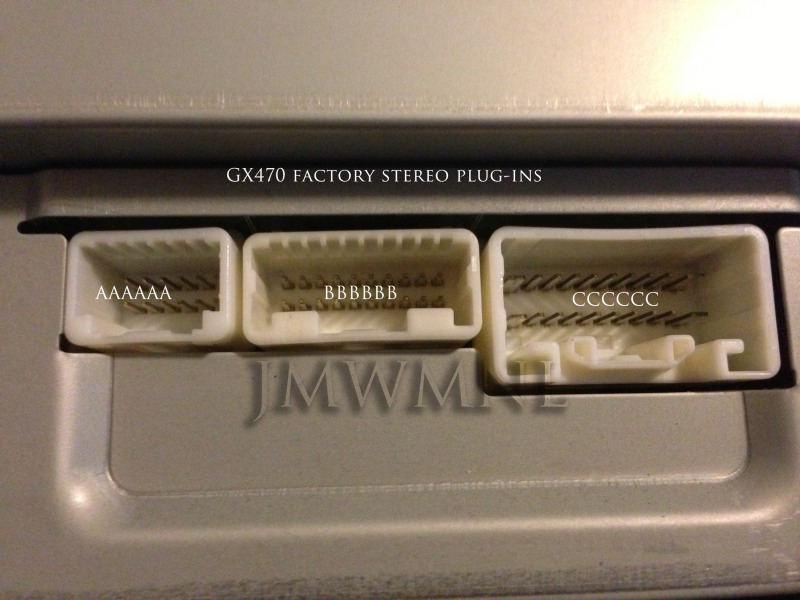
10. Close-up detail of the stereo harness. When you’re finished, you will only use the biggest far right harness and receptacle. The other two will remain free/unused (see photos 24, 25 and 32). The harness off of the SLA-81 interface box plugs into the right plug.
DIY 2005 Lexus GX470 installation of a Clarion NX702 with a Beat Sonic SLA-81 kit
*** THIS IS NOT A DEFINITIVE GUIDE, MERELY A REFERENCE POINT TO EASE THE INSTALLATION. USE AT YOUR OWN RISK. ***
So I purchased a 2005 Lexus GX470 without navigation and without the Levinson stereo upgrade. That means that it was only equipped with the factory six disc stereo with steering wheel controls. I wanted to have the ability to use the Bluetooth feature on our iPhone 5’s, use Pandora, play movies, navigate, and play mp3’s; so I chose Clarion. I have good success with this brand, so I chose them again.
There is only one real option for those that want to upgrade their factory stereos in the GX, and that is the Beat Sonic kit. The kit for my complete stock and base stereo was the SLA-81.
1. Shows the trim bracket as it came from Beat Sonic. It is darker than the factory pewter grey and is more of a matte black finish.
2. This is the Clarion NX702. Chose this over my original NX602, based partially on the fact that people had so much trouble with the 602, prior to the latest software upgrade.
3. All the accessory plugs for Clarion add-ons are on the lower left of the unit, lower right is the Clarion harness, and the SLA-81 interface box and harness are on the far right. Sorry for the lovely red table cloth!
4. *** AT THIS TIME I WOULD PUT THE FACTORY STEREO IN SHIPMENT MODE (see photo 16), AND THEN DISCONNECT THE BATTERY.***
Starting from the center of the vehicle, slowly and gently pry up the center console wood trim in the direction of the arrows. You can use a small screw driver or plastic trim panel tool. Those are the only two pieces you will be removing from the center console. Remove the two Philips bolts on the vertical trim pieces to the dash.
5. Start at the bottom and slowly pry upward, BE MINDFUL OF THE CABLES! These are located behind the hazard switch and airbag light. The trim pulls straight outward after a point.
6. Once the vertical trim pieces are removed, you can see the cables that were attached to them. If I remember right, there are six (6) Philip head screws. (see picture 11) Work from the bottom up.
7. The ash tray and 12volt plug should be first to be removed. You will need to disconnect the wiring harnesses. Set it aside once completed.
8. This is the wiring harness behind the HVAC unit. Again, disconnect them from the back. The HVAC, stereo and clock cluster will come out as one unit. I don’t have a picture of it, but the stereo harness is secured to the left (driver side) of the stereo. Remove the plastic keeper and it will give you more room to disconnect the rest of the harnesses on the back. The harness bundle kind of looks like a shepherd’s crook.
9. Shows the harnesses and how the clock cluster, stereo and HVAC all come out as one unit. The tan foam on the right side of the picture leads to the shepherd’s crook and plastic keeper on the side of the stereo for the harness.
10. Close-up detail of the stereo harness. When you’re finished, you will only use the biggest far right harness and receptacle. The other two will remain free/unused (see photos 24, 25 and 32). The harness off of the SLA-81 interface box plugs into the right plug.


")
