Any order DIY 4x4 Labs Rear bumper? Coastal?

This site may earn a commission from merchant affiliate
links, including eBay, Amazon, Skimlinks, and others.

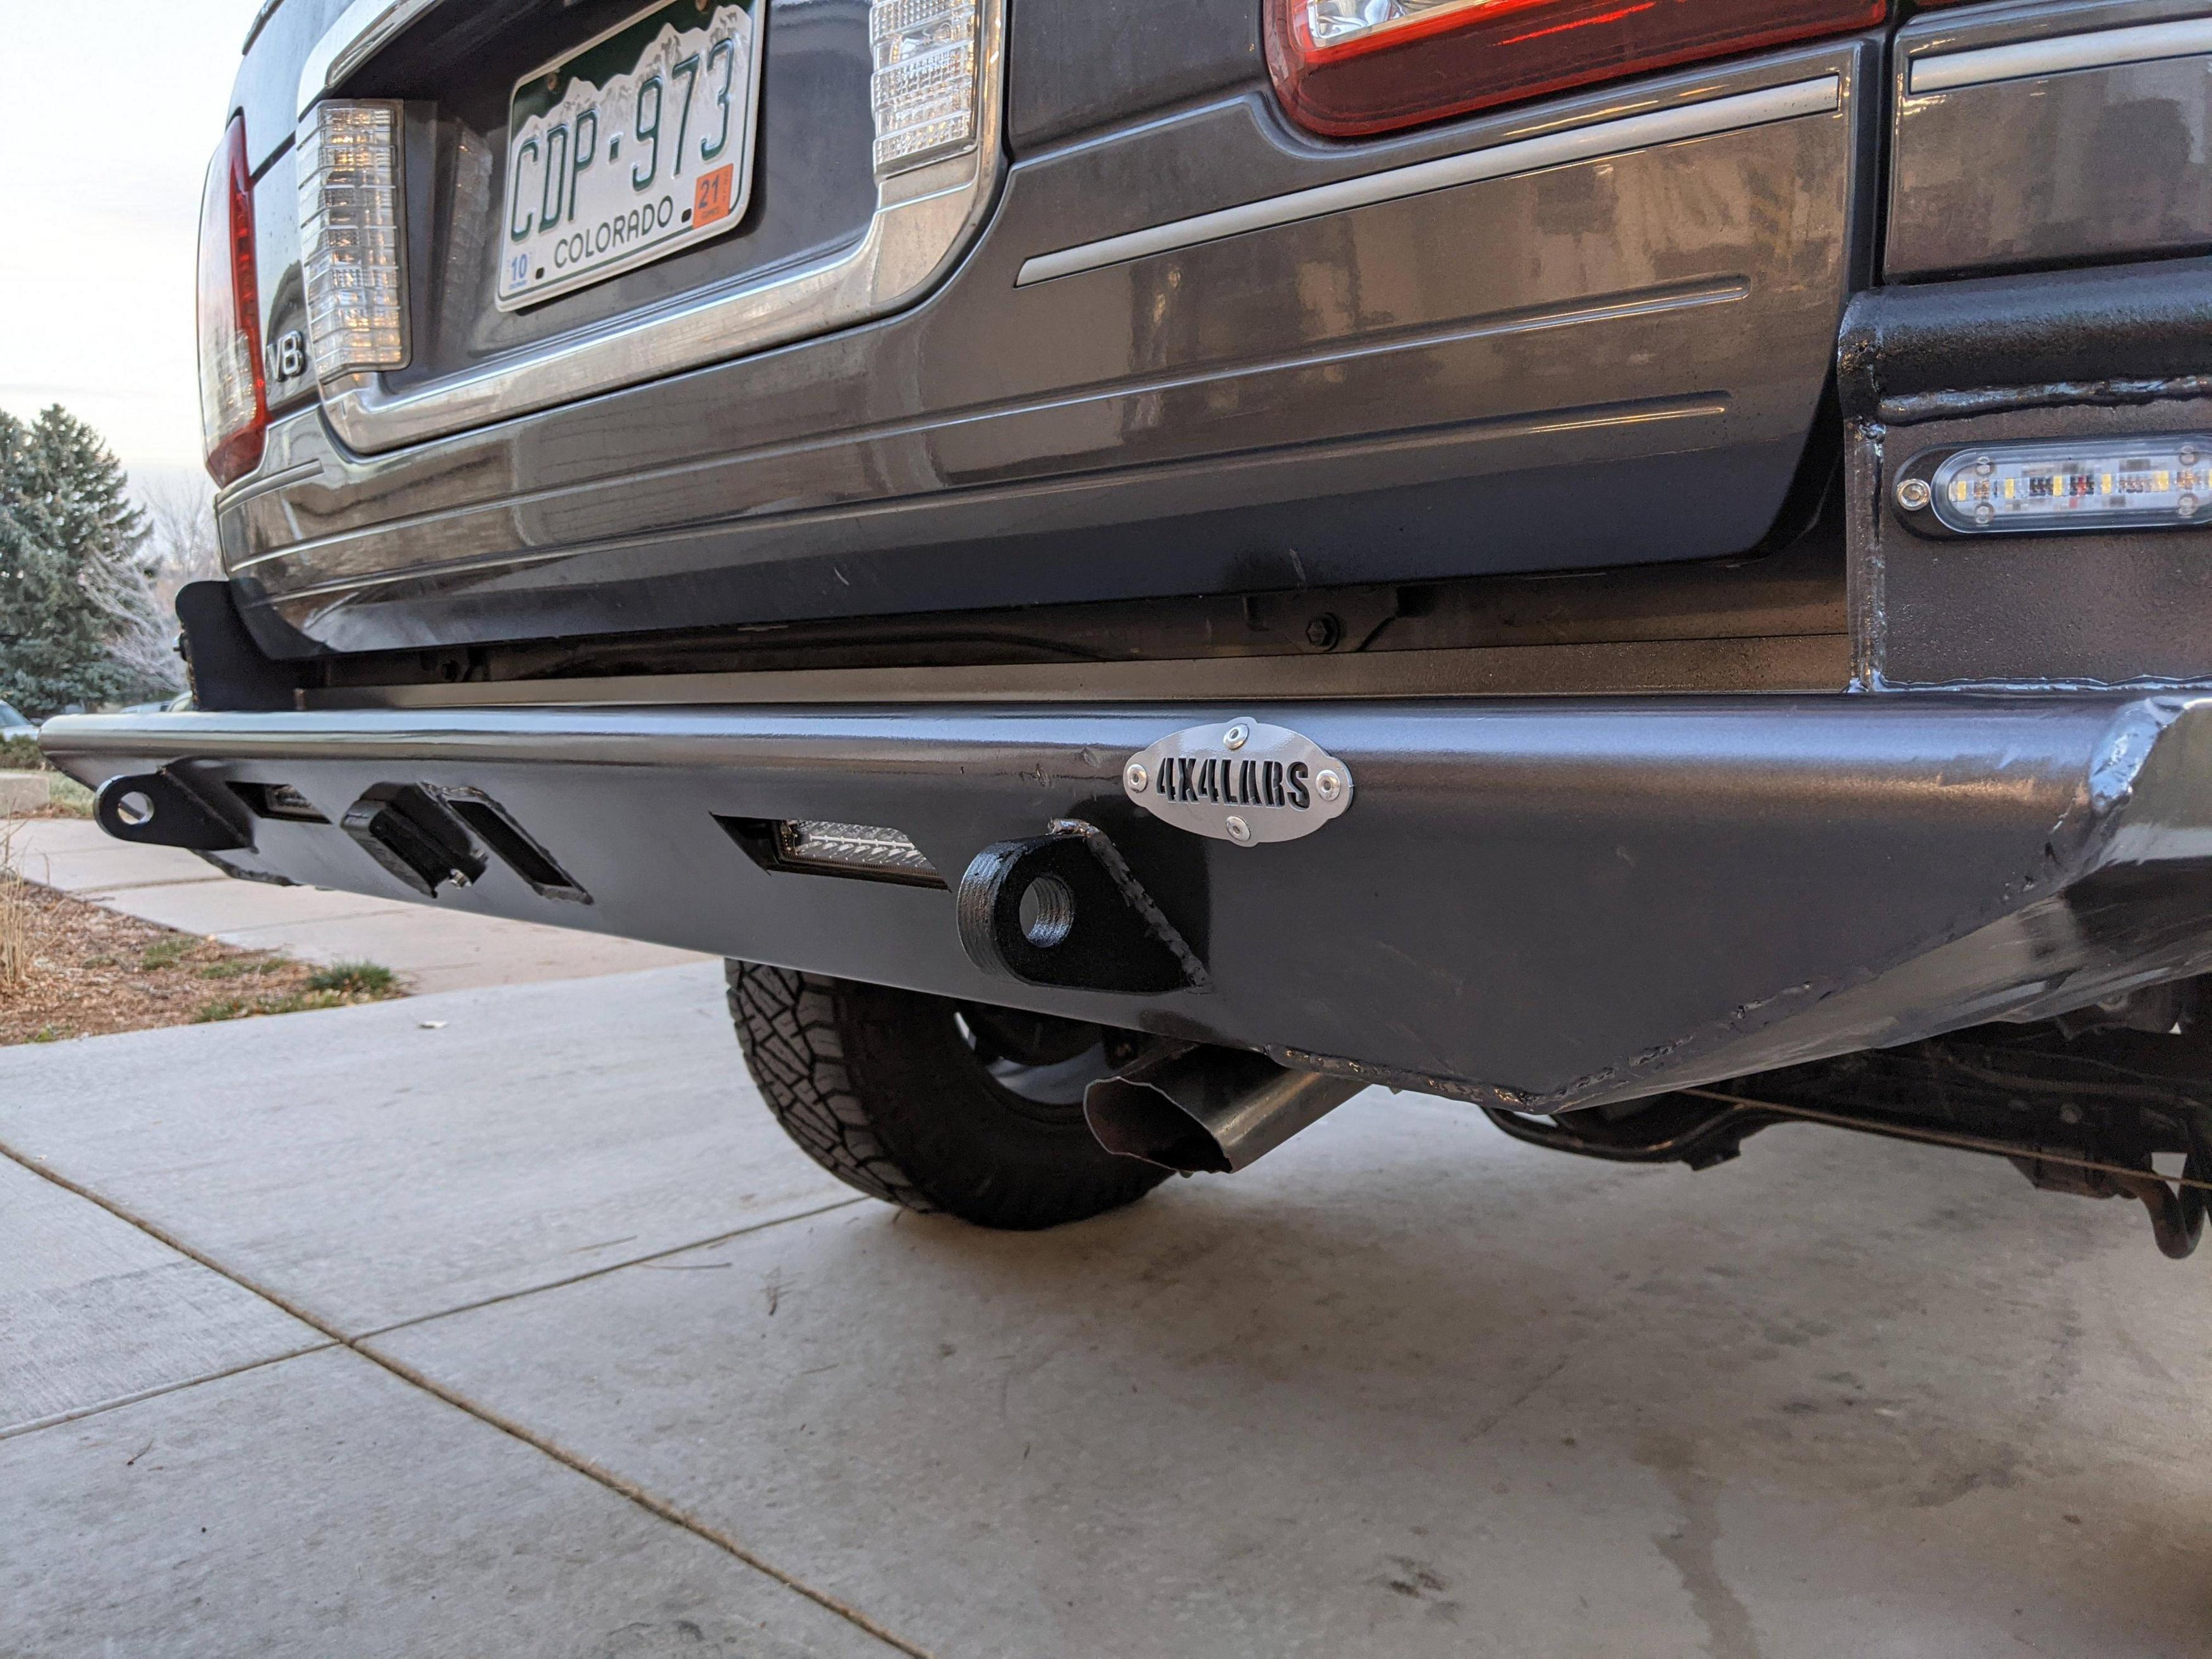
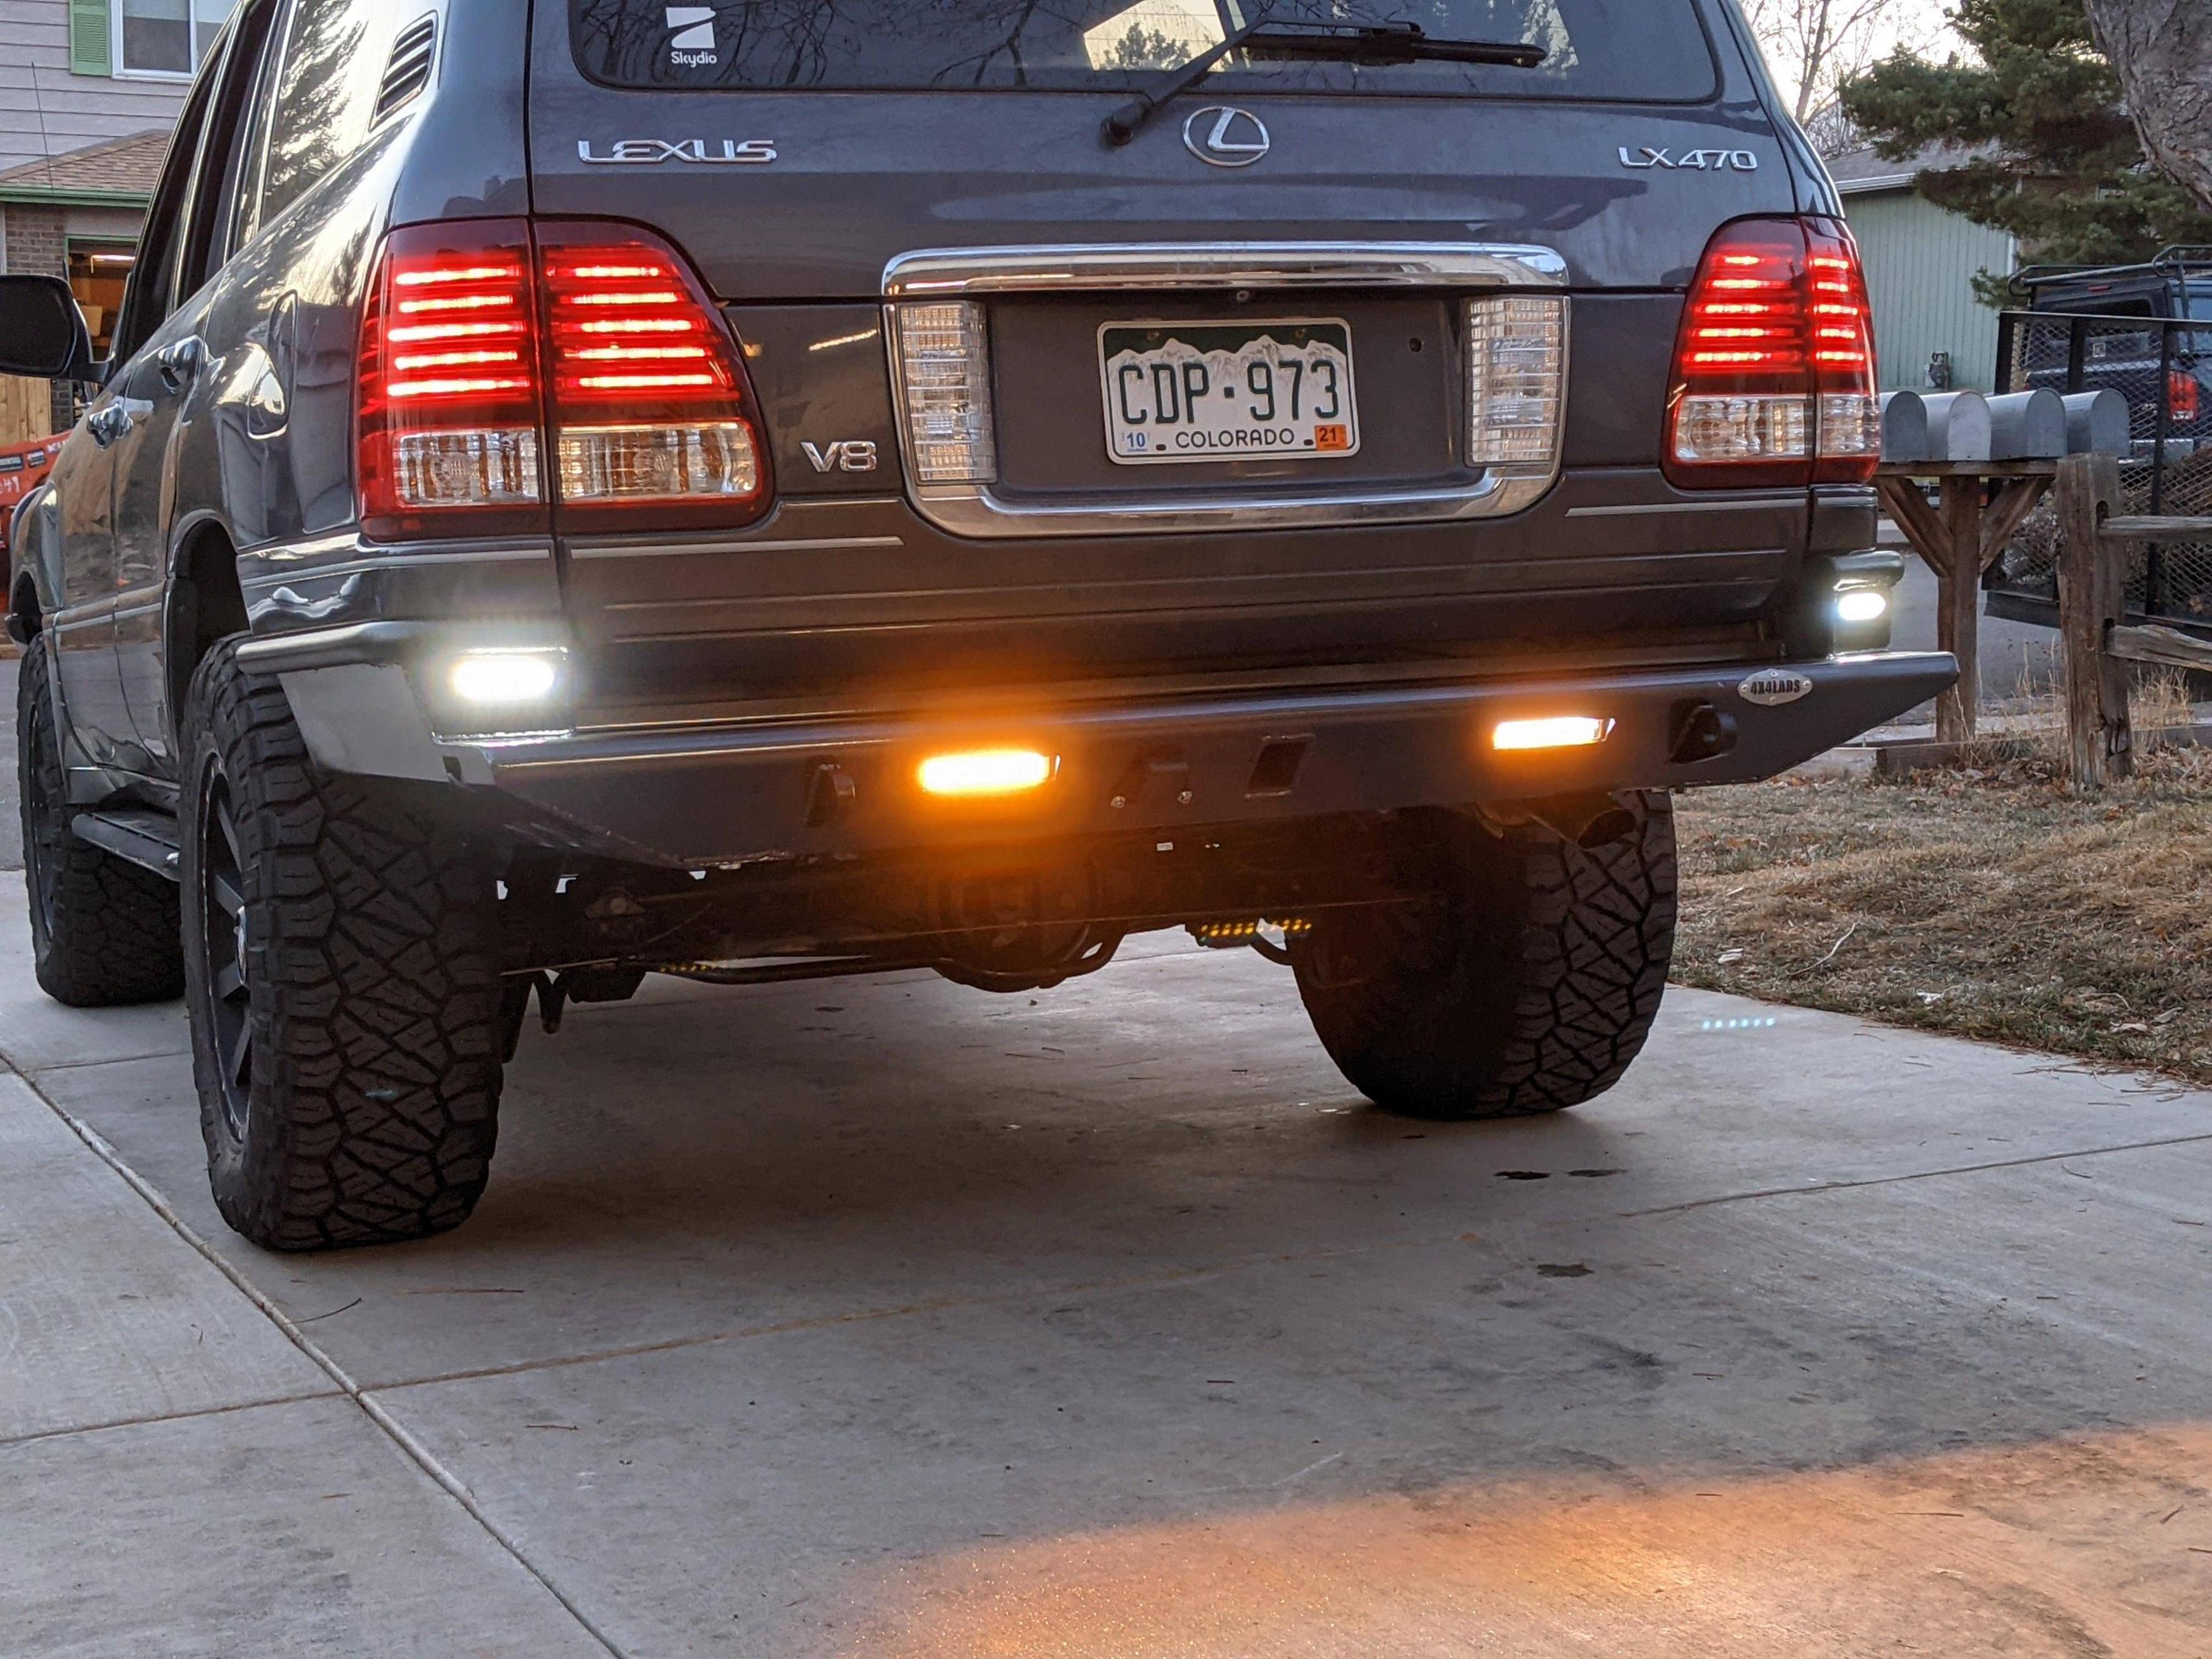
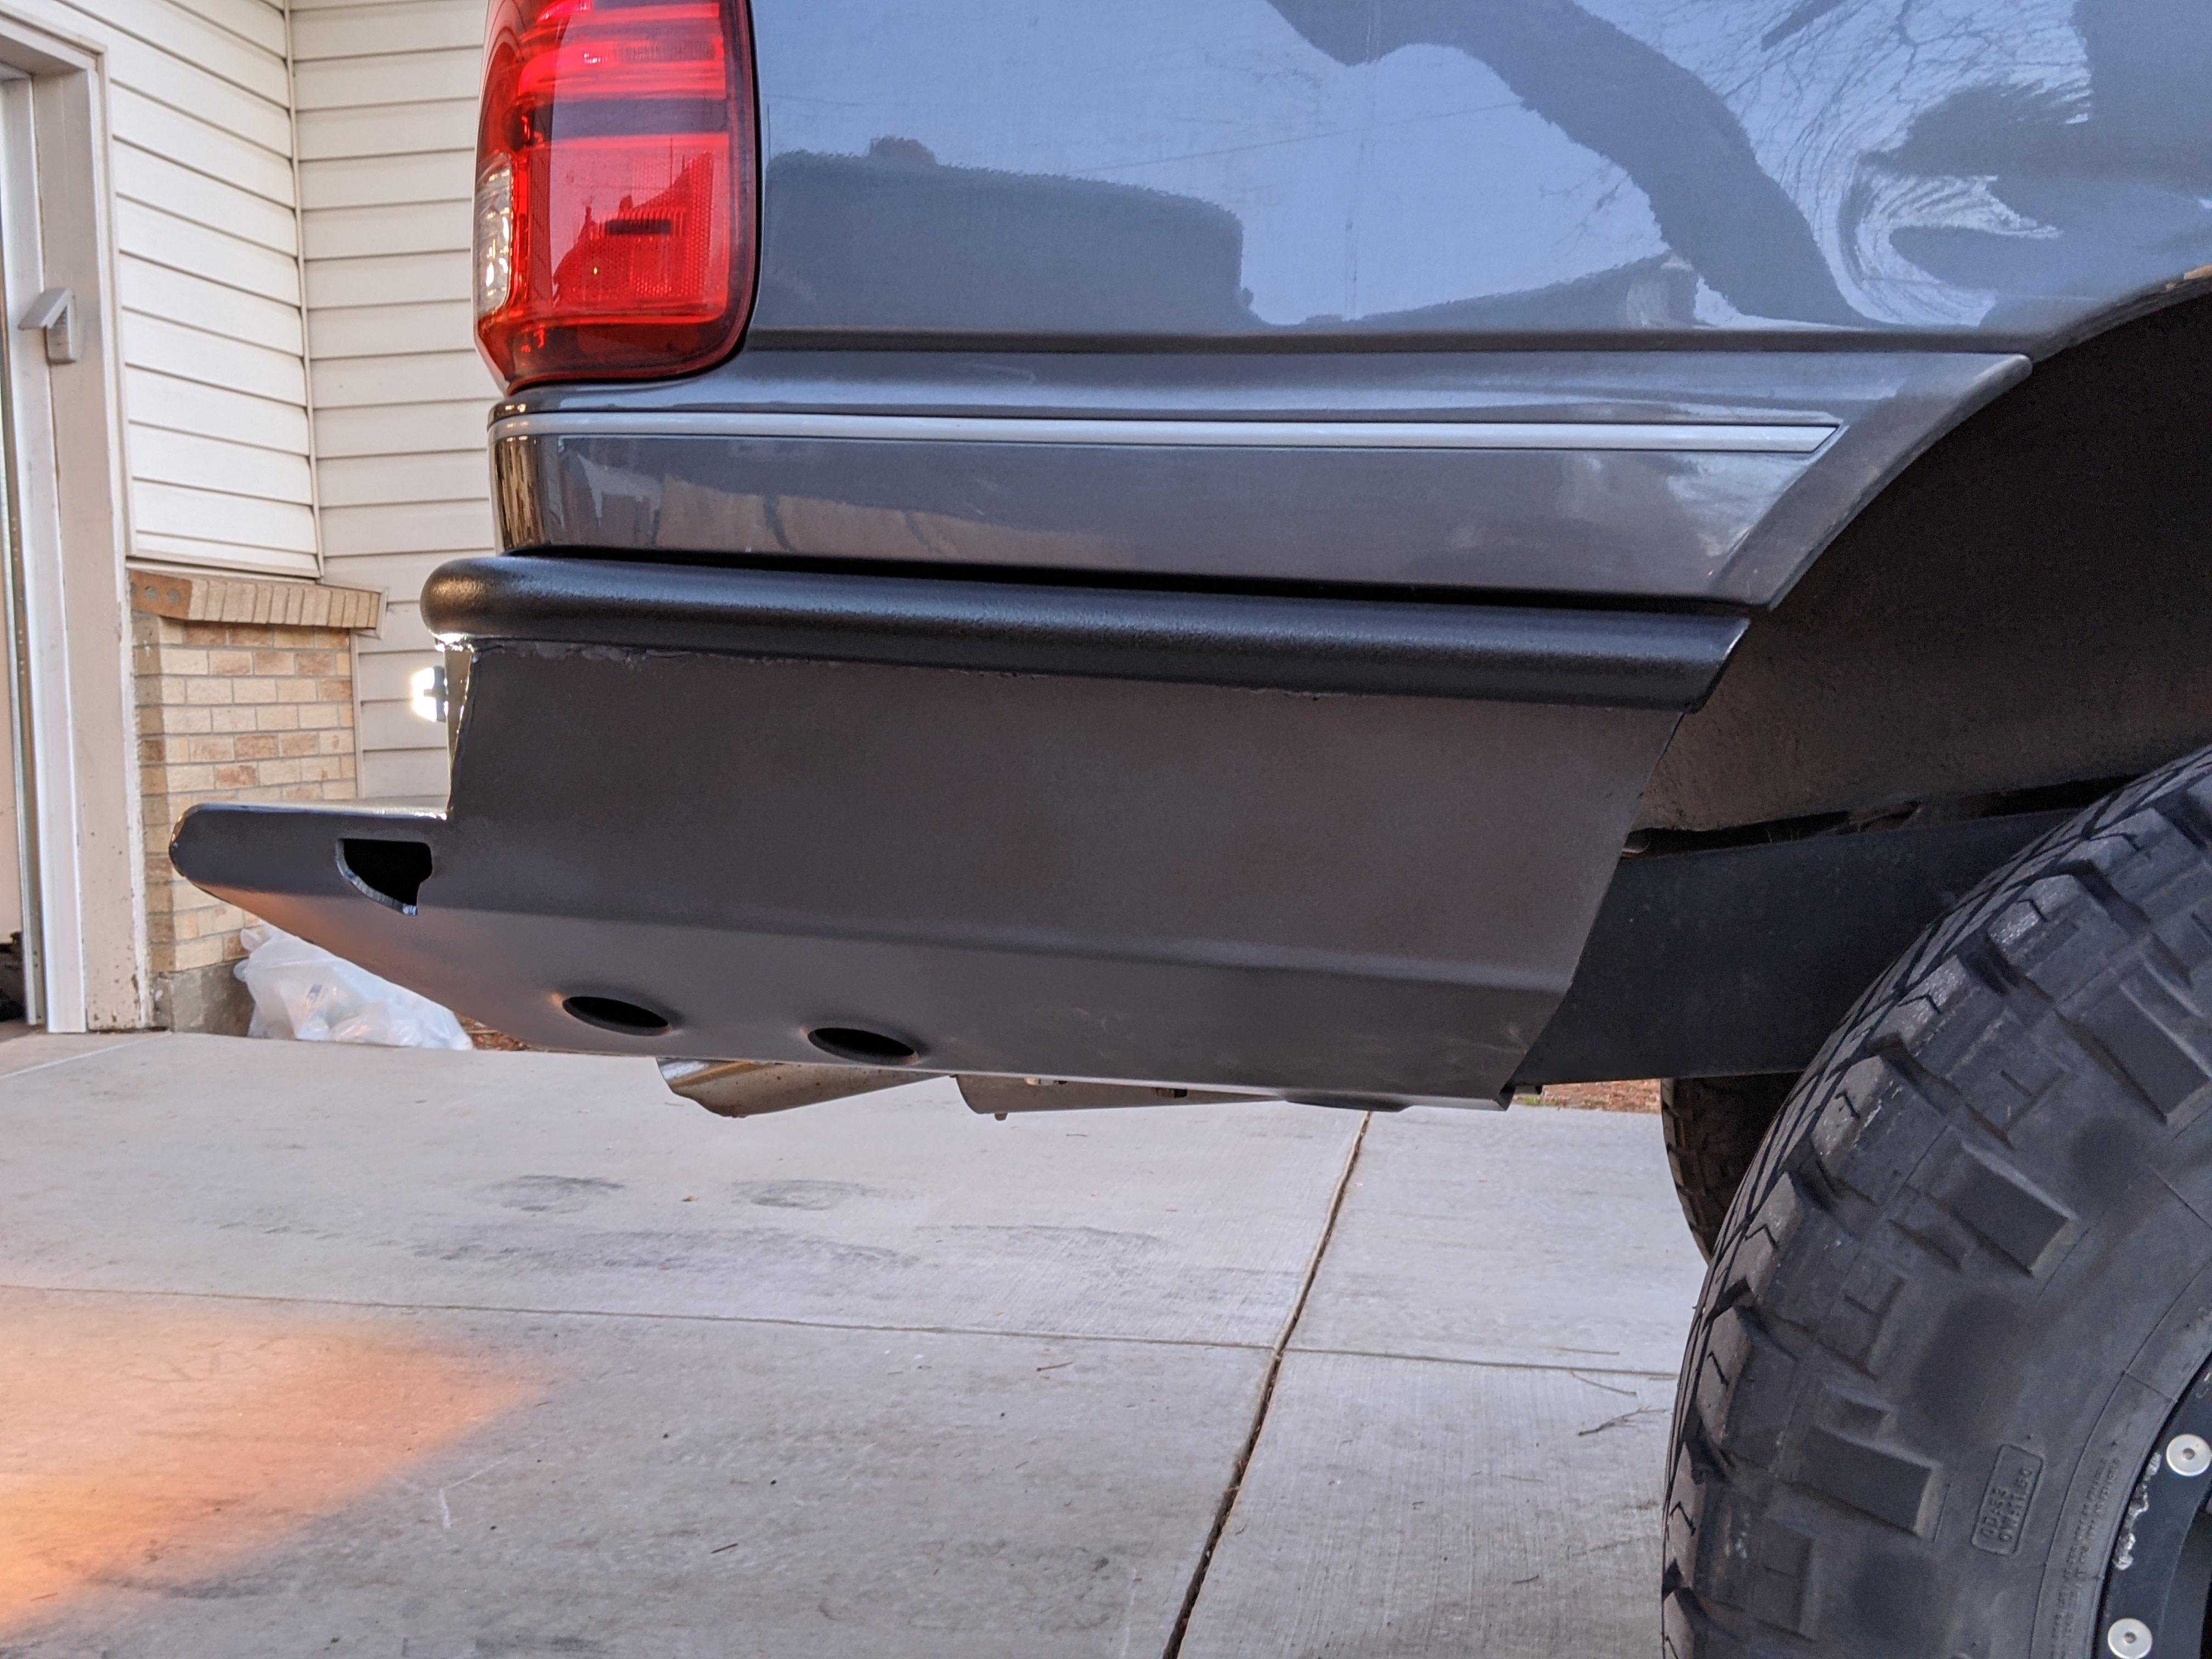
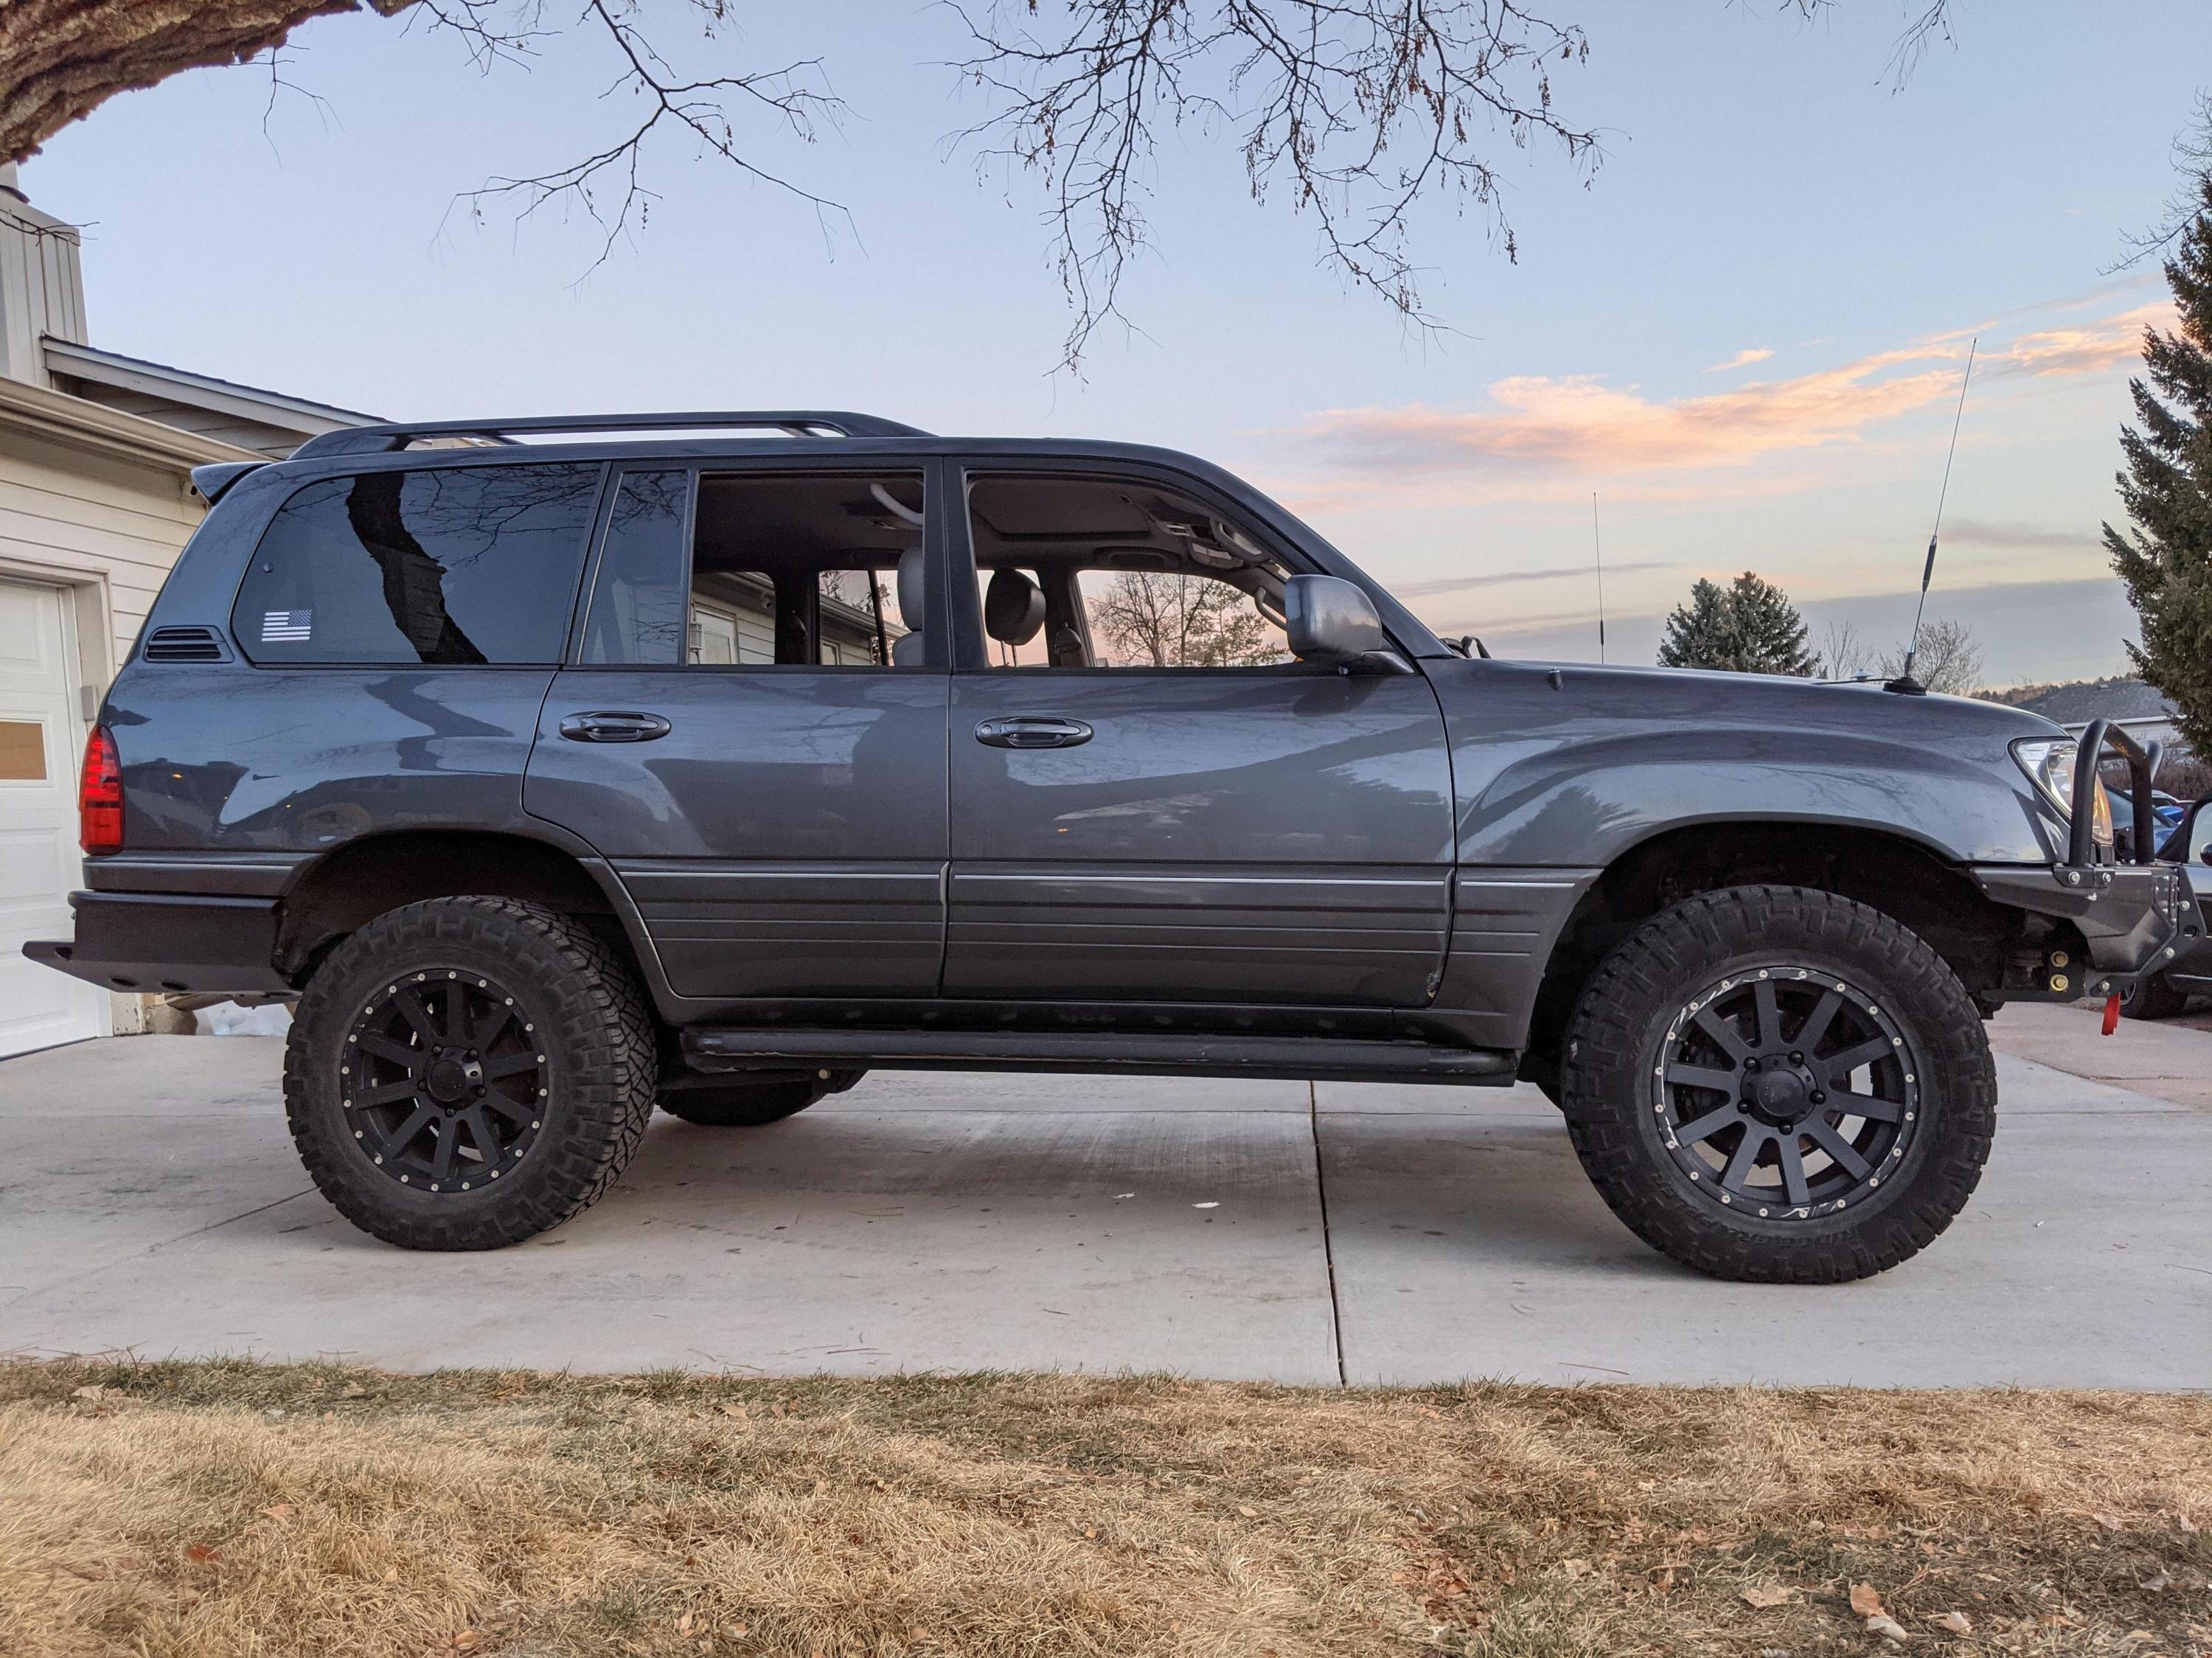
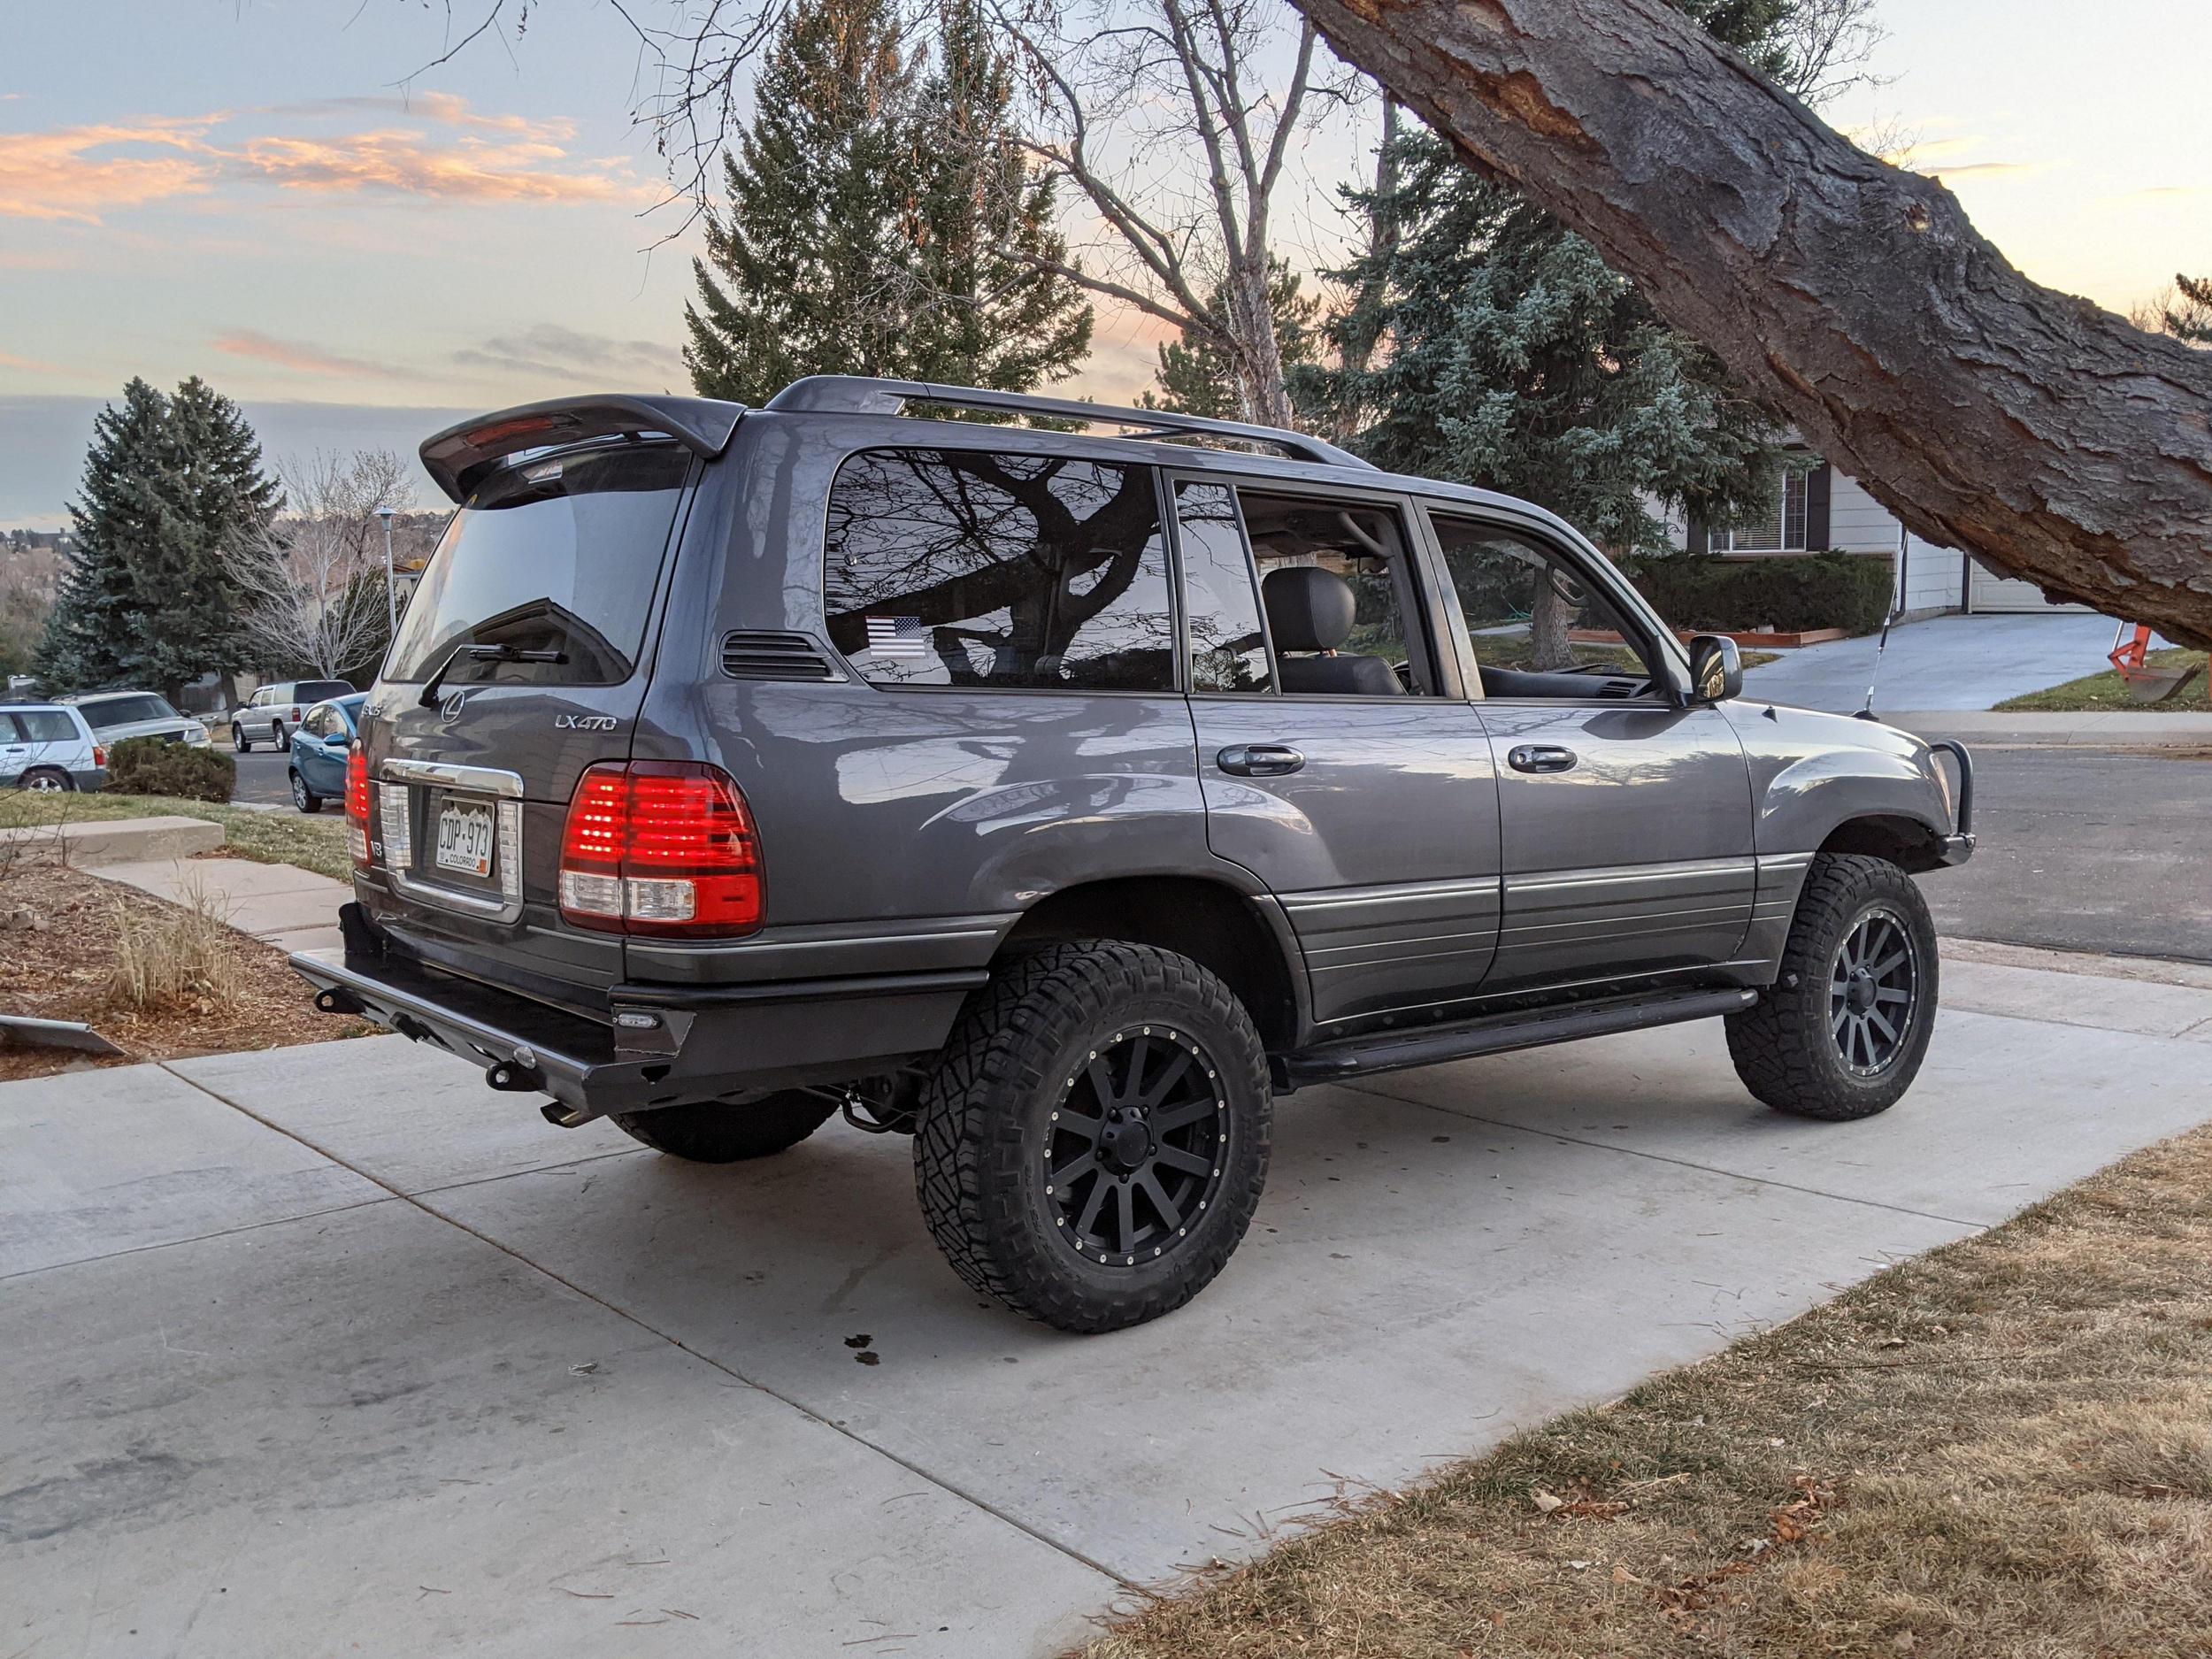
Finished my 4x4Labs kit up yesterday and dropped it off at the sandblaster today. It was so much fun to build. Was basically my first welding project but I think I still did a pretty not-bad halfway decent job. I think the 4x4Labs rear is one of the best looking and most functional. Also considered Coastal but I don't like the side wings as much. Can't go wrong either way.

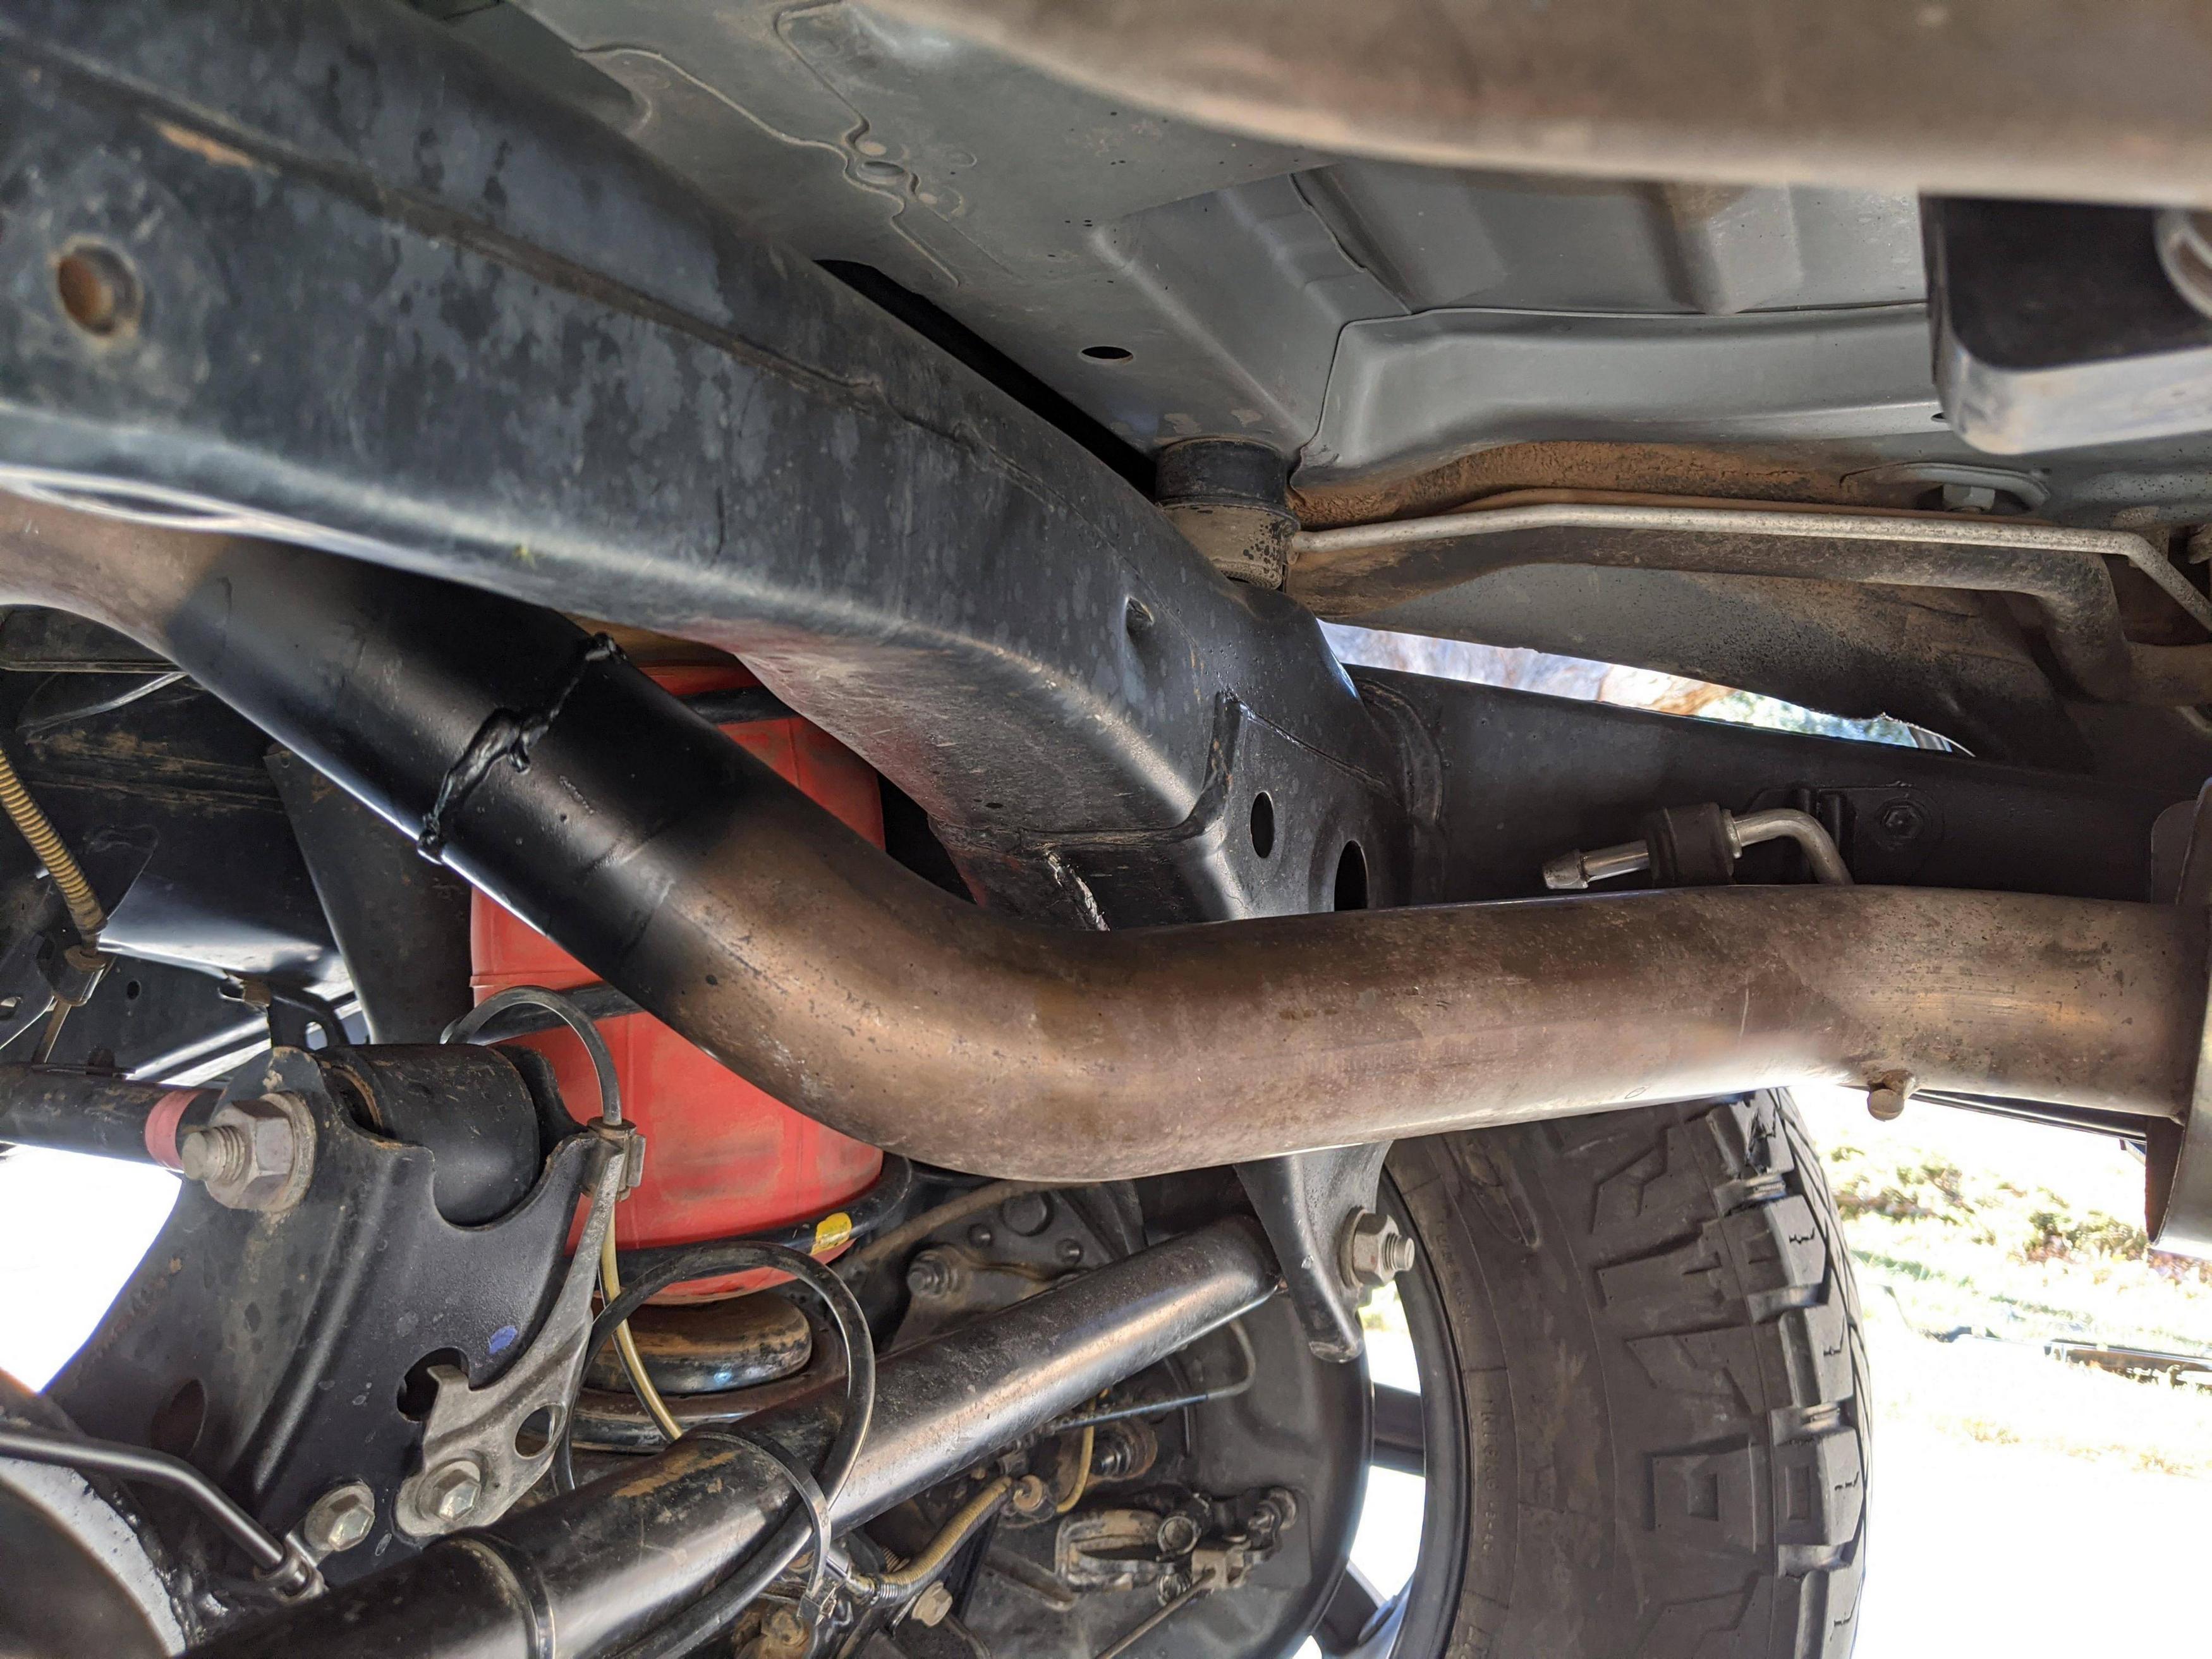
Cutting the rear crossmember took a lot more time than I had budgeted just because it's so close to the tailgate you have to get creative.

NGLrkoe.jpg


9uH3BoA.jpg


FQELccv.jpg


eZyEW2k.jpg


p4jAvzR.jpg


LQS6FRa.jpg


qOLkNTc.jpg


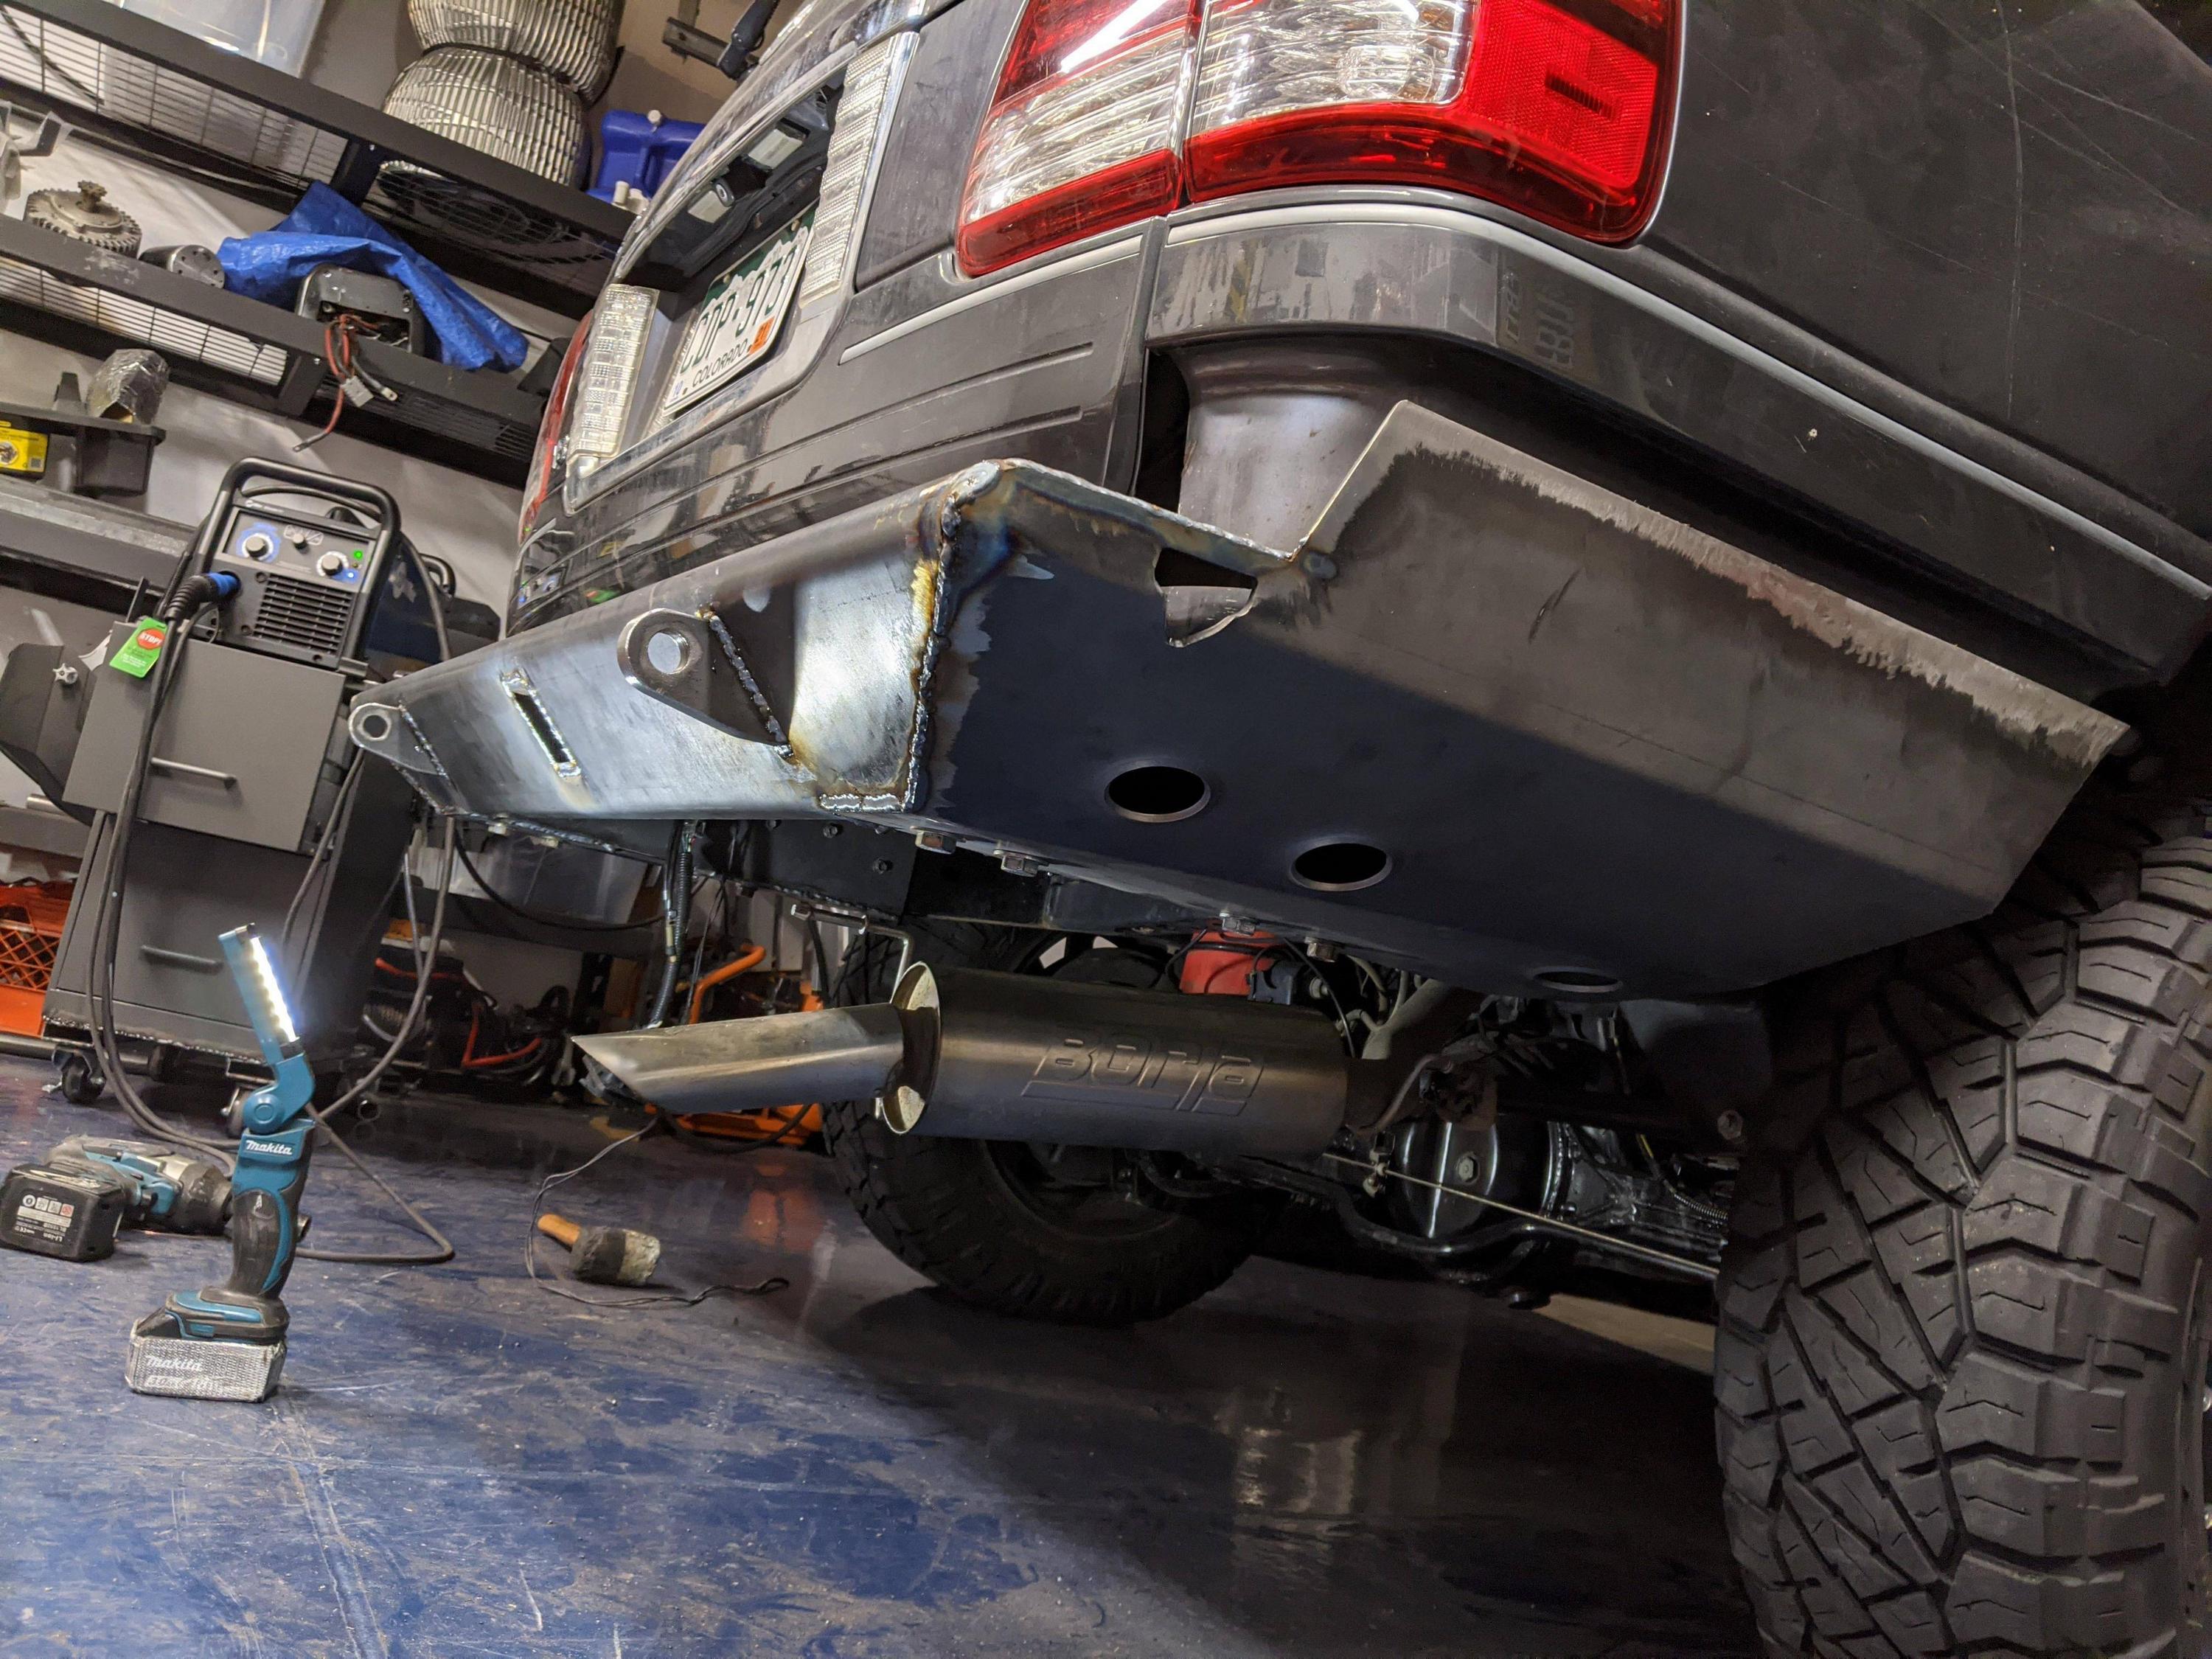
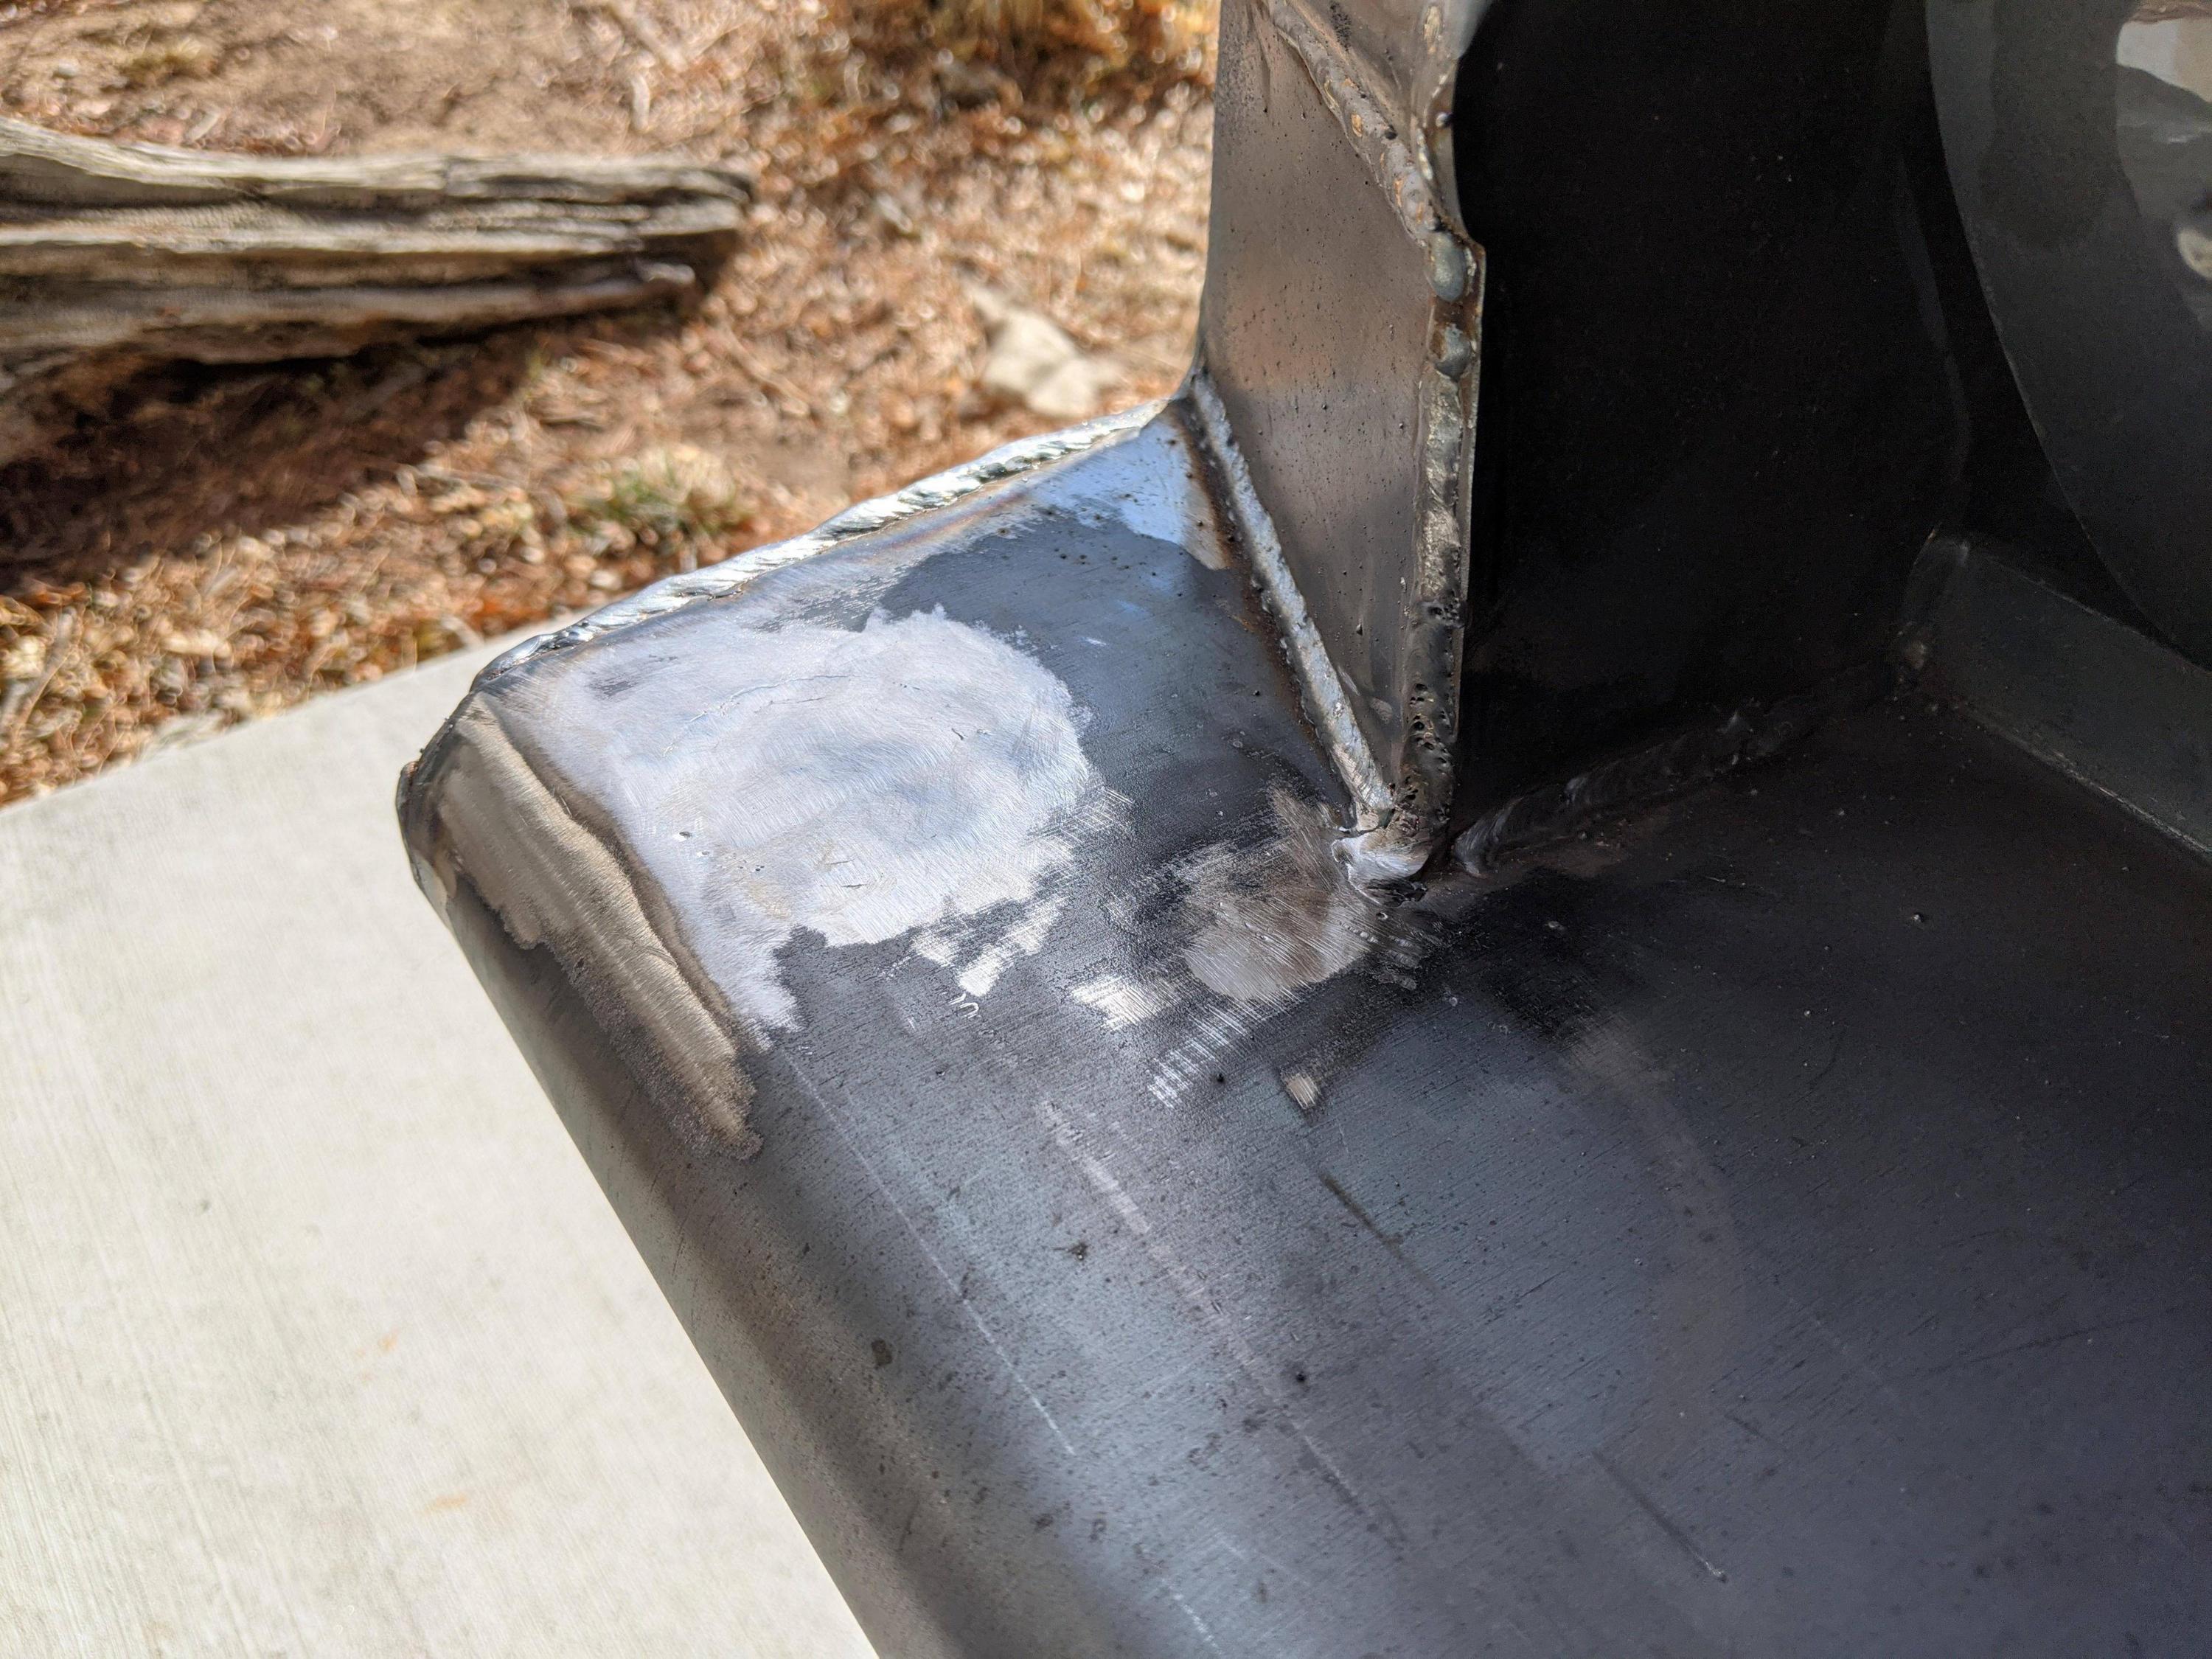
I didn't want swingouts unfortunately I guess the kit only comes one way so you get to fill in the holes yourself:

bGvvAcp.jpg


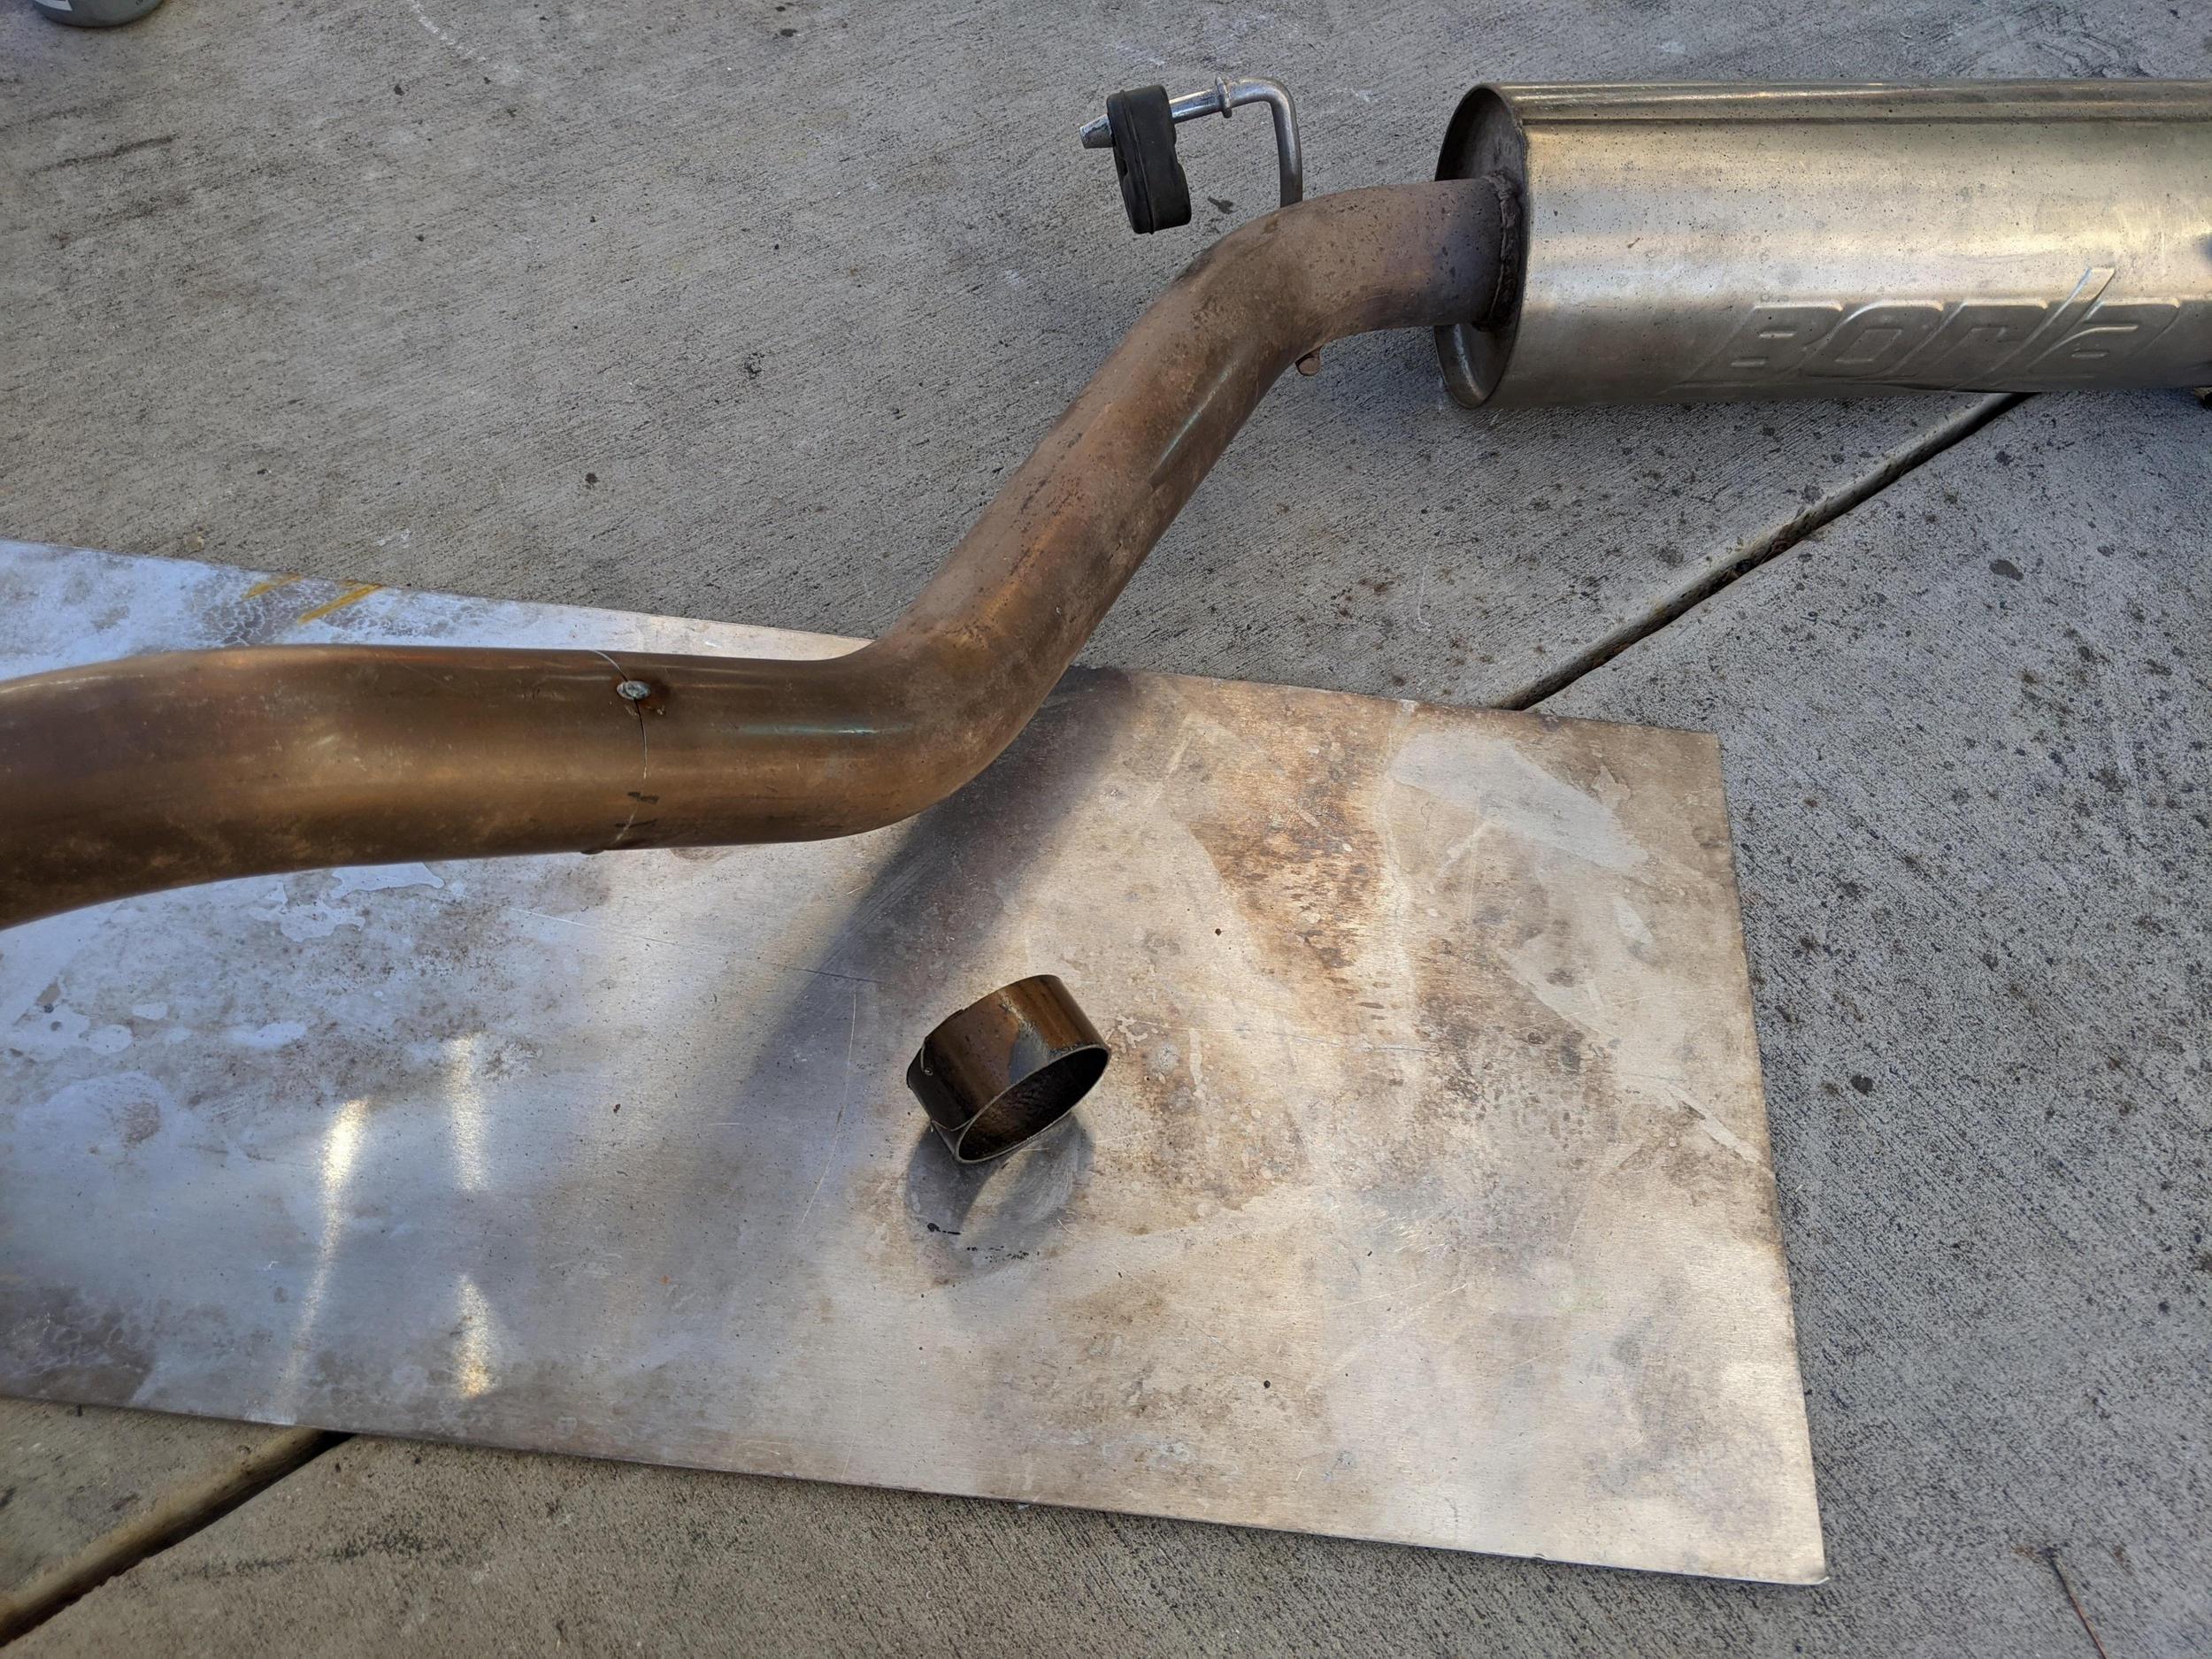
The Borla exhaust still fit on the stock hangars but hung way too far down. All it needed was a simple section taken out to move it up and back and tuck it way up tight. The second to rearmost rubber hangar I flipped upside down after bending it slightly, the rearmost hangar I cut from the stock crossmember and welded to the new 4x4Labs one.

W0ZGJTL.jpg


QmosGV8.jpg


2o1OV6S.jpg


NSexsvX.jpg


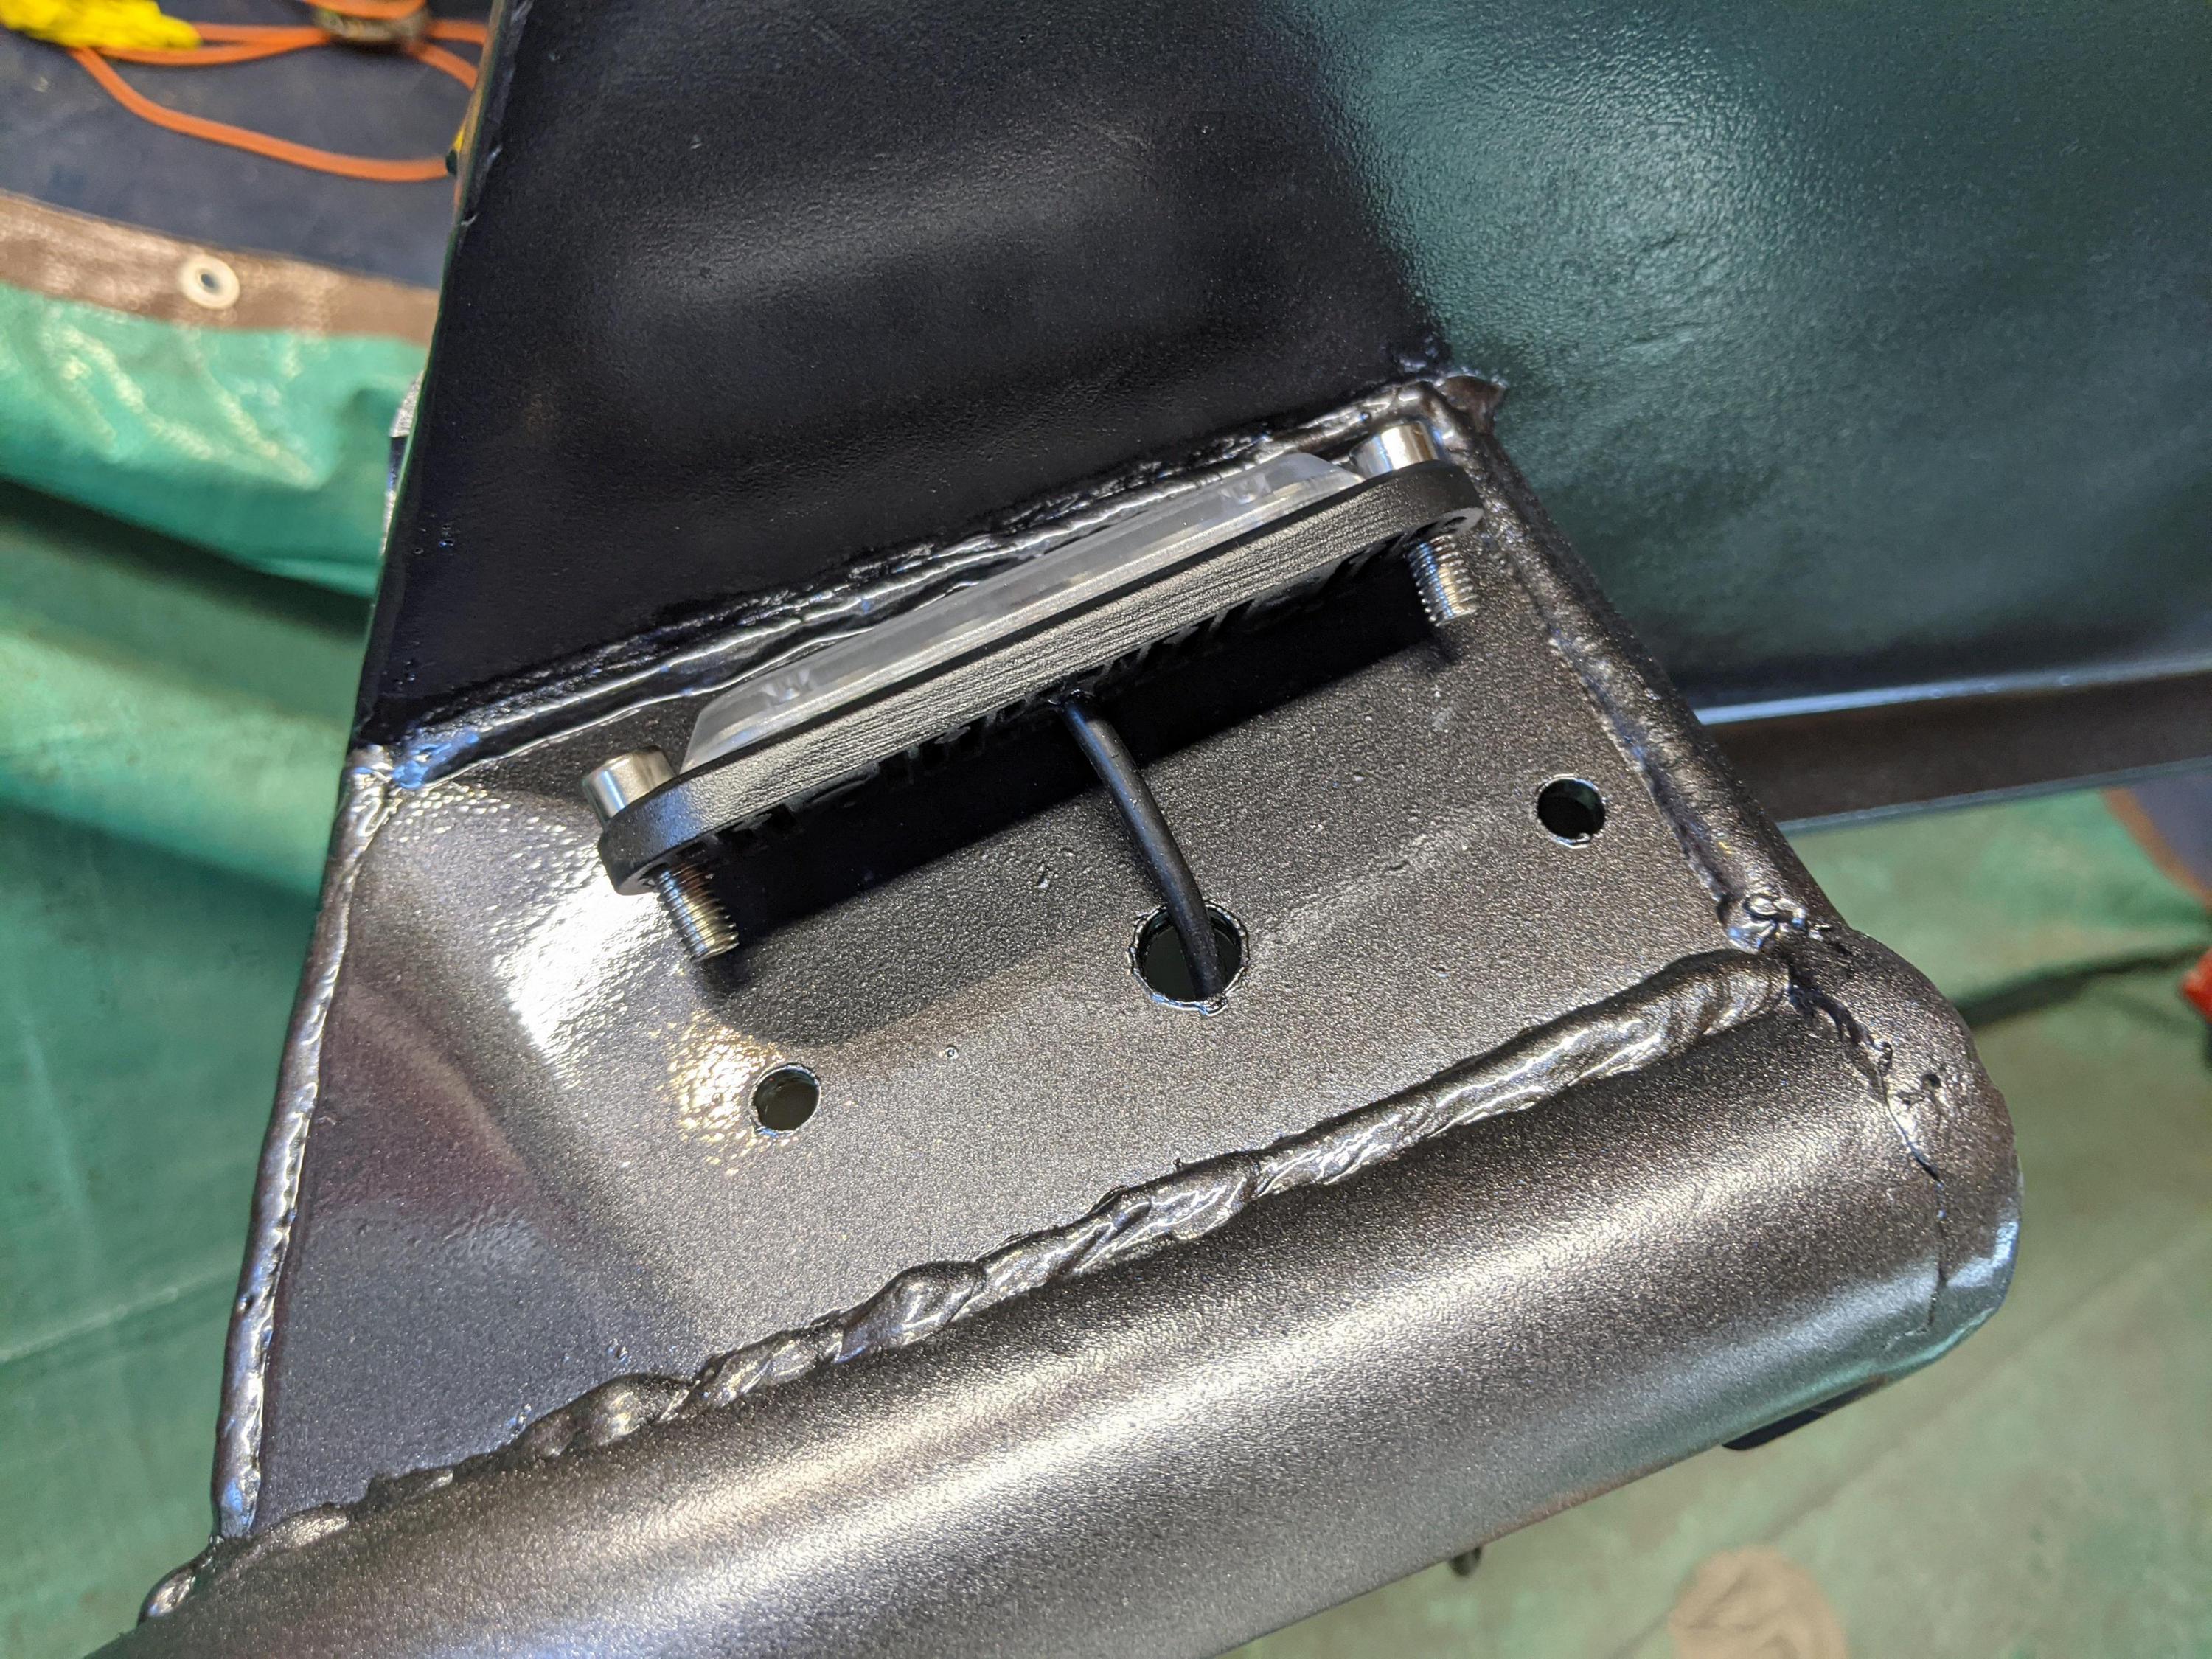
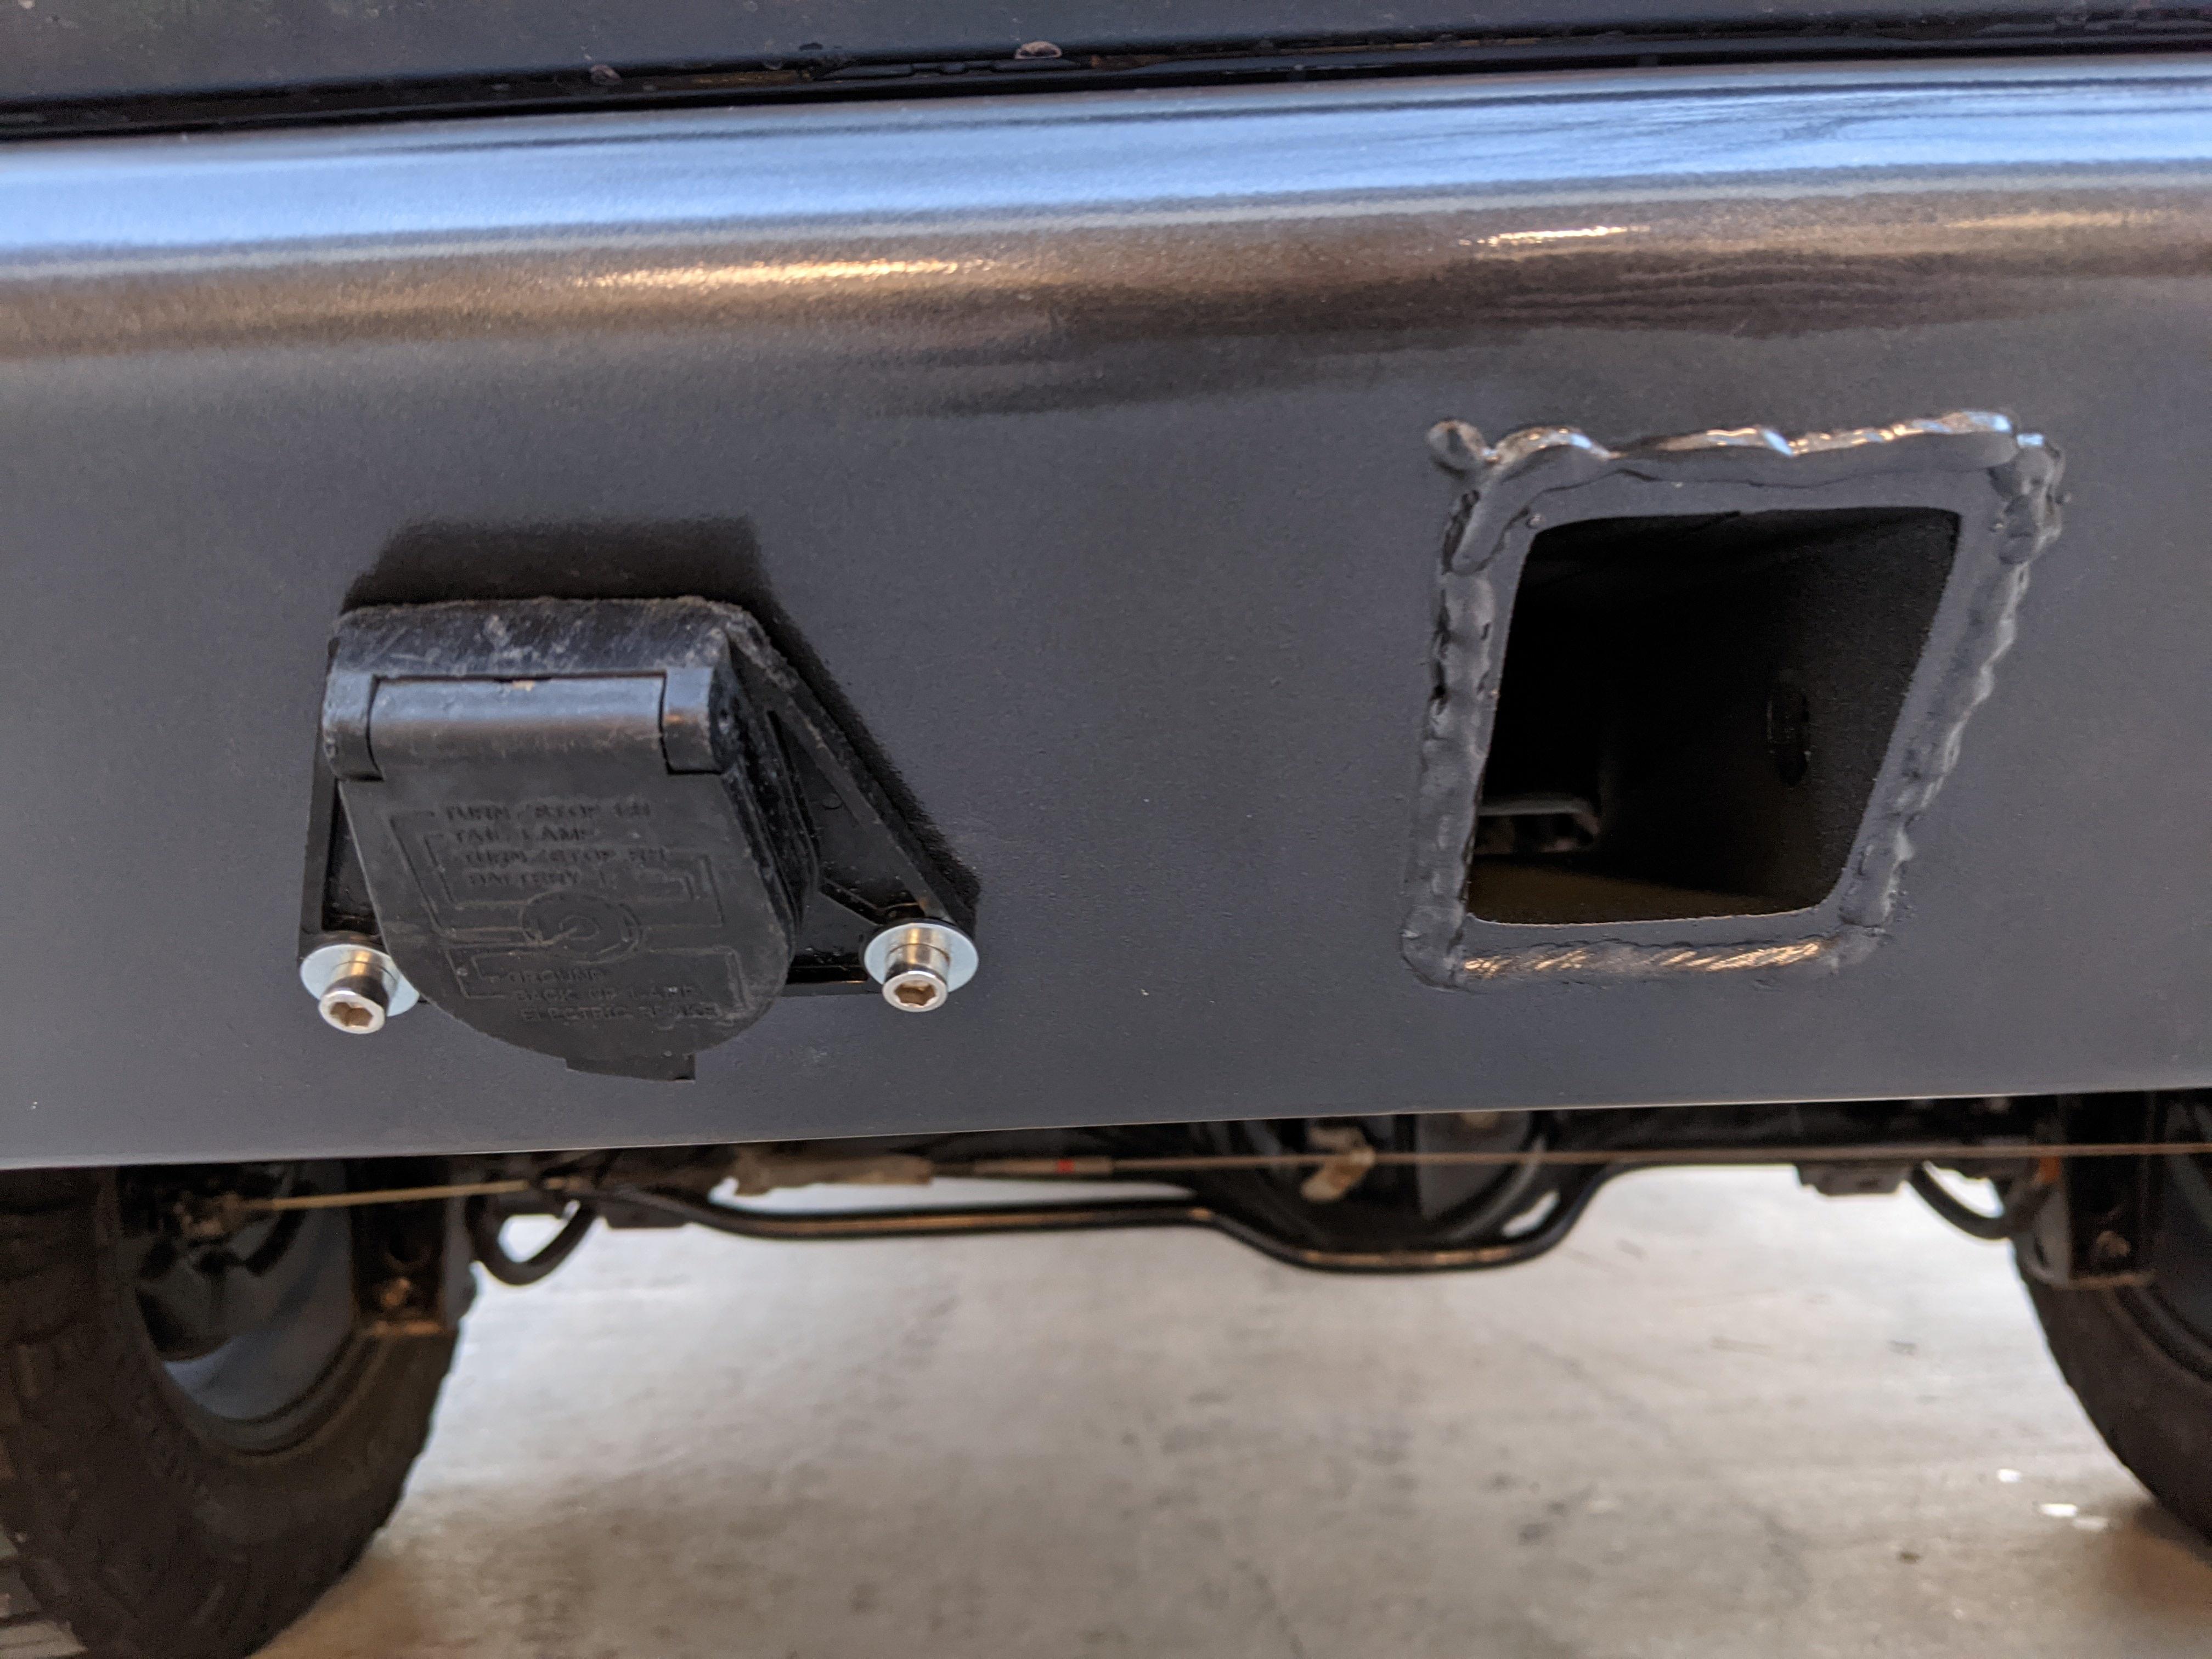
Cut rectangular holes for reverse lights and also a hole for my trailer plug (not pictured)
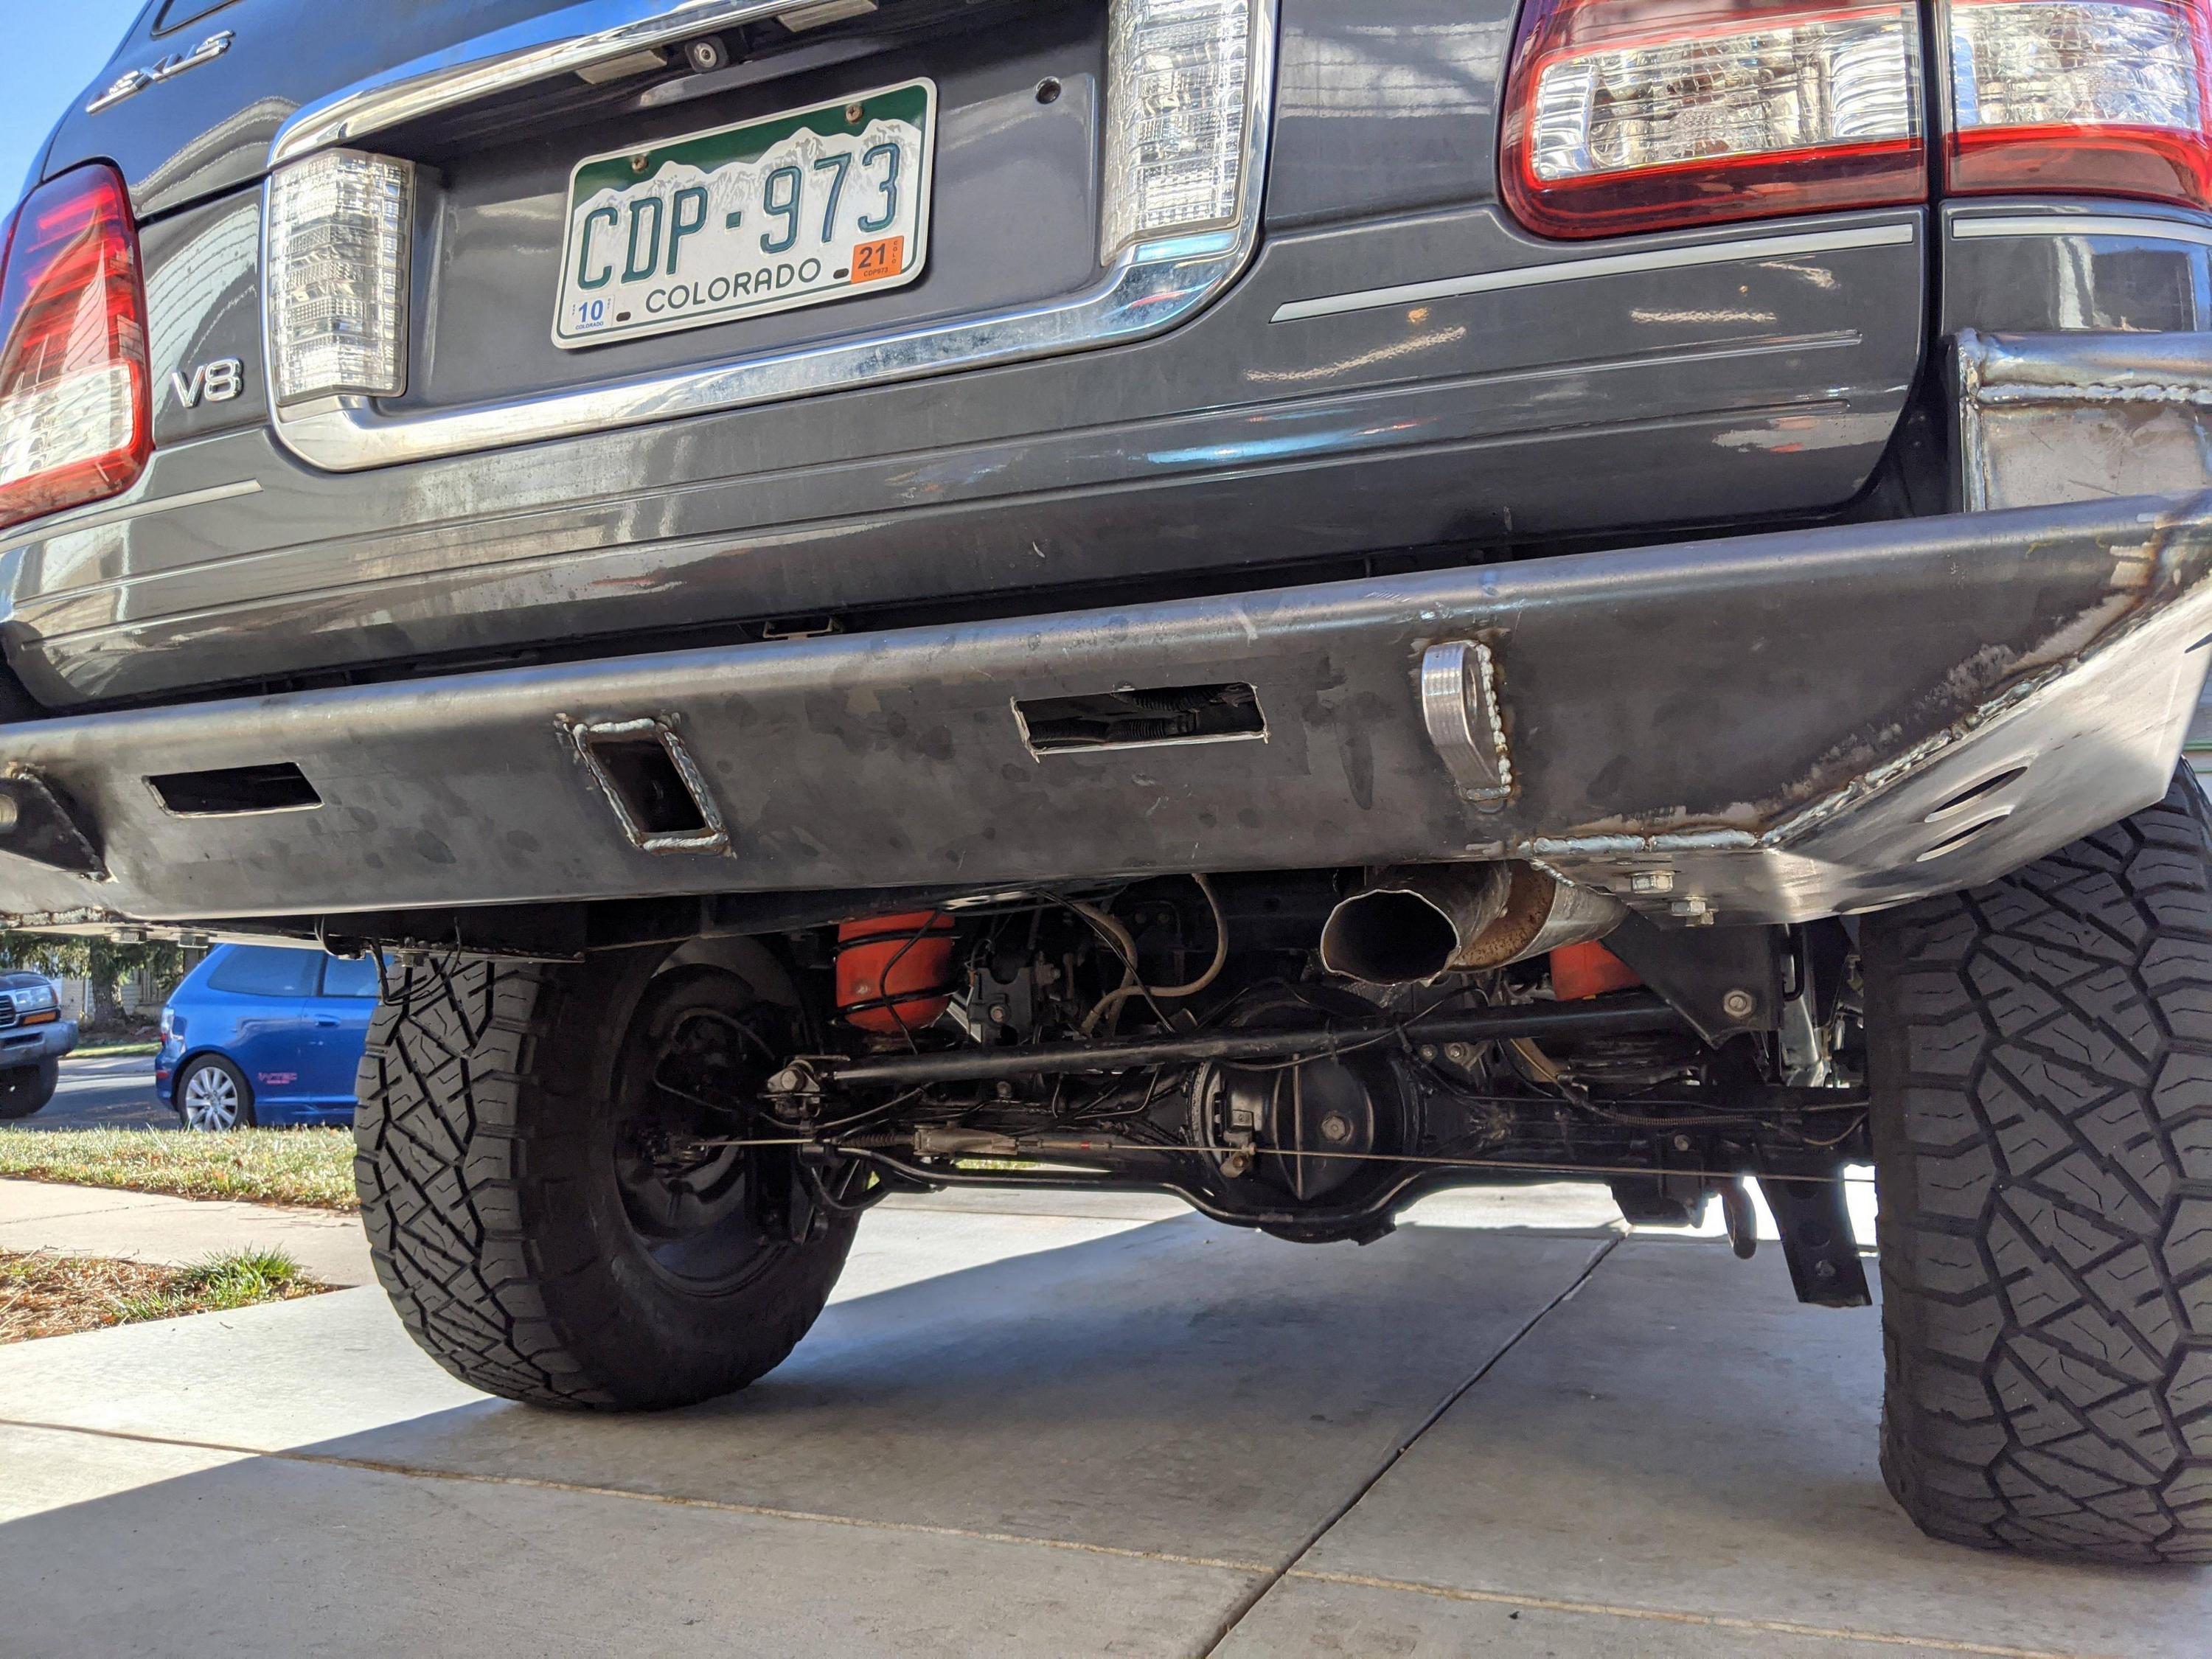
eprwo23.jpg


6xHeTvd.jpg


So much clearance.

Will update when it's painted. I recently bought a Miller 211 and it worked perfectly for this job: Millermatic 211 MIG Welder With Advanced Auto-Set And Cart 951603 - - Amazon.com
 
Last edited:
... Was basically my first welding project ...
GTFO! If you weld like this on your first job, I can't wait to see what you'll produce with some practice!
I love the 4x4 labs bumper but I lack welding skills. I keep asking around for the cost of getting one welded locally but still haven't found a good quote yet.
 
About how many man hours it take. My welder charges about 70 and hour, and does great work, plus fun to talk to, and he said he wouldn't mind taking a crack at it.
 
GTFO! If you weld like this on your first job, I can't wait to see what you'll produce with some practice!
I love the 4x4 labs bumper but I lack welding skills. I keep asking around for the cost of getting one welded locally but still haven't found a good quote yet.
Haha thanks but I also only took photos of the best ones and I did the bottom first so I would have practice before the visible ones ;) With such thick material it's great to learn on and if you screw up just grind it out and try again.

It took me probably 25-30 hours.
 
About how many man hours it take. My welder charges about 70 and hour, and does great work, plus fun to talk to, and he said he wouldn't mind taking a crack at it.

buy the fully built bumper,it will probably be more expensive to pay someone else than have to built by 4x4labs themselves
 
Got my bumper painted up. Just rattle-canned it myself the same way I did my front. Also installed lights and the trailer plug. Did the tubes and recovery points in black truck bed liner, same as I did my front bumper bull bar. I think it came out awesome! I am STOKED on how it turned out and how it matches both my Slee sliders and Dissent front bumper. Along with the overhangs now matching I'm so happy with it!

ColorRite Aerosol Toyota 1E9 Galactic Grey Pearl Metallic + clearcoat: https://amzn.to/3l0num4
Seymour Truck Bed Liner - https://amzn.to/2UWEAH1
Nilight LED Amber+White pod: https://amzn.to/374h8x9
Flat mount LED pod #ad: https://amzn.to/372bM5z

p0Eax7o.jpg


aIGVi0J.jpg


Had to lengthen the trailer plug wiring about 4 inches to reach:

SXD0w9z.jpg


4fyP3wY.jpg


ipQmTr8.jpg


uh7HErT.jpg


r28DZoc.jpg


VqtRkLN.jpg


POPvHVC.jpg


BWush9i.jpg


fwuCbNY.jpg


AxOMbbD.jpg


e9o8Nwq.jpg
 
First tow test! FYI for this bumper a Curt 6" drop hitch worked best to keep my trailer level. Mixed feeling about my backup lights that are cut into the bumper, might have to try something different as they just aren't as bright as I hoped. The flush mounted trailer plug worked perfectly though. This bumper is awesome for backing up you can go well past 90 degrees without jacknifing.

Curt 6" drop hitch: https://amzn.to/33sPDMU
2" ball, 1.25" screw#ad: https://amzn.to/3obtnPi

VpxDc8m.jpg


DTwocBz.jpg


rVThrwU.jpg
 
I added some mud flaps to stop debris and snow and ice etc from building up in the corners of the bumper and frame. This is one drawback of this design IMO. I just used some ABS sheet plastic cut to size. I love working with this stuff; you just score the line you want and then crack it and get perfect cut every time! Tough and durable also.

ABS plastic sheet: https://amzn.to/3aPpDPZ

pYR9qHL.jpg


HbJPBzu.jpg


Y0SrGwy.jpg


nbaIlwJ.jpg
 
Not a 100 guy but saw this thread pop up. I welded up a DIY 4x4labs kit last month. Took me about three days spread over two weeks as I had to fit it in between kids and work and you know, Covid life.

Hacking off the crossmember (don't know if applies to 100s?)
View attachment 2438347

Dry fitup
View attachment 2438350

Welding up the main shell and swingarm test fitting
View attachment 2438353

Pull testing the welds over Labor Day
View attachment 2438357

And fully loaded up for camping (I made a carrier for my propane tank and water stuff, and also a simple bike rack.)
View attachment 2438354

One note is that spray painting it is definitely less "nice" than powder coating, but I also scratched up the bottom and the back edge on rocks and with my tow strap the first time out...so I plan to keep touching it up. If yours will get less (ab)use powder coat seems nicer, but after having a set of sliders powder coated and then realizing how hard it was to touch up nicely I prefer spraypaint.

Message me if you want any more details on building it, I'm not a very good fabricator and it was pretty easy/straight-forward. Would do it again...am eyeing the front bumper kit from 4x4labs too. I would assume their 100 series stuff is just as good.
I had a quick question?? I need guidance and i know this post is old…
 
Hi there, sorry I missed your msg but yeah, let me know if I can help
 
I need guidance, when you cut the rear subframe, and mount the sideflaps and middle portion is it ok to tack and than add the crossmember piece after or before?
 
Yeah, that's what I did. Mount the sides and middle and tack it. I think I attached the cross member after I pulled the tacked-together bits off the truck.
 
I need guidance, when you cut the rear subframe, and mount the sideflaps and middle portion is it ok to tack and than add the crossmember piece after or before?
Yeah, that's what I did. Mount the sides and middle and tack it. I think I attached the cross member after I pulled the tacked-together bits off the truck.
Ok thanks, that helps alot! How bout these two pieces??

1D075999-4398-4308-ACCD-0D7F20974224.jpeg


D3B1F607-79B5-4DC6-94D6-C49AEBF654C7.jpeg
 
You got me there. That must have been added on since I welded my first DIY kit for my 100 back in 2009.

 
You got me there. That must have been added on since I welded my first DIY kit for my 100 back in 2009.

Its this flap next to the side wings…

777F0986-69D6-449C-939D-FB4297ECEC54.jpeg
 
On mine they were attached as one big bend, but it looks like you can tack them on the truck and then remove the whole thing for full welding?
 

Users who are viewing this thread

Back
Top Bottom