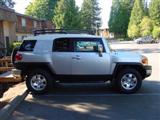
iCarKit ipod adaptor
This is an iPod adaptor that charges your iPod and works with the factory radio of many makes.
The company is
iCarKits.com
My specific model is the
I-Toyota-R unit.
You can control your iPod 3 ways.
From the iPod itself, your head unit buttons, and your steering wheel controls.
You have full functionality of your iPod.
Only drawback is the unit needs a firmware upgrade, and I hear it will not be out until 60 days.
I will have to send in my unit.
Why?
'Cause there is no frickin' text listing the name of the song.
Any factory head unit that can display text is suppose to show you the same thing your iPod shows on the screen.
Right now it just shows the song number.
But other than that major snafu, it is a great unit.
Once the firmware update comes out, I will ship the unit back to have them reprogram it.
Here are some pictures.
All the parts laid out
Lotta wires for sure and connectors.
You do not use all of the connectors.
The head unit
Very simple to pull the dash apart.
I have not done so in over 20 years, and it was really easy for me to do.
At the bottom of each side are 2 screws
you must take out.
Once they are out, you grab the side strips from the bottom and pull upwards.
It will takes some force, but do not be like a gorilla, you may snap one.
They have tangs in them that push into the dash in the middle and top, and they have to break their connection to come out.
Once the side strips are off, remove
2 more screws that hold the faceplate for the heater controls.
Once you have it pulled off, there are
3 plugs you muse disconnect.
You need to push in the little plastic catches to make the plugs release.
Set the faceplate aside.
After the faceplate is out of the way, use a socket set with a 10mm socket and
remove the 4 bolts.
Hook up the cable like it tells you in your manual, it is pretty straight forward.
I may update this thread later with a pic of the cable for the iPod I ran from the head unit to the glove box.
You lower the glove box by squeezing the sides in, and it will drop all the way down.
I used a screwdriver with some tape on it and the end that goes to the iPod and shoved it from behind the head unit into the side of the glove box.
Also the black box is just sitting behind the head unit, I did not tie it down for now.
Will see if it rattles while going into work.
There is a lot of room behind there.
I also may pull all of this apart later and see if the cables are long enough so the black box can also be stored in the glove box.
This will facilitate it when I need to send in the unit for its firmware upgrade.
You can store your iPod in the glove box or in your cup holder.
Since I already had a custom iPod cup holder mount I bought a few weeks back, I am going to use it.
You can close the glove box and have the cable run out the top, and it does not look bad at all.
Here is the iPod back
in the cup holder mount.
When connecting all of this up, pull your radio fuse.
This is much easier than pulling the 3 plugs at the back of the head unit.
Also reset your iPod by pushing the menu button and the button in the center of the wheel to reset it.
After doing so you can fire up your head unit and select CD1 from your head units buttons.
You then should have full control over your iPod with the steering wheel controls or the head unit buttons.
It is pretty trick, but I am ticked off about the text thing.
If they do not make good on it, I will demand my $$$ back.
Also since this is controlled via the dock connector plug, you do not have to mess around with a volume control on the iPod.
When using the aux connector on the FJammer head unit with a stereo mini cable, you had to have the iPod cranked up all the way.
To see the manual on how to install the unit and a cool Flash movie on how it works, here is the URL
http://www.diceelectronics.com/ipod_integration.htm


