75 FJ40 Restoration

This site may earn a commission from merchant affiliate
links, including eBay, Amazon, Skimlinks, and others.

I gotta find me a wife like that. I always end up with women who are afraid to chip a nail.

I look forward to seeing more of your project build.
 
OK...sorry....I forgot to log "burling" out before posting my quick reply...That was NOT "Burling's" comment about chipping a nail....Sorry:doh: That was MY comment....:princess:

It was fun sandblasting.... my OCD about cleaning s*** up till it shines came out...I want the FJ40 to shine....:cool:

Wish we hadn't run out of sand but we'll refill and start up again tomorrow. I really am looking forward to working on it...
 
Good looking wife!. Mine won't have anything to do with my rig. Maybe it's better that way.
 
good to know that your taking the effort with stuff to do a proper rig, she should be a beauty when you finish, keep the fotos coming
 
A few more pics. Parts were sandblasted then Jasco was used and Eastwood Rust Encapulator was used to prep the axles.
picsto11-06-06018.webp
picsto11-06-06059.webp
picsto11-06-06062.webp
picsto11-06-06018.webp
picsto11-06-06059.webp
picsto11-06-06062.webp
 
Axles and skid plate were painted with Rustoleum Satin Black Enamel.

picsto11-06-06075.webp
picsto11-06-06079.webp


Then Resfreshments were in order to prepare for the next steps.

picsto11-06-06058.webp
picsto11-06-06075.webp
picsto11-06-06079.webp
picsto11-06-06058.webp
 
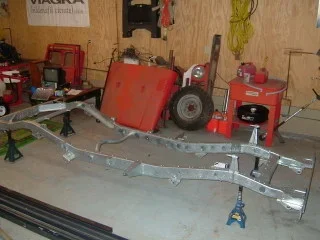
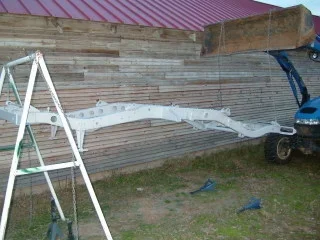
The frame was acid dipped and then galvanized. See pics above for pre dipped condition.
picsto11-26-06007.webp


Primed with Rustoleum 2 part epoxy primer.

Props to Waorani for giving me the part numbers to order from.
picsto11-26-06067.webp


The frame was then painted with Eastwood Chassis Black. I am not sure I would use this again, as it really gummed up in the gun quickly, even with adequate thinning with Xylene. I had to clean the gun 3 times just while spraying the topcoat.
picsto11-26-06072.webp
picsto11-26-06007.webp
picsto11-26-06067.webp
picsto11-26-06072.webp
 
Last edited:
Back in the shop for the paint to dry. Next step is to get the axles back underneath, then broken down for axle rebuilds and disk brakes. I also have a 4 inch BDS lift to install.

picsto11-26-06081.webp
 
If anyone is considering galvanizing their frame, I think it is the way to go. It only cost 250 dollars to acid dip and galvanize it.

Just make sure that EVERY bolt and screw is out. I had several that were broken off and I did not remove them before hand, and there were a few that I missed before sending it off for the galvanizing. They were essentially welded in. I had to drill out the broken bolts and retap many holes rather than using a bolt extractor which would probably have been easier.

I had to retap all of the holes, but taps from FASTENAL made short work of it. I had a cheap set of taps at first, but I can tell you now that 5 dollars a tap is well worth the money and you definitely get what you pay for when you buy tap and die sets (don't forget the cutting oil as it makes the job much easier.)
 
Last edited:
If anyone is considering galvanizing their frame, I think it is the way to go. It only cost 250 dollars to acid dip and galvanize it.

Too late for me on my current project because I just got mine back from being powder coated. But, out of curiosity, where did you have to take the frame to get it galvanized?
 
Rhinoliner,

I took it to South Atlantic Galvanizing in Traveler's Rest South Carolina. They have facilities in North Carolina, South Carolina, Tennessee, and Georgia.

Super friendly people to work with.

I tried to get other companies in my area to do it, but they would not touch an auto frame (liability I guess), but South Atlantic had no problem and told me they had done several in the past.

Lucky for me, I have a friend that was doing construction 30 miles away from the facility and he had a trailer, so the ride for the frame was free there and back.
 
that is too cool. If you have any more pics of the galv and specifically close up of the frame.. Actually found this thead by search under galvanize, thinking of doing the same thing.. :)
 
that is too cool. If you have any more pics of the galv and specifically close up of the frame.. Actually found this thead by search under galvanize, thinking of doing the same thing.. :)

I'll post some better pictures this evening. I am still trying to figure out how to get my pictures small enough to meet the size requirements and some of them end up too small to see enough detail.
 

Users who are viewing this thread

Back
Top Bottom