I'm just starting the process of restoring the stock steering wheel on my '67. It hadn't been a priority and I had toyed with the idea of replacing it with a new wheel, but I couldn't find one with the same diameter (I still have manual steering, and will ALWAYS have unboosted steering") ). I don't want a modern looking steering wheel and the used ones I could afford were in the same condition. Not that I looked that hard
). I don't want a modern looking steering wheel and the used ones I could afford were in the same condition. Not that I looked that hard .
.
Ofcourse I didn't take any pictures before I started
[URL="http://i230.photobucket.com/albums/ee191/fireflyr_photos/Landcruiser%20Restore/FJ40topoff006.jpg"][URL="http://i230.photobucket.com/albums/ee191/fireflyr_photos/Landcruiser%20Restore/FJ40topoff006.jpg"] [/URL][/URL]
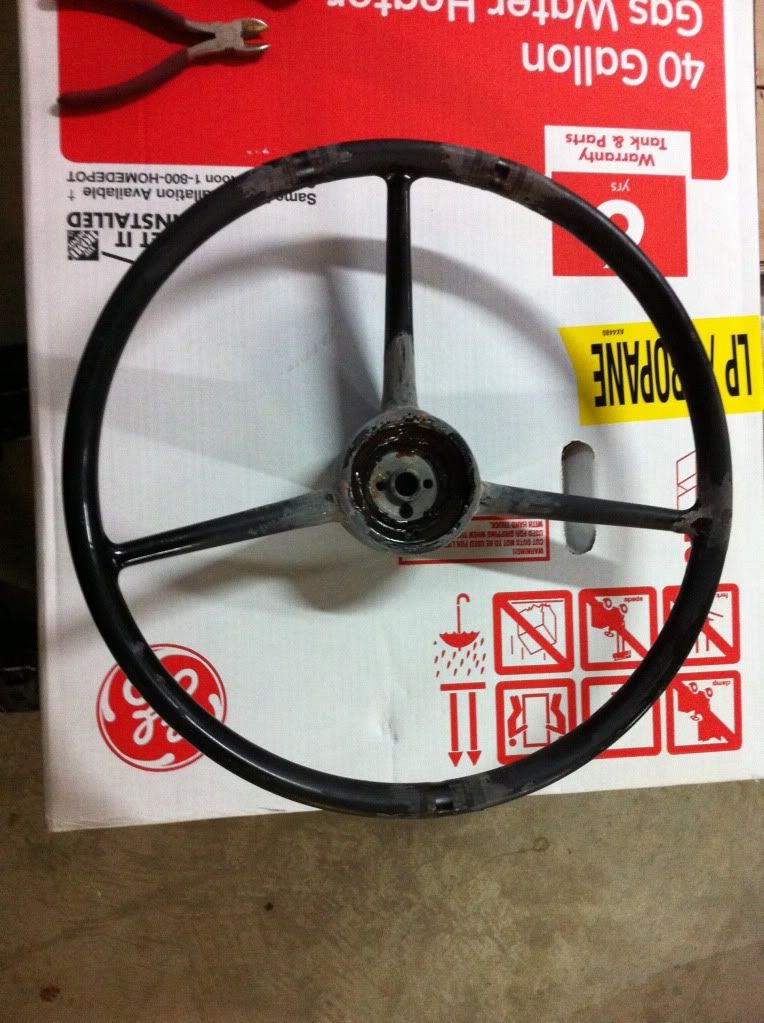
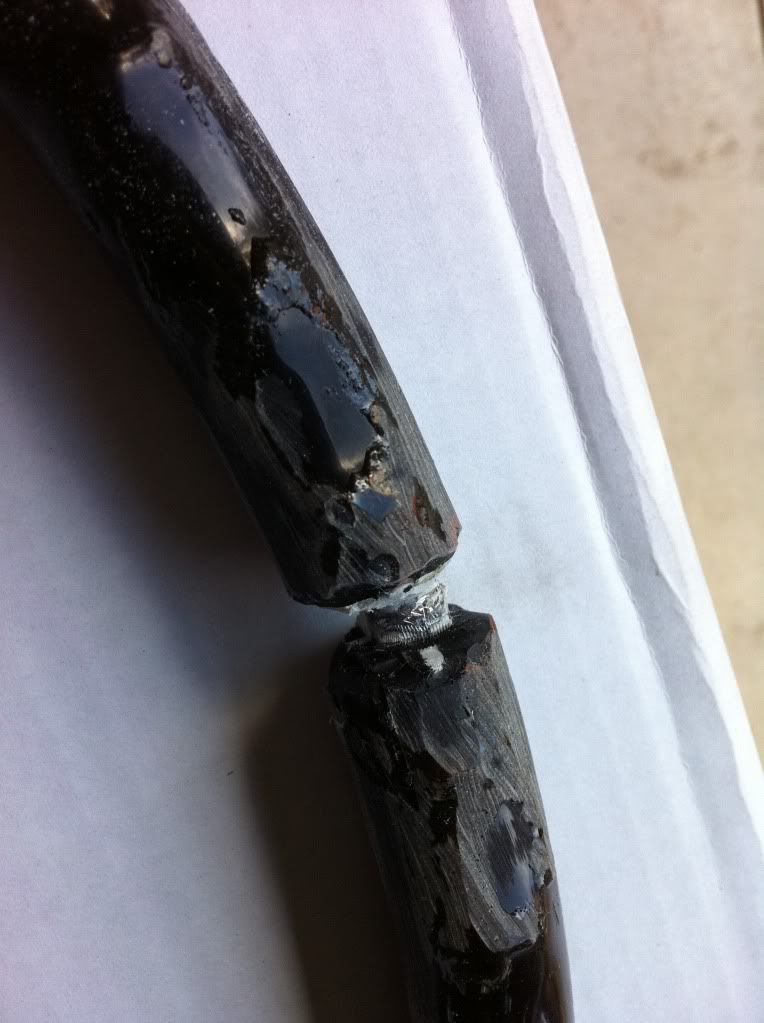
The center hub was severely cracked, all the way to the metal core and the rim was cracked with gaps in 4 places.
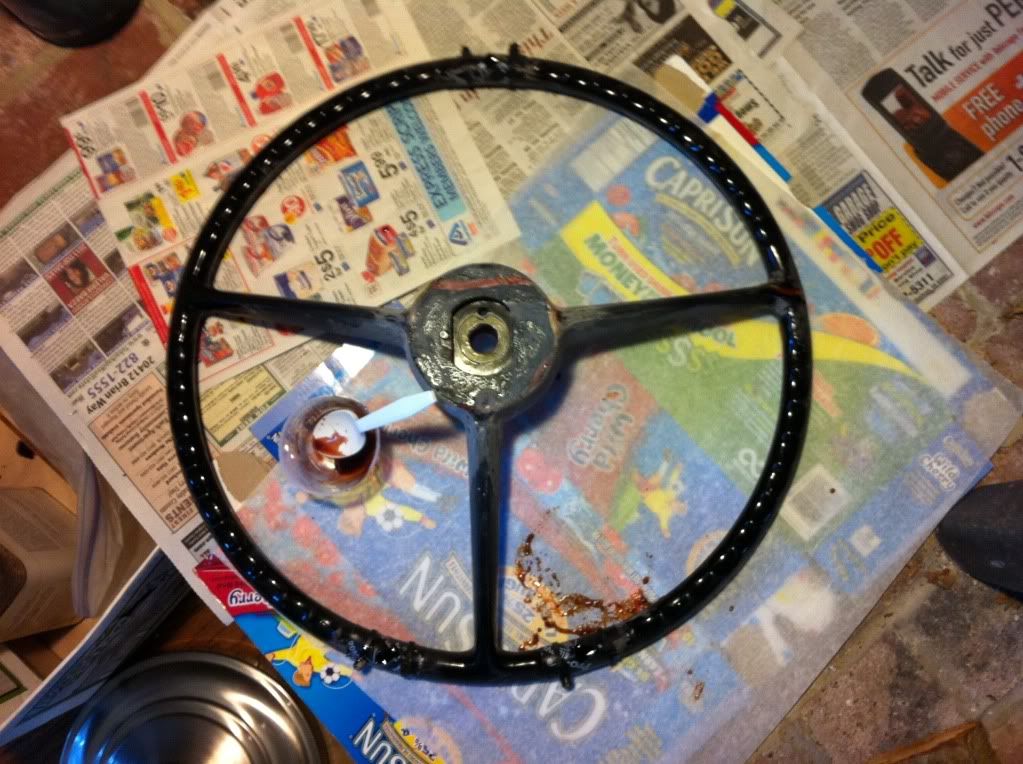
Since the hub was so distorted (even with filler it was uneven) I decided to take the material down so I had a symetrical center. I then used 3 layers of 6 oz. fiberglass cloth and resin to build it up to the original diameter. I overlapped the cloth and brought it around the spokes so it would give the wheel more rigidity. Lots of sanding has brought it pretty close to the original shape. Once the shape was good I gave it a couple coats of wood flour thickened 2 part marine epoxy. I've used this stuff for years in building mahogony kayaks, and although it is a mess to deal with it is as hard as nails.
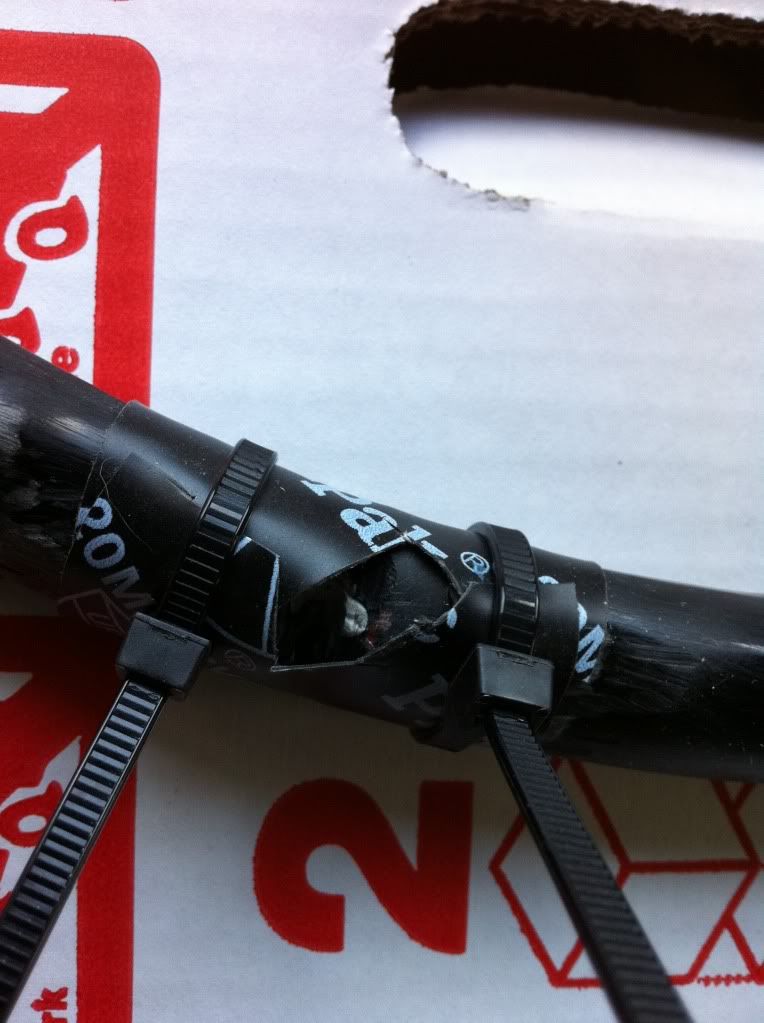
On the rim I had originally filled the gaps with a 2 part epoxy putty from Eastwoods but I found that it wouldn't stick to the original bakelite material. I ground it out and widened the gaps with a Dremel and at the same time roughed up the surrounding material to give the epoxy something to stick to. I then made a mold with thick black tape reinforced with zip ties so the unthickened epoxy wouldn't run out. That's about as far as I've gotten but I plan to sand and use filler to fill the small voids and then prime, sand, prime and paint.
[URL="http://i230.photobucket.com/albums/ee191/fireflyr_photos/Landcruiser%20Restore/SteeringWheelRefirb011.jpg"] [/URL]
[URL="http://i230.photobucket.com/albums/ee191/fireflyr_photos/Landcruiser%20Restore/SteeringWheelRefirb006.jpg"][URL="http://i230.photobucket.com/albums/ee191/fireflyr_photos/Landcruiser%20Restore/SteeringWheelRefirb006.jpg"] [/URL][/URL]
[URL="http://i230.photobucket.com/albums/ee191/fireflyr_photos/Landcruiser%20Restore/SteeringWheelRefirb008.jpg"][URL="http://i230.photobucket.com/albums/ee191/fireflyr_photos/Landcruiser%20Restore/SteeringWheelRefirb008.jpg"] [/URL][/URL]
[URL="http://i230.photobucket.com/albums/ee191/fireflyr_photos/Landcruiser%20Restore/SteeringWheelRefirb009.jpg"][URL="http://i230.photobucket.com/albums/ee191/fireflyr_photos/Landcruiser%20Restore/SteeringWheelRefirb009.jpg"] [/URL][/URL]
[URL="http://i230.photobucket.com/albums/ee191/fireflyr_photos/Landcruiser%20Restore/SteeringWheelRefirb010.jpg"][URL="http://i230.photobucket.com/albums/ee191/fireflyr_photos/Landcruiser%20Restore/SteeringWheelRefirb010.jpg"] [/URL][/URL]
[URL="http://i230.photobucket.com/albums/ee191/fireflyr_photos/Landcruiser%20Restore/SteeringWheelRefirb015.jpg"] [/URL]

). I don't want a modern looking steering wheel and the used ones I could afford were in the same condition. Not that I looked that hard. Ofcourse I didn't take any pictures before I started
[URL="http://i230.photobucket.com/albums/ee191/fireflyr_photos/Landcruiser%20Restore/FJ40topoff006.jpg"][URL="http://i230.photobucket.com/albums/ee191/fireflyr_photos/Landcruiser%20Restore/FJ40topoff006.jpg"]
 [/URL][/URL]
The center hub was severely cracked, all the way to the metal core and the rim was cracked with gaps in 4 places.
Since the hub was so distorted (even with filler it was uneven) I decided to take the material down so I had a symetrical center. I then used 3 layers of 6 oz. fiberglass cloth and resin to build it up to the original diameter. I overlapped the cloth and brought it around the spokes so it would give the wheel more rigidity. Lots of sanding has brought it pretty close to the original shape. Once the shape was good I gave it a couple coats of wood flour thickened 2 part marine epoxy. I've used this stuff for years in building mahogony kayaks, and although it is a mess to deal with it is as hard as nails.
On the rim I had originally filled the gaps with a 2 part epoxy putty from Eastwoods but I found that it wouldn't stick to the original bakelite material. I ground it out and widened the gaps with a Dremel and at the same time roughed up the surrounding material to give the epoxy something to stick to. I then made a mold with thick black tape reinforced with zip ties so the unthickened epoxy wouldn't run out. That's about as far as I've gotten but I plan to sand and use filler to fill the small voids and then prime, sand, prime and paint.
[URL="http://i230.photobucket.com/albums/ee191/fireflyr_photos/Landcruiser%20Restore/SteeringWheelRefirb011.jpg"]
 [/URL]
[URL="http://i230.photobucket.com/albums/ee191/fireflyr_photos/Landcruiser%20Restore/SteeringWheelRefirb006.jpg"][URL="http://i230.photobucket.com/albums/ee191/fireflyr_photos/Landcruiser%20Restore/SteeringWheelRefirb006.jpg"]
 [/URL][/URL]
[URL="http://i230.photobucket.com/albums/ee191/fireflyr_photos/Landcruiser%20Restore/SteeringWheelRefirb008.jpg"][URL="http://i230.photobucket.com/albums/ee191/fireflyr_photos/Landcruiser%20Restore/SteeringWheelRefirb008.jpg"]
 [/URL][/URL]
[URL="http://i230.photobucket.com/albums/ee191/fireflyr_photos/Landcruiser%20Restore/SteeringWheelRefirb009.jpg"][URL="http://i230.photobucket.com/albums/ee191/fireflyr_photos/Landcruiser%20Restore/SteeringWheelRefirb009.jpg"]
 [/URL][/URL]
[URL="http://i230.photobucket.com/albums/ee191/fireflyr_photos/Landcruiser%20Restore/SteeringWheelRefirb010.jpg"][URL="http://i230.photobucket.com/albums/ee191/fireflyr_photos/Landcruiser%20Restore/SteeringWheelRefirb010.jpg"]
 [/URL][/URL]
[URL="http://i230.photobucket.com/albums/ee191/fireflyr_photos/Landcruiser%20Restore/SteeringWheelRefirb015.jpg"]
 [/URL]