
So my wife and daughter were out of town for a dance competition and my son was off with a friend. Time to jump on installing the TRD Pro suspension in the Blue Whale. Handling has definitely degraded and in last weeks cold snap it felt like the shocks were frozen.
Truck up in the air, actually the first time I used the bridge jacks to lift the truck. They worked great, just had to stack my mandrels to get them high enough to reach the jack points.
Wheels off, which I promptly rotated as that's overdue. Ok, front shock assembly. These were a major PITA! Mostly because the truck has electronically adjustable dampening and the module is bolted onto the top of the front shock assembly.

See the wiring plug on the top? Yeah, that thing is the control module. It's held in place with two 4mm bolts, one on the front, the other on the back. They're packed with dirt/road grime and strip easily. I also discovered that the inner CV boot on my passenger side axle is torn, hence all the dirt/grease you see. I'll need to replace the axle next.
Here are the 4mm bolts...
I managed to get this off the drivers side without issue. Once you unclip the harness and unscrew the one bolt you can see, you can then rotate the entire assembly to expose the bolt on the other side and unbolt it. The bracket comes off with a 17mm nut and you're left with this.

I cut the plug off the harness, wrapped the end in electrical tape and then plugged it back into the body side harness. That way no dirt/grime will get into the the plug and if anyone ever wants to go back to stock, they can.
Once I had that total bitch of a module out of the way, it was 3 14mm nuts on the top, a 19mm bolt on the bottom, 2 19mm bolts holding the spindle on, 1 17mm bolt for the swaybar endlink, a cotter pin/19mm nut on the tie rod and 2 14mm bolts for the swaybar bracket. Then the whole assembly dropped out.
Now you have to grind some material off the bottom eyelet of the TRD Pro shocks, they're 2mm wider than the stock stuff and they won't fit into the lower shock bracket. I used a flapper disc on my grinder to do that.

New TRD Pro hotness installed. Everyone knows that red is better!

Ok, all bolts back on, torqued, wheels on, etc. On to the rear!
On the back, it should go quicker as there aren't any modules on the tops of the rear shocks, thank the lord! However, it's not just a plug n play.
First off, do yourself a favor and use a sawzall and cut the upper nut right off. You're not gonna reuse this crap and it's near impossible to unbolt that top nut.
Once you do that, undo the bottom 17mm bolt and pull the shock out slightly. Unclip the electronic ride control harness, clip off the end of the plug, yada yada.
Ok, now you need to grab your drill with a stepper bit on it and enlarge the upper shock hole to 1". Take a M8x1.25 tap and clean out the threads on the frame where you're going to mount the remote reservoir.
Go ahead and push the shock up into place, making sure you have the collar seated all the way up into your enlarged hole. Put the upper bushing on, thread on the nut, tighten down. Use a bottle jack and lift up the hub so you can put the lower shock eyelet on, run down the 17mm bolt.

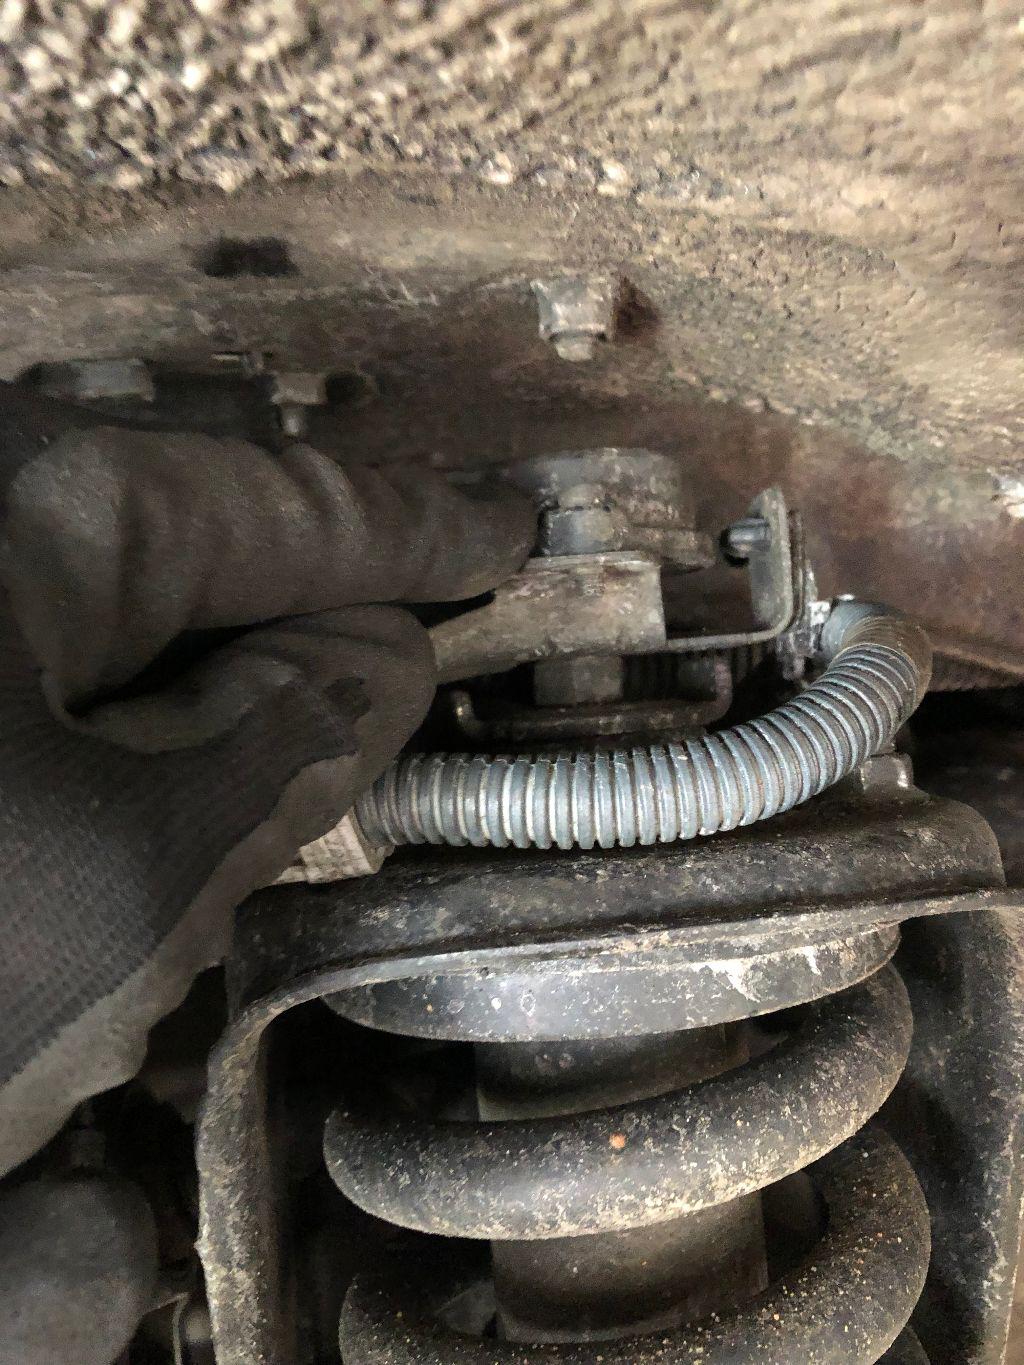
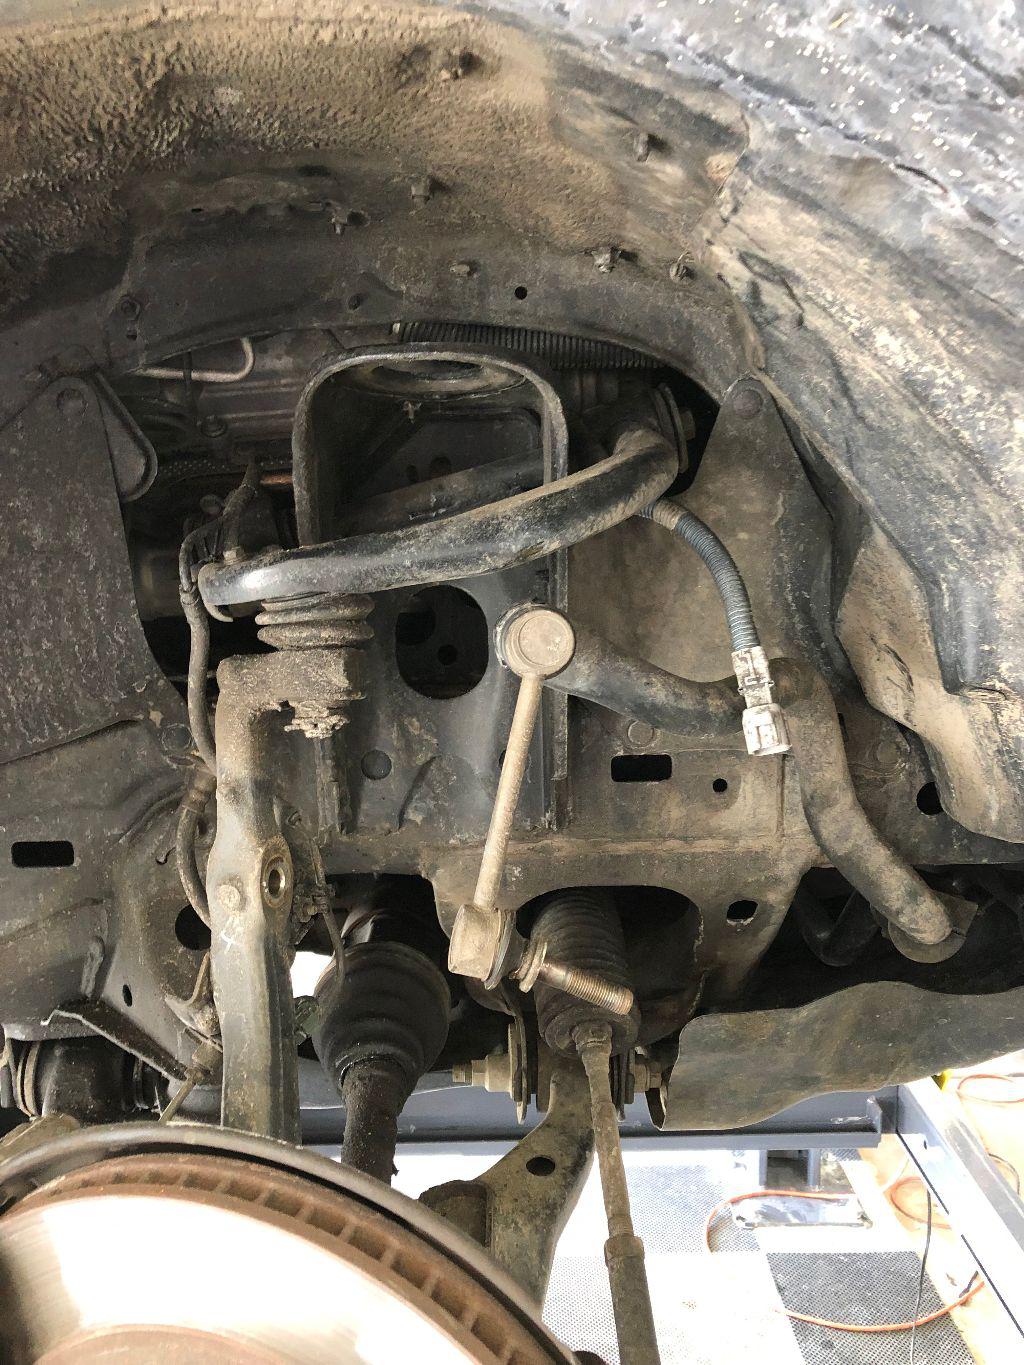
Now we get to deal with the remote reservoir. In the above pic you can see the threaded hole in the frame I'm going to use, it's the top left hole of the three right behind the swaybar link. I routed the hose behind the shock so it wouldn't get hit by the tire.

Wheels on, torqued down. Test drive taken. Truck feels SO much better! I measured the ride height before I started and it basically got lifted 1" all the way around, which mades sense as this suspension lifts a 4Runner 1". These shocks are longer than stock and my rear shocks were totally dead, no rebound at all.
Thankfully the truck still fits underneath my lift. Not gonna lie, this job was a royal pain in the balls. Mostly because nothing just bolted right in and those modules on the front took a ton of time to get off. I actually stripped one of the bolts and ended up using the sawzall to cut through the bracket on that side to get it off.
With any luck this stuff will last a long time. I'll get an alignment done this week, although the only thing adjustable is toe and I didn't mess with the tie rod length at all, so it should be fine. Next up is dealing with that torn front inner CV boot.

Truck up in the air, actually the first time I used the bridge jacks to lift the truck. They worked great, just had to stack my mandrels to get them high enough to reach the jack points.
Wheels off, which I promptly rotated as that's overdue. Ok, front shock assembly. These were a major PITA! Mostly because the truck has electronically adjustable dampening and the module is bolted onto the top of the front shock assembly.
See the wiring plug on the top? Yeah, that thing is the control module. It's held in place with two 4mm bolts, one on the front, the other on the back. They're packed with dirt/road grime and strip easily. I also discovered that the inner CV boot on my passenger side axle is torn, hence all the dirt/grease you see. I'll need to replace the axle next.
Here are the 4mm bolts...
I managed to get this off the drivers side without issue. Once you unclip the harness and unscrew the one bolt you can see, you can then rotate the entire assembly to expose the bolt on the other side and unbolt it. The bracket comes off with a 17mm nut and you're left with this.
I cut the plug off the harness, wrapped the end in electrical tape and then plugged it back into the body side harness. That way no dirt/grime will get into the the plug and if anyone ever wants to go back to stock, they can.
Once I had that total bitch of a module out of the way, it was 3 14mm nuts on the top, a 19mm bolt on the bottom, 2 19mm bolts holding the spindle on, 1 17mm bolt for the swaybar endlink, a cotter pin/19mm nut on the tie rod and 2 14mm bolts for the swaybar bracket. Then the whole assembly dropped out.
Now you have to grind some material off the bottom eyelet of the TRD Pro shocks, they're 2mm wider than the stock stuff and they won't fit into the lower shock bracket. I used a flapper disc on my grinder to do that.
New TRD Pro hotness installed. Everyone knows that red is better!
Ok, all bolts back on, torqued, wheels on, etc. On to the rear!
On the back, it should go quicker as there aren't any modules on the tops of the rear shocks, thank the lord! However, it's not just a plug n play.
First off, do yourself a favor and use a sawzall and cut the upper nut right off. You're not gonna reuse this crap and it's near impossible to unbolt that top nut.
Once you do that, undo the bottom 17mm bolt and pull the shock out slightly. Unclip the electronic ride control harness, clip off the end of the plug, yada yada.
Ok, now you need to grab your drill with a stepper bit on it and enlarge the upper shock hole to 1". Take a M8x1.25 tap and clean out the threads on the frame where you're going to mount the remote reservoir.
Go ahead and push the shock up into place, making sure you have the collar seated all the way up into your enlarged hole. Put the upper bushing on, thread on the nut, tighten down. Use a bottle jack and lift up the hub so you can put the lower shock eyelet on, run down the 17mm bolt.
Now we get to deal with the remote reservoir. In the above pic you can see the threaded hole in the frame I'm going to use, it's the top left hole of the three right behind the swaybar link. I routed the hose behind the shock so it wouldn't get hit by the tire.
Wheels on, torqued down. Test drive taken. Truck feels SO much better! I measured the ride height before I started and it basically got lifted 1" all the way around, which mades sense as this suspension lifts a 4Runner 1". These shocks are longer than stock and my rear shocks were totally dead, no rebound at all.
Thankfully the truck still fits underneath my lift. Not gonna lie, this job was a royal pain in the balls. Mostly because nothing just bolted right in and those modules on the front took a ton of time to get off. I actually stripped one of the bolts and ended up using the sawzall to cut through the bracket on that side to get it off.
With any luck this stuff will last a long time. I'll get an alignment done this week, although the only thing adjustable is toe and I didn't mess with the tie rod length at all, so it should be fine. Next up is dealing with that torn front inner CV boot.
")

