This thread will be my attempt at documenting my latest project on Duke, the HDJ80: a versatile and simple platform that fits my uses. I do not want a 100% designated camp / expedition build because I use the cruiser as a daily and work vehicle.
I frequently haul around hundreds of LBS of camera and production equipment, so the closest I can get to pickup-truck use-ability, the better.
With that said, I also would like to have our camp gear stored in the truck and ready to camp at any moment.
I want to have quick and versatile tire downs, mainly for the cooler and dog crate while on the trail friending camp. I really don’t like anything being able to shift or make noise on the road.
Durability is more important than weight because of how I plan to use this platform for work and productions.
First things first: MATERIALS
4x 4x8 sheets of 1/2in prefinished birch plywood
1x 4x8 sheet of 3/4in prefinished birch plywood
2x sets of single lock 38in 500lbs drawer slides
1x pair of single lock 20in 500lbs drawer slides
2x Southco C2 compression latches
6x 48in aluminum L-Track
TOOLS USED
Circular saw with home-made ‘track saw’ attachment
Drill
Router for edges
Kregg pocket screw jig
Square
Carpenter clamps
Tape measure
Polyurethane
Herculiner roll-on bed liner
Good music
- A good buddy (Adam) to help
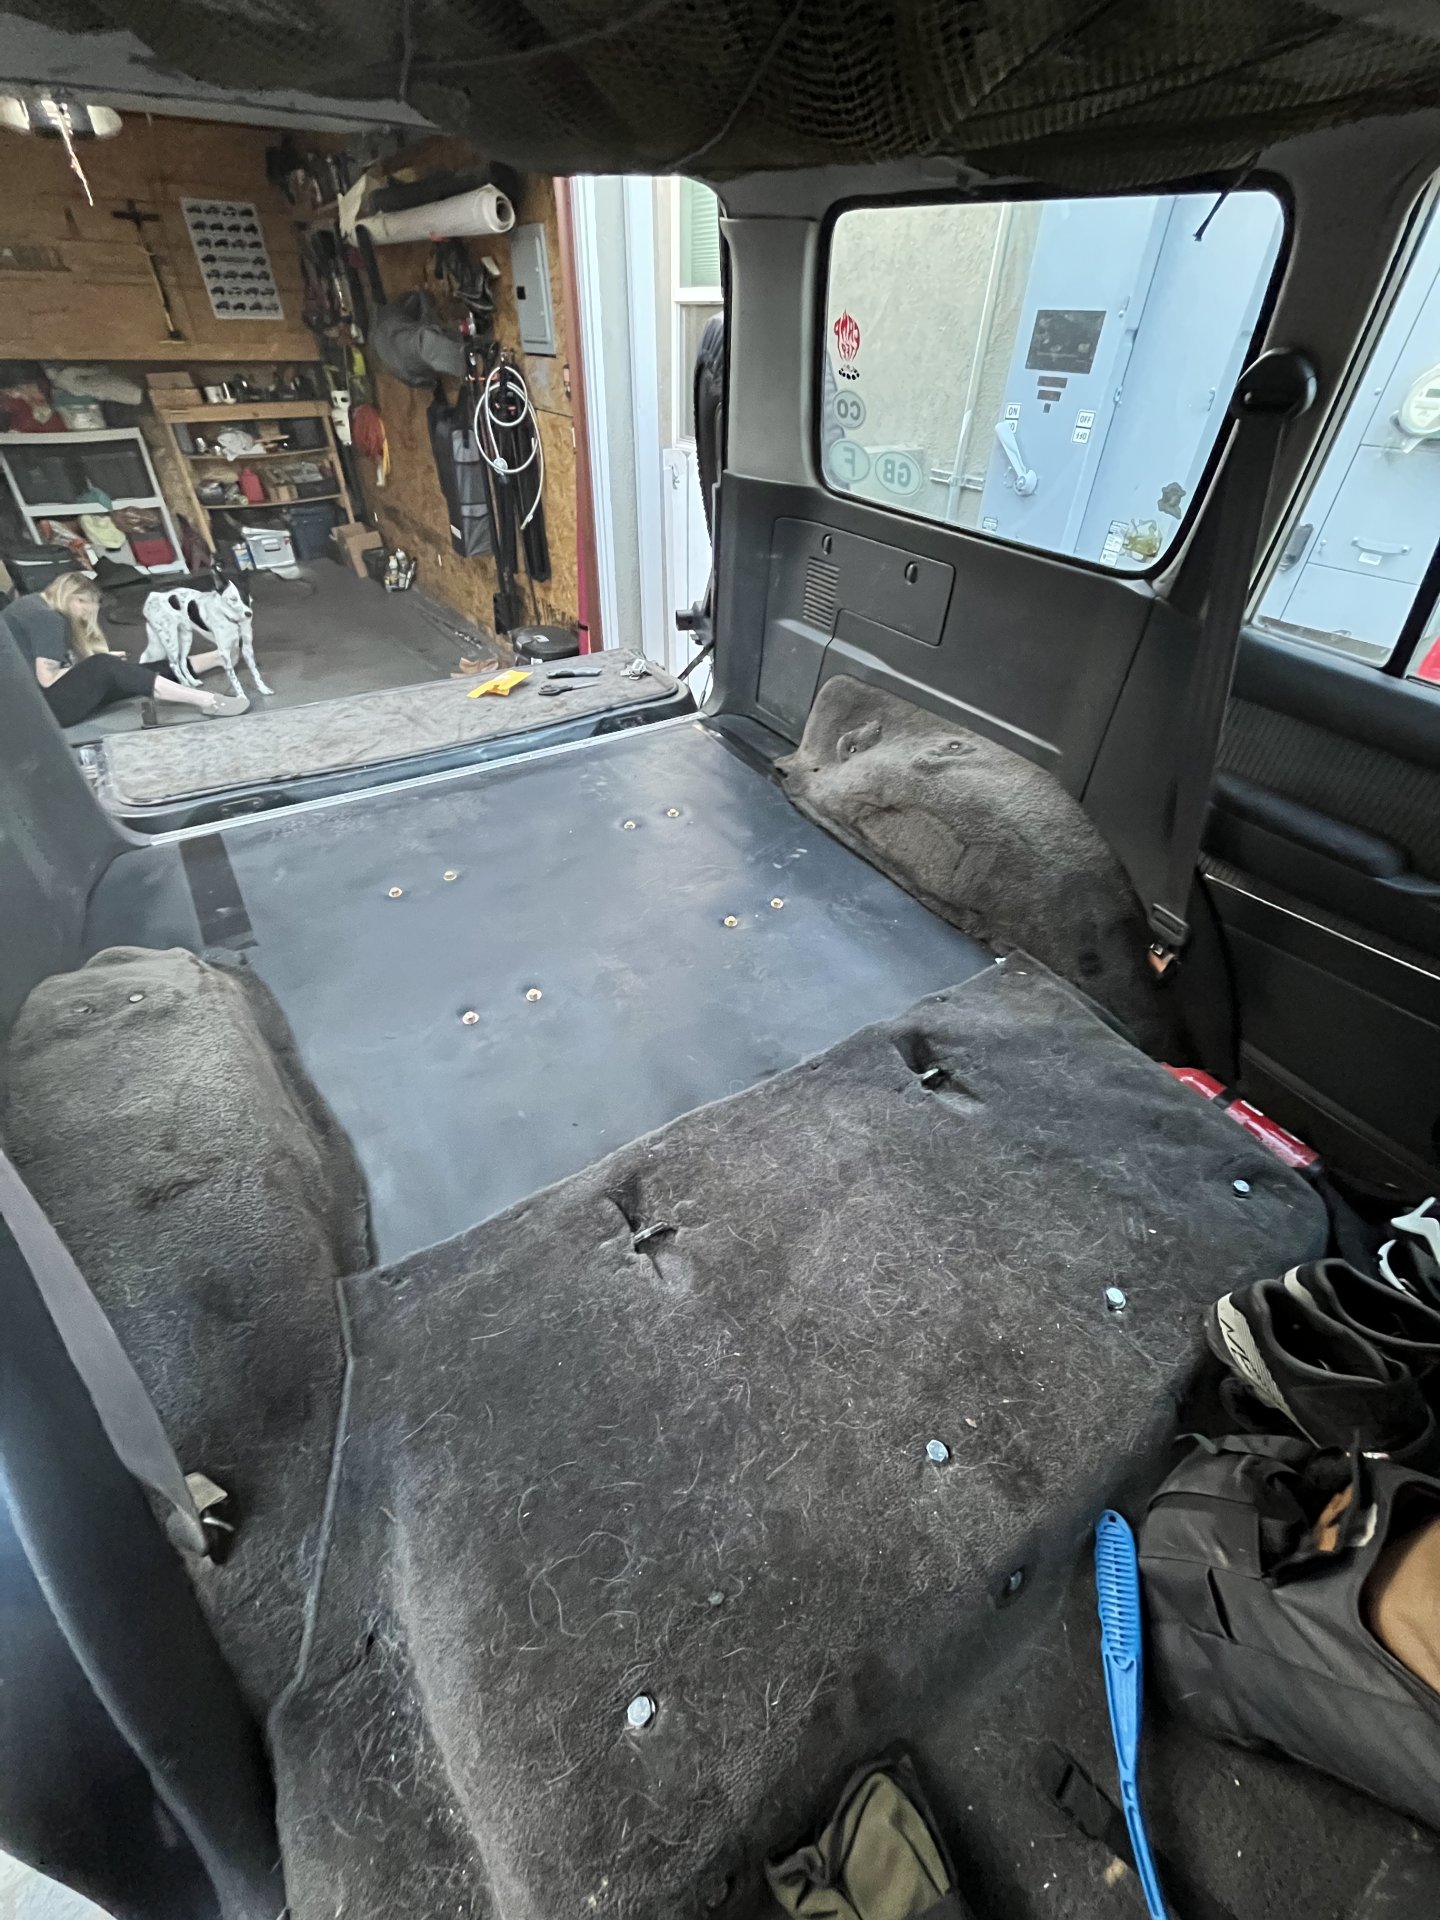
Photos of empty truck after applying KillMat and a mass loaded vinyl:
First piece to cut was going to be the base plate for the drawers. Yes, I deleted the rear seats, but i still plan to build the platform in 2 sections for ease of install as well as being able to throw the rear seats back in if I want.
Cardboard and a jigsaw was used to cut the edges.
A 1in hole drill but wears used to cut sunken holes for the bolts that mount to the floor. These holes were already in the floor from the 3rd row seats.
Once the base-plate was complete and fit, it was time to build the main box for the drawers. Most of the construction and assembly was done using a Kregg pocket screw jig and pocket screws.
Once the base-plate was complete and fit, it was time to build the main box for the drawers. Most of the construction and assembly was done using a Kregg pocket screw jig and pocket screws.
Day 02: Building the drawers was the next step. One drawer is a simple single box, the other will be the kitchen drawer with an additional slide out for the GSI stove. The width of the drawers is the same because the setup is symmetrical. I used the router all of the top facing edges.
The drawer slides need about .75in on each side between the wall of the box and the wall of the drawer.
The height is about 6.5in. Overall platform height is 9 inches from floor to top.
Test fitting everything into the truck for the beginning of Day03
Everything fit, so it was time to make the top of the drawers. This is what i am most excited about: L-track tie downs. 3 rows from front to back.
Rather than routering out a channel from 3/4in ply (which was the original plan) i found it would be easier to make straight lines if i just use 2 layers of 1/2in ply and leave space for the l-track.
To fix the 2 layers of 1/2in ply together, i sanded, scored, and glued the layers together. Letting it sit overnight with a few spare lead batteries and 6 gallons of water on top.
Now that the main box is complete: time to build the platform / storage that will sit behind the front seats and replace the rear seats. The plan is to have 2 cubbies accessible from the the top (rear door access) for tools, spares, and other misc non0camoping things that i need quicker access to.
I also plan to have this section removable, in case i want to throw the rear seats back in at any point, but keep the drawers.
- I added a 1/5in lip to the back of the drawer box
- Brass threaded inserts were added for SS bolts
- the top will also consist of 2 layers of 1/2in ply, so the bottom solid layer was cut to size.
Once the top was cut, i build the box that will sit underneath and cut out the access holes with a jigsaw (the cuts turned out awful but will be hidden). The center divider / support installed perfectly as well.
With the cubbies cut, I can now install the l-track and cut the top layer of 1/2in. I cut the top later from a single piece of plywood and just cut it into sections. Some will be glued down, while other sections will serve as the lids for the cubbies.
Im super proud of how this turned out. Especially the top layer where the bolts sit recessed into the top… gorgeous.
Adding the top layer of 1/2 ply to the edges of the platform behind the seats and rounding / sanding the edges.
The hinged wings of the drawer section were cut from 3/4in ply and the hinges are flush mount spring hinges from Home Depot. they were the only hinges that would work for the clearance I needed.
The final platform is smooth and gorgeous. Basic ally have the functionality of a pickup truck now.
Now that the drawers are complete, I can throw a nice looking face panel on them. I cut one long piece to cover all of the face, then cut that into sections for each drawer.
I used a 1in hole drill bit for the corners and a jigsaw for the complicated cuts.
The stove was too big to open with the faces on, so I had to cut out the shape of the side of the stove to make it fit… it ended up looking pretty cool.
Took the new setup on it’s first trip! 5 hours on the pavement and another few hours on trails. I had the cooler and dry goods as well as a full camera package because we were filming a commercial for Nomad Wheel Co. It was the perfect test!
L-Track tie downs… AMAZING! I can tie down anything anywhere. The only thing i could hear while doing heavy off-roading was the Ice and water in the cooler sloshing around.
Sleeping was comfortable and the added headroom compared to the previous build was a game changer!
We cooked for 5 people and there were some marks left on the face from the heat… I kinda like it (though i dont have a choice now)
The biggest room for improvement was the durability. The pre-finished plywood top surface did not hold up well at all. I saw this coming and have had plans to finish it with something more durable anyways.
I decided to finish the top with Herculiner.
- It’s super durable. I had it on my old drawers and it help up for 6 years of heavy abuse
- easy to clean and touch up
- DIY
- affordable
- Rubberized, rather than hard plastic when cured.