Navigation
Install the app
How to install the app on iOS
Follow along with the video below to see how to install our site as a web app on your home screen.
Note: This feature may not be available in some browsers.
More options
Style variation
You are using an out of date browser. It may not display this or other websites correctly.
You should upgrade or use an alternative browser.
You should upgrade or use an alternative browser.
1978 LPB Teardown and Rebuild
- Thread starter Awl_TEQ
- Start date
This site may earn a commission from merchant affiliate
links, including eBay, Amazon, Skimlinks, and others.
More options
Who Replied?Awl_TEQ
Supporting Vendor
- Thread starter
- #42
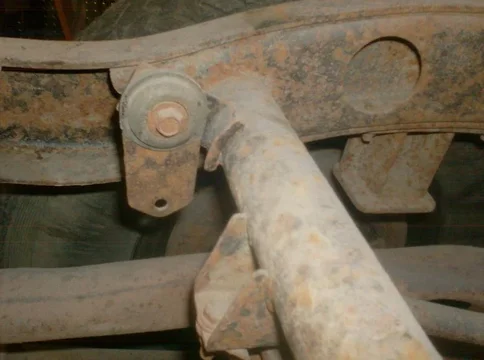
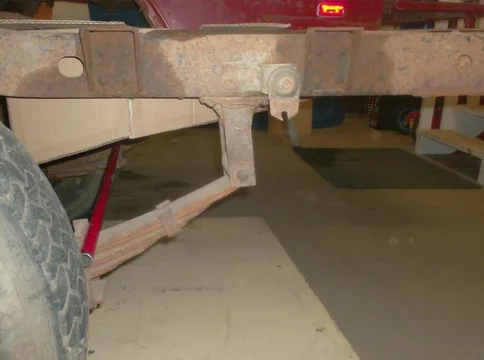
I had to remove this exhaust hanger to gain a little more volume in my tank. The new exhaust will run down the other side of the truck.
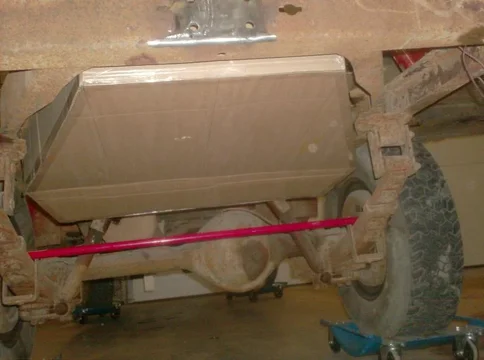
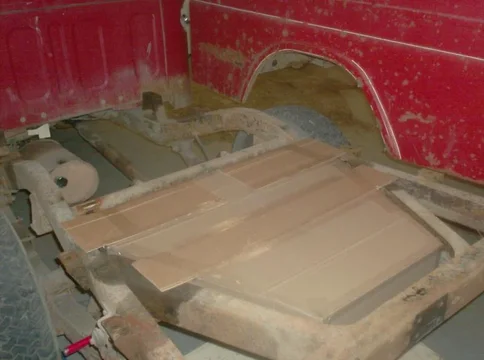
I mocked up a cardboard tank and test fitted it. I like to do it this way so I can better visualize the end product.
Side view. The departure angle of these LPB's isn't great and I have visions of the tail end slamming into the ground as I go over an obstacle. I kept the tank up high and I am contemplating some sort of skid plate or slider for protection.


I mocked up a cardboard tank and test fitted it. I like to do it this way so I can better visualize the end product.

Side view. The departure angle of these LPB's isn't great and I have visions of the tail end slamming into the ground as I go over an obstacle. I kept the tank up high and I am contemplating some sort of skid plate or slider for protection.

Looks great. Wanna build an extra while your at it? 
Awl_TEQ
Supporting Vendor
- Thread starter
- #45
That could be arranged. I'm planning to make it from 3/16" aluminum with internal baffles to counteract the slosh effect. I'm gonna use the mounting holes from the crossmember as well as prolly 4 more tabs to hold it up. It'll have a drain fitting, filler fitting, an air fitting, a "water out" fitting and pressure relief. I'm gonna use 10psi or so from the on board air to force the water to where I want it. At the moment I don't know what I'll use for a fill location. Maybe an RV type panel fitting on the side of the box beside the added fuel filler. I'll also have to winterize and drain the tank 7 months of the year - unless I heat it  - I have two more small tanks for water planned in the box.
24 - are you looking for a water or fuel tank?
 - I have two more small tanks for water planned in the box.
24 - are you looking for a water or fuel tank?
Awl_TEQ
Supporting Vendor
- Thread starter
- #46
Change of plans on the fly
I thought I should research the aluminum potable water tank idea a little before actually making the tank. My concern was any bad tasting water due to the aluminum. A little surfing turned up a lot of mention of bad taste and corrosion caused by aluminum. I could use a potable water epoxy liner but thoroughly covering the inside of the tank and all baffles would be a bit troublesome. So, aluminum is out. My next thought was a thin stainless liner and a thicker wrap of aluminum almost like a skid plate. Galvanic corrosion between the stainless and aluminum would be trouble and the design would get more complicated. That leaves only one option I can think of at the moment - thick stainless tank. That would keep the taste issue at bay, as long as I keep the tank clean with periodic chlorine treatment and rinse. I'm ditching the pressurized tank idea, at least for the main storage tank. A shur-flo RV pump seems to make more sense. I need to calculate the volume of my cardboard tank and decide if I need to go bigger.
So what say all ye proffesors of the University of Mudd? Poke holes in my plan please.
That could be arranged.
24 - are you looking for a water or fuel tank?
Fuel tank would be my first choice.
Awl_TEQ
Supporting Vendor
- Thread starter
- #49
If my calculations are correct the cardboard tank should hold about 21 US gallons or 80L.
24 - if that's not big enough I'm gonna do a fuel tank on mine ahead of the rear axle between the frame rails. It will hang down beside the drive shaft a little and then over the shaft. It will occupy as much volume as I can get between the rear axle and the cab/transfer case. I'll layout that one during this week.
Kevin
If my calculations are correct the cardboard tank should hold about 21 US gallons or 80L.
24 - if that's not big enough I'm gonna do a fuel tank on mine ahead of the rear axle between the frame rails. It will hang down beside the drive shaft a little and then over the shaft. It will occupy as much volume as I can get between the rear axle and the cab/transfer case. I'll layout that one during this week.
Kevin
I'll pm you so we don't fill up your build thread with a tank for me.
Awl_TEQ
Supporting Vendor
- Thread starter
- #51
Hitch
I had a plan for building the rear 2" hitch receiver but after talking to a couple of the more experienced guys at work I altered it a little. It has to be very strong - not only for the obvious reasons but because I plan on using my second 8274 on a hitch mount in the rear as well. I am going to remove the rearmost crossmember from the frame and replace it with a 2"x4"x1/4" wall tube. I am doing this to keep the receiver sleeve as high as possible to preserve what little departure angle I have and for strength. The sleeve will be cut into the tube and gussets will strengthen it. The sleeve will also be directly in line with the frame and the pulling forces will be sent down the factory triangulated frame into the main frame rails. The tube will be bolted on rather than welded because the flex of the frame would tend to crack the steel beside the welds over time. I will bolt it to the angled frame channels with two 3/16" flat bars welded to the new tube. I will also fab up two channels to bolt inside the main frame rails and weld to the tube.
Here are some pics.
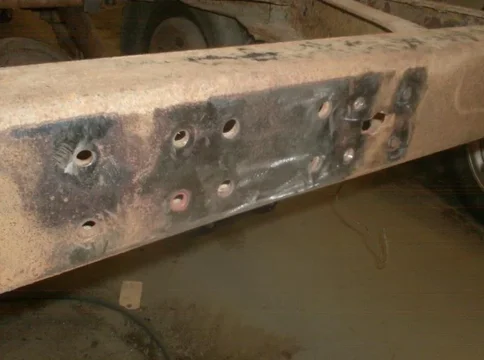
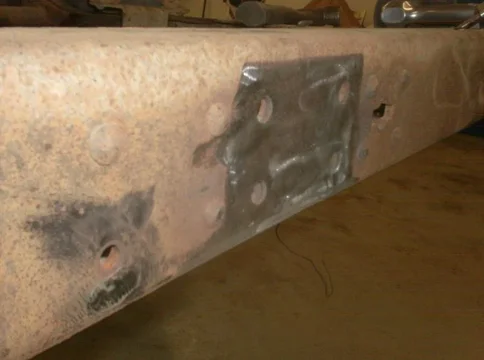
The frame is in great shape - still has the original paint in places.

I got out quite a few tools - decided to grind off the rivet heads and drill 90% of the diameter of the rivet and then use a small punch to hammer it out. I am being careful to preserve the member because someone may be interested in it for their truck.



I had a plan for building the rear 2" hitch receiver but after talking to a couple of the more experienced guys at work I altered it a little. It has to be very strong - not only for the obvious reasons but because I plan on using my second 8274 on a hitch mount in the rear as well. I am going to remove the rearmost crossmember from the frame and replace it with a 2"x4"x1/4" wall tube. I am doing this to keep the receiver sleeve as high as possible to preserve what little departure angle I have and for strength. The sleeve will be cut into the tube and gussets will strengthen it. The sleeve will also be directly in line with the frame and the pulling forces will be sent down the factory triangulated frame into the main frame rails. The tube will be bolted on rather than welded because the flex of the frame would tend to crack the steel beside the welds over time. I will bolt it to the angled frame channels with two 3/16" flat bars welded to the new tube. I will also fab up two channels to bolt inside the main frame rails and weld to the tube.
Here are some pics.
The frame is in great shape - still has the original paint in places.

I got out quite a few tools - decided to grind off the rivet heads and drill 90% of the diameter of the rivet and then use a small punch to hammer it out. I am being careful to preserve the member because someone may be interested in it for their truck.


Awl_TEQ
Supporting Vendor
- Thread starter
- #53
I laid out the center rivet hole pattern on the tube. I will be bolting through these holes. There will be another plate inside the tube with tapped holes in it.

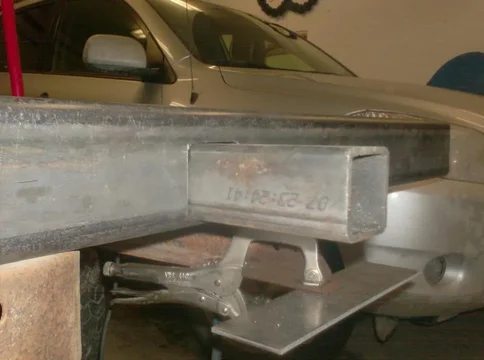
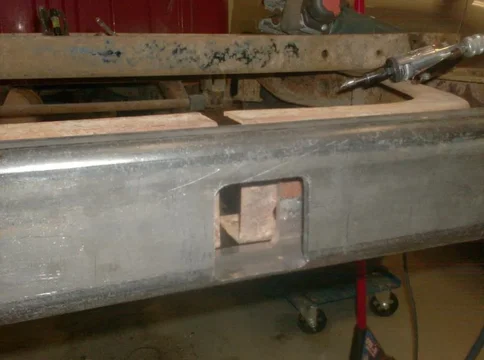
To add strength I will be running the receiver sleeve through the 2x4 tube. To cut the hole without a torch I drilled 4 holes and will use a good jigsaw to finish. It is offset to the bottom of the 2x4 tube to clear the rear valence of the box.

One side done.


To add strength I will be running the receiver sleeve through the 2x4 tube. To cut the hole without a torch I drilled 4 holes and will use a good jigsaw to finish. It is offset to the bottom of the 2x4 tube to clear the rear valence of the box.

One side done.

Awl_TEQ
Supporting Vendor
- Thread starter
- #55
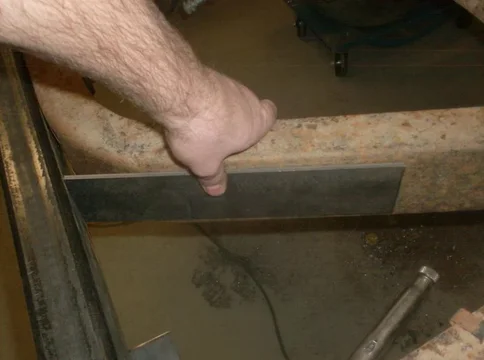
I will weld flat bars to be bolted to the angled channels
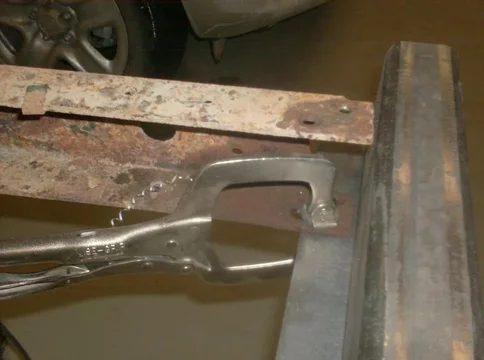
And fab a channel 10" or 12" long to fit inside the frame rail then bolt through the top and bottom flanges.
In total, there will be 16 bolts holding her on. The only thing I don't like is when the frame is out for plating and powder there will be no crossmember holding everything firm. I'll have to make a temporary jig to hold it all together.


And fab a channel 10" or 12" long to fit inside the frame rail then bolt through the top and bottom flanges.

In total, there will be 16 bolts holding her on. The only thing I don't like is when the frame is out for plating and powder there will be no crossmember holding everything firm. I'll have to make a temporary jig to hold it all together.
Look's great.
Awl_TEQ
Supporting Vendor
- Thread starter
- #57
Help please
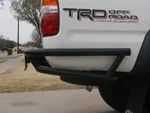
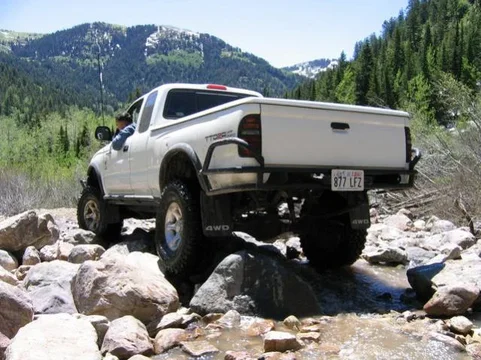
Could you guys help me out here? I plan on using some round tube to come off the rear crossmember I've made above. I'm gonna make it like two "bumper-ettes" that come back, out to the corners and turn forward toward the rear axle then back in to the frame for a slider effect on the tail end. I want to dress it up a little and need some ideas. I searched the ih8mud home page for ideas in the bumper/slider and roll cage galleries - searched for rear bumper threads - searched the internet etc. etc. I'd like to see any and all rear tube bumpers and exo-skeleton treatments of the rear corner on any type of rig. I want protection but not ugly protection - the back of the bed is just 16 ga. sheet metal hanging down and the departure angle sucks as it is.
Please post pics of anything for ideas
Thanks.....
I have nothing for slider ideas but just to say you are making great progress.
Forget a tank... want to make an extra bumper? 
Looking good.
Looking good.
Similar threads
Users who are viewing this thread
Total: 1 (members: 0, guests: 1)

 I had to persuade the weld to let go. Sorry man.
