1977 FJ40 H55F Extended Parking Brake Cable (1 Viewer)

This site may earn a commission from merchant affiliate
links, including eBay, Amazon, Skimlinks, and others.

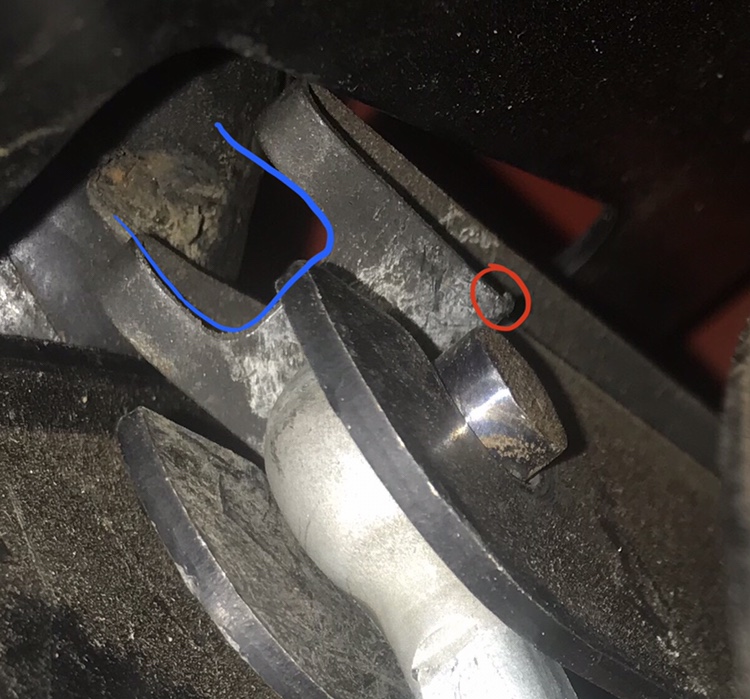
Well, I finally figured out the parking brake.

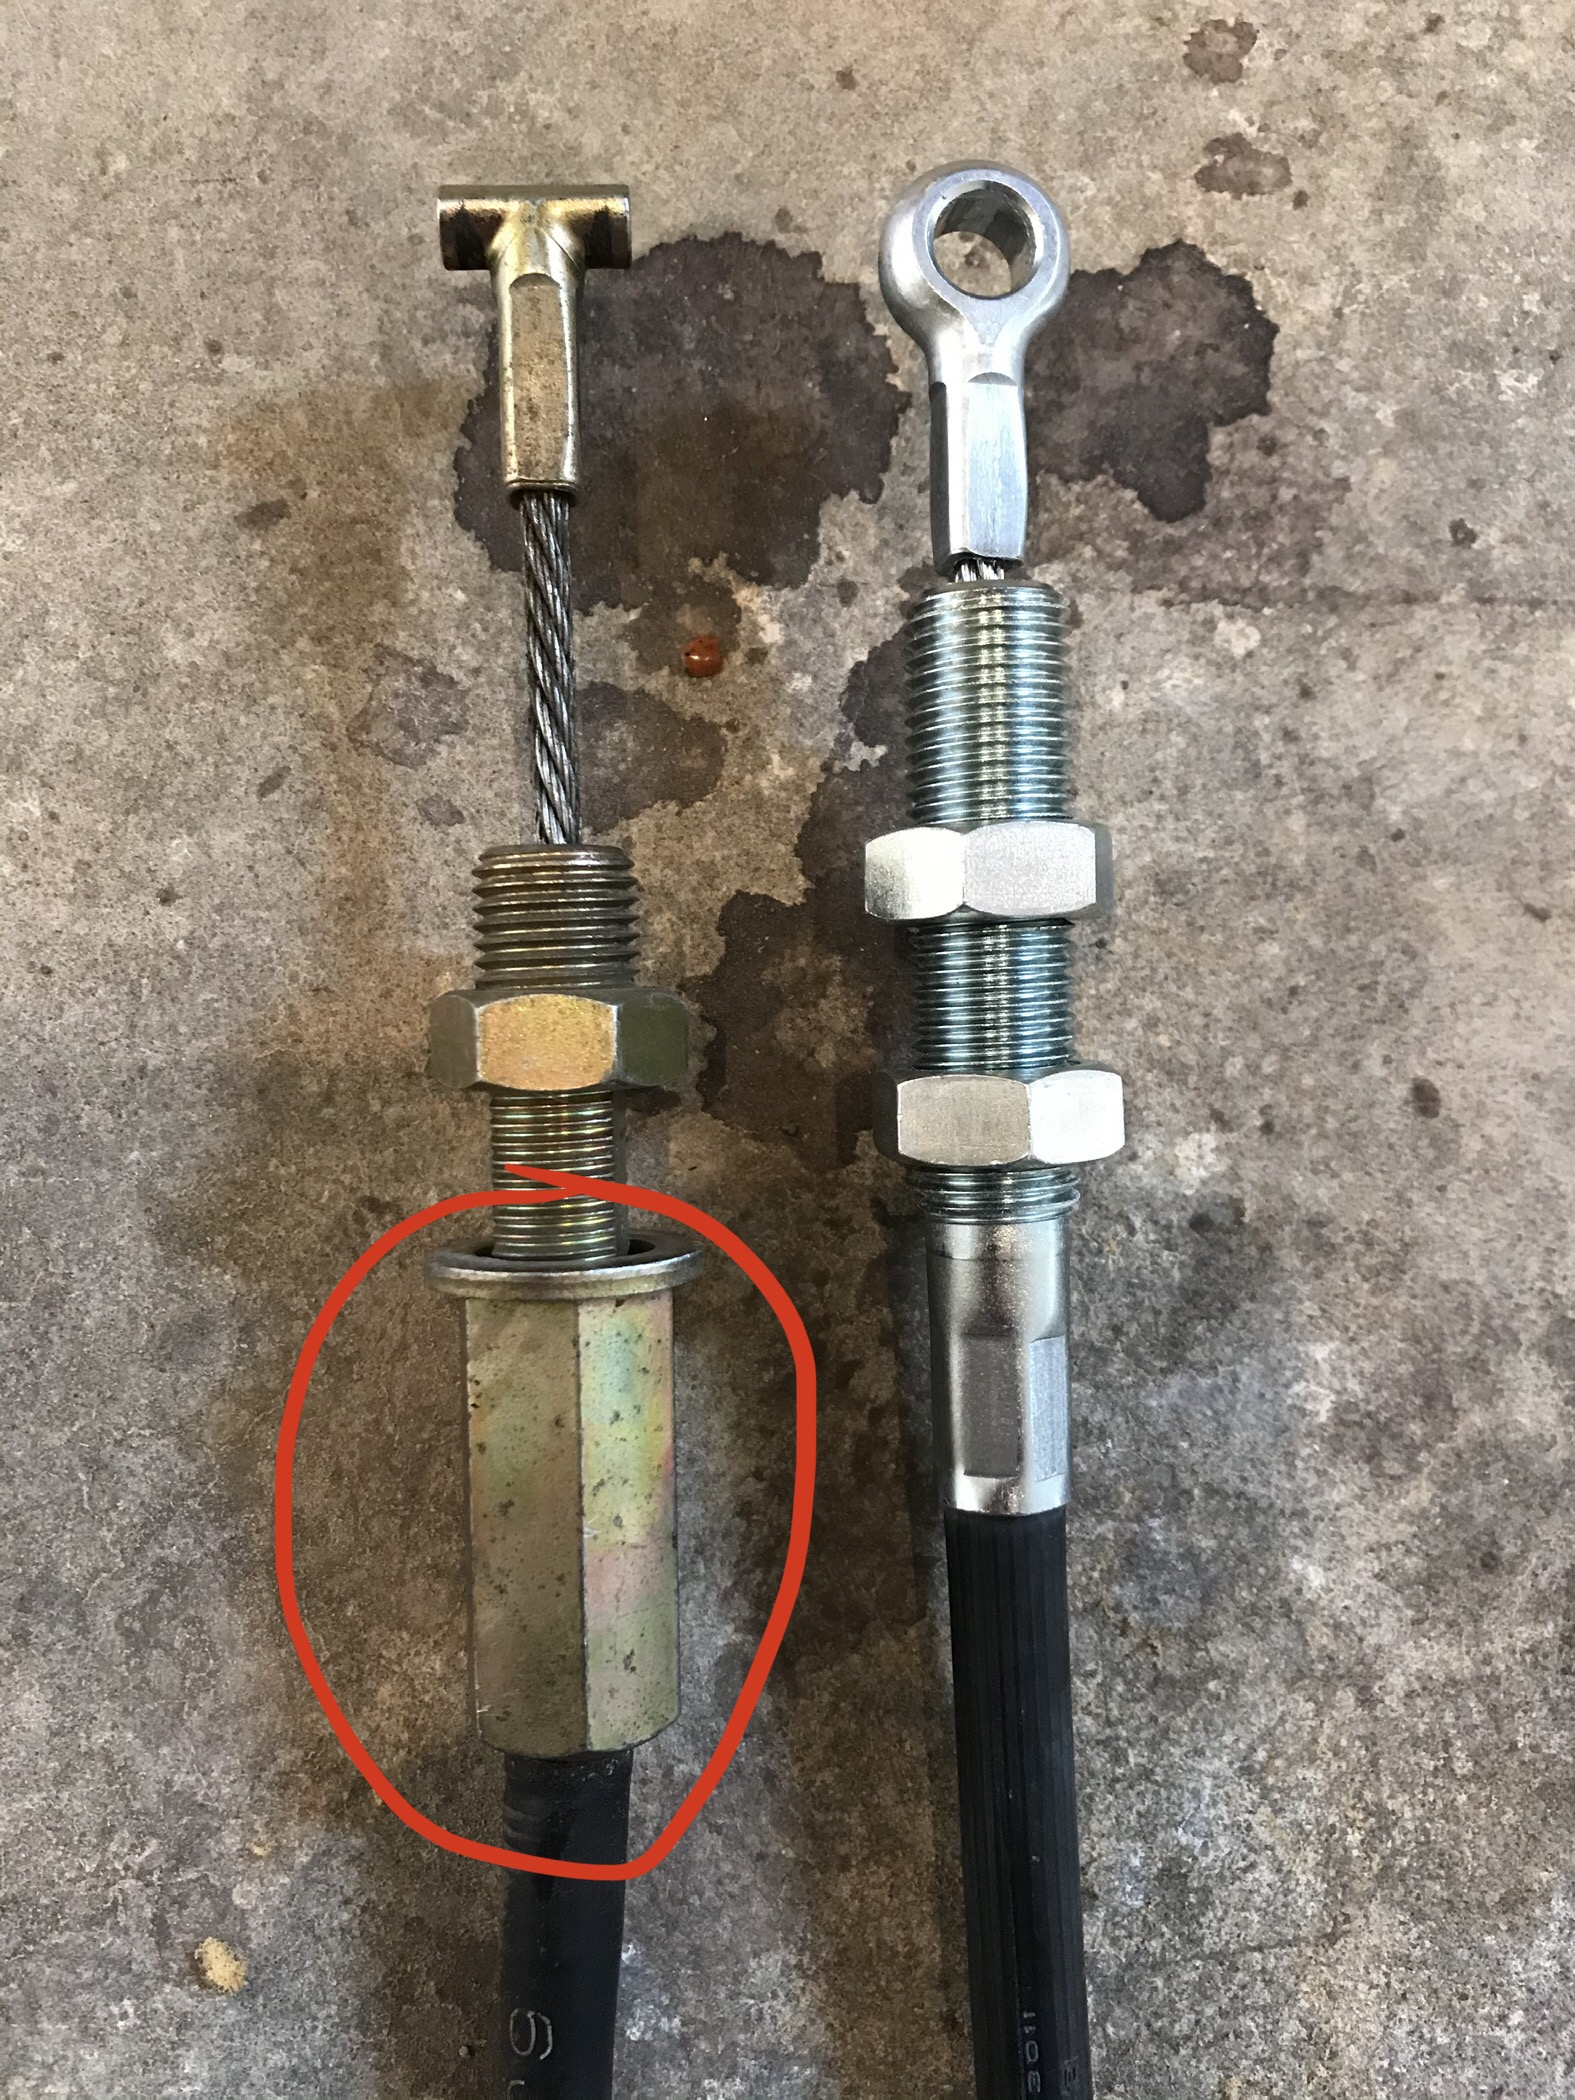
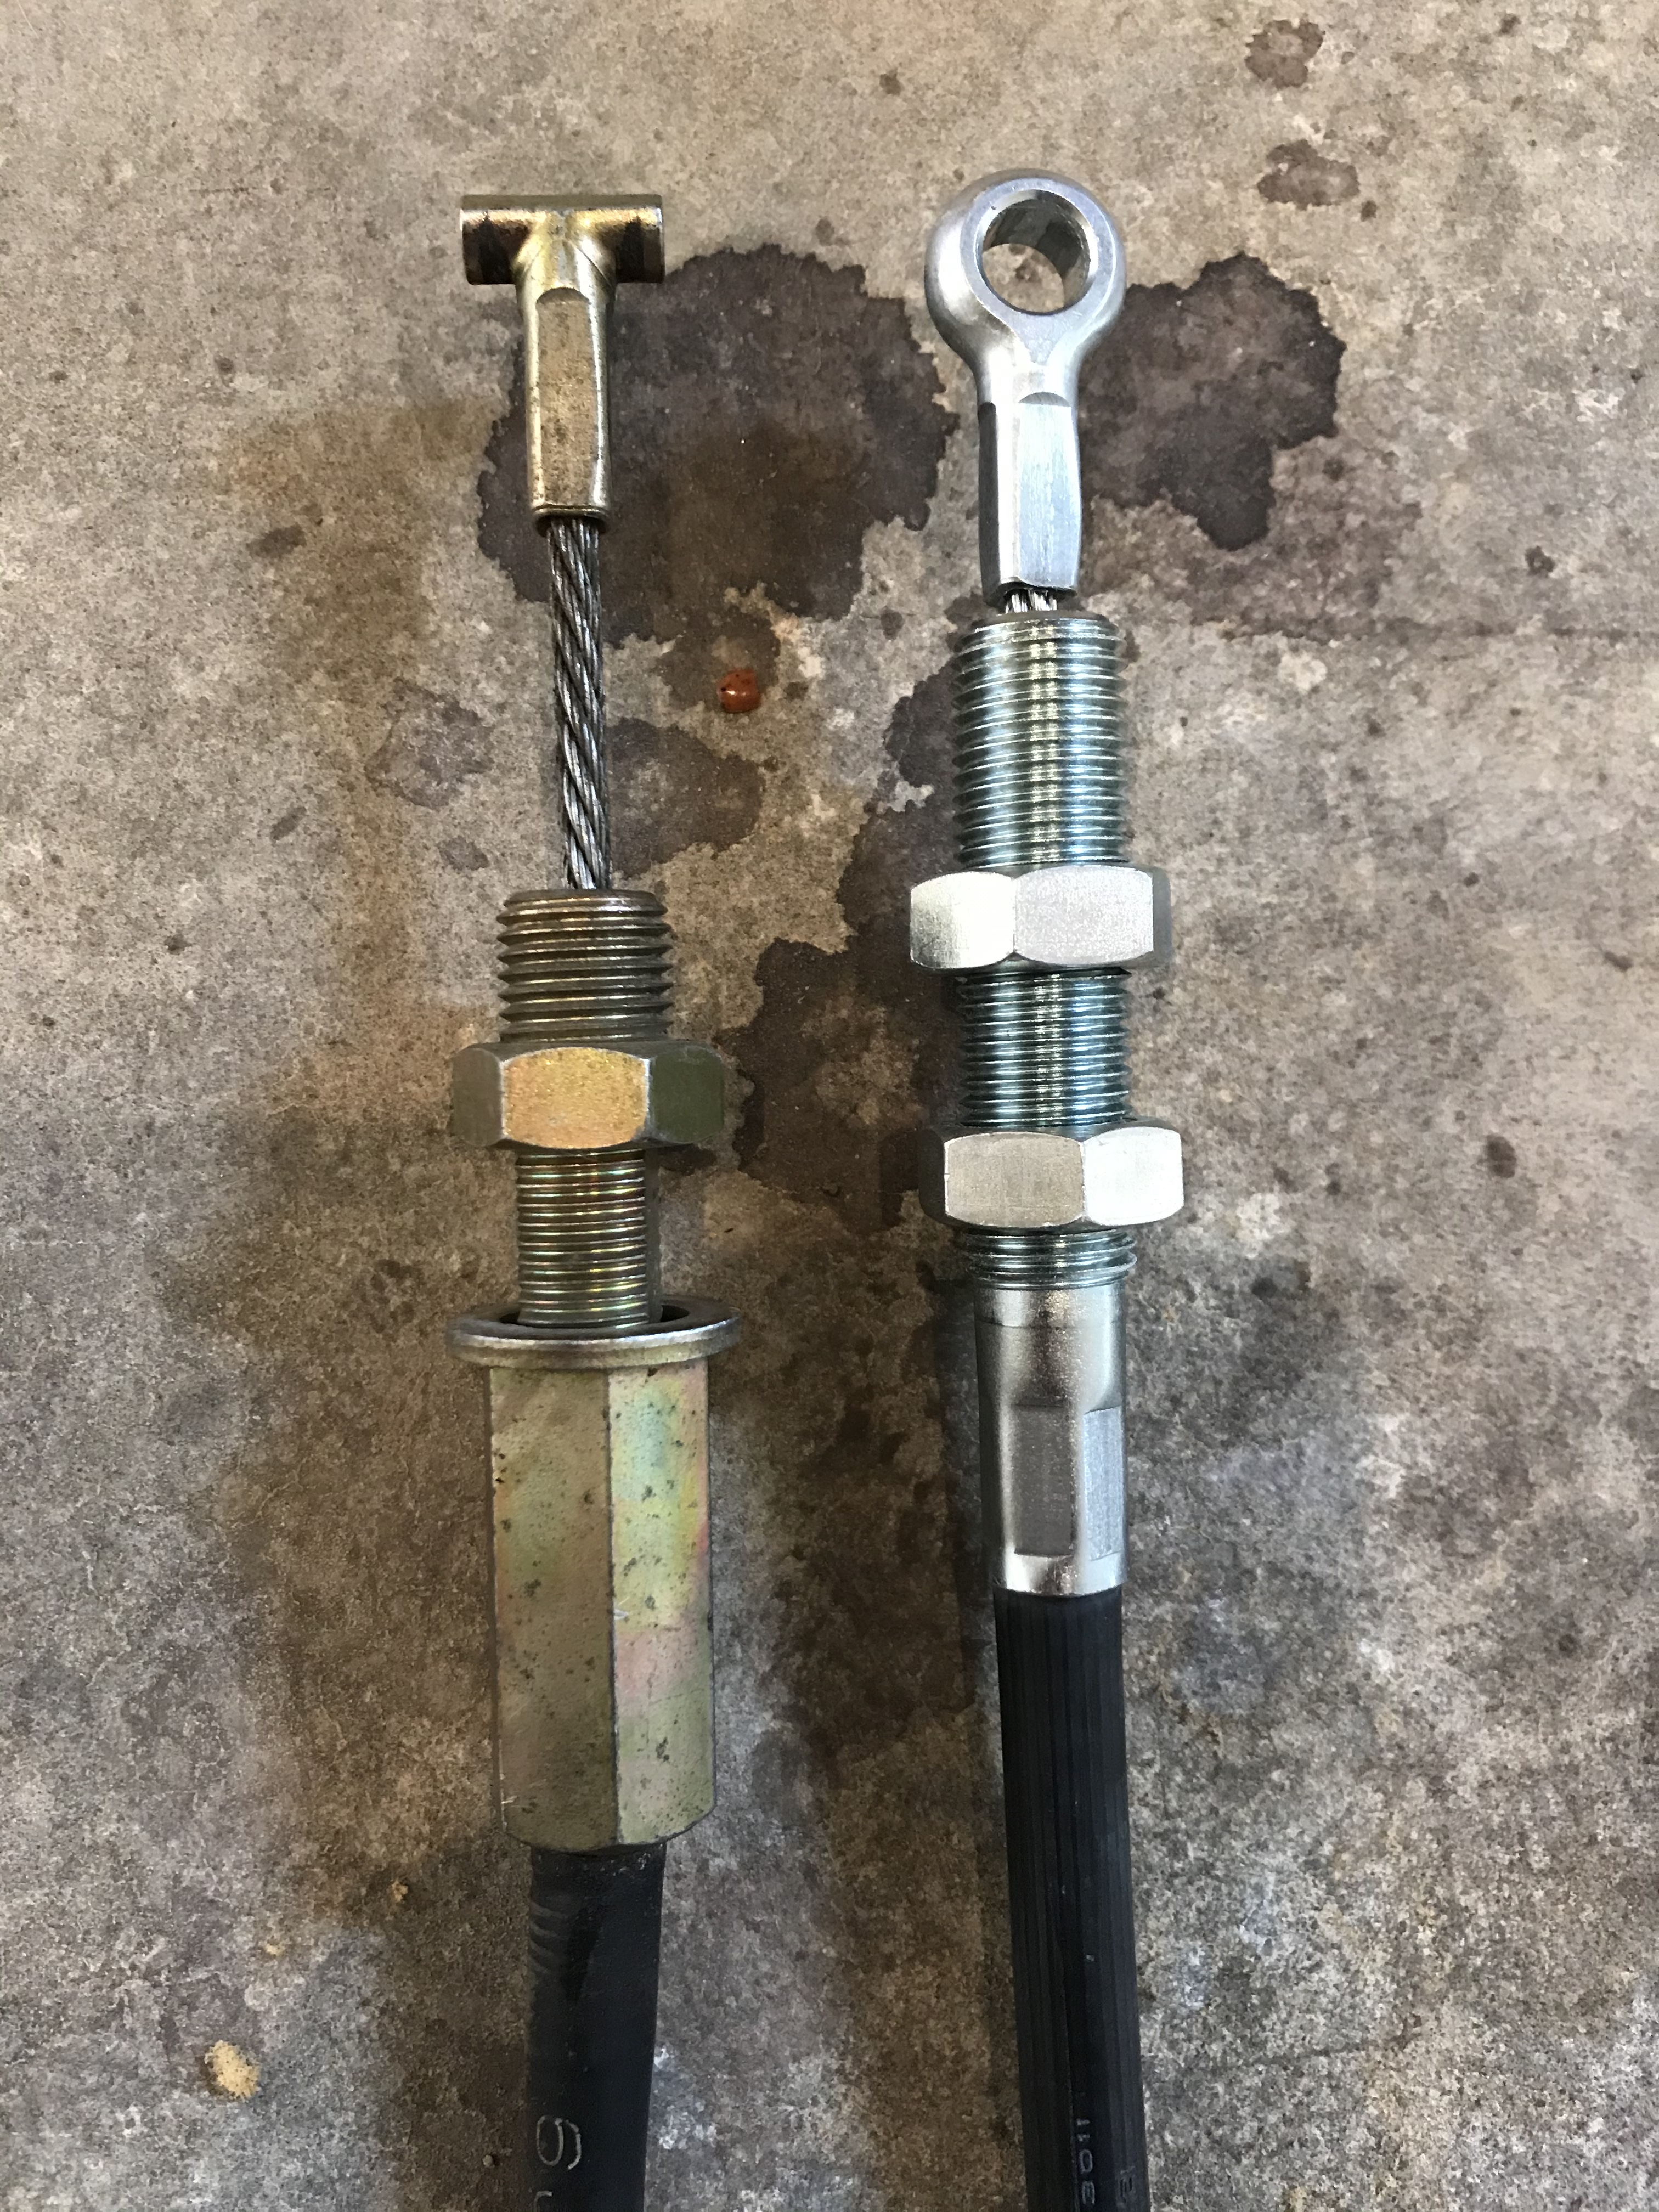
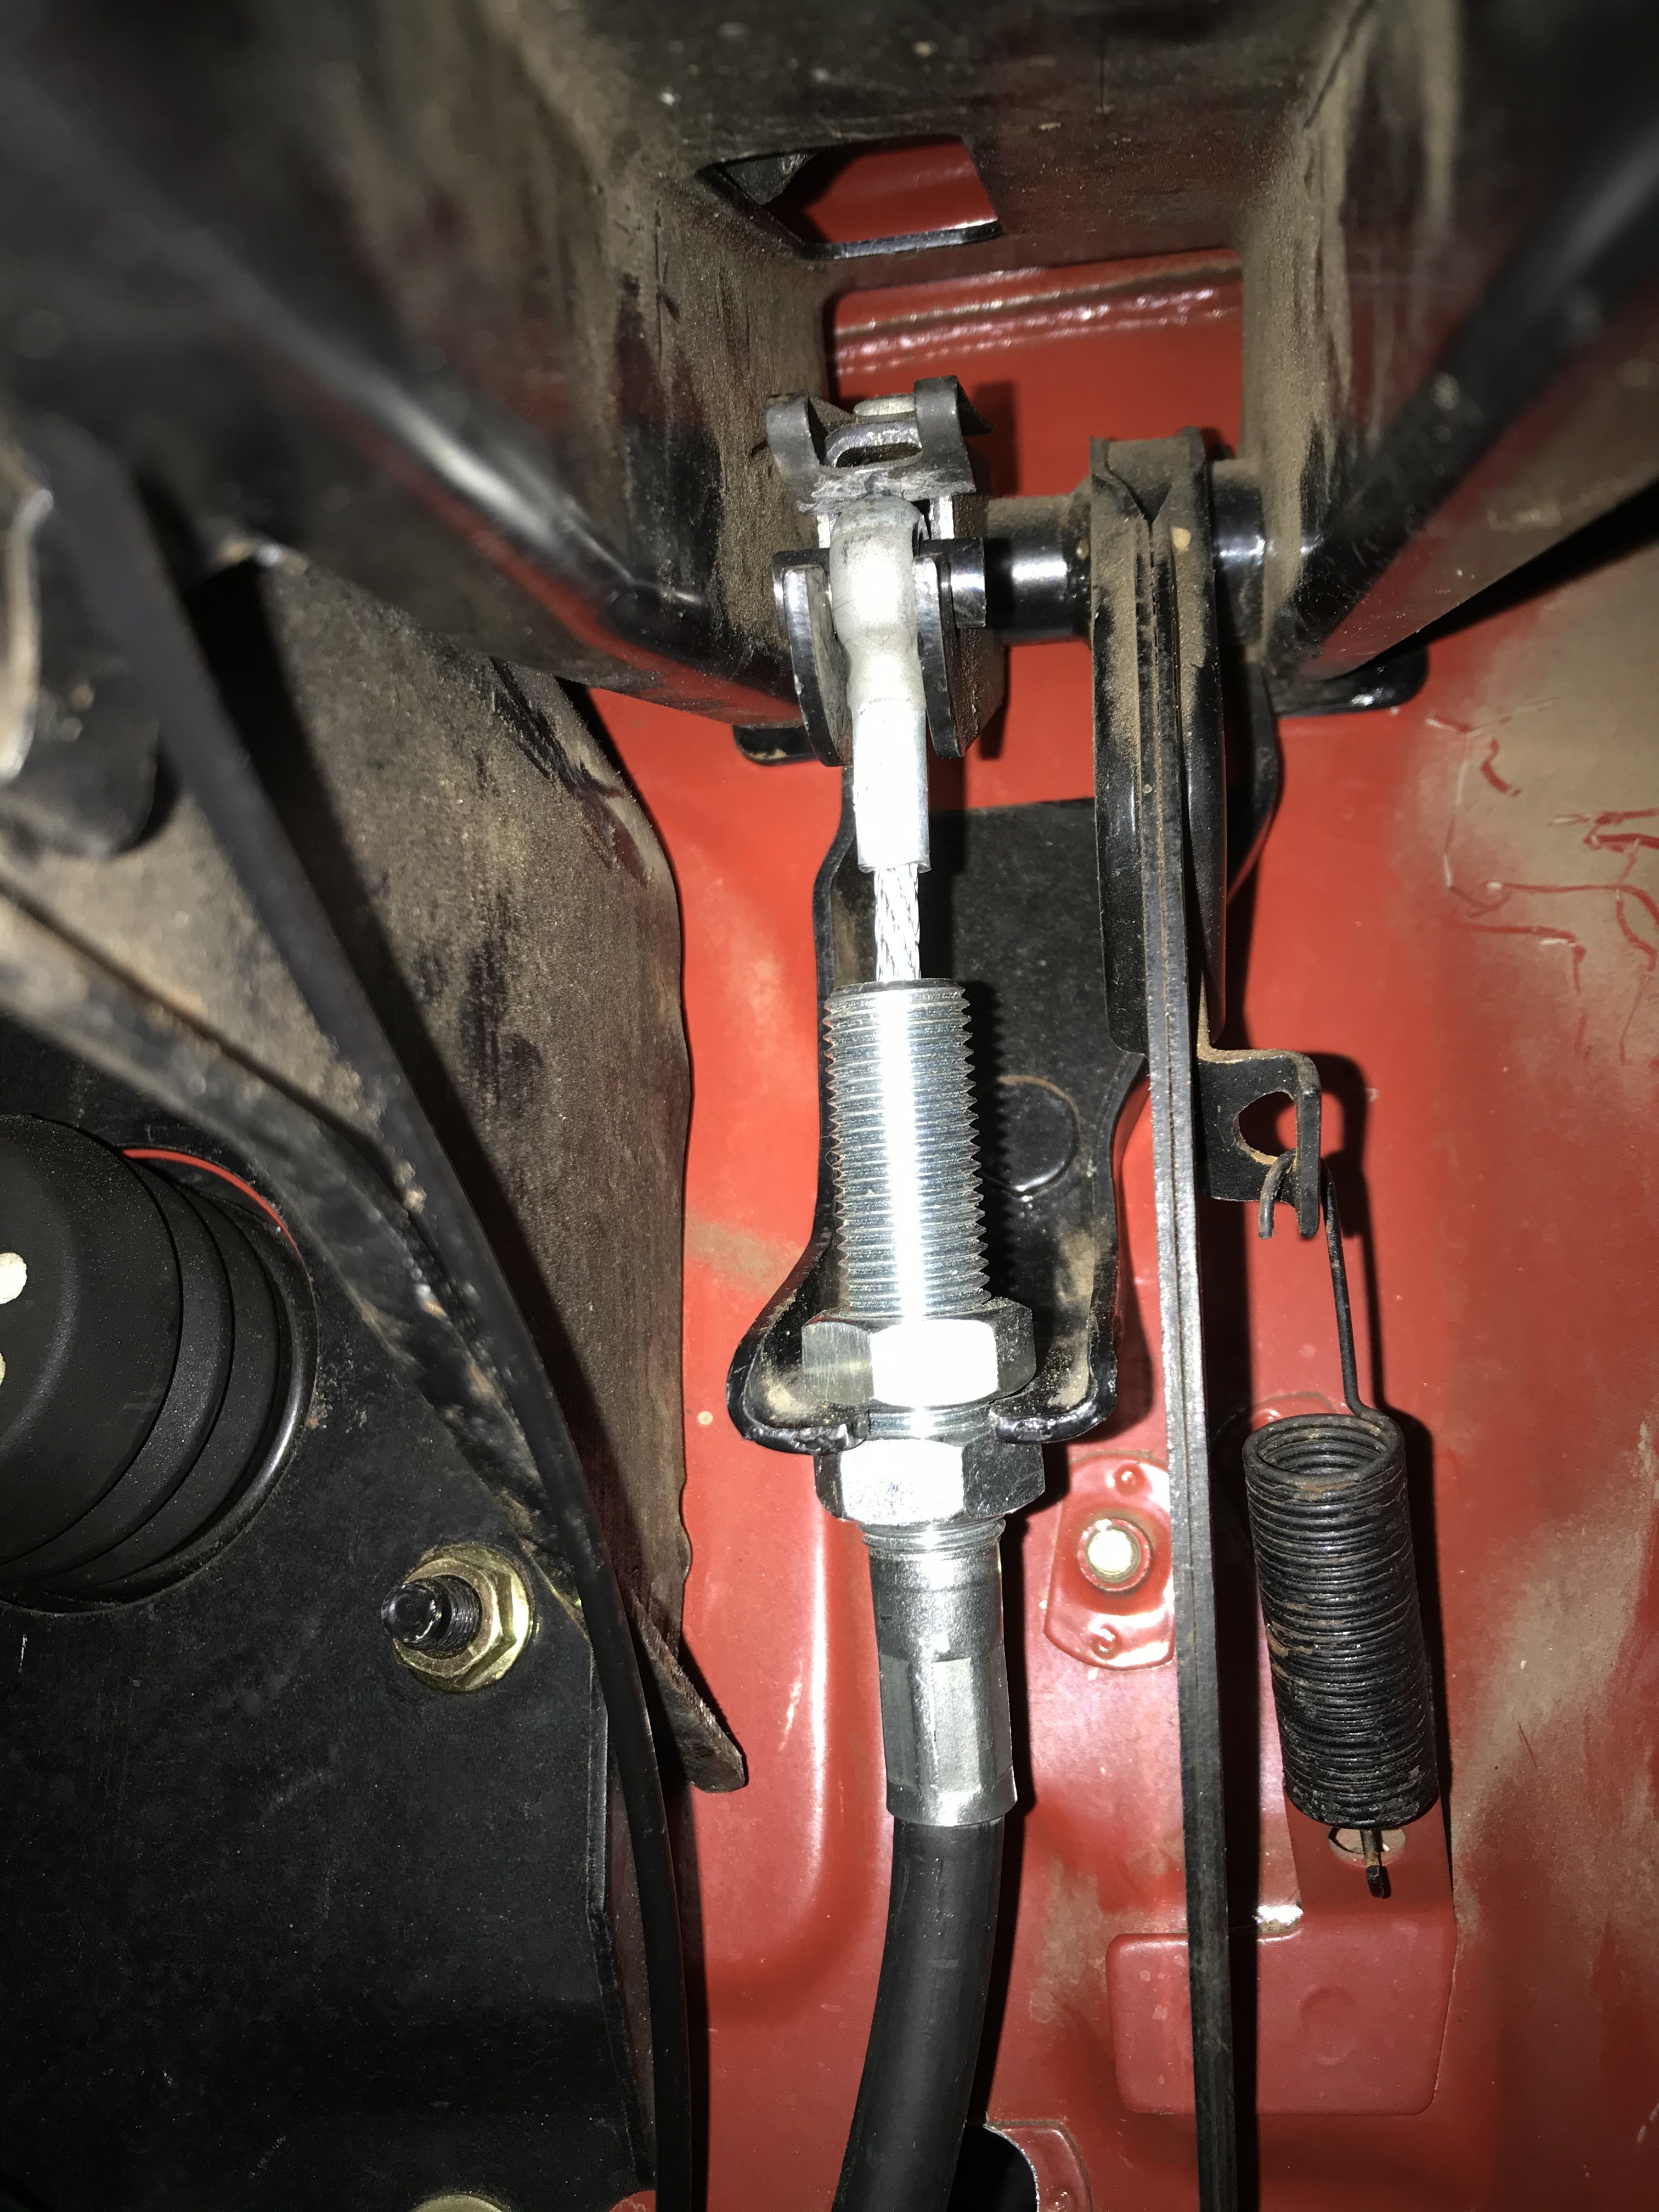
I ordered Toyota Parking Brake Cable 46410-60050 which is 68" long, compared to the OEM 4-speed cable, which is 61" long. This is the perfect length, but has an eyelet on the end, rather than the "T" fitting.

7-F6-D422-F-8663-457-F-8-E5-E-C6766-D5-E0-E59.jpg


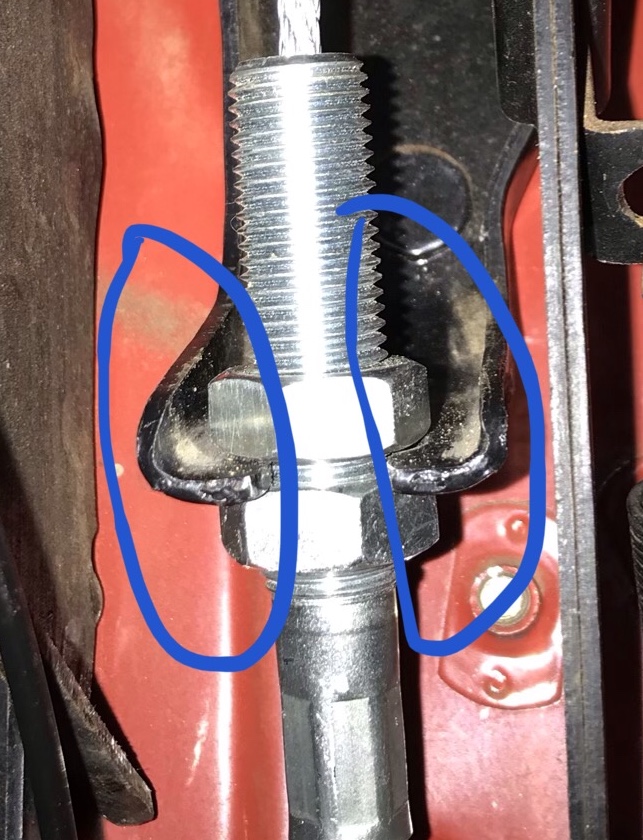
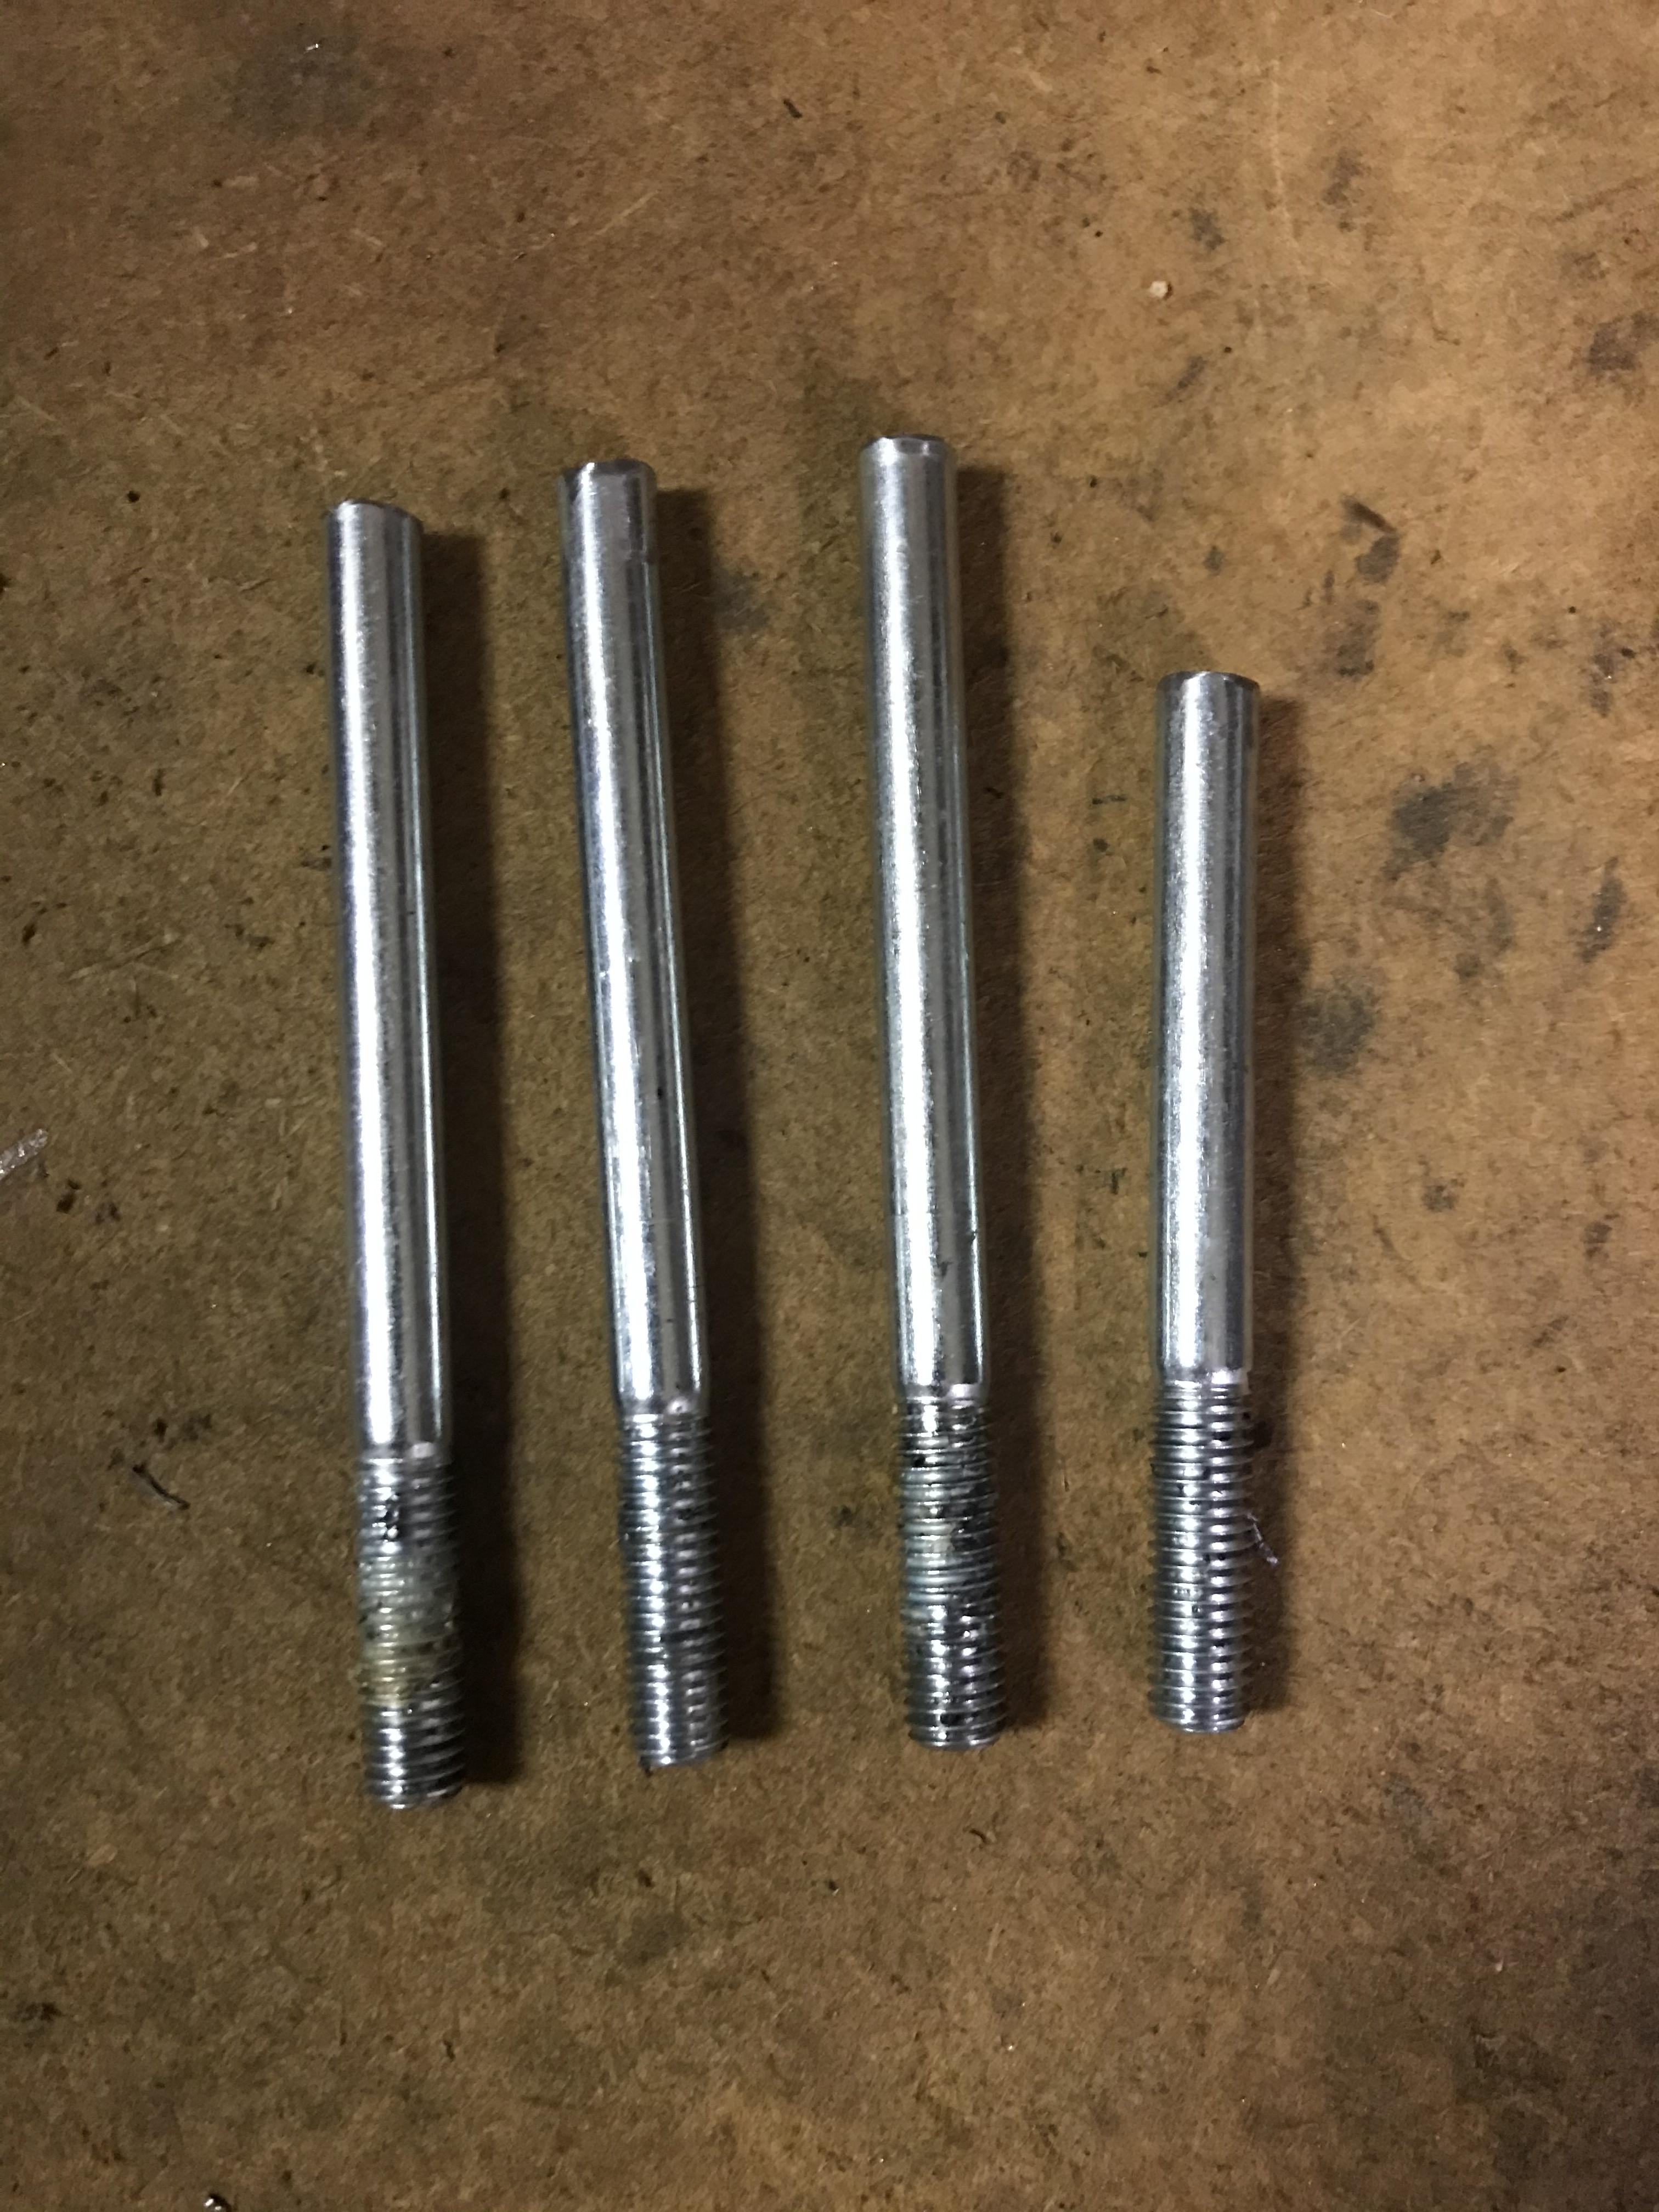
The ID of the eyelet opening is 8mm. I had a set of long M8 bolts that I cut the heads off of to act as guides for my oil pan gasket install. The bolts are not threaded the full length of the shaft, so I cut about 20mm off the shank-end of one of them (the opening in the top of the parking brake bracket is 21mm).
A4373-F80-8-E9-E-4-A30-96-D8-3-E44-FB244-BD3.jpg


The 8mm OD x 20mm length piece fit perfectly in the cable eyelet.
3-A991-C5-D-5240-4-DB9-9720-B1-B823-B13-DE4.jpg


CA5-FBE77-10-C2-4-AD7-9-E43-28286-B127514.jpg


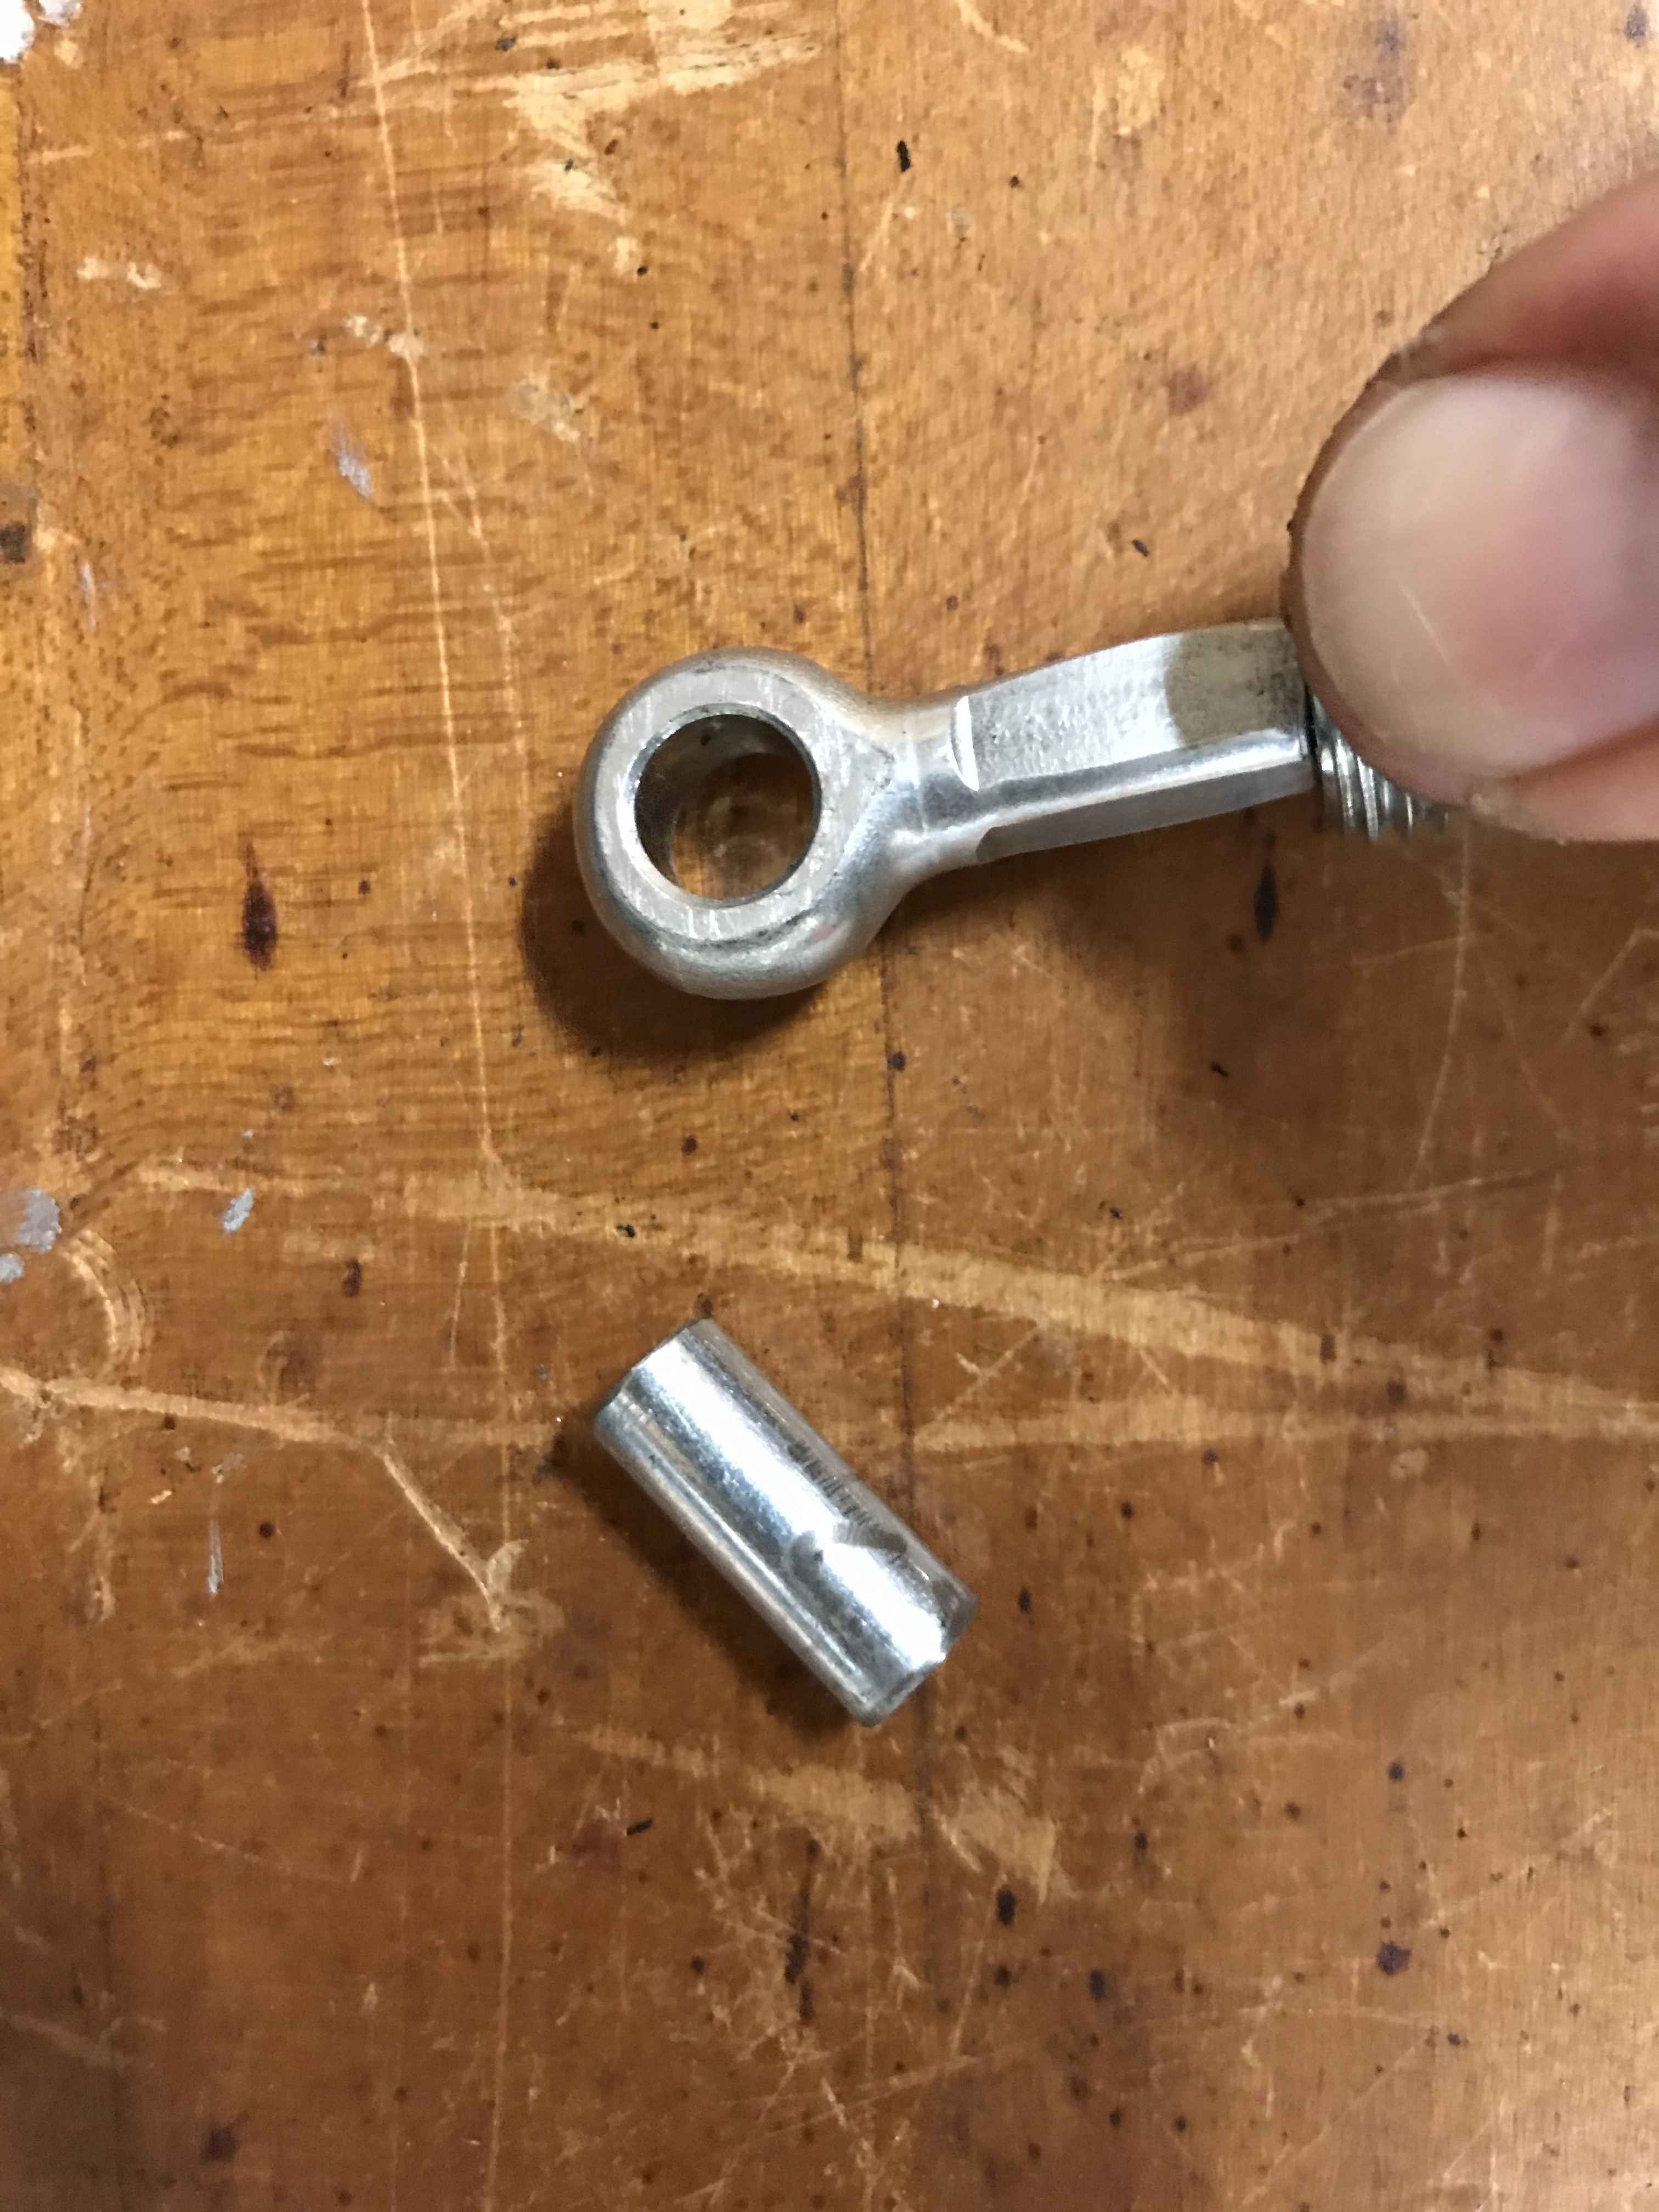
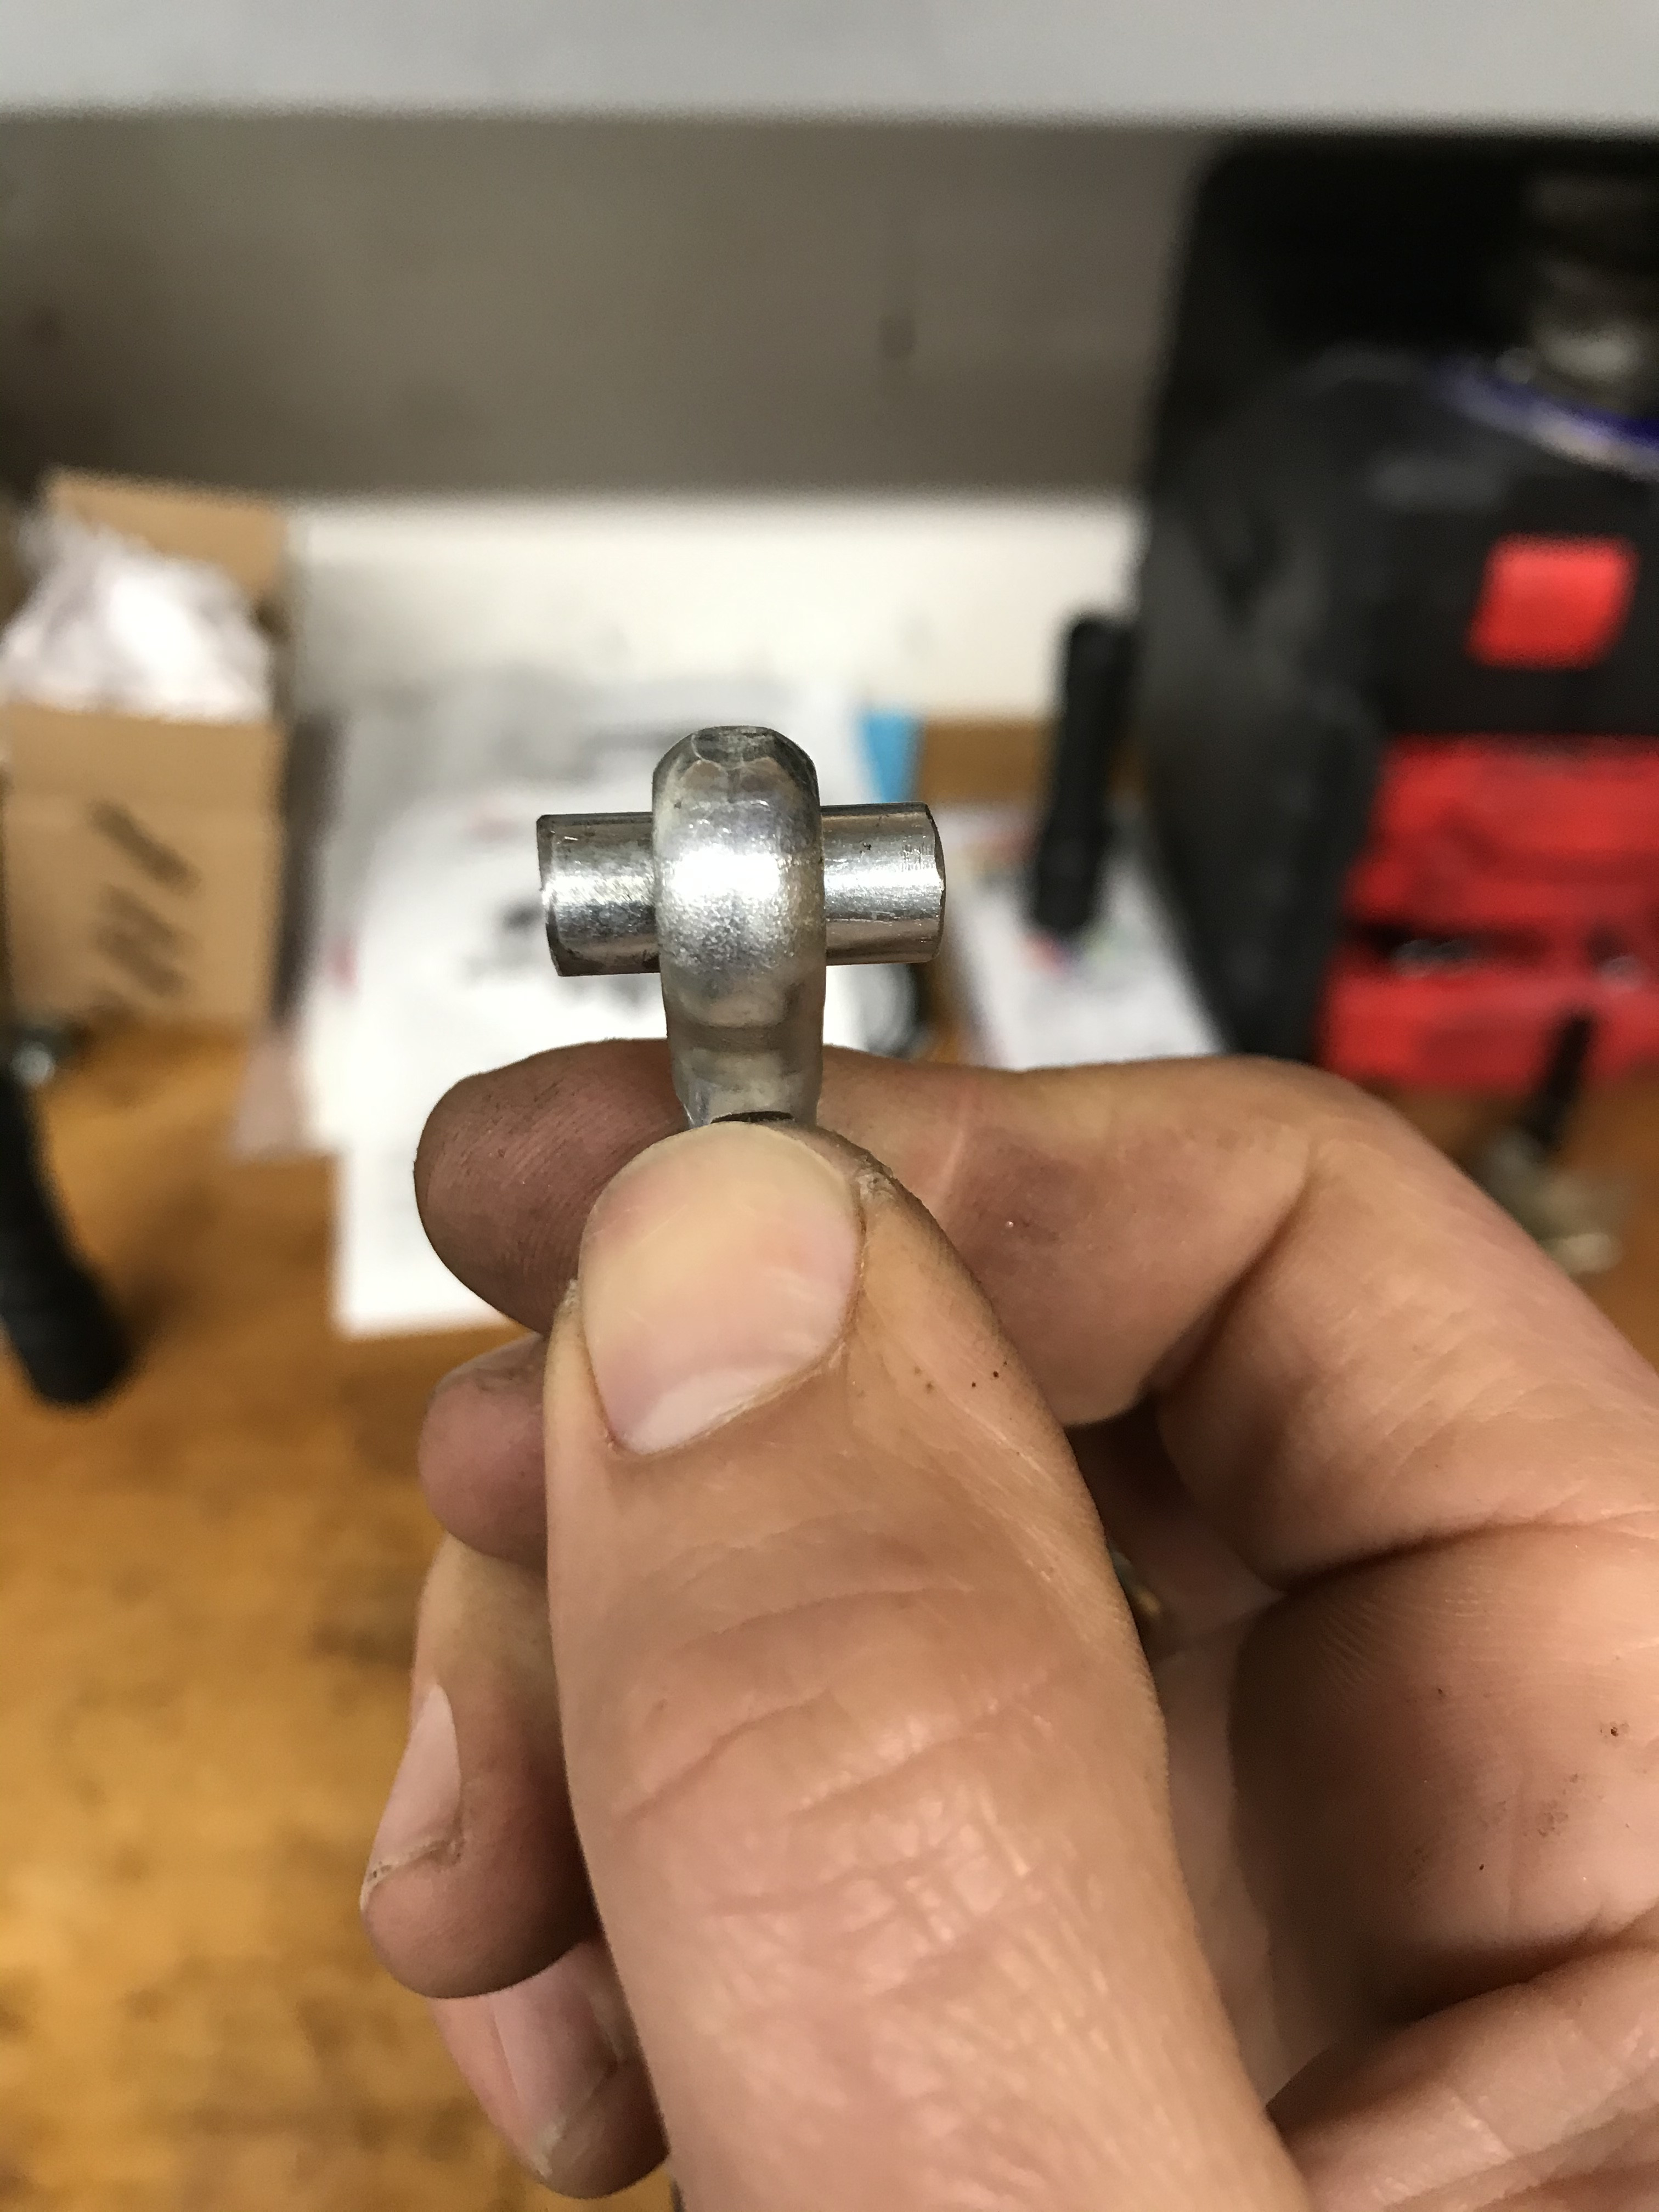
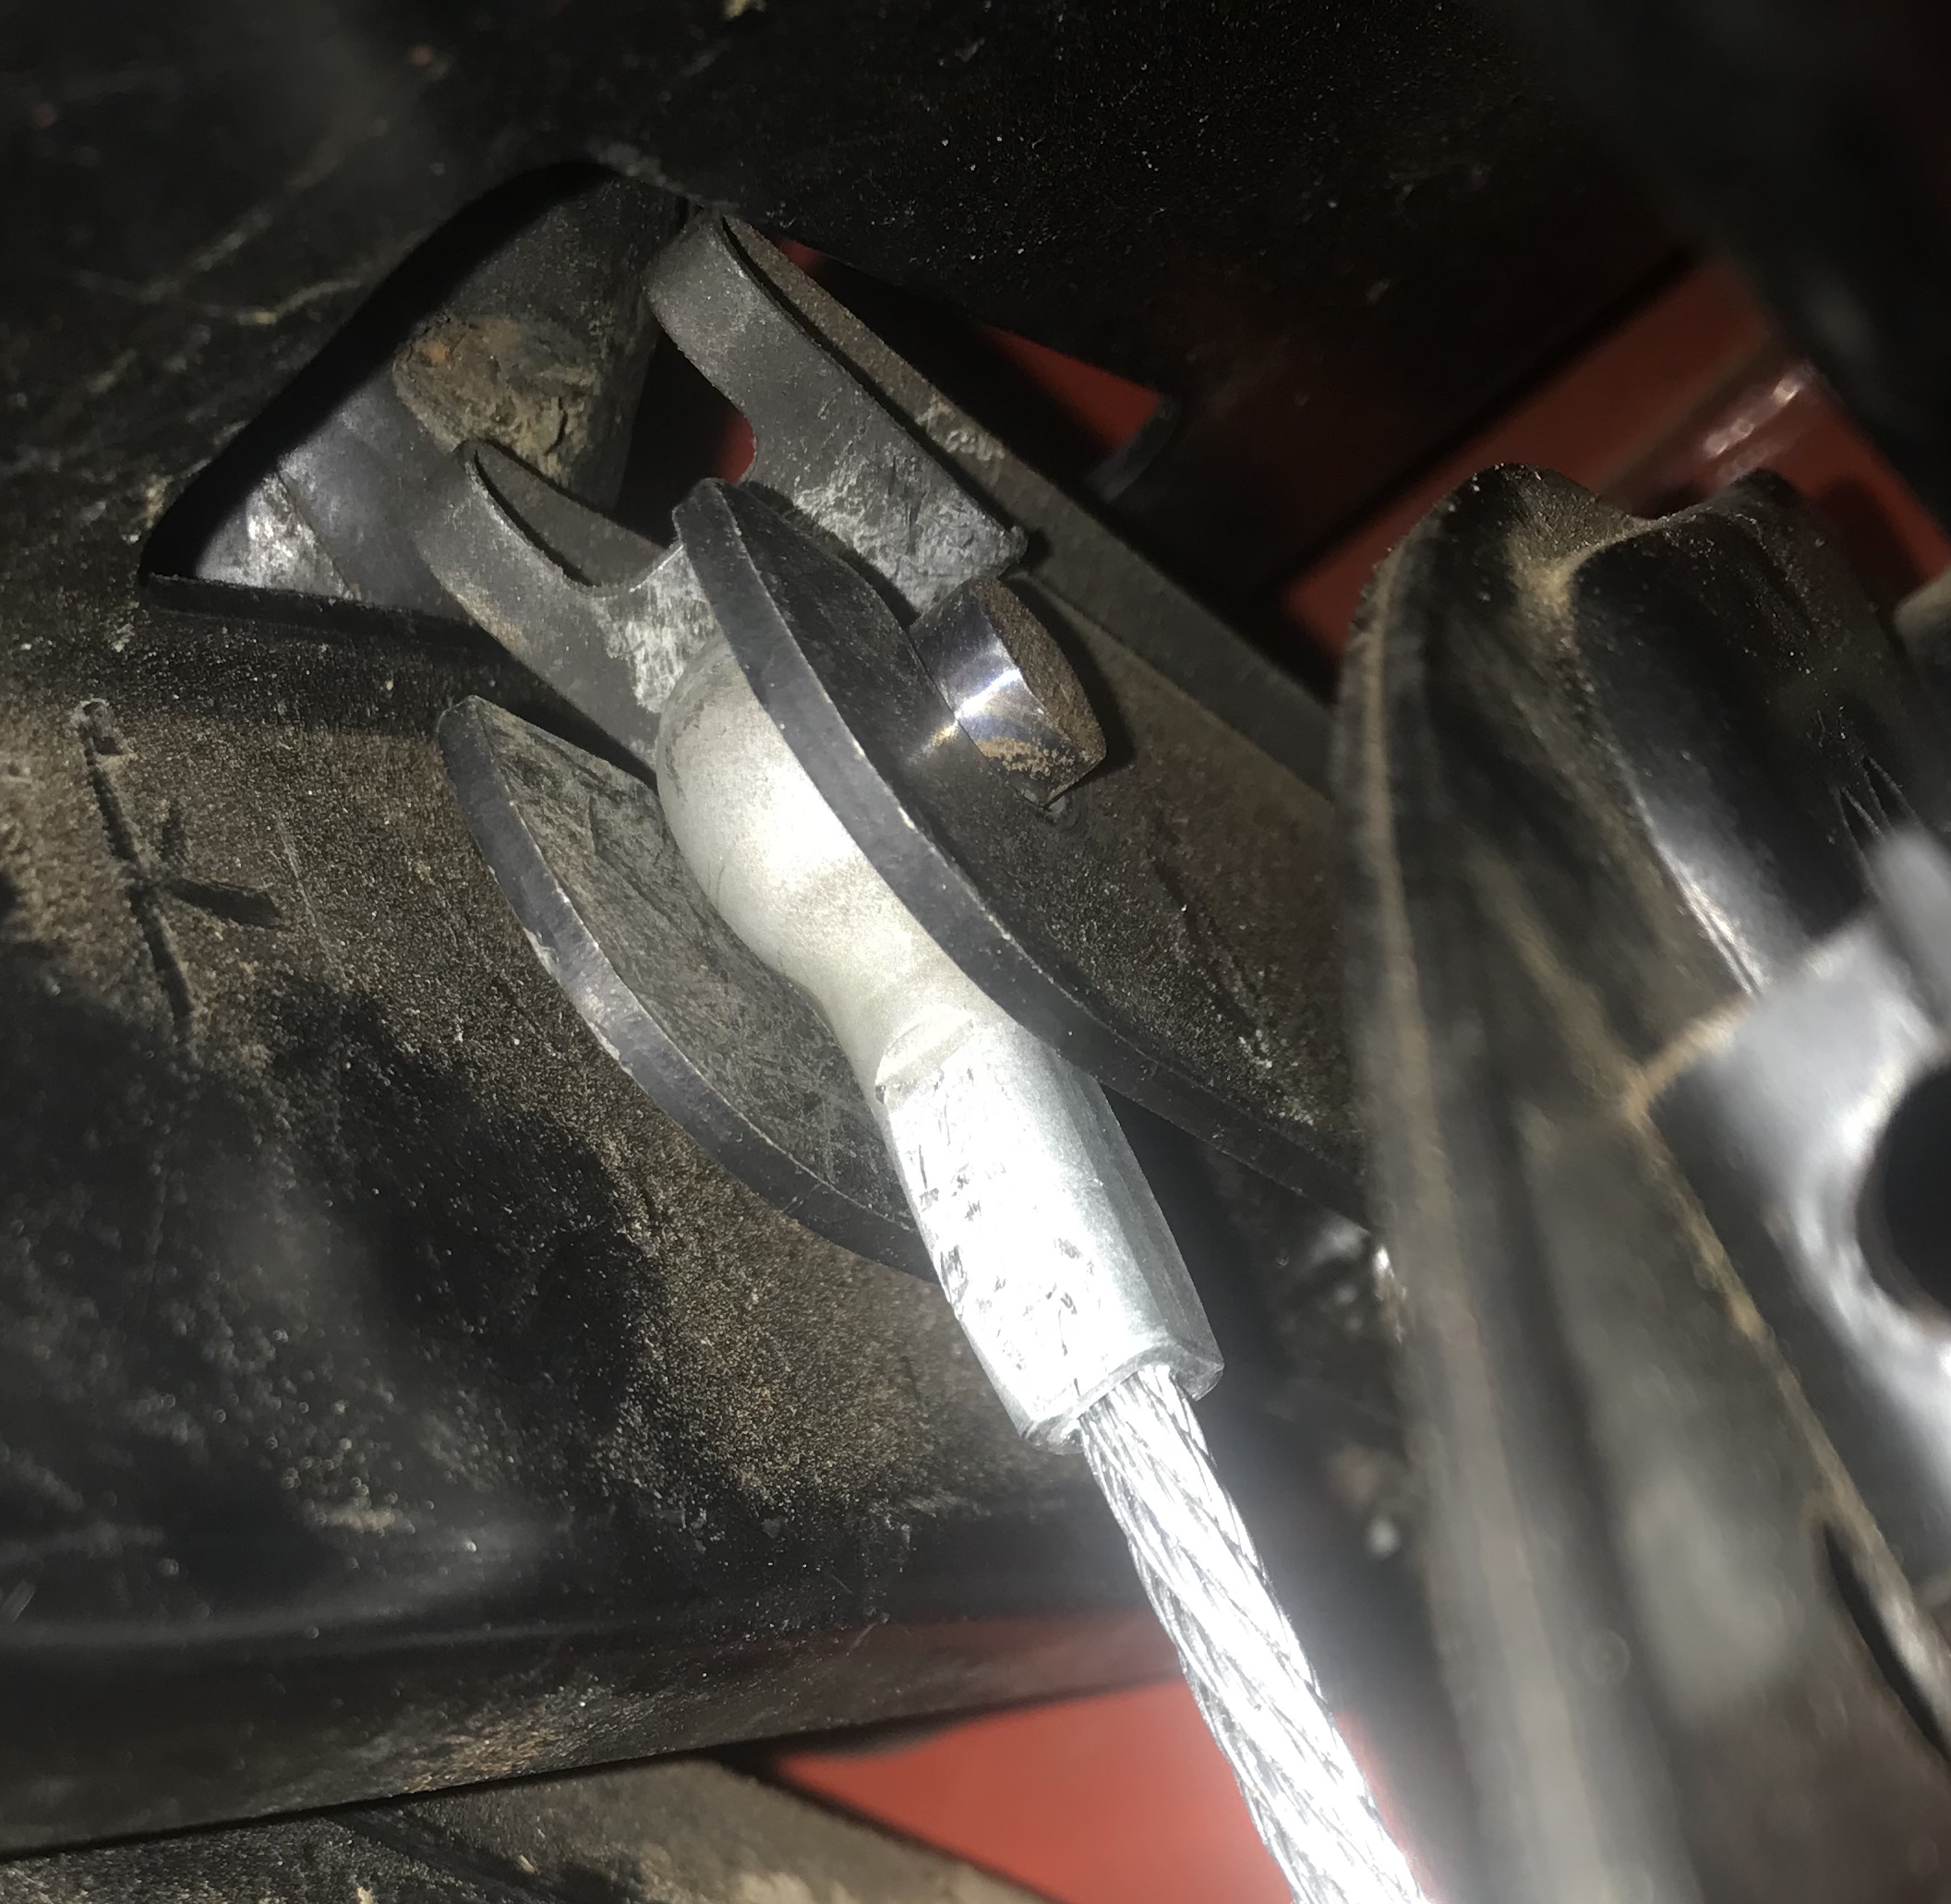
Then I had a buddy tack weld the bolt shank into the center of the eyelet. The tacks were supposed to be on the top of the eyelet, but they were small enough that luckily they worked on the bottom.
30-C2-C956-FA50-4-A36-92-D8-A44165206-EE4.jpg


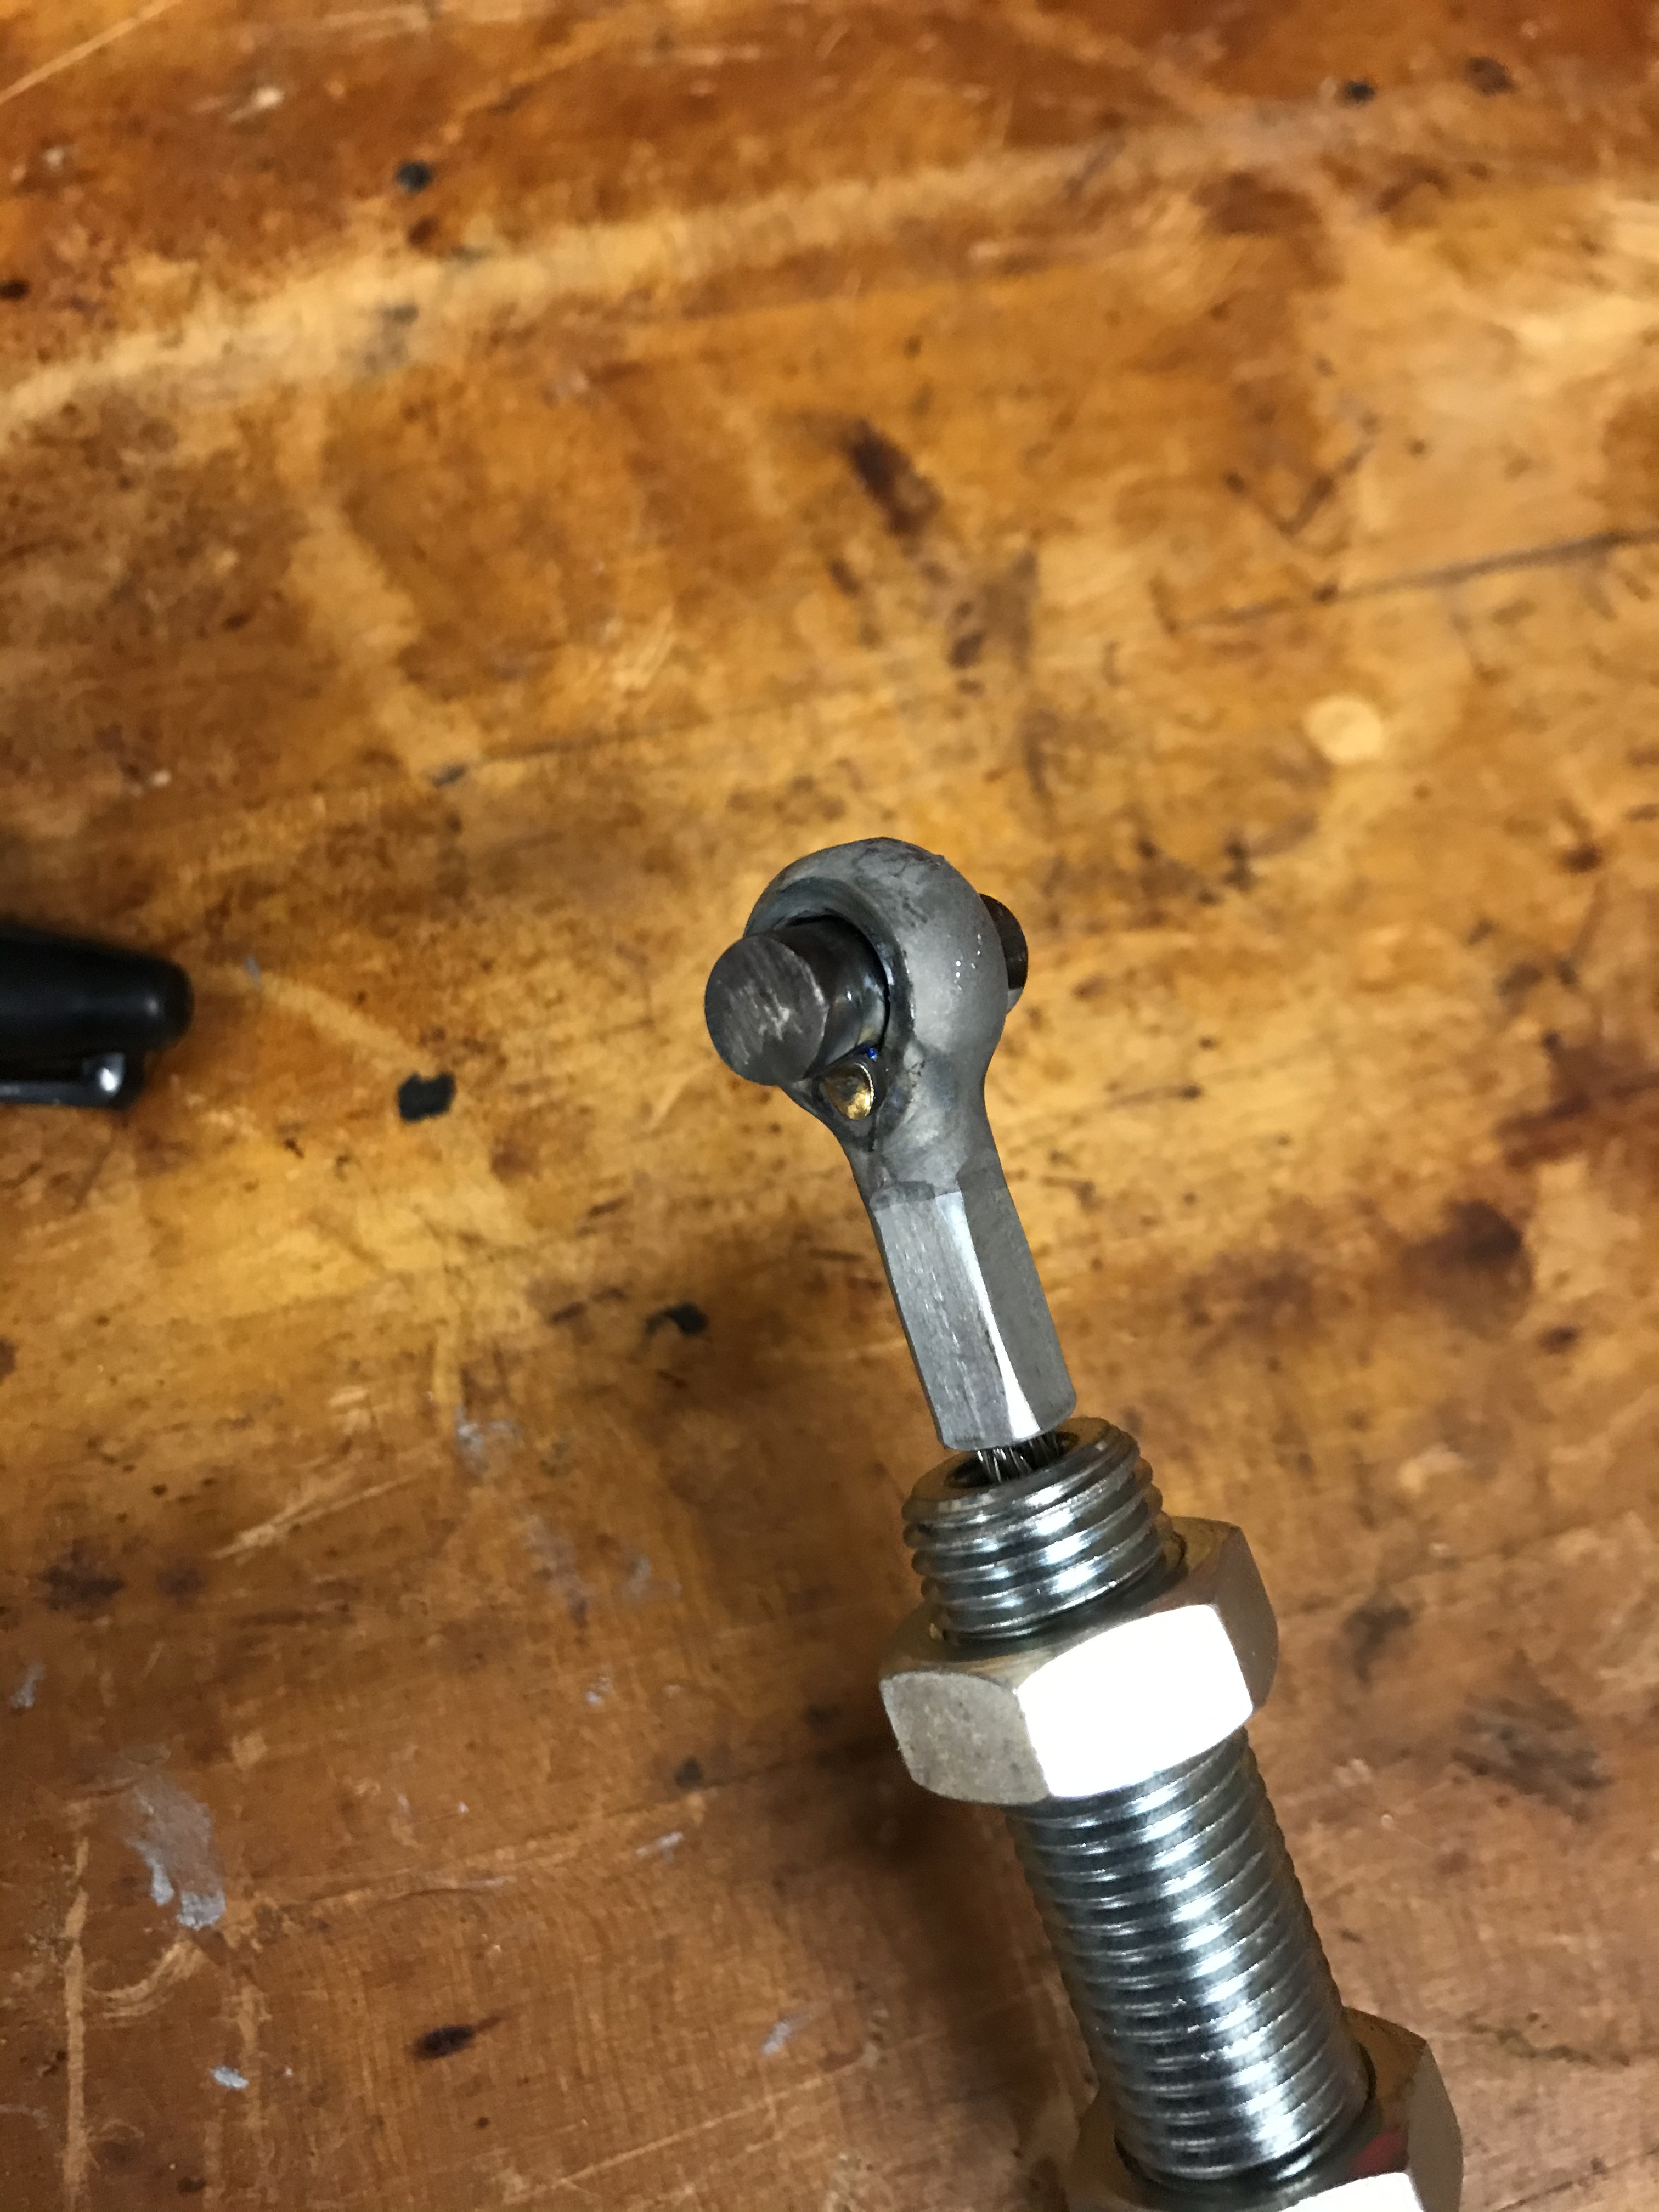
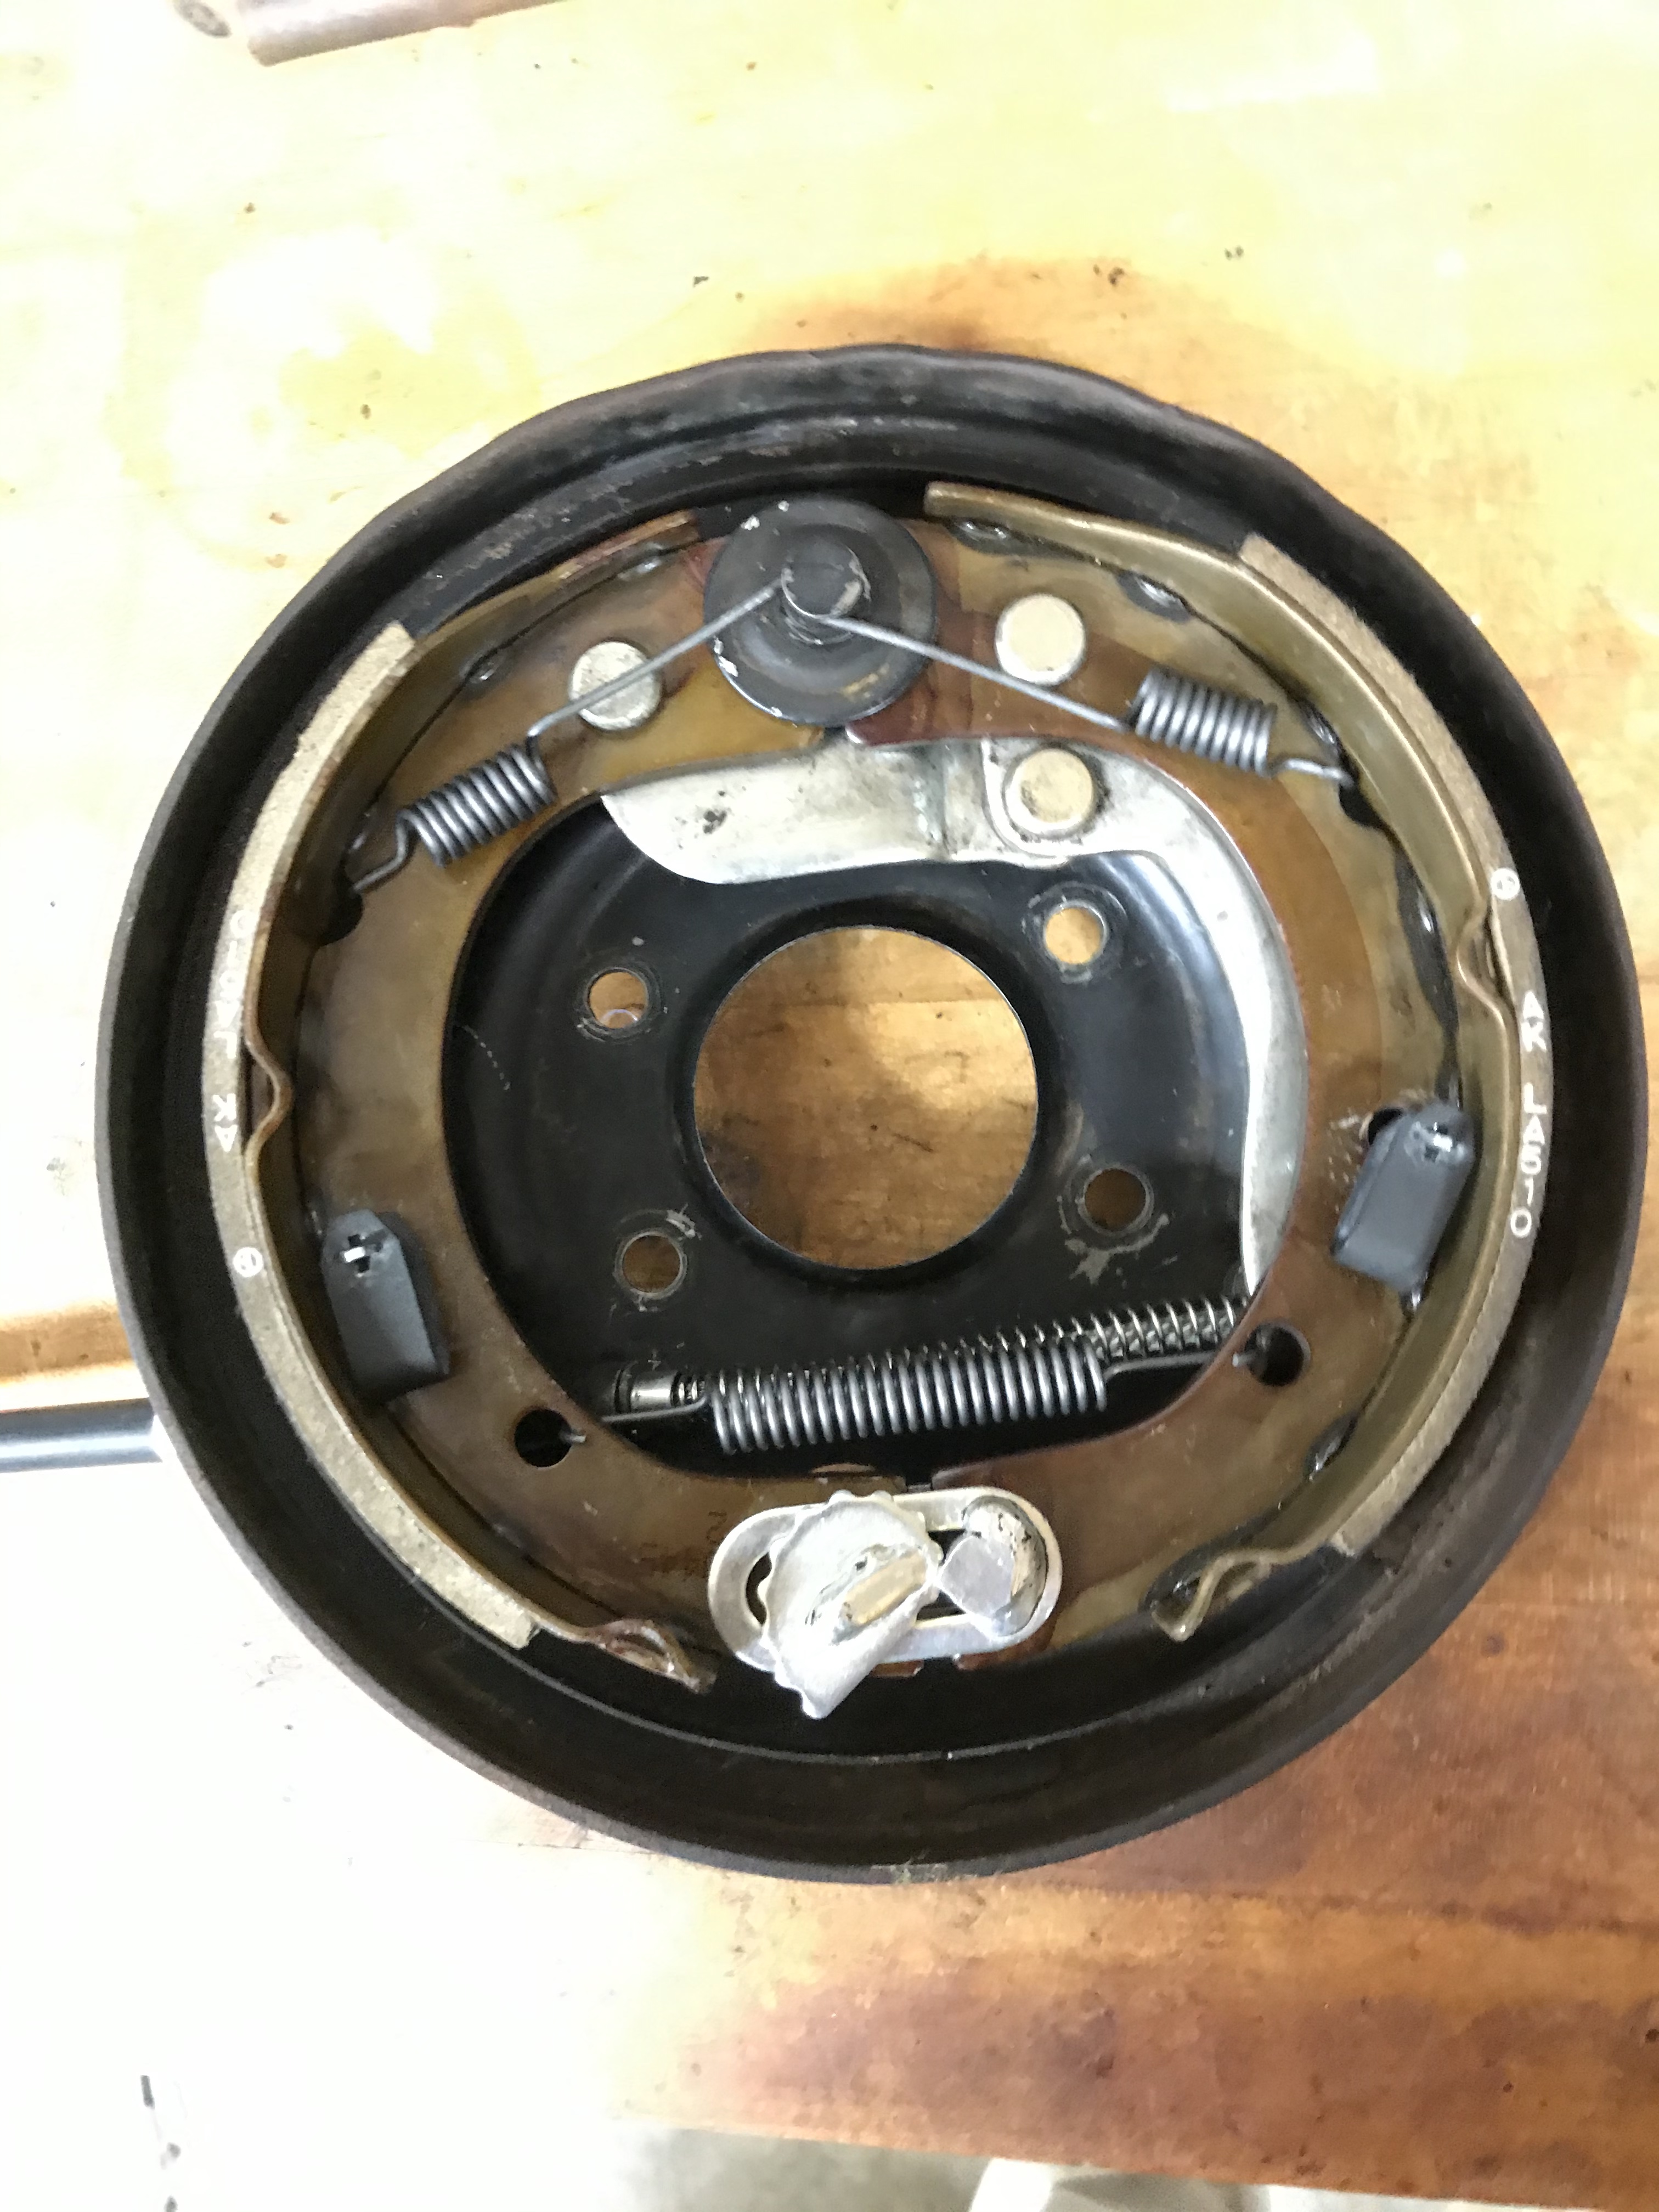
This worked like a charm, so I rebuilt my parking brake with new shoes, then installed the cable and brake assembly.
7-E231-F42-2-F9-F-47-E3-8-CC0-BFF10-E36-E2-C9.jpg

578-C5-D83-48-D5-4360-856-B-D49-E3-C0-E3-F12.jpg
 
Nice JOB! Its funny how we search and search and the easiest answer is sometimes right in front of you. I almost went down this path on the last 40 I built for a friend and have always wondered before and after of how to tackle the cable portion of it. It's good to know there is an easy solution for this because the late model full float rear axles are getting hard to find now. Did you machine some of the threads to get the cable through that bracket?
 
Check out Fel-Pro Snap Ups for the oil pan install. Makes the install easy peasy.
ih8mud.com/cruisertech.php

Thanks! I actually had the motor out of the truck and rotated on the engine stand. It was a breeze and only required the M8 headless bolts as guides since gravity was helping. :)

245-F6-FEA-BFCC-4-CD8-B689-8691-F4310-D89.jpg
 
Nice JOB! Its funny how we search and search and the easiest answer is sometimes right in front of you. I almost went down this path on the last 40 I built for a friend and have always wondered before and after of how to tackle the cable portion of it. It's good to know there is an easy solution for this because the late model full float rear axles are getting hard to find now. Did you machine some of the threads to get the cable through that bracket?


Thanks a lot!

I did not machine the threads to get the cable through the bracket. But you have to remove the top nut from the cable assembly (it will just be loose between the top of the threads and end of the eyelet), slide the assembly through the bottom of the bracket, then retighten the nut once the threads are in place.

Also, on the OEM cable there is a long nut shank to allow a 19mm wrench to clear the bracket (In hindsight I probably could have swapped it over).
1-F3-D2715-994-D-49-C2-9-AE0-6-CA3-A0-F198-A3.jpg


It took some creative acrobatics to get two conventional 19mm wrenches onto both nuts and clear the bracket to tighten. There is only about a 1/4" of workspace between the nut and the edge of the bracket. Probably a crows foot, flare nut wrench, or zero degree offset 19mm head would have helped. For clearance, I had to disassemble the handle pull brace on the dash, tighten the cable nuts, then reassemble the handle.
0478-D973-D52-E-4-E04-8-B89-EE1-A3-CE31-C1-F.jpg


Again, my only complaint was that my fabricator did not tack the welds on to the top of the eyelet. If the tacks are on the top of the eyelet, they can't interfere with the "trough" on the pull handle bracket because they're up by the clip. The clip rides on the top of the eyelet, so they would be a mile away from interfering with the clip. And the action of pulling the parking brake handle would force the M8 bolt shank toward the tacks, instead of away from them. The way it is now, every time you pull the parking brake cable, you're slightly trying to pull the tacks away from the eyelet. Albeit, just by the small amount of play between the 8mm ID of the eyelet and the 7.94mm OD of the M8 bolt shank.
55-A8360-B-0-B45-42-F9-AE04-556-DF3412806.jpg


But I'm just being nitpicky because I'm insane.
 
Timely thread. Thanks for sharing this info. I'm seeing the 68" cable listed has a bracket on the end. Did you just cut it off or it wasn't on what you received?

46410-60050-OE.jpg
 
Timely thread. Thanks for sharing this info. I'm seeing the 68" cable listed has a bracket on the end. Did you just cut it off or it wasn't on what you received?

View attachment 2355524

The bracket slides off the end of the cable. You just have to temporarily remove the adjustment nut.
 
@Will Van did you grind the top, outside surface of the eyelet some to get it to fit in the bracket? I'm copying this install almost to at t but having a hell of a time getting the cable to drop into the bracket. It looks like in one picture above you might have flattened the top a little with a grinder??
 
@Will Van did you grind the top, outside surface of the eyelet some to get it to fit in the bracket? I'm copying this install almost to at t but having a hell of a time getting the cable to drop into the bracket. It looks like in one picture above you might have flattened the top a little with a grinder??

No sir, I did not grind or modify the top of the eyelet at all. I just tacked the bolt shank in the eyelet. However, there may be manufacturing inconsistencies and mine just happened to have a flat top, which allowed it to seat more easily.

The assembly uses a compression tab to apply constant pressure to the top of the eyelet once seated in place in the trough. This makes sure the eyelet continues to ride in the trough and doesn't accidentally work loose when the cable has slack in the line. However, I found that due to the design of the compression tab, the top of the eyelet kept getting caught in the "U" shaped area of the tab (area marked in blue), and didn't want to fully slide back into the trough. Ultimately, to get the eyelet installed, I had to fully compress the tab by applying pressure on the corner marked in red with a flat blade screwdriver while simultaneously applying pressure to the eyelet toward the front of the vehicle. This allowed the eyelet to slide past the U shape in the compression tab, and seat in the trough.

CBFB7-F97-875-B-4-EF0-886-E-D8448-EBA76-F4.jpg


As you've already suggested, you could possibly grind a flat spot on the top of the eyelet, effectively creating as small "ramp" to push the eyelet past the u-shaped machined area on the compression tab.


Worst case scenario, you may have to remove the entire assembly from the firewall, install the cable eyelet on the bench, and then remount.

Hope this helps. Let me know if you have any other questions.

Thanks a ton for that detailed reply. My compression tab may be bent, trying to access and cramps are setting in lol
 

Users who are viewing this thread

Back
Top Bottom