'17 WK2 Trailhawk Overland Build (1 Viewer)

This site may earn a commission from merchant affiliate
links, including eBay, Amazon, Skimlinks, and others.

You'd have the fastest winch in town.:grinpimp:

I have a few Mopar bones in my body, I want a Hellcat bad.
 
Thanks! You might be surprised, but this model year (Technically 15+) actually have favorable reviews on all the sites you mention. The '10-'14 models were problematic, as were some of the WK series, but the post '14 revisions are rather well regarded. In the year of ownership and ~13k miles I've put on it on and off road, it has performed flawlessly with everything I've thrown at it. Obviously only time will tell, but as of now she's a keeper in my book!

Lots more mods than I've been able to document on here, but I'm hoping to catch up on that. Thanks again for checking it out!


Hopefully they're better off now. My sister bought a '14, and while it was super comfortable and fancy, it was in the shop for warranty work 13 times in a 12 month period. She was without it a total of something like 20 weeks out of the year and they never got all the problems sorted out. Took a bad loss by the time she got rid of that pos.

Fortunately all that time spent in rental vehicles pushed her to buy a completely trouble free Kia instead.
 
Thanks! You might be surprised, but this model year (Technically 15+) actually have favorable reviews on all the sites you mention. The '10-'14 models were problematic, as were some of the WK series, but the post '14 revisions are rather well regarded. In the year of ownership and ~13k miles I've put on it on and off road, it has performed flawlessly with everything I've thrown at it. Obviously only time will tell, but as of now she's a keeper in my book!

Lots more mods than I've been able to document on here, but I'm hoping to catch up on that. Thanks again for checking it out!
I certainly hope it's a great vehicle for you. It looks great.
We had a one as a rental not long ago and there was a lot to like (I've had too many poor experiences with Chrysler products to ever give them another shot), and it seems there's great market support for them.
 
Hopefully they're better off now. My sister bought a '14, and while it was super comfortable and fancy, it was in the shop for warranty work 13 times in a 12 month period. She was without it a total of something like 20 weeks out of the year and they never got all the problems sorted out. Took a bad loss by the time she got rid of that pos.

Fortunately all that time spent in rental vehicles pushed her to buy a completely trouble free Kia instead.

I can't even image that! I'd be infuriated. Hopefully that situation won't occur, but I bought the warranty just in case (having the electronics make me nervous sometimes) but if there was truly an issue like your sister's situation, I'd fight Chrysler like hell and drive one of the other two cars in the mean time. Fingers crossed for this one!!

I certainly hope it's a great vehicle for you. It looks great.
We had a one as a rental not long ago and there was a lot to like (I've had too many poor experiences with Chrysler products to ever give them another shot), and it seems there's great market support for them.

Thanks, me too. Love it and always look back in the parking lots to check it out...

The aftermarket support isn't huge but is certainly growing. I've appreciated being at the front of some of the aftermarket options and helping manufacturers with fitment kinds of things. Fingers crossed for years of enjoyment with it.
 
Also Last Spring...

One of the most important things for me in vehicles is visibility. The TJ has a LOT of LED lighting, strobes, etc. - so the plan for the WK2 was bound to be pretty intricate as well. First step for any additional lighting is figuring out how it’s going to be controlled, and from where it’s going to be controlled. After Googling a fair amount of options, seeing if anyone had built vehicle-specific panels, I went ahead with my initial plan to install a switch panel to the lower left side of the steering column. There was a great write-up by a guy on JeepForum a few years ago that followed along the same lines as my idea.

I wanted/needed to keep the switches refined and purposeful, so I had to decide which each of the four Contura switch spaces would control. For me, reverse light is hugely important… second to that is forward facing light, so recessed driving lights or some kind of LED bar will get a spot. Third up in my mind is a strobe light system, as I’ve spent many years with one in the TJ and often find myself pulling over to help people on the side of the road, or utilizing them for other situations in bad weather and the like. Spot 4 then became a catch-all, or an expansion slot.

So:

Switch 1: Reverse LED Lights
Switch 2: LED Bar (likely roof mounted)
Switch 3: LED Strobe System
Switch 4: For the mean time, VHF radio power.

With a quick Amazon order for switches, wiring, heat-shrink crimp connectors, and the 4-space mount, I got to work. The VHF switch cover was from eBay for an extra seven bucks.


Switch Panel - Front
by 2180miles


Switch Panel - Rear
by 2180miles


Switch Panel - Side
by 2180miles
 
The Contura switches I bought were 5-pin versions… Inputs: +12v for the status light and power source, +12v for the locator light (to find the switch when it’s off), and a ground. Outputs: ground loop, +12v for the light itself. It took some research to find out the exact way to wire this, but once I knew I got to work on an 18awg wire loom for them all. The night I put it together I was sitting in my girlfriend’s office as she worked late and finally had to reassure her coworkers that I wasn’t building a bomb in their workplace. Final results were clean, I was happy.

From there I had to figure out what kind of wire loom I would use to get from the eventually-will-be-built control box (relays, fuses, flux capacitors, etc) to the switches. I knew each of the 4 switches would need an individual wire strand to trigger each respective relay, then all would need a +12v lead which they could share, and a ground which they could also share… this brings us to 6-strands of wire for those who can’t count fast.

I work in the live events industry; so 5 and 7 pin cable is a common thing in my life. The issue that I had was the fact that most of those wires, as well as DB9 data cable, are mainly 22-26 AWG, which although it’s okay to push ~0.33A down through, I didn’t want to mess with having to crimp 24 gauge cable to the switch pins. A quick run to Home Depot for 7-strand thermostat cable yielded me a more substantial 7-strand (solid core vs stranded) wire for sprinkler system installations. The other benefit of sprinkler versus thermostat is that the latter was brown, while sprinkler wire housing is black… cleaner to install and easier to hide.

Once I had the wire in hand, I cut each strand to the appropriate length. Red and White would be my hot and ground lines for easy decoding, and the color-coding of the rest would be easy enough to remember for when it’s time to install the control box. In order of (ROYGBIV) I continued past red with Orange on switch 1, Yellow on 2, Green on 3, and Blue on 4. I cut each of the wires to specific lengths to make the sprinkler loom sit cleanly against the switch panel, and then went ahead and crimped/heat shrunk the wires to mate with their female crimp-on ends. I added a separate +12v line made of a miscellaneous five foot section of 14awg wire to tie into an ignition-based +12v line to turn on the locator/indicator LEDs in the bottom of the Contura switches, separate of the ignition.

In laymen’s terms, I wanted the indicator lights to come on with the ignition of the vehicle, but the lights themselves (strobes/rev/LED) to be able to remain on even when the vehicle is turned off. The latter will get their +12v lead from a fuse panel directly tied to the battery.

The result was a rather clean switch panel, parallel grounds and +12v for the leads and switch LEDs, and a 15-foot wire-loom for the relays to be triggered by.


18-7 Sprinkler Wire
by 2180miles


Switch Panel Template
by 2180miles
 
Continuing with the switch panel install…

I apologize in advance for some of the photos seeming blurry, I was shooting this outside, handheld, with a very narrow depth of field to avoid a high/grainy ISO, and had nowhere to really bounce the flash off of in these tight spaces. I know most of you won’t care, but for the photographers in us, I wanted to preface by saying I know there’s a lot of unintentional bohek/obvious DoF.

Next up came the actual dash install of the switches. This part was a bit unnerving, as removing the knee air bag panel from under the steering column required the removal of a fair bit of parts, and the FSM’s Interior Panel Removal section wasn’t really great at depicting exactly what I needed. I took a ton of photos for you to see, but I’ll detail this a bit more.


WK2 Lower Steering Column
by 2180miles


WK2 Left Headlight Panel
by 2180miles

You can see the panel in the photos above that I’ll be working with, and the approximate area the switches will go into, below and to the right of the headlight selector switch and fuel tank door switch. *** DISCONNECT THE BATTERY TERMINALS BEFORE DOING THIS AS THERE IS AN AIR BAG UNDER THE STEERING COLUMN IN SOME MODELS! ***

The required tools here are a ¼” socket set, a Phillips head screwdriver, and a small interior trim pry tool.

1. Pry off the plastic cover to the left of the dash, between the door and dashboard
2. Pry off the steering column surround bezel till it’s loose at the top of the wheel
3. Remove the Phillips head screw to the top left of the steering column
4. Pry back the upper left and right of the large trim piece that covers the lower steering column from where it meets the upper dashboard (there are a few retaining clips, the tool will help)
5. Remove the plastic pop rivets holding the rug piece over the gas/brake pedal
6. Underneath the dashboard, remove 4 Phillips head screws (they’re roughly highlighted in the photo below)
7. At this point you should be able to pull the upper piece of the trim far enough off the dash to remove the airbag trim piece from around the airbag itself.


Lower Speedo Fastener Removal
by 2180miles


Under Steering Column Fastener Location
by 2180miles


At this point you should be able to pull the upper piece of the trim far enough off the dash to remove the airbag trim piece from around the airbag itself. If you do have the airbag, you might struggle here. I decided against removing the airbag itself, and instead just removed that trim, but only after I made the mistake of trying to remove the air bag panel with the pry tool (you’ll see tape in the last photos, I have to re-glue it back together……)

Once I got that done I was able to pull the panel forward and down enough to access the left side, removing the wiring harnesses from the fuel door button and headlight selector. I removed the headlight panel completely in order to better get the Dremel tool in there for trimming.


Removing Steering Column
by 2180miles


After measuring the switch panel and comparing it to the rear support plastic behind the dash panel, I cut out an appropriate section to fit the depth of the switch into the dashboard. After that came making the template for the switch assembly itself, and then taping off the region in the panel in which I’d cut the hole. This was the most nerve-wracking part of the project, as I wanted to make sure that if anything, I undercut the hole so that I wasn’t trying to fill any extra space in if I cut it too large. With the painter’s tape in place, I used the honeycomb print in the dash plastic to make sure the Dremel cut was level and even.


Cutting Dashboard Trim
by 2180miles


Trimmed/Cleaned Up
by 2180miles


Steering Column Prep
by 2180miles


Mid-Cut
by 2180miles


Final Steering Column Cut
by 2180miles


After the 2”x4” hole was cut I used a file to get the edges even and less rough, then did a few test fittings to make sure the switch panel itself would fit exceptionally snugly, which it did after a couple adjustments to the plastic of the dash. At this point I ran the 7-strand sprinkler wire harness through the Jeep and began plugging the crimp connections onto the switch panel to create the final product, leaving the +12v lead for the ignition lights coiled above the dash panel for me to work with at a later date.


Switch Panel Placed - 1
by 2180miles


Switch Panel Placed - 2
by 2180miles


I reassembled the harnesses for the headlights and fuel tank, then began piecing the dashboard back together by reversing the above disassembly procedures. Once everything was back together (note the green tape on the air bag panel that I’ll glue back together), I ran the 18-7 wire harness through the trim pieces along the driver’s doorsill, back behind the B-Pillar, and up to the rear bench. I’ve yet to decide where the actual control box for this will live, so at the moment the remaining 10-feet of loom is spooled under the rear bench until I get around to the final assembly of the control box and relays.

So that’s that… the incredibly nervous process of putting a gigantic hole in the dashboard of a brand new vehicle. I don’t know how the XOverland guys do this all the time, but here I am one step closer to getting this Trailhawk to where I want it to be!

Final install pics once everything was re-assembled, which I’ll replace with newer images once the dash has been fixed.


Switch Panel Installed
by 2180miles


Wide Driver Compartment View
by 2180miles


Switch Panel Installed
by 2180miles
 
Hey guys!

So I found out today that one of my photos (below) was voted into the Overland Expo Photo Contest, and last night was chosen by judges as one of the top 8 images. I was hoping you all might take a chance to vote for it - I'd greatly appreciate it! By their rules you can vote once per day, per IP address.

Thanks so much for the consideration, and perhaps even your vote!

Here's the link:

Overland Expo Photo Contest

Here's the story:

While winter wheeling with a friend in New Hampshire’s White Mountains my Jeep broke through thick ice of a frozen-over river, requiring recovery from my buddy’s JKU. I took a moment to photograph him pulling the FlatLink at the end of his winch line towards the Grand Cherokee to pull me back safely. The photo was handheld, taken at ISO400, f/2.8, 1/50" exposure.

And here's the image:


Epic Winchline Pull - OverlandExpo Contest
by 2180miles
 
Nice picture, too bad it isnt an FJ40.....
 
That is some pretty intimidating wiring on such a new vehicle, but it looks good. Have you actually installed the lights yet, or are you just doing the wiring first?
 
That is some pretty intimidating wiring on such a new vehicle, but it looks good. Have you actually installed the lights yet, or are you just doing the wiring first?

Lights are installed. I'm updating this thread in chronological order, but am 9 months behind from actual install dates because I joint this forum later in the Jeep's life. Next few posts will cover the install of a 30" LED bar on the roof, and aux. reverse lights with strobe function in the back.

Wiring was rather intimidating, yes. Cutting into a brand new vehicle took some serious thought.
 
I had some time home following the switch panel install to work more on the auxiliary electrical system for the WK2. As you’ve seen previously, I built and installed a 4-switch panel in the driver dashboard area to control lighting throughout the Jeep. With 18-7 fire alarm wire I made a loom to get back to a control/relay box that I was building for the rear trunk area to house the electrical components of the system. I ran out of time to work on the control box until a recent work trip, so I had products delivered to the hotel and began constructing the main brain of project.

Hardware used:

- PI Manufacturing Project Box (ABS) – 7.6” x 4.51” x 2.95”
- Blue Sea Systems 5025 6 Blade Fuse Block
- Rigid Industries 40312 Strobe Flasher
- 4x 12v Relays (30A)
- 6A Blue Ox Saturn Diode Pack
- Misc. heat-shrink connectors

It was a tossup as to what project box would fit my components, but using Google SketchUp I built a few examples to see what the right option would be; even despite doing this I was still nervous that I got it right. Upon the delivery I breathed a sigh of relief as everything fit. Trimming and labeling the wires of the relay harnesses, I crimped my connectors and installed them to the Blue Sea Systems fuse panel accordingly. Labeling the “trigger” and “+12v” lead of the harness, I got everything ready for the installation of the lights themselves. With the interest of being able to remove the fuse panel, strobe controller, and relays from the box, but have them be secure and organized in the mean time, I used 3M adhesive Velcro to hold them to the project box itself. With everything installed and fitment checked, I removed the components and drilled out the sides of the project box for the 8AWG wire leads from the battery, and left two holes in the side for the 18-6 control loom and aux. lighting wiring.

The Project Box:


Project Box / Relays
by 2180miles


Rigid Strobe Controller
by 2180miles


Project Box w/ Power Leads
by 2180miles


Once it had the grommets installed and the leads were crimped and heat shrunk, I brought the box out to the Jeep and fished the fire alarm wire out from under the rear bench seats where I had stored it in April when the switch panel was installed. Pulling the 18-6 wire through the grommet in the side of the project box, I went to work crimping and heat-shrinking the switch wires to the relay trigger leads and the +12v and ground switch wires to the Blue Sea fuse system, thereby activating the power and LEDs on the switch panel itself.

Once the switch leads were heat shrunk and everything was tucked away, I nestled the box itself under the rear bench and used HD Velcro to hold it in place. It ended up being a little further to the passenger side than the photo shows, but it is in a place and is small enough that the bench portions can fold completely flat without coming into contact with the control box. I ran the +12v lead/ground from the battery under the bench hardware trim piece, then under the OEM floor mat and into the battery compartment. It worked flawlessly and is VERY hard to find if you’re not looking for it. I might someday heat shrink that cable too, but for now they’re simply red and black as they run under the flooring. I ran some wiring out of the control box to my multimeter and then the light bar that’s going on the roof (install write-up to come) and was pleased to see that the switches activate each relay appropriately, and the light functions without issue.

One step closer! Next up will be the aux. lighting installations themselves.


WK2 Electrical Box Wiring
by 2180miles


WK2 Project Box Components
by 2180miles


WK2 Project Box Sealed
by 2180miles


WK2 Project Box Under Bench Storage
by 2180miles
 
Had a chance to get the Trailhawk into the woods after this week's Nor'easter, as it was a prime time for a photo shoot. I used to take the Wrangler out for moments like this all the time but haven't as much with the WK2. Since most of the posts are technical write-ups for the build, I thought I'd spam my own thread with some photos of her.

Enjoy :)


by 2180miles


WK2 Front Stance
by ]2180miles[/url], on Flickr


by 2180miles, on Flickr


by 2180miles, on Flickr
 
May 2017...

With less than two months until my girlfriend and I loaded this Trailhawk up to take it nearly 7,000 miles across Canada, I was kind of under a time crunch to get the modifications installed (and fine tuned) before we roll out. One of the things that I’d wanted to do for a while for a multitude of reasons is install roof rack cross bars. While I’m hoping to not need to run a cargo basket or roof rack, I’d like to have these bars in place to potentially get a roof-top tent in the distant future, carry extra gear if need be, and provide a mount for some auxiliary lighting.

I was scanning eBay and saw that there was an “open box” set of Rhino Rack RSP-27 cross bars for about $50 under the Amazon/E-Trailer website pricing. These were the bars I wanted, as I believe they’re the sexiest of those available… yeah, I just used sexy to describe a roof rack cross bar, but these taper off to the roof rail height whereas other models end in a T shape, sticking off the ends further than I need them to. At $225 delivered, I wasn’t sure what to expect from the whole open box labeling, but despite a few dents in the OEM box and a bag of hardware open and spilled throughout (the seller included a new bag of hardware in addition to the original, so no hard feelings there) it was a pretty simple process to install the bars, just a few T-25 torx bolts to tie it together and into the factory rails… Couldn’t have taken me more than 20 minutes to get it done.

I was able to drive with them on over Memorial Day holiday as we headed up to Vermont for a friend’s weekend-long BBQ party, and was happy to hear minimal whistling from the bars. I make a living as an audio engineer, so I’m sure it was my hypersensitivity to sound that made me pick up on it, as Dani didn’t mention hearing it at all, so we’re good in that regard. The bars look great up top, and it gives it a bit more of an overland-y aggressive appearance in a subtle way.


OEM Roof Rail - Top View
by 2180miles


OEM Roof Rail - Side View
by 2180miles


Rhino Rack Rail Mount
by 2180miles


Rhino Rack - Side View
by 2180miles


Rhino Rack - Top View
by 2180miles
 
June 2017...

With the switch panel installed in the dashboard, Rhino roof rack in place, and electrical control box wired and mounted under the back seats, the time finally came to order and install the LED bar that I planned for the roof.

While I’ve always been a Rigid Industries guy (full disclosure, technically this vehicle will have one pair of their lights), a friend turned me on to a company called Black Oak LEDs out of Florida while he was working on his Tacoma build. I’d never heard of them before. I saw the quality of the product first, as Rob had 2x 4-LED pods on his front bumper, and learned of the incredible price point second. While the market for LED fixtures has quickly become flooded with cheap knock-offs and poorly assembled units at “affordable” prices on Amazon and other web portals, Black Oak manufacturers one impressively solid and powerful product. I reached out to their products team back in March and began speaking to them about my Trailhawk build, my interest in modifying the WK2 Grand Cherokee line in a way that not many others had done yet, and my intrigue into their larger scale LED product offerings. I was put in touch with a guy named Chris who was equally as interested in getting me on their list of sponsored vehicles, and after a month or so of talking, we got the ball rolling. Quick aside, if you’re interested in checking out Black Oak LED products for yourself, you can take an additional 10% off their web prices by applying the code “2180miles” at checkout.

Despite quite a bit of research into previous WK2 owner mounts/installations, it didn’t seem that anyone else had ever put a light bar on the roof. Plenty of other owners have done small light bars and pod fog lights in the lower fascia on either side of the ACC camera, though save for one minimally documented roof bracket, it seemed that I was again in uncharted territory for my installation. My plan/hope was to get as wide a light bar as possible, packing in as many lumens as possible, into a very sleek and minimally invasive housing. This without question limited me to a single-row kind of fixture at whatever width the roof rack crossbars would allow. My plan was to tap and drill the cross bar piece to the mounting pattern of the light bar brackets, and cross my fingers it would fit between the cross bar and the glass of the roof. In measuring out the Rhino Rack cross bar to 36” wide after installing it, I then went to work checking out Black Oak’s single-row series of lights, finding their 30” to measure in at 34” with the mounting brackets attached… perfect!

Placed the order on a Tuesday, the light bar shipped on Wednesday and was delivered on Friday with a hand written “Thank you” on the invoice. So far, Black Oak was winning my vote a hundred times over. I eagerly unboxed everything upon returning from a work trip and discovered that despite my attempt to pre-measure everything, there simply wasn’t enough height under the cross bar to allow for the light to fit. Ugh… dead in the water. So after some thought I took it to the local fabrication shop and had them shorten the height of the Black Oak stainless bracket by 3/8”, but that didn’t work either. So I called Black Oak and asked if they could custom make me a bracket, and after speaking with John on the other end he suggested I try their super-short-low-profile-fits-anywhere-awesome-bracket… for an easy to reason $15. It was delivered in 2 days and worked perfectly.

After all these pieces were in order, it took all of 20 minutes to get the cross bar tapped out and finagle my trimmed mounting hardware into the exceptionally narrow tolerance height of the cross bar.


Marking Center Measurements
by 2180miles


Drilling Rhino Rack Crossbar
by 2180miles


Narrow Tolerance Inside the Crossbar
by 2180miles


LED Bar Mounted
by 2180miles

One of the more thought provoking parts of this project was figuring out how to cleanly get the wiring into the vehicle. I had almost no interest in drilling through the roof, nor removing the headliner for access to anything, so I moved on to Plan B. Utilizing the placement of the OEM roof mounting rails, I removed the factory rail and plastic trim pieces from the top of the Grand Cherokee and laid the Black Oak wire loom out along the length of the roof. By snaking their proprietary water-tight connection through the end of the roof rail trim piece, I was able to fit it down the length of the roof rail itself, right up to the point where the Rhino Rack cross bar bracket fastens down.

This will be easier to show with photos than to describe with words:


WK2 Roof Rail Removal
by 2180miles


Black Oak Wire Harness Routing
by 2180miles


Taking my trusty Dremel with a circular sanding bit at the end, I wallowed out a hole at the tailgate end of the plastic roof rail trim piece, just enough to let the 14-2 wire loom through without giving it too much room to play. I re-fastened the roof rail and trim pieces back to the driver’s side (I had decided early on that I wanted all the wiring on that side as that’s where the control box was living… less wire to run, less work to do, happier me)… By running it down the OEM metal roof rail piece, I was able to tuck it in there and secure it with the roof rack hardware pieces, eliminating any need for additional fasteners. It tucked away perfectly, and left me with the wire harness clip to live just behind the front of cross bar mounting bracket, right about where the light would drop it’s connection point.


Roof Rail Trimmed
by 2180miles


Roof Rail Installation
by 2180miles


WK2 Wire Harness Routing
by 2180miles


Wire Harness Routing
by 2180miles


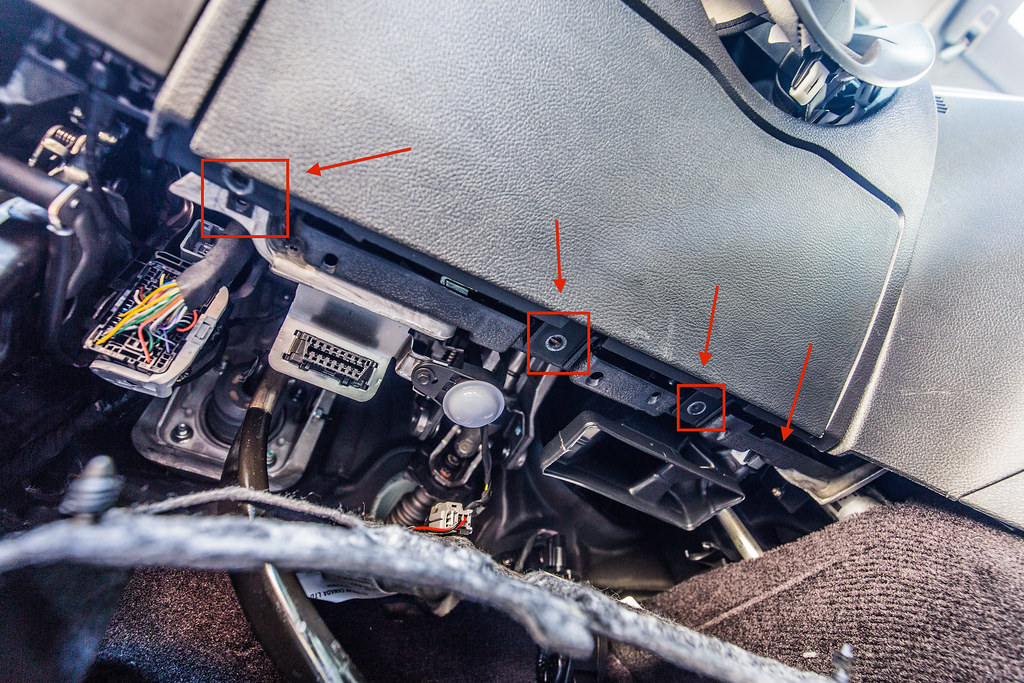
Once the wire was run through the new exit point from the trim piece, I began removing the rear upper trim pieces from the inside of the Grand Cherokee. I have to come to <i> very much </i> dislike removing trim pieces, but it’s the only way to do things cleanly and have myself feel like I’ve done a professional install job, which has become important to me while modifying this vehicle. I toyed with how to get it into the cabin, and ultimately decided to pull out the gasket that houses the controls for the hydraulic tailgate piston. It’s a gigantic gasket, and upon removal I saw that there was plenty of room to sneak the shrink-wrapped Black Oak harness inside of there.

I took the same dremel sanding bit and carefully trimmed back just enough of the gasket’s outer edge (lower edge, ideally to alleviate excess water from getting near it) and fed the wire harness through to the inside of the d-pillar. It’s important to note as you look at the photo below, that I went back later with clear silicone sealant and liberally applied it around the gasket to seal up whatever tiny openings may have arisen from my adjustment to the OEM seal. From there I ran the wire down the d-pillar to the bottom of the tailgate, unscrewing the factor internal cargo hook and running the wiring under the trim pieces and along the length of the spare tire trunk trim piece towards the middle bench.

You can see in the photo below that I highlighted the wiring harnesses external stretch in red, then the pink portion shows where it’s being run inside the vehicle.


Black Oak Wire Harness Routing
by 2180miles


WK2 Roof Light Bar Wire Routing
by 2180miles


The final bit here was tying the Black Oak harness into the control box I had just built and installed a week or so prior. FYI, for anyone trying this, I ordered one of the Black Oak 8’ extensions for the wiring harness, which I was VERY happy to have for this installation. Once the grounds and +12v leads were connected to the appropriate ground bus and relay, I tied the light bar into the waterproof connection point on the roof and tested the dashboard installed switch panel to activate the light.

HOLY BRIGHT.

That’s about all I can say. The specs on this 30” bar using the available 5w CREE LED’s is roughly 16,500 lumens. Let me tell you, even in broad daylight, this thing is blinding. I’ll be taking it out next week for a nighttime photo shoot to really show it off, but for now let me report that this thing is one of the brightest light fixtures I’ve ever seen… and that’s as someone who works in the concert production industry with some serious lighting systems. I’m exceptionally impressed with the build quality, customer service, and actual power of this light bar, and look forward to ordering more products from Black Oak in the future.

Here are the final close-up installation photos... more to come to show off the actual power this thing packs into such a small form factor. In the end, it wasn’t a huge pain to get this installed in what I truly believe is a very clean form, barely noticeable unless you’re really looking for it up there. Thankfully there’s a few millimeters of space under the light above the glass, and also enough room between the light and the cross bar to fit a mounting bracket for a RTT in the future if my path goes that way :)

That’s all for now – talk soon about some other neat stuff.


Mounted on WK2
by 2180miles


Black Oak 30” Single Row Wide
by 2180miles


Black Oak 30” Single Row - Rear
by 2180miles


Black Oak 30” Single Row - Rear Wide
by 2180miles


Black Oak 30” Single Row
by 2180miles
 
Wind noise that close to the sun roof?
 
I dont want to like jeeps but this build grows on me each time I scroll through the pictures. Great Attention to detal and functional mods.
 

Users who are viewing this thread

Back
Top Bottom