Radiator Change Today- Questions (1 Viewer)

This site may earn a commission from merchant affiliate
links, including eBay, Amazon, Skimlinks, and others.

Mike6158

Random Pixel Generator
Joined
Jun 1, 2014
Threads
65
Messages
984
Location
Weimar, TX
Website
wildlightimagingstudio.com
Iplan to change my radiator today. I couldn't find where anyone has posted a step-by-step procedure. If there is one, I'd appreciate a link. I've changed radiators on older cars numerous times but none of them had froo froo like AC units (that I appreciate more than I did way back when) so it was a lot easier.

I wasn't too concerned about swapping the radiator out until I saw the compressor to condenser discharge line running over the top of the shroud. I don't want to disconnect it and have to recharge my AC unit. Is it going to be a problem?

p1316053061-4.jpg
 
The FSM doesn't say to disconnect that A/C line, but it does say to remove the shroud, fan and related parts before removing the radiator. Haven't done it myself, but looks like a full afternoon of work.
image.jpg

image.jpg
 
No A/C line removal required...and I suggest you avoid doing that! Fan needs to be removed, then the fan shroud can be removed. Then unbolt the two brackets that hold the high pressure A/C line to the radiator. Then once you have the upper and lower radiator hoses removed (and auto trans warm-up lines, found on the bottom of the radiator of early model years, if so equipped) along with the side brackets that hold the radiator in place...lift the radiator straight up and out.

Reverse with the new radiator.
 
I posted that at 11:39AM... procrastinated about an hour... I was done with the install at 2:15. I have some air tools but I was outside under a tree, on a concrete slab. I used a butterfly air wrench and an air ratchet, plus a few hand tools. I doubt if it even took 2 hours.

Just read spressomon's post and that is exactly how I did it except I didn't pull the fan. I just pushed the shroud back.

I think this was the easiest radiator pull and install that I've ever done. Even my '69 Camaro (402 cid) was harder and it didn't have AC or tranny cooler (manual trans).

I didn't drain the block and the coolant percentage was low. How much antifreeze (full strength not 50/50) should I put back? I've got 1/2 gallon. I'm going to run to town and pick up another gallon. The closest Toyota dealer is hours away so I'm not going to be able to put the factory stuff back in. What little it had was probably Prestone anyway.

Actually... It might make more sense to buy the mixed stuff and if I need to add, add the full strength stuff mixed with water. Thoughts??
 
I did this yesterday... remove overflow... unbolt the brackets on the top of the radiator unbolt the 2 bolts that hold the shroud DO NOT remove the fan... just lift the shroud 1 inch and move it back toward the engine... drain radiator from the bottom you have 2 transmission cooler lines be ready with some plugs (old spark plugs work well for the rubber lines) and you need a drain pan to catch the fluid from the radiator there are 2 12mm bolts you need an extension for you have to go through the grill theses are the top bolts (nuts really) and then 2 bolts facing down on each side of the radiator again a long extension works 12mm socket there is one more 12mm bolt on the pass side near the top and the overflow has 2 12mm bolts... thats it you have plenty of room (remove hoses FIRST and replace hoses LAST) should be a 20 min job.... you will have to transfer the side mounts from your old radiator to the new one... 2 12mm nuts each side
 
Hello, I too was searching for a step by step. Doesn't seem too bad. I did find this write-up on the club lexus forum that might help others as well.

www.RockAuto.com has a Denso replacement for $151 plus $23 shipping to my door. 2/25/16

Other posts seem to suggest Toyota original or Denso for replacement.

Link 2001 LX470 Radiator Replacement - Club Lexus Forums

Cut and pasted below.
Hi guys,

I couldn't find a step by step on this so snapped some pics while I was replacing my wife's radiator today. Wife's started overheating and I found a hairline crack at the very top almost invisible especially since it sprayed all over the place by the time I got it home, so made finding the issue more difficult. Bought a new radiator on Amazon (Spectra Premium CU2282 Complete Radiator) for about $215 bucks.


Step 0: unpack the new one and make sure there are no obvious holes or other defects. No reason to go through a bunch of work if it got damaged.


IqhoI22aDcuNjmZRwmrPyt40LMd6k7MfUz7749gVX05akLpZByTPL9vwY5xHQXyy6GqOT4drfpQdQKpDYHNEqI6S05zm6T7u7bsfzXXUIEBl6BHx7zOhVXClIO_JAvY-vN3nThEu


Step 1-3:

Take off the underpan... its a few bolts and I use an old soccer ball to kind of support it as I'm taking all the 12mm bolts off. Its a little heavy and easier to control that way.


Start draining the fluid left in the radiator. Also notice that the jackwads that did some work on my car earlier this year used some cheap green fluid instead of the Toyota Red stuff. Not saying that's the cause of my problem, but another reason I'm not taking it in anymore for others to work on... its better to just do it yourself.


Finally, take off the negative battery terminal.


ExEg6nC86S0psP-obBe9TqGqJDs8NFxDVcPVaayUMCsefmUW_wTKBdvWH--jAP1RhZuArO9Ql32ZaHC_IXc-YiXX4sXrym8wPmDzZ-VJZPv2xUly3YDHvtq86dqxZVDEhNf1KJBq


LpAQMJtWxVWRjb6vUsIwp2tGnsgEJ5pc8hRgVxbh9f25NUDwGDSgcqnKZNj3YD-PnR0xx856O_EjQ_EAxq3Eo7DLUkH9ZN0uJCdLKH-9VVq0HbJKJoy-c1rBTdgha0HsMdLPPoub


9-4rLny0n9tW0Qlqd_STNHduCxnKFt559ET7BMKV-5jsKJsE3YTX4oEVuJYmFnSr4qRqC4GoK0FyU2m5Raz1_sTkywQabaeljGXliHjDQXUQuGD5sJMEh4ruCj4MGf-tWhSM4kHR


Read more: 2001 LX470 Radiator Replacement - Club Lexus Forums


Steps 4-6

Take off the overflow... its easy and only 2 bolts

8A6kdzF9kBa4gOZ7vqciCDQnTZyl3j8fB9piuv7hA_98NUjTTAllFwJtZvAv-IzksewWnophU75kOjFPARb0FE7OCb6a-XKBm4IYo0H1yXBPnTMDE-eMF06OmkrfP-jcRzKK6Kt0


bv_1ch7bLMDVwrl-uygbFZk2OHRd30ss7ZeGkj5tGsa3fBZjqsbNVqIRX5DuWqNfxGJa7TJn1Iqz_o0lKCCPNJT12xiBTCTKoYp-uIo5dZKJygSBMtct-_ayrI-ItoLO_mpLKNw-


92j0Wnvy6dNncfZvEC1HP2pdTCnPwyQzrMZd198gJuDV72X8fqoF4cv-g6oI4CJxRau_l7EgWKdmJG1N4qwlGD__QKRIujIE19M6WTg0wzlxqMpbvGxbI3J7QjVPfGQl6JInwOBV


Steps 7-8

I was going to take off the whole top radiator hose but noticed I could just take off the one attaching to the old radiator and pinning it behind the fuse box... I'm lazy and don't do more than I have to.


AzXo94HvLy9XKT6RxKk0COrE2Y9UV2gXd22yHoEfjFlFEos2whXWuzuNWz0xG6OuW78PjTXxQVbEltxwMYzwAvqqkLzEUThuOq1m14P1Xs4Q0RWIwftvQO8HEZg1oC5qGtgIpsB0


htvKHBOKz3cW6K0AvYyq-_OPeRrjqU3xy6aSEQPIeKkHeWBbetybVf9D2MUh8vNgrP0ztTKuO7sIzUjGlexVvUoEtRNtJMnbyRtyp0QDp-bw6h0QSygF1zMuYJhYjiFsfmMR4_pw


Read more: 2001 LX470 Radiator Replacement - Club Lexus Forums


Steps 9-12

Take off the airbox to give you room to work. There are two bolts one obvious near the front, the other is near the back of the engine... don't forget that one like I did... doesn't sound nice when you almost break the box. Take off all 2 hoses in the back and one near the front under neath it (step12 pic).


kTCs8APmuVjkeTUR80WALj_6XnRlFEsn8wZp9YI78ewjOpzfBDSRTErfS_Qa4hAS_TDm0eAL7XtDiTgDTHp3YvfNosHzRhrzMrlzg1TDD233kFt-GYHaBWQ20aaUGgXkph7xjOo3


1HK4ClNls2BfyKtfaAKk1hm4HGDCVAebUgx6O7nNPCKXeuOhKcH8RqIQxy-W1BJHgAKbPIdvWkPiwqVjBQQUzJzCrF9G_dd9oxX5z26g8HVNpHUauWyhv4kTTDZg3VYMIFRk7zSn


el27SzqepgU6P2owhz7T4t2-PM7g2RcI7N6obYygzJ2wTPZ9pF4epwZosbKx3jzCKCMrkjIsIrieODDF8NMOhcu8vvNkL8mbjN--joF7BhsDWNOHQXgmICFwNrsQ6OMh2KEU6-Id


6IEHNatUSH1pMlsIXJS5tZmSDRWrXQ6z35rPiWqKKSL-b0q1Gt85yrYd7tXc8UXRuvXXIx8R09dofvXSm2aX3gh1P9ewSgcv4eTl_jm-bgtiLXatlB3HHoaqj7EipduyOniWXTsk


Step 13

Lower radiator hose is easy to get to now and plenty of room to work for the rest of the steps.


7BND4IrPQnloZvOaLKb9N29snNHHzHNp0djr2cP5x9j9T-rnbWf12rgF1C_zB87I6DAvsbk6x6YFTksPAXIe2SsFXFefbrGM3BgAVLNodvChednJLuNqFA_lD3kJaGHgXLXo4pa_


Read more: 2001 LX470 Radiator Replacement - Club Lexus Forums


Steps 14-15

Make sure you have some paper towels... lower radiator hose poured out more fluid than I expected and soaked me... glad to have my shop glasses on.


8JkaKUsx9wk0fNwUi0lL-6ZEr9IVaVGkebgScN7E437ZnST5auWpulL3BKXToR9ZbbPWQhg9Cy33GCXMsH4eA68Pzw3WKIojk-wmWDhdrZD_KWr0ko2Urhz526C-xezSmaJdcGxO


Us--taz9loeo4YzBAYUPfNOKEg79G1VeiuLiG2OWmQY7vZP-vWwwWHLGU6mGe17ewfJv81wrK2U6heeOUqiYXizPaW2fia0wAPG8yPMmdxrb4S8WQ18s63D0WE9QW5Acekjps0AT


Steps 16-17

Take off the two 12mm bolts holding the silver AC line to the Radiator. I also immediately fit them on the new radiator so I don't lose track of where they go. Saves time later.


SOCLC0Ukyx9BXsOLuZ8jqKzrnjSZnb7npfzyK90kr1JtlktpxBirimjCA8fnU91s4abohzW803tL2jz9P3ubjyVA_WFWOz2c_2cCpDrKTuUaoEHZf3CXTUa-MzoN9yvylMF9GGX3


BRecZJl2UpOye40fDlSzr13UwZVG9RnlosMdJjSNxCRGBcl-dENkIGyQW3M6ylU2MTBy5ZsV2gHqYQmgFH3hZN9OgNhJXPv4nsrzu6PinHaqQreVc4ISwWGaLHSXfqXljjQWckAb


Step 18

There are two 12 mm bolts on top that attach the fan shroud to the old radiator. I opted to not take off the fan at all. I figured there was enough room to do it by taking off the shroud. This pic is just another example of why you should do work yourself. The guys that worked on my car the last go around broke the driver side clip that holds the fan shroud to the radiator. I used Quicksteel to rebuild and put it back together... just takes more time and is frustrating.


41wlVBaKEA1D2En65ed9sQbt5sgljAkJkes9YVV9XlPDoighb2HblfQU8TGehR4jGkGW29y_TRrFv_ari667pPB4CLzjQTidhg6hI3UWiKdpnyWDquC-6v7USQ1rtVhDEfEDCIPm


Read more: 2001 LX470 Radiator Replacement - Club Lexus Forums


Step 19

There is 12 mm one bolt on the passenger side of the shroud once that's off the shroud is loose. If you crawl underneath you can see the shroud sits in the bottom in two grooves on the radiator so no screws down there.


YTM1fvK53TbX-j7y5d1xz24whqBzid9ERPcvooes3tqWE38rY_b5AzfnWlfHhAjVjRwqCfB0f1kepeLJ1W-Al5Odw5ROPoMDGBSsWOjG48AQOxq0JmFt5MOtXKGfeZKNqhKhx717
 
Step 20

Shroud is now completely loose and you can wiggle out the radiator past it when its time. No need to remove the fan which looked like a pain in the *** to me so I didn't touch that.


3fWzF-1bLGgqIqG8hI9DVS6BxR6yVe-TVvUW1wn3WzxhTTk2EDqIZOZ1itHAUYuQ4S0qDyk00KA11VwU97ip1e46jVecY1Mt0ESb7dl2GGAZns9w9JizTga02eBtGoaWhAAWy5iN


Step 21-22

Take off the two smaller hoses (transmission). I used two old toothbrush to shove in the hoses to stop any leaking. Not exactly a Nascar fix... but where there is a will there is a way!


I98qwuhq2C21_myR8KiuoDN9X54LGSOJ5zz408Z4Od1VWeESVwlt8YaVmea5MbND5bnznfqHukegN4mPYCqUj-p6THDVoYjXhUsCNL1Po8O93YSTEiPPRffLbTjVl4Su3p-5WI9l


1TR1dmkB4xyMUyayBdT1zOaJgvMMYZx-9nnqhThouPQ6-_j0wQWRFJ-3xZkcrKIBM6QV8U2w8KWX-n05_8Sq-XUmK4z5I_2XyoTqiosby4DYRj0wLXkfgn2y4rwbj6ZpE6r1dDrs


Read more: 2001 LX470 Radiator Replacement - Club Lexus Forums


Steps 23-27

This was probably the most time consuming step for me. I opted to take off the brackets completely off the passenger side of the radiator. There are two bolts on the radiator that go into a bracket and that bracket is held down by a big 12 mm bolt at the bottom. There are also two other bolts on the front of the car that come off. Once you take it all apart... the two brackets come off very easily as does the grommet it sits on. I did this so I could slide the radiator over to the passenger side when I removed it and that let me only take off the two bolts on the driver side and NOT take off those brackets. I did this because I didn't remove the battery and its harder to work on that side.


L4JxA5uNaJP4PLadwZnySUZGoi65KZs-5nrmw8kkFqmUC2EQvhLuLHPBGslWxFNHOp6OghcTNwfgIsXDTMRuf45jmUkKdfQJzY9Ll-pw_Gn5ArKK_gMH5CkB7TGAG5kwCMlcepSr


_v_ORxVvMk9DK99g1BFWXDyyS70k1Ioux2yuz1KNoJ2wD6K_5--6PabMG99PU9SaKr_5gIf178-ZJWbi-YaSgWMxJp-DvoL3CxDX0LR_mTmhPDblHm2kBTsCnnY4vvlH9dkJoJ2Q


iFqD4gB4UgCfHoBtZ5ZBCb2RDHFuUuSEqbZhQDiUwySuVVP76y2G8fVMvQDmpJG0OlSPnaEbGCLZlmJJppOlMKW49bksfOS6lLEhLtkHtIiYWZQi-UIQmzyae7iTrXgP2QRV44o9


7Q62SBUx3Pj6OErRXLYjchxAtHX2kDyO3n7WsMmDNhpDYBT-Q16UGSjZA5Pgc7jkn2bZLP5irfAz5RU9zeASiPnJiA7PJJwRoLzPEu7ES2ijtzJVUQmeJXP_l-SCAil_VQG89g4Z


cD_Mohq9fb5usho3H_cCJp-C13N6OV9wlv7NZMnOks__JltRAUiDRfSv8cJmspYcfkykkdJjJdV_LHHqdLEzequkWK16GUAkxv5xMCPrOMpIb9RP67IRBveEnYs9gFNSUPPLQIp0


Read more: 2001 LX470 Radiator Replacement - Club Lexus Forums


Step 28:

I just took of those two bolts on the driver side and that was it.


Lk-bbnqRAL58q1cyyDgFdTyp4wnB1hcaVg_iAV1oXnSfIh5DyJxS3oPv14hWaza4_IG5HGDU6GnL8bhHfbJTqJwR8Eyeeu4h4tbAnCuGqcetS4UcGo3-ul2aiHDnvkr67Q94CGmB


Step 29-31:

There are two 12mm bolts in the front of the car holding the radiator in place. Take those off and be sure to actually remove the grommet completely from both sides. You'll put them back on the new radiator.


ISYcTkKGi1gdVuS5POihW7MtchrnKJzvFSSUmimRJuvBtFvVDYxFo8RznP4Nddtv8oTUQ7lTBuzSH4GLVpGIlc3Bt-qGLUQZVe5fR1KUnDSbs6T-3JPqlt8v_fl1cXWcUJXa4Qzc


N6AXNG5g9BYMo_Phkcy3n-y3OhQqy0QfkvreGJbyNpTb-jFLqKy78j9Gyj438QWiypu66AQJ7UvbBw64uxdHk2B9t7Bmm4l1k5SwNSRSHeKyGOhEUQuvXrD3qiYoImzkkwzDYH_C


1dpVkIvTOPziKfr4acP6qs9ouVZCtzzLK8Fojk6wrGuIVZZhCphio-LYaEJev_byZXRHnXysXJEF1Bc0wF0mLdaCw8XZsub-8AipwuV3_i3394KNMSdYYGLYCVd7y5Ip4Ms0I6o2


That's where I stopped snapping pics. Just reverse the steps and your all done. Then fill it in up with a 50/50 mix of distilled water and this stuff. 2 of Toyota Genuine Fluid 00272-1LLAC-01 Long Life Coolant - 1 Gallon. I ordered 2 gallons from amazon for about $34 bucks free shipping. You just run the car with the heater on and keep filling it up until it doesn't take anymore and the heater is blowing hot air. I also filled the overflow with distilled water just in case and will check it in a few days to see if I need to add more.


Read more: 2001 LX470 Radiator Replacement - Club Lexus Forums


fter a week or so I did a follow up inspection and everything seems fine with the replacement work. I noticed however in the back of the engine area there was radiator residue. I hadn't noticed this when I did the replacement work. The t fitting that runs the fluid for the heater is probably cracked. I went ahead and ordered a new t fitting (87248-60460) from toyotaparts.com. I replace the hose as well. Anyways, I just wanted to add this since its near the back of the engine and just to have stumbled across it. Would have been nice to have noticed when I was doing the radiator replacement. When you have over 200k on a car this is a pretty cheap ($8) preventive maintenance item to avoid future issues.

Here is a pic of what it looks like with a small leak.

Land Rover LR4® SUV

Comfort & Convenience For 7 Adults. Schedule a Test Drive To Learn More LandRoverUSA.com/LR4


Read more: 2001 LX470 Radiator Replacement - Club Lexus Forums


aYfDLWbZnMOkKSt14T6y7IoFLsYIQ1btDEOSkn6rFGX4-ZH7R8xSptNrRTw_V-rl6kUTxVw9504JM10s5gNjjz2WEDiPKGCUAdISUnm2szdL7dySdV6AxpxCy2cLST9kTEpCwxpx


Just a few observations on what I've read so far...


If you're draining the engine to replace the coolant, drain the radiator first, then BOTH block drains. The passenger-side is somewhat tricky to get to, so use a 10mm socket with a u-joint or wobble extension. Placing a foot or so of clear plastic tubing (HD or Lowe's) on the drain nipple on the engine block drains and have a few empty plastic milk jugs or similar.


I'm not sure why anyone's needing to mix coolant...just get Toyota Super Long-Life Coolant...it's pre-mixed and ready to roll out of the jug.


NO need to remove the fan to remove the radiator.


Heater hose T's have a rep of failing, especially the one more toward the centerline of the truck...that's the hot side from the engine to the heater.


Pex T's (HD or Lowe's) are brass and eliminate the T's as possible points of failure.


The heater is ON at ALL times regardless of where you set the temp...motorized baffles ("doors") simply balance hot v. cold air to whatever you've set the temp. O-rings on the metal tubes going from the T's to the engine should also be replaced, as long as you're "in there".


Steve


Read more: 2001 LX470 Radiator Replacement - Club Lexus Forums
 
Great write up! I have a stupid question regarding how much coolant is required for just the radiator change (not complete engine flush). The post above mentions this, but it wasn't clear to me (I'm not the smartest) so I thought I would ask anyway.

If you are just replacing the radiator, and not completely draining the coolant from the engine, how much do you need? For example, if I am using the pre-mix (Toyota Genuine Fluid 00272-SLLC2 Long Life Coolant - DO NOT ADD WATER), how many gallons are needed for just the radiator replacement? Hope this makes sense. Sorry if t is already answered.

Lee
2000 LC
2004 LX
 
I did mine last month and used under 3 gallons. I'd say I have about 1/4 gallon left.
 
My day just went from bad to worse.

Noticed coolant level dropping (no overheating) and realized that radiator is wet at the top and bottom at the plastic seams (2000 LC, 140K miles, only had Toyota Long Life pre-mix coolant in it). I have ordered a new radiator, hoses, thermostat, etc. planning on replacing the radiator next weekend.

Then I pulled the bottom front engine cover just to take a look, I noticed that the water pump weep hole is also leaking (this may actually be the main source of my leak....

I had the timing belt and water pump replaced by a local shop 4 years ago. I'm surprised that the water pump is failing again, I would have expected it to last more than 4 years... Am I missing something? If the water pump is failing, should I do the whole timing belt kit with water pump or can I just do the water pump...

Any advice... I was ok replacing the radiator myself, but didn't really want to get into the water pump (how hard is this?)?

Frustrated...

Lee
2000 LC
2004 LX
 
Pretty easy once you have the radiator out. Its your call if you want to replace or reuse the tbelt but it has to come off to get to the pump. Just make sure you have something to take off the crank pulley bolt and torque it on.
 
Just finished replacing my water pump and timing belt. I followed this post Timing Belt for Dummies writeup and this one 90K and Starter replacement job my only issue was getting that crank pulley off. i finally had to borrow tools from a mechanic friend. A large chain wrench and i huge breaker bar ratchet. It uses a 22 m socket to remove the bolt. And i was able to remove bolt with minimal effort. I tried an air wrench but my air compressor is only 20 gallons, it was not strong enough to break that crank shaft pulley bolt. Good luck.
 
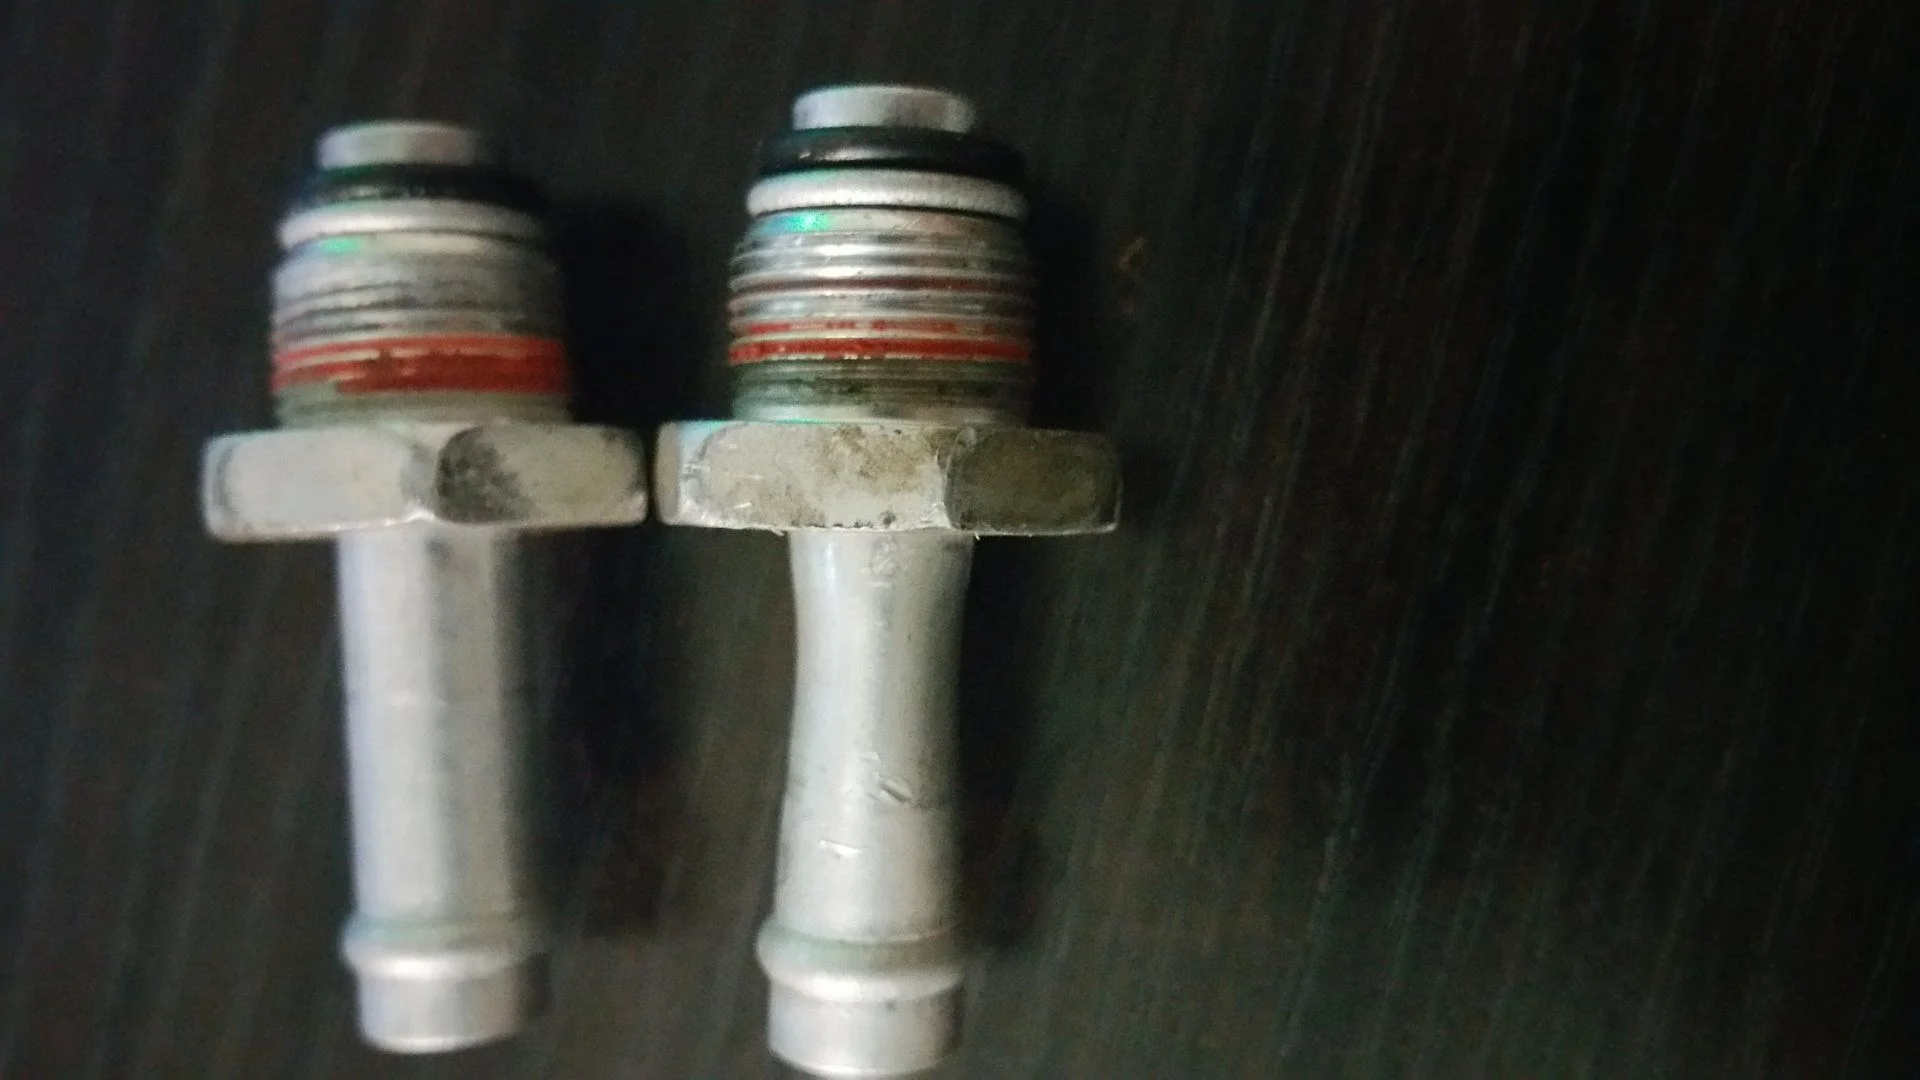
Hello! This is my first time replying and it seems like I could use some help! I have an 06 LC and was working changing out my T-Belt. This post on removing the radiator was easy for me to read (Thanks for the detailed pics) I followed the steps but made a clear mistake on steps 21-22. I applied too much pressure on the trans cooler line and ended up pinching the trans cooler connector!!! (The adaptor that screws into the radiator and then the hose connects to) I got the radiator out and got the T belt done, but I went to Toyota dealer for the part and THEY DO NOT MAKE IT! I can only buy it with a new radiator! Genuine Toyota part is $600 and the AM ones are fine but my radiator is in good condition. I went to several radiator shops and none of them had a part that would work. Any recommendations as to solving my problem without buying a new radiator?
 
You might find a hydraulic hose repair shop and and see if they can make you a new fitting. Or, someone here who may have changed radiator lately can pull this from their old radiator for you. Or if you're clever, you can McGuyver a new fitting. Check these transmission line fittings on Summit and see if you can cobble something together.
Transmission Line Adapter Fittings at Summit Racing
 

Users who are viewing this thread

Back
Top Bottom