Post Up Winter Projects

This site may earn a commission from merchant affiliate
links, including eBay, Amazon, Skimlinks, and others.

Disconnect the battery and put a test light between the bat and cable. If it lights up, there is a drain.
Clocks and Radio memery will also show as a drain, but the light should be dim for these.
 
Saw the 'Cado in person last Thursday. The tube work into the A-pillar is sweet and tight. Brian did a fine job of inserting the tube across the top of the windshield into the inside of the A-pillar, welding it to all 4 layers of sheet metal in there. Then drilled 2" hole into that and inserted the driver's sidebar into that before welding it. That's a lot better than I had pictured in my mind. I thought they were going to have to run a vertical to the floor along the A-pillar, but this looks pretty solid. Plenty of headroom for Dan too, 'cause they used Mike as the height gauge.

Got to take a look at it myself yesterday. Looks really cool.
 
Just waiting on UPS ground from Washington state for this beauty to install on Bertha.
600cfm Performer series carburetor, non-EGR model.
Edelbrock%20Performer%20Series%20carb%20for%20Y-Block%20(Medium).jpg

and this has to be installed to accept the big E
edl-21211.jpg
 
Last edited:
I would recomend an extra fuel filter a few inches from the carb. Also if you are using an electric fuel pump that is over 6 psi you need a regulator. I ran mine without either of those and had all kinds of issues.

Looks good and should run well with that though....

Dave
 
We're going for subtlety under the hood. Now the outside, is a different story. I've been banned from giving away any previews. :) Let's just say that if you know Kitty, you can imagine the direction it's headed.
 
For those that didn't get to see Bertha the Grand Cruisineer in Royston...

New Edelbrock Performer 1406 with intake manifold. Probably cut 50-60 pounds of weight with this upgrade. The old intake was a massive chunk of steel. The new one is cast alum.

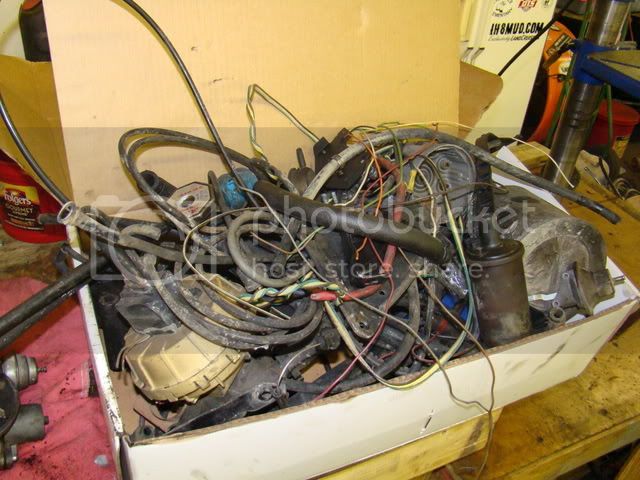
While ACC was at it, they replace all the plugs (it had spacers on at least 2 plugs!), plug wires and distributor. They desmogged it and cut out all the unnecessary vacuum lines, pumps and reservoirs. The old t-case was vacuum operated. The t-case we swapped in is fully manual, so we got to clean up all but one vac line needed for the AC/Heat switch.

AND, they replaced just about every electrical wire and connection from the firewall forward. No more twisted wires and butt splices!

now for the pictures:
DSC03661.jpg

that's a fuel filter bracket off of an FJ62 :lol:
DSC03660.jpg


the old junk, notice the crud falling out of the old intake manifold (ugh)
DSC03665.jpg


all the old wiring, smog and vacuum system leftovers.
DSC03667.jpg


Happy Girl!
DSC03663.jpg
 
Now on to my rig...
Out with the old. Notice where the tires rubbed the outer bend and created surface rust. I noticed on the passenger side that the stock UCA was impacting the spring enough to contact the shock body. The shock body had a patch where the paint was rubbed off.
DSC03675.jpg


Gussets welded and painted and Total Chaos UCA's installed. This is at full droop. The downside is the stock swaybar locations are voided by the spindle gussets. So either going to do without or A) modify swaybar links B) go with limit straps.
DSC03676.jpg


This is the shot from overhead. Notice the space between the spring and the UCA at full droop. You can stick your entire hand in there.
DSC03677.jpg


Other views from the top again.
DSC03678.jpg


and from the side
DSC03680.jpg
 
Last edited:
Nah, the skinny LTBs don't rub, but my Wranglers do. All that rubbing is from three specific trips in which I wheeled with the Wrangler Silent Armors:
1) Moab 2007
2) Katemcy 2008
3) Monkey Mountain 2008

The LTBs just don't get along with stock steelies at low pressures. I decided not to run them below 25psi ever since the last Cullowhee trip (ran two flat and had to reseat).
 
Spent the entire weekend borrowing garage space at ACC to work on Bertha again...10am-8 or 9pm both nights. And still didn't get her completely buttoned up at the end. Mike and Brian did some final reassembly of connections and hoses and topped off fluids for us Monday AM.

All that new found compression is causing decent oil leaks to turn into gushers. We traced the major one to the timing chain cover right away and the next biggest was from the oil pan.

Had to remove the AC compressor (lines still connected), the water pump, the PS pump, the pulleys, the belts, the fan shroud & fan. Scrubbed all gasket surfaces and sandblasted/repainted the timing chain cover, oil pump assembly, oil pan. Installed new PS pump and reservoir.

Sorry didn't get much pictures by the end of Sunday, just too tired to care at that point.
Here is the front of the block with all the accessory pumps and the timing cover removed. Once we got a look at the chain we decided to replace it and the sprockets.
DSC03697.jpg

Before the timing cover was completely off...
DSC03687.jpg

Bottom of the engine with oil pan removed.
DSC03695.jpg
 
Last edited:
Now on to my rig...
Out with the old. Notice where the tires rubbed the outer bend and created surface rust. I noticed on the passenger side that the stock UCA was impacting the spring enough to contact the shock body. The shock body had a patch where the paint was rubbed off.

Rick - how much more droop do you have?
 
nothing brings back memories like having a nice V8 torn down. Love my inline 6 but spent many a time working on V8's when I was younger.


Update for me: Got the 62 all cleaned up with new alternator and buttoned up a few things. Hope to get a push and get it sold in the next few weeks. I'll miss her but it will definitely open up more options on other vehicles.

I got the lift on 'lil sprout (the 80) and need to get alignment checked so I can order bushings for the arms. Also hope to get the CB and CDL installed in the next week or so. Then got to working on the chevy wagon and get it going again. (Anyone wanna give me a few grand so I can go ahead and do the LS1 and auto swap in it. :)
 
Rick - how much more droop do you have?

I have as much as I want, without creating any binding of the cv axle. Don't remember if I mentioned that I replaced both tie rod inners and outers, while it was all apart anyway. It was then that we discovered that one of my inner tie rods (passenger side) was toast. It has about 1/8" of play in the ball joint (that part we suspected anyway) but also the rod is definitely bent at the narrow part right next to the ball joint. The driver side is still good enough to keep as a spare. Still want to put the swaybar back on. Right now on city streets I'm lifting the outside rear wheel on hard, 90* turns. I can definitely see how it would be more comfortable to ride trails without them though. Just need to go back to the drawing board and see if we can figure out another approach to a quick disconnect.
 

Users who are viewing this thread

Back
Top Bottom