
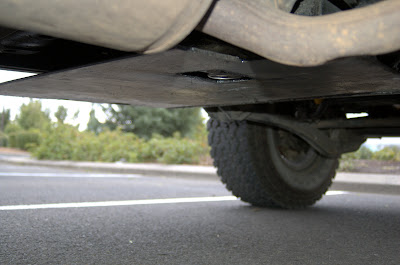
So as I've been getting into wheeling more and more, I've decided it was time to get some protection for the transfer case, as it's just begging to be hit.
Background
I initially considered going with Slee's or IPOR's, but there were a couple of draw backs that made me go a different route.
In the case of Slee's original skid plate, it doesn't cover near enough IMHO. A local cruiserhead here has Slee's original, and after the wheeling he has done (including Rubicon) the side of it is chewed up from hitting rocks at an angle.
In the case of IPOR (and Slee's new one IIRC), it's removing the factory cross member. I seriously considered removing it even for my own build, but you don't buy hardly any additional clearance (the t-case hangs below the cross member) and you have to deal with the hassle of building (and installing) a new one that matches the factory specs.
Additionally, neither Slee's original nor IPOR's attaches anywhere at the end. A hard enough hit could easily cause them to bend. Slee's new one does mount on the frame rails, but that wasn't an option when I started my build.
I also wanted coverage for the tranny. It'd be fairly difficult to hit it with a rock, but I'd much rather plunk down some cash for protection than deal with a cracked tranny on the trail. (I believe I read somewhere that Slee is coming out with a tranny plate that attaches to their new one.)
And finally, the biggest draw back to any of those options was price.
If I went with something that was pre-done already, I would have chosen Slee's new one in a heart beat. If that one wasn't an option, then IPOR's. All three of the skid plates are well designed and will function as they were intended, just none of them quite met my needs/requirements/wants.
Initial Design Decisions
I had a few basic requirements for my armor:
These design decisions basically ruled out any of the existing options.
The fellow who did most (darn near all) of the welding and cutting had built his own skid plates for his FJC. He had used 10 gauge steel, and had bent them up quite badly on Rubicon. The plates did their job that trip, but really wasn't ideal for the type of wheeling that he intended them for.
With that in mind, I had decided to aim for either 8 or 10 gauge steel, and double up the thickness in the weaker areas, along with some extra framing/bracing to prevent any bending.
Unfortunately, when I hit up the local steel yard all they had in their scrap/remnant section (in the size that I wanted) was 14 gauge. From there it dropped to 4 gauge. This was an easy decision as 10 gauge would not hold up to an FJC wheeling, there was no way that 14 gauge would survive an 80!
They did have some 2 gauge diamond plate that I briefly considered....but then I figured I wanted to keep it off the bump stops without having to catch air.
In retrospect the 4 gauge turned out to be an excellent choice. With the exception of one spot where the steel is a bit narrow (due to the positioning of the drive shaft, and being relatively close to the front lower control arm), I did not need to reinforce any areas of the plate itself.
And now for what you all really care about.....pics!
Initial Cutting
As the only thing we had to go from was a very rough cut chunk of cardboard and some rough measurements, we did a lot of cutting-fitting-cutting-fitting-cutting-fitting-cutting-fitting.

Some of the initial cuts. Plasma torches are cool!
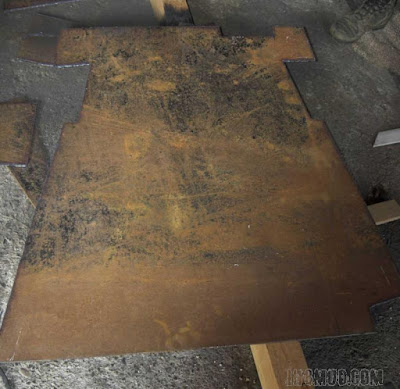
First pass. Lots of steel yet to be removed.
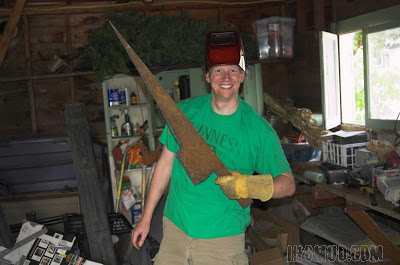
This is what happens when you let your helper cut without close supervision. He goes and makes a sword.
Final Cutting
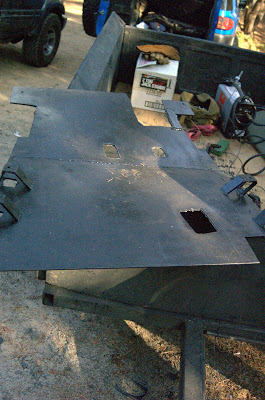
Skipping ahead about a half dozen hours of work (and did I mention test fitting?), we have what is essentially the final product.
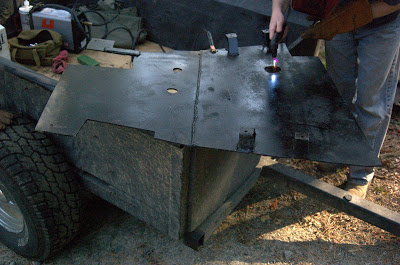
Cutting out the access holes for drain plugs and zirks. The initial cuts were too small (and one was slightly off, due entirely to my WAG that was not quite right).
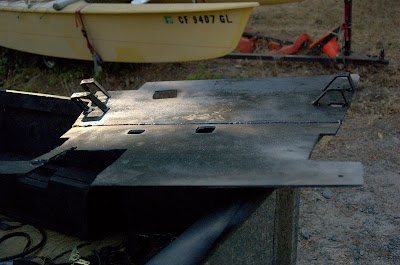
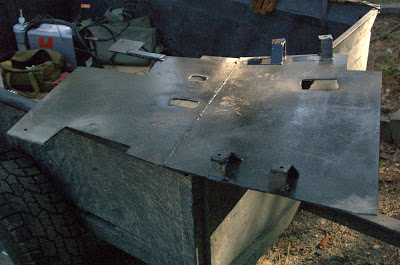
Plate finished! (View from the front of the plate, looking at the top.)
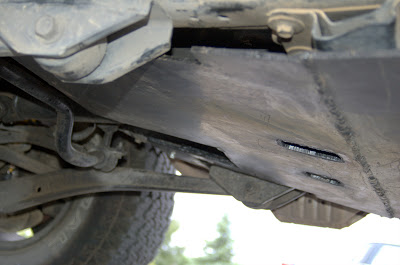
View from the drivers side.
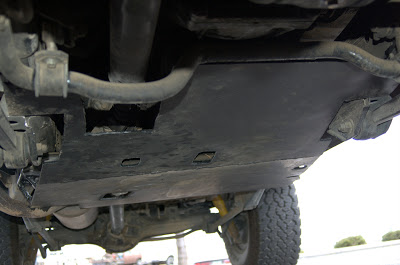
View from the back of the plate.
(More after the cut!)
Background
I initially considered going with Slee's or IPOR's, but there were a couple of draw backs that made me go a different route.
In the case of Slee's original skid plate, it doesn't cover near enough IMHO. A local cruiserhead here has Slee's original, and after the wheeling he has done (including Rubicon) the side of it is chewed up from hitting rocks at an angle.
In the case of IPOR (and Slee's new one IIRC), it's removing the factory cross member. I seriously considered removing it even for my own build, but you don't buy hardly any additional clearance (the t-case hangs below the cross member) and you have to deal with the hassle of building (and installing) a new one that matches the factory specs.
Additionally, neither Slee's original nor IPOR's attaches anywhere at the end. A hard enough hit could easily cause them to bend. Slee's new one does mount on the frame rails, but that wasn't an option when I started my build.
I also wanted coverage for the tranny. It'd be fairly difficult to hit it with a rock, but I'd much rather plunk down some cash for protection than deal with a cracked tranny on the trail. (I believe I read somewhere that Slee is coming out with a tranny plate that attaches to their new one.)
And finally, the biggest draw back to any of those options was price.
If I went with something that was pre-done already, I would have chosen Slee's new one in a heart beat. If that one wasn't an option, then IPOR's. All three of the skid plates are well designed and will function as they were intended, just none of them quite met my needs/requirements/wants.
Initial Design Decisions
I had a few basic requirements for my armor:
- Protection of the t-case
- Protection of the tranny
- Frame rail to frame rail coverage (for protection from weird angle hits, for additional strength, and for easy mounting possibilities).
- Keeping the factory cross member in place.
These design decisions basically ruled out any of the existing options.
The fellow who did most (darn near all) of the welding and cutting had built his own skid plates for his FJC. He had used 10 gauge steel, and had bent them up quite badly on Rubicon. The plates did their job that trip, but really wasn't ideal for the type of wheeling that he intended them for.
With that in mind, I had decided to aim for either 8 or 10 gauge steel, and double up the thickness in the weaker areas, along with some extra framing/bracing to prevent any bending.
Unfortunately, when I hit up the local steel yard all they had in their scrap/remnant section (in the size that I wanted) was 14 gauge. From there it dropped to 4 gauge. This was an easy decision as 10 gauge would not hold up to an FJC wheeling, there was no way that 14 gauge would survive an 80!
They did have some 2 gauge diamond plate that I briefly considered....but then I figured I wanted to keep it off the bump stops without having to catch air.
In retrospect the 4 gauge turned out to be an excellent choice. With the exception of one spot where the steel is a bit narrow (due to the positioning of the drive shaft, and being relatively close to the front lower control arm), I did not need to reinforce any areas of the plate itself.
And now for what you all really care about.....pics!
Initial Cutting
As the only thing we had to go from was a very rough cut chunk of cardboard and some rough measurements, we did a lot of cutting-fitting-cutting-fitting-cutting-fitting-cutting-fitting.
Some of the initial cuts. Plasma torches are cool!
First pass. Lots of steel yet to be removed.
This is what happens when you let your helper cut without close supervision. He goes and makes a sword.
Final Cutting
Skipping ahead about a half dozen hours of work (and did I mention test fitting?), we have what is essentially the final product.
Cutting out the access holes for drain plugs and zirks. The initial cuts were too small (and one was slightly off, due entirely to my WAG that was not quite right).
Plate finished! (View from the front of the plate, looking at the top.)
View from the drivers side.
View from the back of the plate.
(More after the cut!)
Last edited:
 )
)
 ).
). .
. 

") .
. 


