New bolt-in version of the seat box. (1 Viewer)

This site may earn a commission from merchant affiliate
links, including eBay, Amazon, Skimlinks, and others.

That should be the case, I can't guarantee anything without slapping the templates on the floor, but it should just be the front mount hole dimensions and the angels that they sit at.
If you are up for the drive come on down for a visit! Send me a picture of your floor pan first so I can confirm we are looking at the right thing.
I've still got that old side panel set.

KR
 
Update

All brackets out, floor painted and repaired, heat insulation in and starting on the sound proofing. I think I will post up a pic or two to get Kevin's opinion on the notch just to be sure. Maybe tomorrow. :)
 
Nice, if you just cut the corner out up to where the wire harness mount holes are you will have plenty of room for the corner of the box, it would really only barely touch anyway.


I sent out Jaxons seat box yesterday:


IMG_0047.jpg


On to the next one now....
:cheers:
 
Kevin are these notches suficient for purpose. Or should I plan on hacking off some more they are in line with the brace and past the mounting hole.
001.jpg

004.jpg

and one of all the insulation in place

010.jpg

Still have the sound dampener to place but I am keeping it back away from the edge so the box and the carpet mounts will not have to deal with such a thickness.

001.jpg


004.jpg


010.jpg
 
Hey Doc, you've cut way more than you needed to there. :p
Oddly enough you might not have gone far enough inboard though.

It's easy to drop the box on there and check the fit though, I would recommend test fitting it anyway to see what you are dealing with.


Compare your pic to mine, you can see how tiny the little triangle I cut was, and that is bout twice the size it needs to be:

IMG_9810.jpg


001.jpg
 
Oh I will test fit but there is still that other layer to put in, the sound dampner and it's thicker than the insulation. But as I said I am keeping it back from the edge hoping to lessen instalation woe's. I think I got it on the cut my trianle pieces were slightly larger than yours but I can always cut off wheel some more after fitment. Just trying not to get filings in the closed cell foam and carpet. :) :grinpimp:
 
update bump

Beast at carpet upholstery shop, All insulation and sound proofing compleated, was in a rush as the appointment time for the shop was approching so I did not get a shot of the sound dampining instilation but it is thick. Unpacking the box soon(It looks good no damage and having unwrapped Kevins stuff before I need to alocate at least a day for unpacking) and installing as soon as possible. :) Out on the road again so it will be at least a week before the install, so finished pic's of the install will be delayed a while, Jason yours might get done before mine, but that's not odd everybody gets there projects done long before I can. LOL Doc
 
Hey Doc,
This might be one time you get yours done first. My truck JUST came out of paint this week so I have a LOT of work to do to get it together since it's pretty well stripped. Hopefully I get enough done this weekend to have it ready to go to the interior shop to have the headliner installed and have a new windshield put in. After that it's back to the house for continued assembly. Unfortunately I only have a few hours a week to put into my 60 with my work schedule. But the timing of getting my box from Kevin is perfect since I can start trial fitting as I go through assembly.

Tomorrow: Finish stripping the stock roof insulation and replace it with FAT MAT. Then remove the seat tabs and fix/paint the floor before installing insulation throughout the entire floor. A few other smaller tasks and it should be ready to go in for headliner and windshield install this week. With any luck that is.

I'll let you know once I get close, and will definitely post up some picks once I start installing the box.

:cheers: :beer:
Jaxon
 
sheesh, some beta testers you guys are.

I wanted to get these things out there and installed so we could make sure they work right!
I'll get matt's finished up next week and maybe he'll pull through for us. :p

Whine, Whine, Whine, your worse than the AA gears!!!!;)
Seats and carpet are coming along expect to mount this next week end.
 
Just got back from a few weeks traveling out west. I'll be ready to start the install as soon as you get the box done my friend. Can't wait just need to find a donor subaru for seats…..
 
Looking forward to it! Please just assure me you don't come up with any new cool toys till I get a new job! I don't want to have to look for a new wife. This one came with a great name and a patience for my addictions.
 
going in

Shop just called, beast is carpeted and the seats are recovered. Saturday pic's of box install, baring any auto accidents going home and or heart attack on my part, will be posted here first. :p
 
Ta Dah!!!!

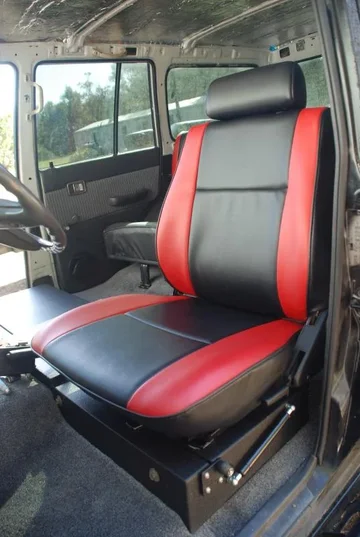
Dang dude it's just too easy put it in for fitment and never took it out. Everythin fit first time only problem I had was some paint on the threads and you had nothing to do with that. I told you I could break an anvil with a rubber ball. Modification of the stock mounting bracket amounted to cutting off the lower projections and drilling out two rivets one fore and one aft. Locating an appropriate position in the truck and drilling 4 holes. Done.

Package as it arrived no damage well one lift rod was bent but I bent it back so all is good also cardboard on the corners wore through and rubber the powder coating off, nothing a little black paint didn't cure. 005.jpg

025.jpg

022.jpg

005.jpg


025.jpg


022.jpg
 
marine carpet

Had this done locally less than 300.00 for material and install.
015.jpg

And the bent rod 028.jpg

And box installed and drivers seat installed 051.jpg

015.jpg


028.jpg


051.jpg
 
And the rest of the story

As I own the shop I have another fellow who works there every day doing large truck and forklift repair. Keeps someone there while I am away, but it can be destracting. Also was working on these today the reason I did not get both seats installed. 045.jpg

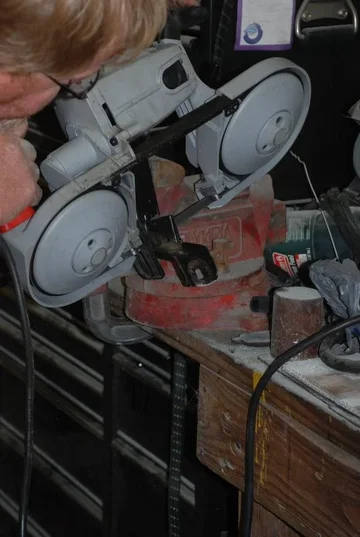
And a shot of cutting off the brackets for the seat sliders
047.jpg

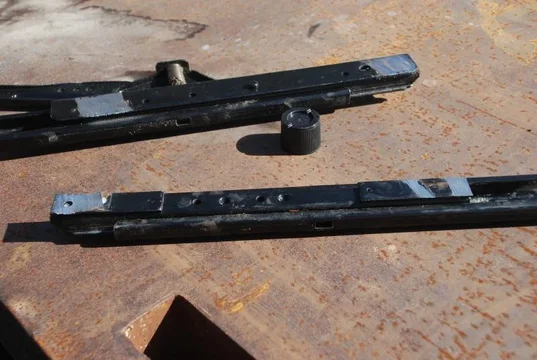
And how the sliders look after the leg removal. 054.jpg

Then just install on the seat , put on the box and mark the holes for drilling drill 4 holes and done dude this is just tooo easy, just like always thanks Kevin Now when is my window coming?:)

045.jpg


047.jpg


054.jpg
 

Users who are viewing this thread

Back
Top Bottom