Need help with rear cup holder design

This site may earn a commission from merchant affiliate
links, including eBay, Amazon, Skimlinks, and others.

How much space is there opposite of the 1+" flashlight hole? That would be a better location for a USB/12V plug. You wouldn't need to run a wire in front of or through the cubby to install the outlet that way. It might be nice to have two small pockets if someone doesn't want to do that, but just moving it to the back would be plenty for me. I don't see myself putting much in those since I keep one flashlight in the console and one attached to the door. I am sure it would get filled somehow though. :)

I originally tried to put the hole in the back since that IS the bettter location. The issue is that it doesn't fit. I would have to push the entire cup holder out another 1/2" and I'm trying to keep it as tight to the center console as possible.
 
is the wipey compartment big enough to hold sunglasses? If not, it should be!

The "wipey" compartment is definately big enough to hold sunglasses but not big enough to actually hold wipes. Once I actually pulled the dimensions off of the wipes bags; I realized there was just no way to make them fit. So under the passenger seat they will stay. I did want to add a simple storage compartment for whatever needs come up. My son wants to put his matchbox cars in there. I'm sure we will fit it with something quickly.
 
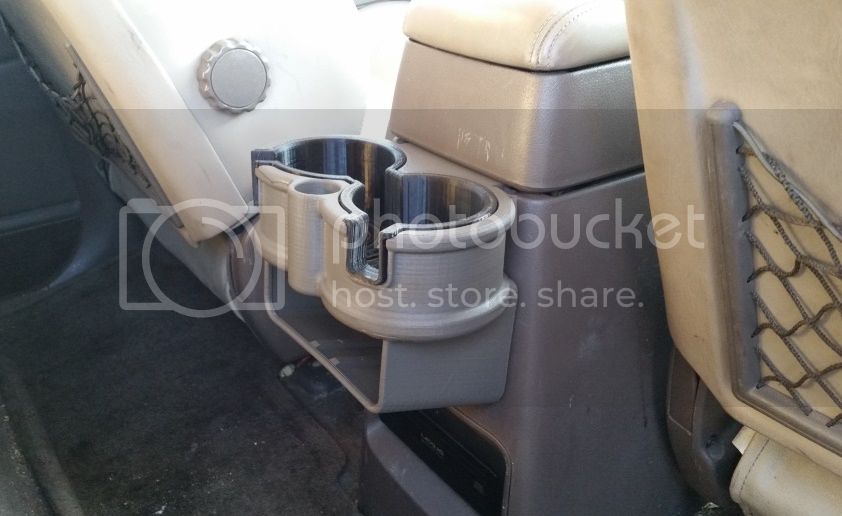
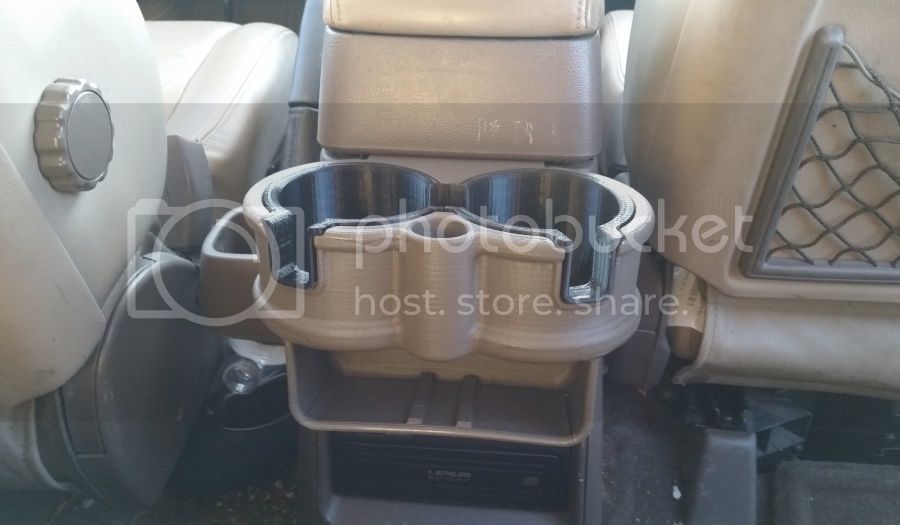
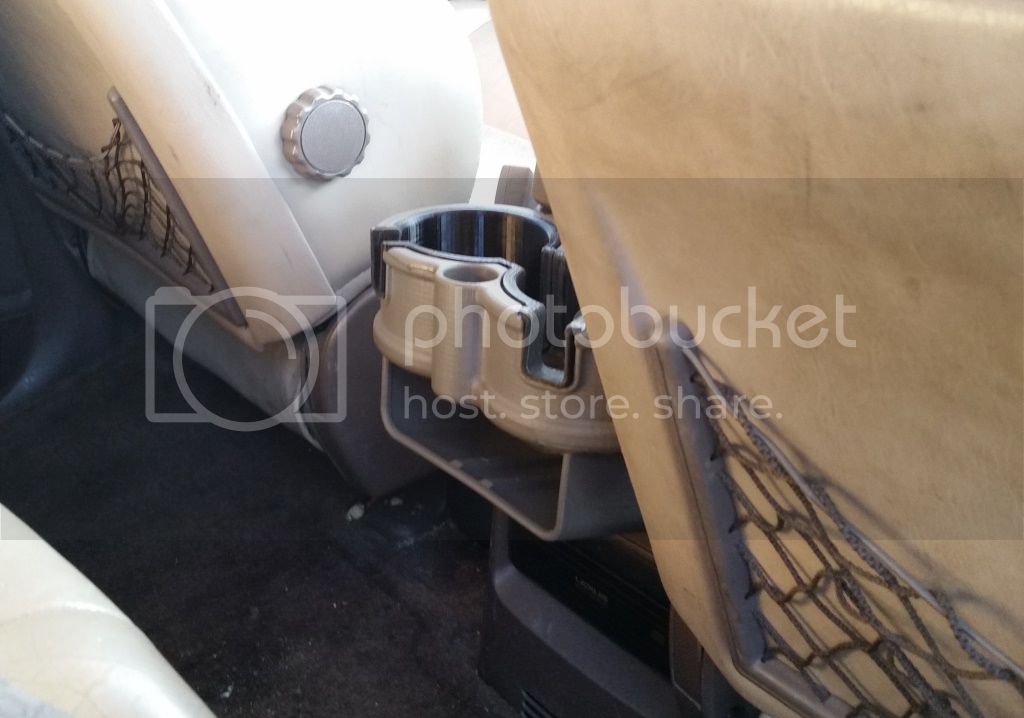
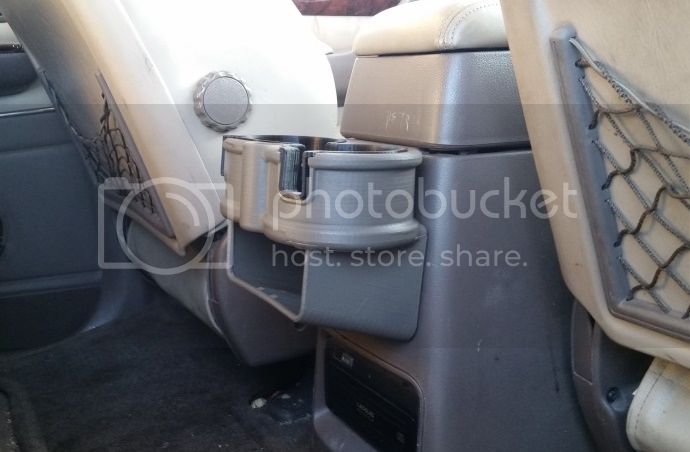
Just got back from the garage and I have good news; the cup holder design WILL fit with both seats all the way folded down and forward. The seats are right up against it when they are all the way pushed foward, BUT that is with my current double cup design which is round on the backside. My rear design if flat and sits over 1" tighter to the console. That should allow the seats to be pused all the way forward and still have a little clearance. I was a little worried for a minute. I put a LOT of time into that design and I really didn't want to scrap it. The cup holder actually doesn't even stick out past the drivers seat (which is all the way back since I'm 6' 2"). It's almost perfectly flush with the back of the driver seat; so it definetly isn't an obstruction when climbing through. Here's some pics. Remember, these are NOT of my new rear design. These are of my front design so fitment is total garbage.


whenever you're ready let me know i want mine in toyota gray to match my front BH3D double cupholder ;)
 
the print time, material used, and shipping should all be about the same as my front double cup holder. So I will probably price the rear the same price of $60. I'm trying to figure out how to create a package deal on my website for the front and rear double cup holder at a reduced price. I am currently running a 15 percent off coupon and free shipping through christmas which does help. Coupon code is "bh3d15"
 
I used that code when I bought your front set recently and it definitely help but the price for the quality of the front set is well worth it! Once these are made I'll be sure to pick them up as well.
 
it will probably take me a couple weeks to get a good size batch made. I want to have a good amount in stock so I don't get overwhelmed with the first wave of orders.
 
I'd order the tan - it does clear the rear seats folded?
 
Craaaap!! I didn't even think about the folding seats. I feel really stupid. That is such an obvious thing to consider. I totally spaced on that. Since I have carseats in the middle row and they are a PITA to remove and install constantly; I end up never folding that middle row down since I try to avoid at all costs removing the car seats. I will go out in the garage right now and see where I'm at. I actually have a simpler design and have already printed it. It was a fold up double cup holder. I stole the idea from a universal fold up cup holder I bought at Pepboys. I just modified the back side to fit the center console of our 80's. I was quite proud of the design so I printed it out and installed it. It didn't last 24 hours. My 4 year old was quite excited to flip it out and put his cups in there. He also thought it made a great step when climbing into the front seat which immediately broke the lower swinging arms. I decided to scratch that idea. With a 2 and 4 year old boy and another child on the way; I need something just about bullet proof. I may have to go back and rework that design if the seats hit my current design. This is exactly why I asked for feedback. You guys will see things that I'm totally missing.

I was asking based on experience. I have an discontinued double folding cup holder on my center console and the clearance was already fairly limited. Glad your new design will fit because the folding cup option is better than nothing but not kid friendly as you now know. I had to do repairs for the exact same thing after it was utilized as a step.
 
Design is looking good.

As i was walking into costco tonight i realized that the other thing that might fit in the flashlight holder is the "lip stick" form factor external lithium battery packs that are becoming popular as emergency phone chargers, etc. Their girth says cubano more than lip stick to me, tho.
 
So I spent the last week working hard and getting a prototype made and fitted. I had to make a pile of fitment changes to get it to fit perfectly. I also had the part WAY too big. It was a 37 hour print and that did not include the 10 hour black inserts print. My prototyping printer tried to commit suicide about 24 hours into it. I had to replace quite a few parts. I decided to make the top and bottom as a seperate piece so the super long print is now 15 hours for the top, 9 hours for the bottom, and 10 hours for the inserts. It still totals 34 hours just to make one, but my machine does MUCH better with the shorter prints. The two pieces snap together and then after an acetone bath, they beccome one piece. I will get some pics up tonight or tomorrow. I have gone through 4 prototypes already and the 5th is on the machine right now. I'm REALLY close to having this perfectly dialed in. If this print is perfect then I will immediately get into making a batch with hopes to have this up on my website by this weekend. The last two prototypes were really close to perfect so those will probably go up for sale for a reduced price. The pics I post tonight will be of those.
 
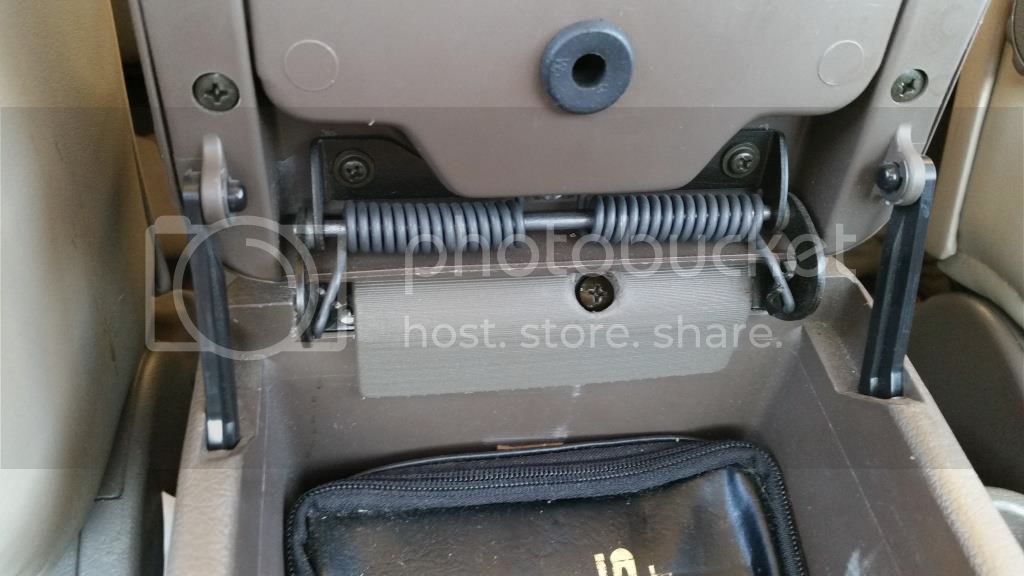
Here's version 5.0 of the prototypes. Fitment is perfect. I had to make a few last changes to get fimnent dialed in and a few structural upgrades for durability. It sits nice and snug to the center console with no gaps. Matching that 5 degree slope with a slight bend vertically and horizontally PLUS is tapers at the top was a HUGE PITA, but I finally got it matched. I'm proud of how it turned out. I have now made 3 of these with two more on my printers as I type. I will make a batch of about 10 total over the next few days and get these up on my website by Sunday evening. This can be attached with simply hooking it up top and using the 3 large strips of 3M adhesive OR you can use the screw holes with any 1" coarse thread screw. I made sure this fit on ALL 80 series console. I had to make this in two pieces. The bottom tray is one piece then the double cup/top is the other. I then snap the two parts together and do a 40 minute acetone batch which bonds the two parts into one. There is still remnants of a seam if you look closely but it's not as extreme as the seem you get on injection molding parts. There seems to be two models of center consoles. One with the padded armrest/top and one with a tray on top. The one with the tray on top has a hinge that goes all the way across the rear lid which prevents the "hook" from grabbing up top. I made another design that does not have that hook. It would mount with the adhesive AND screws only. 90%+ of us have the center console with the padded top and the design in the pic will fit that one.


Looks real good. Did you say sale on until the end of the month?
 
Last edited:
Congratulations! Great design!
 
Looks swell, still no back seat interference? My shopping list is growing :o
 

Users who are viewing this thread

Back
Top Bottom