All this may not be necessary, but it’s what I did – others can correct or offer easier alternatives I just didn’t think about. Caveat, I didn’t take pics and I’m writing this up after the fact. If you start doing this and it seems like my instructions seem to be missing a step – they probably are.
Prep work:
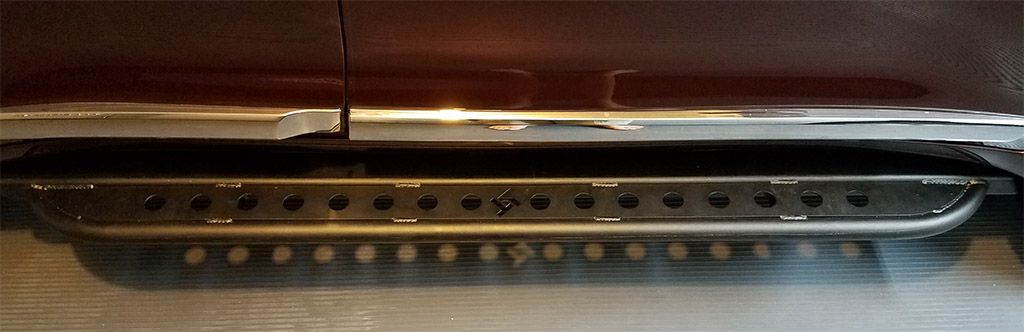
1. Using a 12mm socket and ratchet, remove the six bolts on each side holding the OEM steps to the body (12 bolts total). There's a locating tab on the center bracket and you have to move the step around a little - don't just try to yank it off. Set steps aside, and while doing so marvel at the lightness (and thus how little they could do to protect the rockers).
2. There is some prep work I found necessary to be done before trying to fit up the sliders. First, I put the sliders on two floor jacks and raised them into approximate position. This allowed me to see several plastic plugs on the frame I had to pop off. It also allowed me to see which existing frame holes would be tapped and used to mount the center support bracket.
3. On the passenger side remove the three 12mm bolts holding the gas tack skid plate in place. Don’t need to pull it off, just get it loose.
4. On the driver’s side there is a bolt that holds two hydraulic lines to the frame at the front end of where the sliders go. You first need to bend the bracket out enough that the slider mounting plate can fit under it (~3/8”). Then you need to remove the bolt holding that bracket to the frame so you can pull the lines out enough to get the 6” long front mount bolt in without doing damage to the lines (it gives the lines enough flex to move around as you place the bolt in position). This is easily the most frustrating thing because the factory must have done this without the body in place. I used a 12mm ratcheting box end and after going half-crazy got the bolt out (getting it back in at the end will finish off the other half of the crazy part).
5. Tap the holes in the side of the frame for the middle mount. There was no way the tap Jason provided was going to work in the holes of my 2017 LC, so off to the hardware store to purchase the correct drill size to support a 12M 1.25 tap (27/64” IIRC). Probably time to mention that drilling into a frame is hard work, so make it a "bit" easier (pun intended) and use some cutting oil. Probably not the best, but I just use some chain oil I keep around for my chain saw.
Install the sliders:
6. Using the jacks again, I maneuvered the sliders into position. Looking through the middle mount bracket holes and locating the tapped holes in their centers will give you a good fore/aft placement.
7. I went to the rear mount and got the bolt and backing plate started then went to the front and did the same.
8. I tightened down the front, then went to the rear and tightened that bolt down too.
9. On each side, I inserted the bolts through the middle mounts and tightened them down.
10. Now I used the jacks to raise one side of the vehicle and placed jack stands such that I would have space to get under there with my trusty 0-850 RPM ½” drill and using the two-step process (first ¼” drill, then 5/16” drill) drilled out the six bottom mount holes on one side. I inserted the 6 bolts and torqued them all to about 30 ft-lbs, then went back and brought them all to between 35 – 40 ft lbs. (note: I couldn’t get my torque wrench into the other spaces so I just “winged” the proper torque for all the other nuts & bolts - I've been working on cars & trucks for about 50 years so my arms & hands have some sense of tightness).
11. Repeat step 5 on the other side.
12. Reinstall the three bolts that hold on the gas tank skid.
13. Reinstall the bolt that holds the hydraulic lines – this will complete the going crazy part as mentioned in part 4 above.
14. Jack vehicle back up, remove stands, lower vehicle, stand back and admire your work. Marvel at how much better they are as actual steps, not to mention the whole rock slider thing (and my wife offered to pay for them to help prevent parking lot dings – life doesn’t get a lot better than that).
15. Drink beverage(s) of your choice and/or go drive your truck.
Prep work:
1. Using a 12mm socket and ratchet, remove the six bolts on each side holding the OEM steps to the body (12 bolts total). There's a locating tab on the center bracket and you have to move the step around a little - don't just try to yank it off. Set steps aside, and while doing so marvel at the lightness (and thus how little they could do to protect the rockers).
2. There is some prep work I found necessary to be done before trying to fit up the sliders. First, I put the sliders on two floor jacks and raised them into approximate position. This allowed me to see several plastic plugs on the frame I had to pop off. It also allowed me to see which existing frame holes would be tapped and used to mount the center support bracket.
3. On the passenger side remove the three 12mm bolts holding the gas tack skid plate in place. Don’t need to pull it off, just get it loose.
4. On the driver’s side there is a bolt that holds two hydraulic lines to the frame at the front end of where the sliders go. You first need to bend the bracket out enough that the slider mounting plate can fit under it (~3/8”). Then you need to remove the bolt holding that bracket to the frame so you can pull the lines out enough to get the 6” long front mount bolt in without doing damage to the lines (it gives the lines enough flex to move around as you place the bolt in position). This is easily the most frustrating thing because the factory must have done this without the body in place. I used a 12mm ratcheting box end and after going half-crazy got the bolt out (getting it back in at the end will finish off the other half of the crazy part).
5. Tap the holes in the side of the frame for the middle mount. There was no way the tap Jason provided was going to work in the holes of my 2017 LC, so off to the hardware store to purchase the correct drill size to support a 12M 1.25 tap (27/64” IIRC). Probably time to mention that drilling into a frame is hard work, so make it a "bit" easier (pun intended) and use some cutting oil. Probably not the best, but I just use some chain oil I keep around for my chain saw.
Install the sliders:
6. Using the jacks again, I maneuvered the sliders into position. Looking through the middle mount bracket holes and locating the tapped holes in their centers will give you a good fore/aft placement.
7. I went to the rear mount and got the bolt and backing plate started then went to the front and did the same.
8. I tightened down the front, then went to the rear and tightened that bolt down too.
9. On each side, I inserted the bolts through the middle mounts and tightened them down.
10. Now I used the jacks to raise one side of the vehicle and placed jack stands such that I would have space to get under there with my trusty 0-850 RPM ½” drill and using the two-step process (first ¼” drill, then 5/16” drill) drilled out the six bottom mount holes on one side. I inserted the 6 bolts and torqued them all to about 30 ft-lbs, then went back and brought them all to between 35 – 40 ft lbs. (note: I couldn’t get my torque wrench into the other spaces so I just “winged” the proper torque for all the other nuts & bolts - I've been working on cars & trucks for about 50 years so my arms & hands have some sense of tightness).
11. Repeat step 5 on the other side.
12. Reinstall the three bolts that hold on the gas tank skid.
13. Reinstall the bolt that holds the hydraulic lines – this will complete the going crazy part as mentioned in part 4 above.
14. Jack vehicle back up, remove stands, lower vehicle, stand back and admire your work. Marvel at how much better they are as actual steps, not to mention the whole rock slider thing (and my wife offered to pay for them to help prevent parking lot dings – life doesn’t get a lot better than that).
15. Drink beverage(s) of your choice and/or go drive your truck.
Last edited: