
This is my first post that may be of any benefit to other members. I had fun doing it and figured I would share.
Over the summer I crossed three moderately deep water crossings that got me thinking about my fluids after each one. First thing I would do once I got home was check my fluids. This was getting annoying and I figured I wanted to extend my breathers so I didn't have to keeping worrying about getting water in my diffs.
I put together my ideas for this project based on a few different articles I found on the web; one I saw here where spressomon discusses the fact that transfer and tranny breathers attach to the external of the tranny dipstick, a few from some other 4x4 sites discussing breather extensions in general, and a few from Australia discussing how they did it as well.
I think the finished product turned out great... I probably over engineered this, but hey, we drive Land Cruisers, so it's only fitting.
All said, I probably spent $35-$40 to extend all 5 breathers (transfer case has two breathers, plus the rear diff, transmission, and front diff).
Parts used:
25' of 1/4" ID low pressure fuel hose
1/4" ID fuel filter
5/16" to 7/8" hose clamps (I used 9)
2 rubber padded hose clamps (purchased from ACE)
1/4" ID hose T's (purchased from Home Depot)
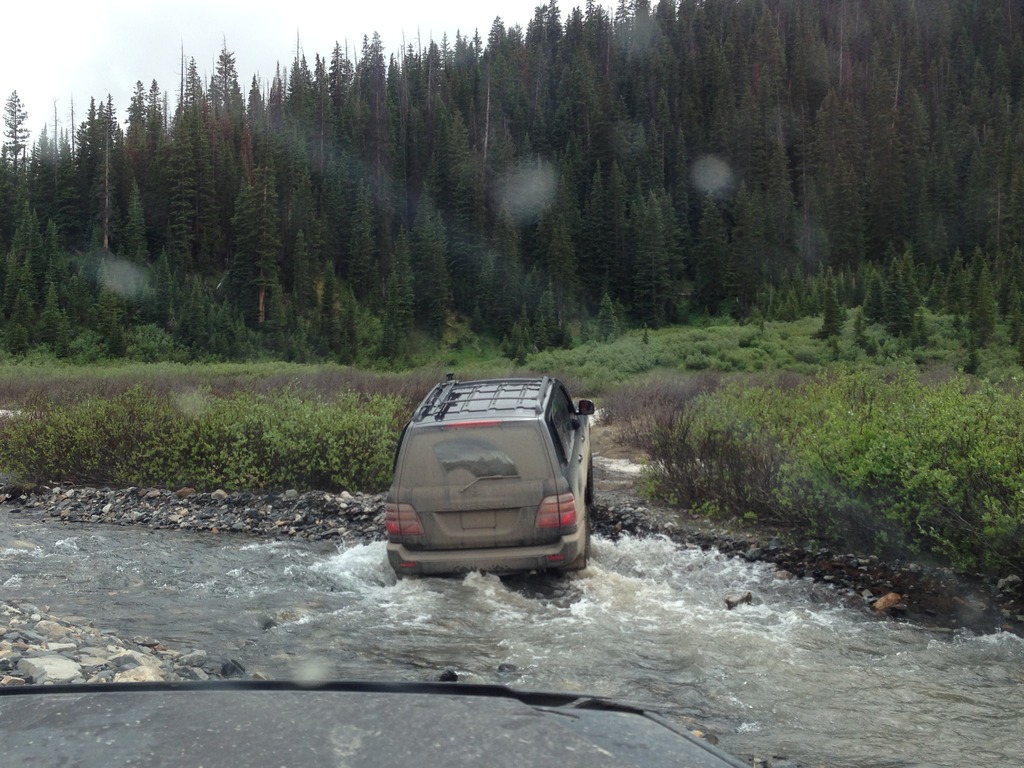
This water crossing was in Crested Butte. It was a little deeper than the image lets on, as you can see I'm climbing out already. (The second water crossing was also in Crested. It was the deepest and widest of all three, however my GoPro decided to only record audio, which was pretty disappointing.)
This one was at the beginning of a trail that had two options, cross the water or go to the south and cross really deep, thick mud. I believe we all have the same feelings toward MUD, so I choose the water.
Illustrations from the FSM for each of the breathers.
Front Diff

The front breather is attached to a metal extension running from the diff.
Rear Diff

Transmission

Transfer Case

Fuel Line

Hose Clamps

Hose T's and Padded Hose Clamp

Fuel Filter

The beautiful girl being worked on

You can see both Transfer Case breathers in this shot. I've already removed one hose.

First hose on

Old hose vs new hose

OE rear diff breather

Rear diff breather and hose removed

The rear diff took the most hose, I brought the spool under the truck with me and fed it along the E-Brake line. I made sure to leave extra hose for full flex of the suspension

Over the summer I crossed three moderately deep water crossings that got me thinking about my fluids after each one. First thing I would do once I got home was check my fluids. This was getting annoying and I figured I wanted to extend my breathers so I didn't have to keeping worrying about getting water in my diffs.
I put together my ideas for this project based on a few different articles I found on the web; one I saw here where spressomon discusses the fact that transfer and tranny breathers attach to the external of the tranny dipstick, a few from some other 4x4 sites discussing breather extensions in general, and a few from Australia discussing how they did it as well.
I think the finished product turned out great... I probably over engineered this, but hey, we drive Land Cruisers, so it's only fitting.
All said, I probably spent $35-$40 to extend all 5 breathers (transfer case has two breathers, plus the rear diff, transmission, and front diff).
Parts used:
25' of 1/4" ID low pressure fuel hose
1/4" ID fuel filter
5/16" to 7/8" hose clamps (I used 9)
2 rubber padded hose clamps (purchased from ACE)
1/4" ID hose T's (purchased from Home Depot)
This water crossing was in Crested Butte. It was a little deeper than the image lets on, as you can see I'm climbing out already. (The second water crossing was also in Crested. It was the deepest and widest of all three, however my GoPro decided to only record audio, which was pretty disappointing.)
This one was at the beginning of a trail that had two options, cross the water or go to the south and cross really deep, thick mud. I believe we all have the same feelings toward MUD, so I choose the water.
Illustrations from the FSM for each of the breathers.
Front Diff
The front breather is attached to a metal extension running from the diff.
Rear Diff
Transmission
Transfer Case
Fuel Line
Hose Clamps
Hose T's and Padded Hose Clamp
Fuel Filter
The beautiful girl being worked on
You can see both Transfer Case breathers in this shot. I've already removed one hose.
First hose on
Old hose vs new hose
OE rear diff breather
Rear diff breather and hose removed
The rear diff took the most hose, I brought the spool under the truck with me and fed it along the E-Brake line. I made sure to leave extra hose for full flex of the suspension


