DIY 3D Printed Cup Holder Plans (4 Viewers)

This site may earn a commission from merchant affiliate
links, including eBay, Amazon, Skimlinks, and others.

Well, you have $10000s in printers, you can afford to get a couple nice terminating tools for the connections. You’ll use them a lot and it can make a big difference in assembly time and in reliability to have the correct tools.
It’s on my to do list. I’m actually completely broke and went too heavy on filament and too few machines, which is why I’m looking at kits to save money on more. I haven’t actually sold anything yet. Even when I do, I’ll be broke for a while as all my money will go into machines and tools; I did not set aside “income” as part of my plans. It didn’t make sense to pay myself then use personal money for more machines, so I’ll just skip a step.

Someone is coming soon to pick up a few rolls of filament so I’ll buy some tools for electrical work then. @grinchy also I’ve been busy bud but if you need any printed parts and can find me the 3D file just shoot to me along with address: I haven’t forgotten and still use that compressor you donated! Soon I’ll be able to return the favor.

The good thing is I bought filament at end of fiscal year and tax season so I got a great price. I’m well stocked on all the pieces minus machines and 3D models, and we will get to the 3D models part soon enough.

I’ll be able to afford all the tools later after I start selling but we are roughing it at the moment boys. I was lucky to even get donated a saw/ended up donating 2 printers back (SLA ones), and I’m about to make extremely good use of that table saw; save thousands in shelves from donated wood and saw.

This first one I will have to settle for less than usual standard, but I promise you once you give me the right tools: every single frame I put together will be perfectly square, every nut and bolt torqued/thread locked to spec, every rail lubricated, and every electrical connection meticulous.

I just don’t have time to scour through every guide, so point me to the best. I can’t afford every tool, so point me to the bare necessities.

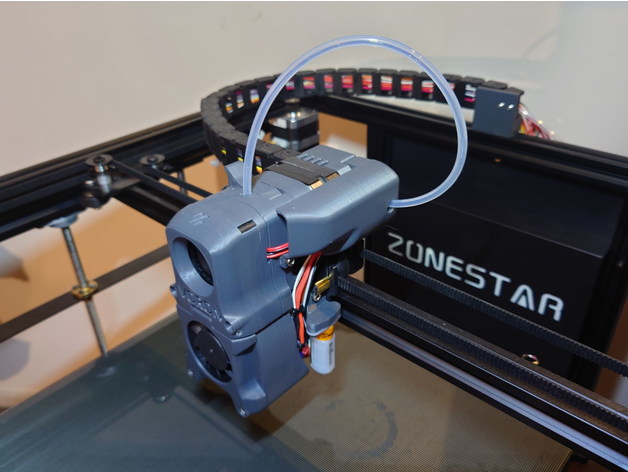
Help me out here boys, and remember I am trying my best with what I have. I printed about 10 parts I needed during this project, and I would check every single port on my board if I knew how/and could print the tools for it.
 
I'm honestly not sure what qualms they have with wrapping them in tesa. That wiring underneath is more tidy than mine. I didn't even bother with wrapping any of my wire because eventually I'll end up tinkering with it.

As far as the thermal fuse goes, it can run without one but you should know that SSRs can fail open so there is a potential risk without that failsafe especially since it's mains powered. Keep in mind also that this is a DIY so you are your own QC especially when it comes to sourcing of parts and their dependability. I made sure I sourced my SSR and power supply from a reputable vendor for peace of mind. Not sure about the kits that are out there.

You can get a relatively cheap wire stripper/crimper at harbor freight along with some butt connectors and you can have it installed in just a few minutes.
That’s a good thing just in case you need to mess with it, like I will. The Tesa tape was not my first choice, but once out of zip ties it was either that or:

0EF2184A-9CF9-4E53-92EF-0CEDF78ECAF7.png


Boys I’m not here to beg anyone for sympathy or ask for a handout, but let’s not forget I was living out of my car just a year ago and survived on a $10 tool kit and a $80 torque wrench (for brakes/rims).

I’m not trying to take the shortcut to save time, if needed I’ll tell everyone to wait on the cup holders like I have been. If I wanted to rush things I would’ve shipped off PLA and petg holders and called it a day, and would at least have a little income. I’m not rushing this, but I don’t want to keep everyone waiting over something that can wait. At some point it’s quicker to build another than to redo one just to make it slightly better, as long as I am not leaving any in a risky state or in a state that affects print quality.

I had a limited budget and did not account for basic tools or building my own, and to get decent price on filament it took most of my budget. Bad planning for leaving myself heavily short on machines vs materials, but at least we don’t have to worry about materials being short.

@grinchy until the Vorons all my machines totaled less than $500 each, with most around 300. For $10k I would have closer to 30 machines but I sadly only budgeted $5k for machines. It just looks like a lot because the entire fleet of sidewinders were only $3k.

I actually spent more on the automatic ejection, and artificial intelligence failure detection system coming in the mail this week. Without that, I just would never find enough free time to manage a hundred or more. I can build a printer for a purpose, like cup holders, then set it to run that job for good / que up as many as I want; then just keep feeding filament. Set it then forget it, and move onto to next printer/another job.

Now imagine this, instead of me making things for you and then shipping to you, I would now put one of my machines in your house and print it straight at your house; I can remote access it and literally do everything for you. The cost of shipping over time is more than the machines, if I made your part and ship to you. Manufacturing at the point of consumerism makes more sense for things so cheap that it costs more to ship it, not to mention the extra time (even without ship delays, and even when ordering same country).

When I am not making things for you, or when you become comfortable enough to run one on your own, then you can take over. I will make sure to set everyone up with something new-user friendly, and you’ll never need to know how to “drive the manual” of 3D printers (aka paper / corner / manual bed leveling and controlling every slicer setting).

You can also join my distributed manufacturing group and have your printer print parts to fill orders when not using for yourself, so each machine will come with a plan for it to pay for itself. You can also sell your own products.
 
Last edited:
FYI I plan on keeping all the practice builds for myself. Any one I build for others will be much more meticulous. This baby is my learning experience, along with the next 9.

So I will end up separating everyone at first into 2 categories and slowly transition everyone into 1:

1. I just want the dang cup holder and I want it now! I don’t care about a printer in my home, Or your life story!

2. Those who would rather have one in their home and have me teach them how to do everything I can do. It can be any machine, not just ones you can get from me, as I plan on having many different models in stock for the purpose of educational videos and testing. This will take more time.

3. Yes.

(3 means both)
 
Flexible inserts, not a bad idea boys.

Taking a page out of Peugeot. Many more books to look through.

0E1442E0-AC35-42F2-AFBB-3A5FEF9C5291.png
 
Here comes the Artillery:

I’ve been working very hard on figuring out how to make BIG ABS prints work with my current fleet, so I can knock out the cup holder que in a timely manner and move on to other exciting projects I have planned for mud. I want to be able to use my Artillery fleet (the bulk of my printers) to boost production for mud.

Anyways, Meet the VAAPR bed - which is a part of my automation system.

It’s made out of material that expands and contracts based on temperature. When heated, the bed contracts and helps “grip” prints. When cooled, it expands and helps release the print; then the tilt and the “sweep” is enough to push print off the bed and automatically begin new prints/next In que.

This is one of the last two pieces I need to make BIG ABS work on my very modest setup. I have 11 systems coming and then we will begin tested automated cup holder production.

The last piece of the puzzle is to upgrade my bed and hotend to 150C and 300C/3mm/big nozzle capabilities, respectively. I plan on doing this with upgraded heating pads ($20 each) and ordering a fleet of “alternate tool heads/hotends” ($100 each).

I’m taking out my first loan (ever in my life) this month to fund the rest of what I need to get the first fully automated fleet up and going.

#fingerscrossed but at the same time, I know this is going to work because we are going to make it work!


Last couple photos are my practice runs for big abs with no enclosure. I basically figured out this week the cheap beds where you can’t get your prints off the bed because it’s too sticky… it’s actually great for ABS (abs releases easily when cooled, basically slides off).

-Sharpe

FD3A869B-4FBC-40A4-846D-A3EF8D2AACB5.png


F5B28FB1-2F79-4650-879C-2B005A1F984C.png


D5F98503-5594-4E77-92DE-6444971A131F.jpeg


image.jpg


Also figured out I can make my own abs slurry to help things stick, and I have an infinite supply of it for really cheap (we wholesale acetone and I have plenty of ABS scraps). It’s glue that doesn’t ruin bottom layer quality because it’s made from same material as the print/gets melted into it. It’s like manually putting down your first layer of ABS, for subsequent layers to easily adhere to.

The ABS slurry is something anyone with a printer (of all types can use) and it’s something I plan on providing to mud for mostly just shipping costs (dirt cheap, or “mud cheap”.
 
Last edited:
The biggest issue I've had printing the cupholder in ABS has been warping. It seems to get worse the bigger you go or the more infill you use.

Even with a heater chamber I had some issues. Hopefully you have success by printing the rafts and brims. Great progress tho.
 
The biggest issue I've had printing the cupholder in ABS has been warping. It seems to get worse the bigger you go or the more infill you use.

Even with a heater chamber I had some issues. Hopefully you have success by printing the rafts and brims. Great progress tho.
Thank you sir, are you doing it on the Voron? The Voron bed does not move so it should have no issues if enclosed.

If not on a Voron or on a printer with a moving bed, the bed movement itself creates a draft which can bounce off bed and lift from under first layer, in addition to warping higher layers.

I use a draft shield: limited height if I’m worried about lifting from under, and full height if worried about warping from currents coming in from the side (most cases they do not come froM top).

Then I use a brim not to help it stick, but because I have a bed slinger like most folks, the brim is to soak the warp/lift. My draft shield and brims usually ends up deformed, but the prints come out okay. They are both layers of armor to “absorb” drafts.


Anyways I will for sure figure it out boss and share with everyone here. I’m going to start securing down the cup from the bottom and work my way up; deal with each source of warp as I go.

The ABS slurry, strong bed heat pad and the VAAPR bed should more than enough to handle first layer adhesion; likely won’t even need slurry as I have not build a way to automate a coat of it.

In the future I’ll have multiple tool head setups as well as 1 hotend capable of printing liquid (for making printable robotic parts/depositing hydraulic liquid into suspension parts mid print), and even the slurry can be automated.

@peez206 the slurry is free for mudders, and I’ll accept a donation to help me with shipping but not required. I’ll make a few gallons this week.

Also example of a draft shield, notice how the shield is warped, and the brim has began soaking drafts that make it past shield? The print itself is okay/I’m keeping eye on it. Voron part btw.

image.jpg


I got the going wide part figured out, now I just need to figure out how to go tall. I'll practice with my Mother's Week gift; BIG MOTHER MARY. I say big because it's the only way to get the text to show well, is to print it in max scale.

1652219075093.png

1652219151534.png

1652219453624.png


If anyone wants one for their own mother, I will be more than happy to make one for her free of charge. It will be an honor, and my pleasure!

I can also re-personalize it for you. No you cannot take my personalization because only 1 mother can be the best mother the entire Human Race has ever known, and that is mine. There are only 2 weeks out of each year where I refuse to remain humble, with Mother's Week being one of them.
 
Last edited:
@peez206 in case you’re wondering why all the Voron Parts.

I decided against building vorons 1 at a time, and use this one to learn to build 10 COREXYs at a time: leaning towards HEVORT at moment for big build volume as well as kenimatix tiltable bed.

Im going to take my time and redo the entire electrical part; from the hotend down and with proper tools this time. Then i’m moving into software and learning that.

I also took a few pages out of the Voron manuals and decided to convert all my hotends to the new Stealthburner, and this will be my answer to needing an entire fleet of 3mm hotends.

A glimpse into the future of my tool heads/hotends:

Adapted to creality ender gantry/carriage.
  • featured_preview_20200701_125305.jpg
Zonestar, same as Geeetech


  • featured_preview_DSC_0528.JPG
Anycubic
  • featured_preview_foto_1.jpg
And here it is, adapted to the Sidewinder/Genius pro gantry:

1652226309282.png


The internet is a beautiful thing and now I know what to bulk stock up on in terms of hotends and hotend parts; things designed for the afterburner and the stealthburner (new version In last photo).

Not a complete post without showing you guys a few reasons why I chose this hotend:


Instructions for building your own here:


I will surely have extras later for you guys as well.

Cheers,
-Sharpe

741FB402-A1BF-4CF5-8CCA-1208F3BA9588.png
 
Last edited:
@peez206 i'm working on some things that will allow any printer to stick the big ABS cup holders; for your Voron it will literally be a cakewalk. Basically anyone will be able to make their own.

ABS slurry you already know about, and likely not even needed.

Here is another piece of the puzzle:

1652399606499.png


You move the draft shield closer and extend or move brim outswards, so that the brim overlaps the draft shield and secures your draft shield. Now even my draft shield wont lift and warp from under; aka my first line of defense is now holding much more firmly and provides better protection against drafts that lead to warps/lifts.

If you skim through last night's testing, you'll see how much i struggled before:

1. Moving print to back of bed, because of bed slinger the back is more safe / less draft (because wall behind printer). You can also orient your print (in cura/prusa) parallel to the X axis, if bed is slinging in Y direction.

2. Overlapping brim and draft shield, so that brim is now used to hold down draft shield. I no longer need to have brim touch the print itself and that slightly improves quality around bottom edges.


Next week i will begin testing another plan: external support/adhesion, but the non sticky gluey make your bed dirty kind.

I put cup near edges, make brim big enough to reach edges then use external clamps to clamp down the brim near edges. That should be GG.

Hope that helps.

-Sharpe
 
Last edited:
@peez206 bro do I even need a voron??


That’s 420mm/s for the potheads like myself; over 5 times default settings from manufacturers profile and 8 times default settings in cura and Prusa, which is what I was using before.

It’s printer optimization week In preparation for automation (saving even a minute per print when making hundreds and later thousands per product, is worth spending a week or two optimizing before sending into automated production).

Jk on the needing vorons; I look forward to Voron optimization. If we can make $150 printer go 500mm/s & 5000mm/s acceleration with cura and wheel bearings, imagine what the linear rails and klipper will do!

Also, the Vorons have better cooling for printing cup holder without supports. Example of longer bridging:


Enjoy the calm before the storm boys, at some point it’s going to feel like we are going from 0-100. I’m pushing first batch up til end of month for ship also, sorries. Need time for setting up the Quinly stuff next week and do a little testing, namely optimization specifically for the cup holders.

-Sharpe
 
Last edited:
Update:

I am donating the 2.4 to a local Voron Community member, who offered to take over for me and help me make cup holders. He’s already got a couple VORONs. His name is John.

The trident I am recruiting help from John and community members to build help me build a “production worthy” example to send to manufacturers for parts sourcing and assembly. I’m working on some things to get the costs down for everyone and be able to offer it assembled.
 
Quinly got here today, I am scrambling to build shelves and make some space for unboxing. After VAAPR beds are setup I am going for round 2 of trying to get this bad boy to stick in ABS. If this works then we have 10 sidewinders with Quinly/VAAAPR beds standing by.

Fingers crossed. You guys can check the stream in about 2 days and it’s going to be swarmed with abs test prints, starting with miniature cup holders. Ih8mud cup holder Keychain is coming.
 
Building a wall of shelving for printers and these are the shelf brackets. I made some smaller ones before in petg carbon fiber and that was way overbuilt (pif for reference), so these are in carbon fiber PLA instead. Still looks and feels overbuilt.

The before and after weekend pictures are going to be good; in the process of squeezing 60 hours work week into just the weekend (fri-Sunday).

DFF5A3DB-4DDD-4370-983D-BFC7DD536CB0.png


image.jpg


image.jpg


image.jpg
 
You should sell these shelf brackets! They'd be great for the shop.
That’s a great idea boss! After we get our wall of printers up, it’s just a matter of throwing them into the que.

Think of it like Kinkos where you pick what to photocopy, and I just provide the machines and help you operate them. This way I don’t need to worry about copyright as I am selling/providing the printing service itself, and only that.
 
3 just came out, and Holy s***.

Compared to the petg carbon fiber one from Genius Pro, which was also max size for its build volume.

My wall studs will break before these for sure.

And these will get stronger when I start using the 5kg rolls instead of 1kg, as that was my limit this time (wasn’t the build volume as I can go wider on bottom).

12 hours print time (cost of $.10/hour electricity and 1 kg of carbon fiber PLA at $20/kg). Im aiming for $30 or less including shipping this bad boy (mud price, retail will be least double). I’m also going to work on a calculator to help you guys estimate costs for anything you need, as It’s not possible to list everything that can be printed.

Also, Soon 3mm filament (compared to 1.75) will be an option, which will result in faster prints and stronger prints for same amount of material used. $20 per bracket for PLA Carbon fiber shipped is definitely possible; little less for PLA+ and little less than that for PLA. I honestly think PLA is adequate and the carbon fiber, once again, is overkill but it’s there for the option of extra peace of mind. Keep in mind we can go crazy and make these MUCH STRONGER, but I don’t see a reason for that just yet. Maybe once we start working with metal and have to stock much heavier things, we will go back and reoptimize.

image.jpg


image.jpg


image.jpg
 
Last edited:
If anyone needs easy shelves I will be offering these Moidules as well.

If you need easy and cheap: I’m using them with scrap wood from local free Craigslist and building my entire system of shelves for next to nothing.

These will cost more to ship as each one is maybe $1-3 depending on size; I can scale as big as needed for any wood/board size (it can cost more than $3 each). Picture is 100% scale versus 140%. Shelf on left on 100% and on right is 140%. These are so easy your 7 year old can start building furniture with them; wood joinery for dummies like me.

Update on scrap wood: One mans trash is another mans treasure! I need to make another round around town and collect more flat pieces/scrap wood! I’ve used up most of the last hail which was an entire LX full.

Also got a similar system for storing remote control vehicles, and if you combine that with the fact that I can scale up things designed for toys, to something big enough to be practical... like a toy car shelf can one day be a real car shelf. 3D Sets Storage System – 3dsets.com - https://3dsets.com/product/3dsets-storage-system/

That and oversized toys, that’s always an option too!

350E2721-24A0-426D-9A46-6F7593A42C75.jpeg


image.jpg


image.jpg


image.jpg


image.jpg
 
Last edited:
3 just came out, and Holy s***.

Compared to the petg carbon fiber one from Genius Pro, which was also max size for its build volume.

My wall studs will break before these for sure.

And these will get stronger when I start using the 5kg rolls instead of 1kg, as that was my limit this time (wasn’t the build volume as I can go wider on bottom).

12 hours print time (cost of $.10/hour electricity and 1 kg of carbon fiber PLA at $20/kg). Im aiming for $30 or less including shipping this bad boy (mud price, retail will be least double). I’m also going to work on a calculator to help you guys estimate costs for anything you need, as It’s not possible to list everything that can be printed.

Also, Soon 3mm filament (compared to 1.75) will be an option, which will result in faster prints and stronger prints for same amount of material used. $20 per bracket for PLA Carbon fiber shipped is definitely possible; little less for PLA+ and little less than that for PLA. I honestly think PLA is adequate and the carbon fiber, once again, is overkill but it’s there for the option of extra peace of mind. Keep in mind we can go crazy and make these MUCH STRONGER, but I don’t see a reason for that just yet. Maybe once we start working with metal and have to stock much heavier things, we will go back and reoptimize.

View attachment 3015584

View attachment 3015585

View attachment 3015587
$30/bracket? That's not very competitive with steel shelf brackets from big box stores. They are $10-$15 (for 12-16" brackets) and can hold 1000lbs per pair. Not to mention wait time.

Don't get me wrong, it's neat...but solving a problem that didn't exist.
 
$30/bracket? That's not very competitive with steel shelf brackets from big box stores. They are $10-$15 (for 12-16" brackets) and can hold 1000lbs per pair. Not to mention wait time.

Don't get me wrong, it's neat...but solving a problem that didn't exist.
This is why I say I’m working on optimizing, that one is mostly PLA carbon fiber costs and is overbuilt. End goal is to ship them for $20, $10 for local. They do not have to be so thick and use up that much material; they do not have to be in CF.

First is the 3mm filament and reducing the material costs in half, Performance PLA/plus should be plenty for this, and even cheap petg likely overbuilt.

Also can you link the metal bracket for $10-15? Only thing I have for comparison in the house is the skinny brackets in the closet. I’m not out to beat anyone, but I do want to build the best bracket I can for the best price I can; I’ll take anything for comparison and to gather ideas from.

This is why we need a calculator, to see where it makes more sense To go custom size or to make our own.

So to help you understand: let’s remove shipping costs, and consider that over time efficiency, and materials & ship cost will go down:

1kg PLA - $10
1 kg PLA plus - $15
1 kg PLA -CF - $20
1 kg PETG - $10
1 kg PETG CF - $20

Now consider that the small one for $2.50 in material cost (PLA) is rated for 80kg.


Now consider that PETG is same cost but way more strong and will not snap on you. What the petg one I shared is rated at, I’m not sure but it feels like it can handle quite a bit more.

Now consider that scaling it up, sometime twice as long can take up 3 times as much material.

So one 4 inches shorter is like half the price. Then consider how wide it is, I could cut costs in half just by making it more thin. That’s before everything else.

So the example you’re seeing is on the larger side and is only the starting point from where I will begin cutting costs down. It’s also buying 1 and shipping for 1 vs 2, 2nd much cheaper.

also, consider most of my cost is shipping and you’re comparing to local pickup prices.

$2.50 is price for mud for local pickup for the 80kg rated one, same for petg version that stronger but not sure how much: decent amount.

Then with ship it becomes $10.

For the 400 cm version it’s $10 (petg) but with ship it’s closer to $25-30 due to size. This is why I plan on catering big things only to locals. My goal is to get costs down to $5 per bracket, likely even less, and allow $15 for shipping.

This is why I said end goal is $20 delivered, and if you don’t think it will be worth that, I’ll send you a pair; I want you to find me the best bracket out there for $20 and see for yourself. For locals who get it for 5-10 bucks depending on size, it will be a no brainer.

I didn’t mean to scare anyone, but the $30 example is worst case scenario where shipping accounts for half, and for overbuilding it with using too much material and too strong material.

I recommend PETG and wait for me to cut material costs down to $5, then price for mud will be exactly $5 plus ship.

image.jpg
 
Last edited:
@lx200inAR do you want to be my quality control guy for shelf brackets for mud? I’ll mail you a $5 pair, $10 pair, $15 pair and $25 pair before ship costs). I really want you to compare them to even local pickup prices, and give me time to work my shipping costs down. For free for your service of inspecting it, for mud and for me.

Remember I do this because I enjoy it, not because I need to make a living off mud. I’m not trying to solve anyone’s problems but my own with these shelf brackets. Try to understand I work without cash most of the time, and approach many things through a “can I make it myself” perspective. I have a lot of plastic and no cash, so never even considered “competition”.

Basically, just assume if you “need” something from me, that I will mail it to you. You see something you can use just tell me and shoot me address, and if money is a concern, just send me a donation later when it isn’t. Let’s just say your future self paid for it. This saves me from being concerned about charging too much, all the time.

Also, I’m just getting started/a newbie on the grand scheme of things, and appreciate the inputs on where I need to improve.
 
Last edited:

Users who are viewing this thread

Back
Top Bottom