Daisy the 80: LSX376 Poverty Pack(ish) build (7 Viewers)

This site may earn a commission from merchant affiliate
links, including eBay, Amazon, Skimlinks, and others.

Joined
Oct 21, 2021
Threads
28
Messages
347
Location
Pinckney, MI
I've been meaning to throw up a build thread / adventure documentation for a while on this truck. I figure now's as good a time as any to knock it out!

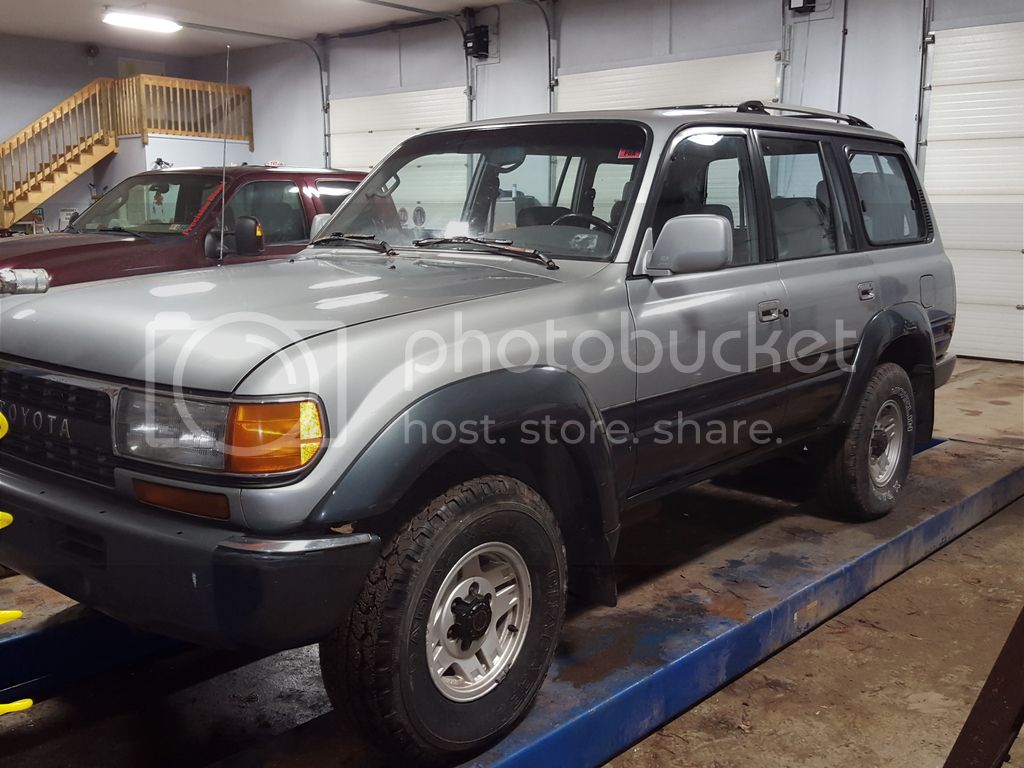
In November 2023 I purchased this 80 from @Stoshu.

It was an 6.2L LS (L92) swapped 1991 Cruiser that drove well, but needed some love.

I added a few things from my other 80
  • Bowfin rack
  • RCV axles
  • Drawer system
  • Dual battery / RedARC system
  • TuffStuff Alpha Roof Top Tent
  • Wireless Carplay head unit
  • Stock 16's / 35" KO2's

I also did a lot of troubleshooting a some swap issues
  • Corrected the PCV system
  • Tweaked the MAF location to read more accurately
  • Added a Wide Band O2
  • Started from scratch with the tune
    • Previous tune had all fuel trims disabled
    • Previous tune had all Knock detection disabled
My son (5 at the time) was into Star Wars at the time, and renamed it the Millennium Falcon (AKA: The fastest hunk of junk in the galaxy) due to it's worn silver exterior and monster engine.

Once I got it running right, we took the Falcon on a bunch of adventures!

Friends-giving 2023, out first outing! Rushed to get a hitch setup to haul my teardrop, and basically ran it as-is. Camped the weekend on the Manistee River, down some forest roads.
1748457251511.png


Hocking Hills State Park, New Years 2024. Weekend camping with friends, shaking down the power system and cold weather setup.
1748457698882.png


Snow Wheeling, Northern MI Jan, 2024
1748457832267.png


Winter Romp Feb 2024 (OH, WV, MD, PA). Some pretty good wheeling, a few hundred miles of dirt, and 5 nights of camping.
1748458058032.png


1748458176461.png


Continued....
 
The Romp was hard on the truck. The wheel flares took a few good hits, and I decided that I wanted to go flareless.
1748458809553.png


Shot up north to catch the Northern Lights on Mothers Day 2024. We had to drive down into the dry lake bed of Wixom Lake to get some cool shots. I also swapped over to the Tundra / Sequoia positive offset wheels that were on the truck when I bought it. They looked perfect with the narrow no-flare body.
1748458960017.png

1748459020243.png


Continued...

1748459068413.png
 
Joined up for Cruise Michigan 2024 and met up with some local Cruiser owners.
1748459508297.png


1748459528308.png


We spent the summer camping most weekends, exploring the Manistee National Forest and other parts of Northern Michigan
1748459935516.png


Around this time I also cut a deal with a buddy of mine. I would swap a project truck I had (08 Envoy Denali, 5.3 LS with a Truck Norris Cam, Headers, and a good tune) for a paintjob on the Falcon. My plan at the time was to duplicate the stock Silver paint, getting rid of the two-tone.

In August 2024, we attended the Keweenaw Overland Adventure Retreat (KOAR). It's held in Copper Harbor, the northernmost point of Michigan at the tip of the Keweenaw peninsula, and we've been attending for years.
1748460151995.png


1748460197335.png


Continued...
 
With KOAR in the books, it was time to prep the truck for our biggest trip so far. We drove from Michigan to Arkansas to attend the Rendezvous at the Ozarks event.

1748460771108.png


Camping in some Illinois corn field
1748460807285.png

The next night we got an amazing northern lights show, all the way down in AK!

1748460941308.png

1748460960262.png


1748460976543.png
 
We went on to tackle some pretty good wheeling in the backwoods of AK.
1748461033644.png


1748461086885.png

1748461144957.png


After wheeling for a couple days, the truck started to throw some airflow related DTC's. The Ozark dust had completely clogged the air filter.

1748461220799.png
 
With the year's planned trips complete, it was time to start the paintjob process!

We were already committed to do a huge 3 week trip to Newfoundland in June 2025. The truck had to be done, shaken down and ready to go for that trip.

I wanted to do a simple re-spray in the stock base color, and avoid doing jams and other areas. My plan was to avoid having to completely tear the truck down. I knew I didn't have the time to pull that off.

Once I started really looking close at things, that wasn't in the cards. I found a ton of little things that added up to a much bigger job than I wanted.
  • The bottom seams on three doors were beginning to rust
  • The passenger floor was rusty, and getting soft
  • The front valance was damaged and needed to be replaced
  • The fuel door was damaged and needed replacing
  • Sunroof was leaking from cracked drain tubes


With all the little things adding up, I decided to make this a much bigger project, free time be damned!
  • Full disassembly
  • Sunroof Delete
  • Welded flare holes
  • Deleted rear wiper / washer
  • Add all non-sunroof truck roof reinforcement bars
  • Glass-out repaint in 045 Toyota White
  • 100% new rubber seals, window runs, etc...
  • Second Skin sound deadening / thermal insulation
  • New window regulators
  • New lock actuators
  • Aussie door panels
  • Radius Fab Snorkel and Airbox
  • Quad headlights / new Grill
  • Fresh powdercoat on bumpers and sliders
  • New trailer hitch, built into the rear frame crossmember
  • New headliner
  • New carpet
  • Delete 3rd row brackets
  • Tailgate storage
  • Window tint (Glass out)
  • Poverty Pack trim (Blacked out mirrors, Chrome Door handles, Chrome belt molding)
Obviously that was WAY too much work to accomplish, so why not toss a NEW ENGINE at it too.

The 6.2L L92 that was in the truck had around 220k miles on it. It was tired, it leaked, it ticked, it burnt through a quart of oil in 500 miles. With Newfoundland on the horizon, I wanted to freshen it up. I originally planned to rebuild the current engine. I wanted to delete the VVT system with an LS3 cam, and refresh the engine. I decided that because the engine was 10.5:1 compression and only ran properly on Premium fuel, I wanted to swap to some dished pistons and build it to run on 87 at ~9.5:1 compression. Premium fuel is less available on the island (and other places I plan to travel to, Baja, etc...) so I wanted to avoid having to run it.

With that build in mind, I started collecting quotes, picked a machine shop, and joined the waiting list. It was going to be really tight to get the engine done, and in the truck before spring.

A couple weeks later I ran across an ad for an LSX376-B8 for sale. This variant of the LSX has the "Bowtie" block (Reinforced, revised oiling pathways, longer sleeves, improved in all the best areas) and is 6.2L, non-VVT LS3 cammed, forged piston, and 9.0:1 compression from the factory. They're primarily build for boosted applications, and are warrantied from GM to 8lbs of boost. All of my L92 accessories, intake and exhaust would bolt on, and the tune should be pretty close, since the heads and displacement are the same.

The total cost for the LSX was going to be about the same as my engine build, and this is a fully GM built long block, with a warranty, nearly exactly what I wanted to build. I jumped on it and had an engine dropped off in the garage the next day.

1748463122031.png


1748463209118.png


1748463400967.png


The only real downside I see to the LSX based engine is weight. The long block weighs about 40lbs more than the iron block LS, and 120lbs more than the aluminum block I was running. In both cases, I think the total weight is less than a 1FZ, so I figured it would be ok.

The holiday season got crazy, and progress slammed to a halt for a couple months.
 
With Thanksgiving, Christmas and New Years out of the way, it was time to start wrenching.

My plan morphed to:
  • Swap the engine
  • Shake down the engine
  • Start prepping for the paint work
1748463683555.png


1748463709253.png


1748463742705.png


There were really no surprises, and the engine dropped in after a few nights of wrenching after work!

The tune was actually a lot closer than I expected it to be, and I started driving it to work for a few days to put the 50 / 500 break in miles GM calls for. The first two oil changes were perfect, with nothing unexpected.

The new engine felt GREAT. It had more power everywhere than the tired L92. Fuel economy seems unchanged so far (I'm currently 4k miles in). It runs on 87 octane, towing my teardrop, with ZERO KR, even lugging up a hill in 6th.
 
With the new engine going strong, let's test it out!

We joined some friends for a snowshoeing / camping trip at Tahquamenon Falls in the Upper Peninsula. Nothing like an 800 mile road trip, towing a trailer, with a freshly broken in engine.

We made it up and back without a single hickup. The truck ran perfectly, and pulled like a dream! We even got 4" of fresh snow for the drive home.

1748464160217.png


1748464185295.png

1748464217154.png

1748464241160.png

1748464272243.png
 
A couple weeks later I ran across an ad for an LSX376-B8 for sale. This variant of the LSX has the "Bowtie" block (Reinforced, revised oiling pathways, longer sleeves, improved in all the best areas) and is 6.2L, non-VVT LS3 cammed, forged piston, and 9.0:1 compression from the factory. They're primarily build for boosted applications, and are warrantied from GM to 8lbs of boost. All of my L92 accessories, intake and exhaust would bolt on, and the tune should be pretty close, since the heads and displacement are the same.

View attachment 3916552

The LSX376-B8 looks like a big upgrade over your old motor.

The LSX376-B8 comes with a 6 bolt block but not 6 bolt heads?
 
The LSX376-B8 looks like a big upgrade over your old motor.

The LSX376-B8 comes with a 6 bolt block but not 6 bolt heads?
I wouldn't say it's a huge upgrade over a good running L92, but mine was very tired.

Yeah, the block is setup for 6-bolt heads, but comes with 4-bolt in this configuration. They also make an LSX376-B15, designed for 15lbs of boost, that comes with the LSX 6-bolt heads.

-Rob
 
With the new engine running great, I wanted to switch up the tire setup as well. I loved the stance on the 17x7.5 ET15 Tundra wheels with 35-12.5-17's. I found that a set of 17x8.5's ET0 with 255-85-17 would put the outside of the tire exactly where the current setup was, but give me a nice tall / skinny tire look.

I picked up these Nomad Avro's from MUD, and went with the Baja Boss 255-85-17. The math worked out perfectly and the stance is exactly what I was looking for!

1748531329259.png


1748531361760.png


1748531421124.png


1748531456371.png


1748531491832.png
 
Now it was time to make a big choice. I had to have the truck in a good state for our trip in June, and as it stood, it was ready to go. I could either leave it well enough alone, or, tear it to pieces for paint.

After consulting my paint guy, wife, and looking at the parts I'd need, I decided to go all-in on the paint / body work.

First step was to evaluate the issue in the passenger floorboard area. The heater core has been leaking for a while, leaving a lot of moisture under the carpet. I knew there was a soft spot, but I needed to see how bad it was.

Ok, a little worse than I thought, but not bad.
1748532240959.png


Let's keep hammering at it until I find clean metal... Up into the footwell, and back along the rocker... Ok, that's a little worse.

1748532315578.png


Time to start cutting. All of the rusty metal was cut out, spot welds were cut, and layers were separated. All in, it was a lot worse than I had planned...

1748532403481.png


1748532437389.png


At this point I started looking for a floor cut to replace a big section of the floor. I ended up getting a good cut from a MUD member, and patched in all of the bad areas with clean OEM metal.

1748532964825.png
 
Thing start to get a bit out of order here, since I was working on 10 things at once. I'll try to keep specific projects grouped together.

Next up, I committed to deleting the sunroof. Mine had cracked drains, which leaked water into the roof cavity every time it rained. I decided if I was dropping the headliner to fix that, I'd be ripping the whole thing out.

Before I started, I secured a set of non-sunroof headliner bows, as well as ordered the roof bracing that exists on the non-sunroof trucks. See my thread here for more details on that.


The sunroof was removed, and a sheet of 16ga steel was cut to fit the hole perfectly. I slowly welded both the top and bottom seams, trying to keep the panel as cool as possible. Then the internal rim around the sunroof was cut out, and the stock roof bows were installed. Some of this work was done after paint, due to parts availability / timing.

1748541329913.png

1748541384740.png


1748541414472.png
 
With the floor patched and the sunroof deleted, I got to work on the rest of the body.

Welded up flare holes
Deleted rear wiper / washer
Resealed drip rails
Replaced 3 doors due to rust along the bottom seams
Replaced front valance
Removed every nut, bolt, clip, trim, etc... that connects to the body.

1748541864902.png


With the body stripped, it was off to paint jail March 21.

1748541926355.png


1748541955017.png
 
The plan for paint was a full color change to 045 White.

Once the truck was out of my hands, I also decided to have the interior sprayed with Second Skin sound dampener, with the hope of cutting the drone down a little without having to quiet down the exhaust note.

I also had finally received the Radius Fab snorkel kit and airbox after a 3 month wait. Those were sent over to the painter to be installed before spraying.

One of the things I noticed on the truck during tear down, was that the rear crossmember (where my hitch bolted) was rotted out. The Trail Tailor bumper covers that spot, and holds most of the load of the trailer, but I decided I wanted to fix it anyways.

I have a spare (RHD) 80 series chassis sitting around for a future project, so after confirming the crossmembers were the same, I started modifying it for an integrated, low profile hitch. My plan was to build the hitch on this chassis, and move it over once the truck was back from paint.

1748542527304.png


1748542553008.png


1748542571606.png
 
Finally, almost two months later on May 18, it was ready!

I picked up a uhaul dolly and headed over with a pile of parts. The plan was to install door seals, latches and handles in order to haul the truck home safely without damaging the new paint.

1748542971132.png


1748542996916.png


1748543020423.png


After a 100 mile run, she's home!

1748543337240.png
 
So far it's been a thrash putting things together as I have time. I started with the rear of the truck, and moved towards the front.

The rear hatch and tailgate are completely assembled. The only thing left is the rear glass, and that will be done by a professional after the headliner is in (More on that later). I sourced all new badging, including the Aussie spec part time 4wd badge.

1748543695222.png


1748544166735.png


The front end is completely assembled and almost ready to go. I sourced a new grille (complete with LSX badge to cover the three "Turbo" badge holes), mostly OEM quad's, and alibaba corners. The headlights are fully installed and tested. I also installed the freshly powdercoated bumper. The only open item is to complete the relocation of my winch controls. I tucked them under the valance, cleaning up the top of the bumper by quite a bit.

1748543850507.png


On the interior, I have three out of the four doors completely assembled, including glass. Everything got new or cleaned up regulators, seals, window runs, vapor barrier, etc... I'm also installing the Aussie door cards with chrome Poverty Pack belt molding.

The biggest hold up I have today is the headliner. I purchased an FJ80 (no sunroof) headliner from a manufacturer called Headlinermart. It seems to be a great quality piece, but they forgot to sew on the front A pillar fabric. They are sending a corrected headliner, and I expect it to arrive this weekend.

With the headliner installed, I can move onto the windshield and back glass, and get this thing back on the road!

Stay tuned for live updates....
 

Users who are viewing this thread

Back
Top Bottom