2003 Coleman Taos build up (1 Viewer)

This site may earn a commission from merchant affiliate
links, including eBay, Amazon, Skimlinks, and others.

Joined
Oct 2, 2004
Threads
9
Messages
200
Location
PHX AZ
Website
www.robinhood4x4.com
Well, I guess it's about time I posted this build up thread on mud since I think I'll get better feedback from you guys than the regular popup forums. This is a copy and paste from those forums.

Back in October of 2011 we picked up this Coleman Taos from craigslist.

IMG_9796s.jpg


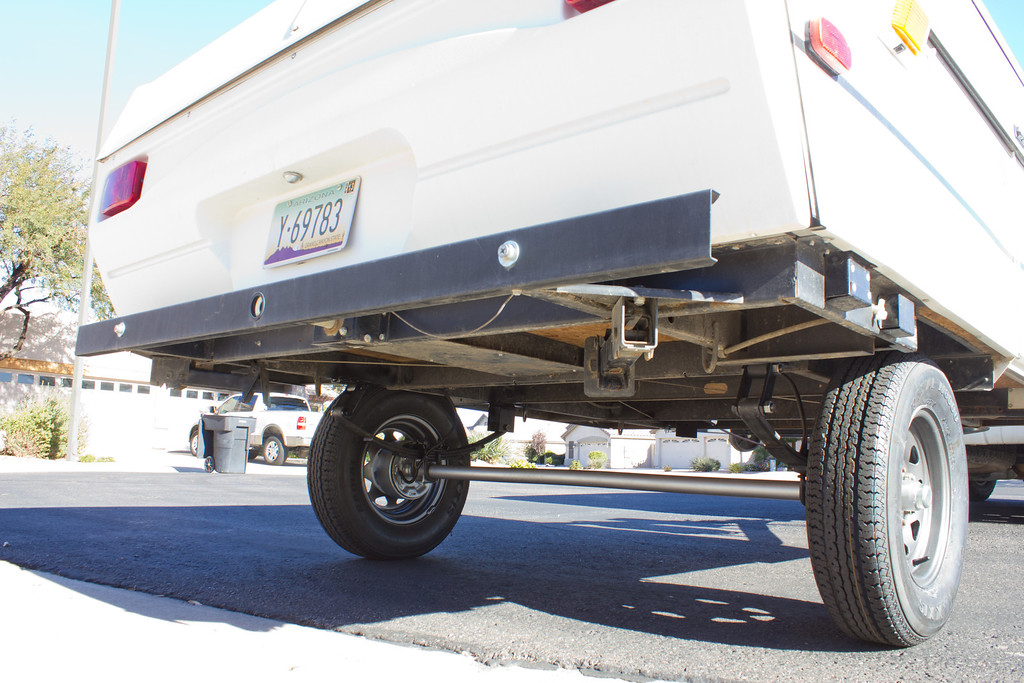
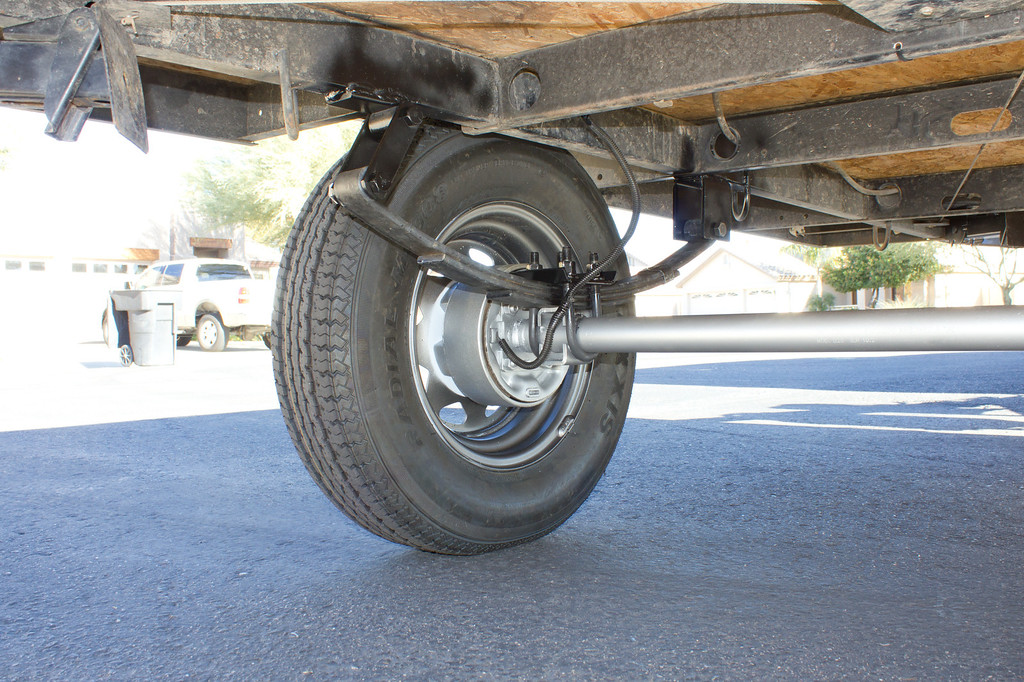
It's pretty much the smallest modern camper made which is exactly what I wanted for the trails. The previous owner did a SOA conversion to give it a small lift. As it sits now, I have 1.5 feet of clearance between the ground and the frame.

IMG_9798s.jpg


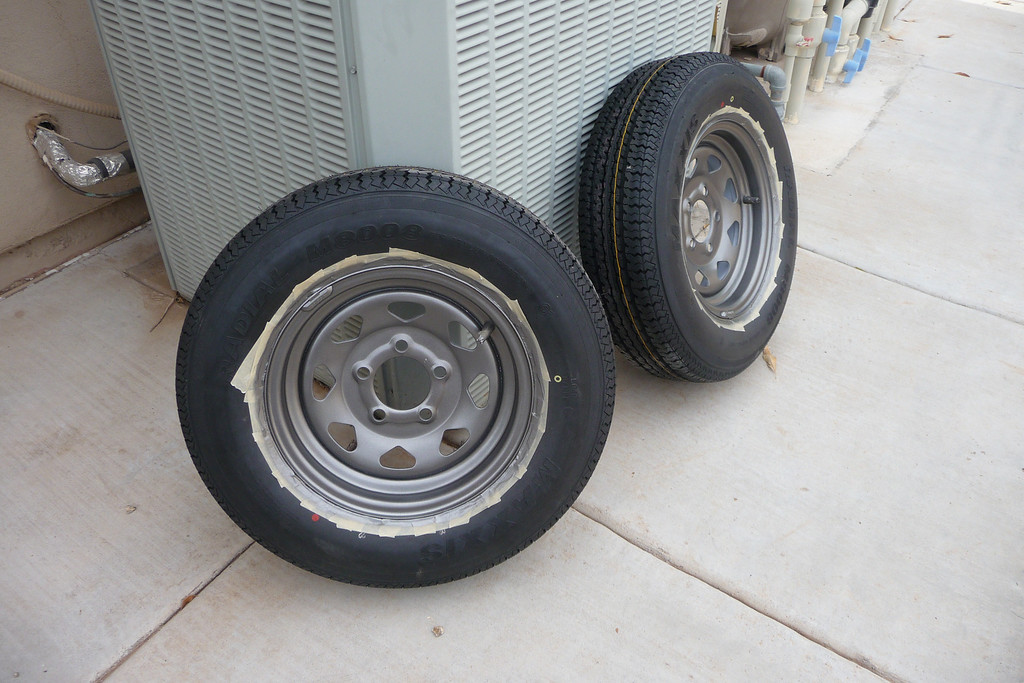
I'll probably end up doing a couple inch block lift and maybe put bigger car tires on. It also definitely needs armor.

2003Taos_entryclosed.jpg


Other possible mods include a larger water tank (existing is 5 gallons), water heater, shower, electric water pump, propane heater, residential wood flooring.

Here's the interior:
2003Taos_inside1.jpg


2003Taos_inside2.jpg


It'll be a challenge to figure out where to put everything, but I think I can do it.

Oh, and the ruffled curtain hanging thingies have got to go.

One last pic of the back.
IMG_9801s.jpg
 
Then, after about a year of camping with it, the mods really started up.

February, 2012.

The first thing that had to be done was figure out the toilet situation for the wife. Thetford makes a toilet that fits perfectly in the little storage area by the door.
2003Taos_inside2.jpg


But me being me, I couldn't leave well enough alone and had to have the bigger one so I wouldn't have to worry as much about extended camping. So in order to fit the bigger portipotty in the same space, the plan was to make the whole cupboard removable.

Well, the flimsy wood and particle board structure wouldn't repeated removal so I had to beef it up some. I welded up a steel frame and bolted everything together with (54) 6-32 screws. :D
IMG_1403.jpg


It fits perfectly.
IMG_1405.jpg


P1090266.jpg


P1090267.jpg


This baby is so strong, you could almost use it for a stand alone chair!

I'm not sure what the next mod will be, but I need to install a Wave heater, which is like a mister buddy, but much bigger. I also have an idea to fit a shower in there too. Before that, I think the priority will be to add an electric water pump, real sink faucets, and a water heater.

Water storage tanks are expensive though, both fresh water and grey water tanks.

I know, not the sexy mods you were thinking of, but first things first.
 
The major build started last year in December.

The first priority was new tires because I think the old ones were the original tires. Since everybody on the internet says trailer tires suck and they all blow out, I was bound and determined to get some LT tires under there. Here's what it would have looked like with my 30" stock tires off the 4th gen.

i-ZMD9hs7-XL.jpg


i-qxn3Jt7-XL.jpg


That would have taken a lot of work to get those things under there. The smallest LT tire I could find were 26" tires and even those would have been a stretch. Not impossible, but there was a strong possibility of needing to cut into the frame and outer skin for clearance. Reluctantly, I went with plan B, which was a set of Maxxis tires, which have a relatively good reputation for a trailer tire. This is where the second problem came in. The smallest tire they make is a 24" tire. Well, this would require larger wheels and about 1" more lift. What pushed me over the edge, was looking at the spring hanger welds. It must have been training day when they made my trailer because my little miniature schnauzer could have done better welds than whoever put mine together.

i-r3r4nVW-XL.jpg


So I decided I would upgrade the suspension and use 1" taller hangers and shackles. Oh, and I found out my axle is actually a 2200lb axle, instead of the sticker that said 1750 lbs. It turns out the sticker was probably put there by Coleman because either the springs, wheels, or tires weren't rated for 2200 lbs.

Then the surgery started.

Here's one of the hangers cutoff. Like I said, the welder must have been new, or something.
i-bXRjM25-XL.jpg


Here's another hanger. They even blew a hole through the frame!
i-PHvbXjP-XL.jpg


Another reason it was a good idea to re-do the suspension was because the previous owner simply flipped the axle under the springs, but turned the axle upside down. This axle has camber to it, meaning that when it's loaded, it's supposed to flex flat. Well, the shop that did it, reused the ubolts and even stripped one of the nuts. The axle was being held on by 3 out of the 4 U-bolts and they were all bent to hell.

That's as far as I got with the suspension, so on to the new wheels and tires. Those came in sooner than expected and because I had some left over wheel spray paint from the miata wheels that I never painted, I decided to go blingy. I painted the trailer wheels a metallic silver/gray, kinda like teflon color.

i-kW28MFh-XL.jpg

i-MKfdC2k-XL.jpg


Here's a comparison of the size:
i-GZ83zT5-XL.jpg

i-q33RCfk-XL.jpg


And here's what it'll look like when it's done:
i-9hV5Swh-XL.jpg


Here's a teaser of phase 2:
i-btx5ST5-XL.jpg

i-TdFp2hJ-XL.jpg

http://www.amazon.com/Light-Heavy-Offroad-Trailer-degree/dp/B008CSHRL2/ref=?ie=UTF8&m=A7RNQ92KM0URZ
 
Keep in mind, this was all posted in real time when I was working on it in Dec, so the dates below are off a little.

In the last episode, we left off with the axle removed and the hangers shaved off. On saturday, I started welding on the new perches to the correct side of the axle for a flip, but as I got further into the welds the welder started acting up and giving me really porous beads, as if it weren't getting any gas. It was also not feeding the wire very smoothly. Finally, I figured out that the liner was bad which was causing too much friction which caused the wire at the feed to buckle and make spaghetti. One of the strands of spaghetti must have hit the knob which keeps the gun attached to the welder which in turn allowed the gun/hose to come loose, preventing the gas from reaching the end of the gun.

So on Monday, I headed to the welding store and got a new liner. It feeds much better now, better than it has in a few years. I no longer have to keep the hose perfectly straight and the beads are perfect once again (at least within my abilities).

Today, after measuring 3 times and welding once, I got the new hangers tacked to the frame. I think I have the axle to within 1/16" square, whereas I'm pretty sure it was originally off by about 1/4" from the factory. For the next few days I'm just going to keep it tacked while I mull over everything I did and make sure everything is correct, before welding it up completely. Oh, and Coleman did not weld up the original hangers like the instructions from Dexter say to. They welded only the sides of the hangers, while dexter says to weld around the front and back too.

i-qWnGWFb-XL.jpg


Again I'm going blingy by painting the axle silver.
i-mdLcJvp-XL.jpg


Here's the new perch welded on.
i-8LV39XJ-XL.jpg


Stay tuned for the next episode.
 
Sometimes I hate the fact that I have to do everything right, otherwise I could have had this done a long time ago. Here you can see where I beefed up the new U-bolt plates. They were originally flat like the old rusty ones, but as you can see, the old ones were all bent to hell. Well I couldn't have that, so I welded on some stiffeners. On top of that, I couldn't have rusty stuff under my camper so I also painted everything I could (you'll see this theme).
i-fHpNbFf-XL.jpg


Before I welded the spring perches to the frame, I realized I had to pull out the wiring from the frame otherwise they'd get burnt to a crisp. That was a big pain the butt because some of the wires were kinda big and didn't want to be fished out. Plus, there was a plethora of those stupid crimp on wire splicers that had to be pulled out too. Did I mention I hate those things? No wiring of mine will have those because all they do is cut the strands of wire and introduce a spot for moisture to get in and cause corrosion. Those things went into the trash and out came the soldering iron. Every connection was soldered together, then 3-4 coats of liquid electrical tape were applied, then heat shrink tubing or electrical tape was used to cover it. Here's a shot of the axle under the trailer and some of the wiring hanging down for the brakes.
i-cCxWkVf-XL.jpg


Fast forward to today, where I finally got to hook it up and take it for a spin! Here's how it sits:
i-dChMv2T-XL.jpg


i-3qP8kd2-XL.jpg


i-zvTqXrn-XL.jpg


It's a little nose low which is surprising because I even flipped over the ball on the hitch to raise it up some. Oh well, nothing a little lift won't fix. Here's what it looks like underneath:

i-xwCrpLn-XL.jpg


i-4wpchNC-XL.jpg


i-PgQTVMZ-XL.jpg


In that last picture, it looks like I got a little too generous with the brake control. I was testing them out because before one of them wasn't working, so after this rewire, I wanted to heat them up a little to see if they were both working now. Looks like they are. By the way, these little 7" brakes don't do a whole lot. I can feel them slowing the truck a little, but they don't come anywhere close to locking up. The bigger tires don't help any either.

You can also see my wiring job. No exposed wires hanging down from crimp splices anymore. Everything zip tied, protected and strain relieved properly.

Here's my blingy wheels:
i-Q4VZRnZ-XL.jpg


The step in height is now 25" so one of the next projects will be steps (the previous owner ripped the off before he did the axle flip).
i-NP49psw-XL.jpg


Here's the tire clearance. Now that I look at it, I think I could have gotten the 26" LT tires to fit! Dammit. Oh well, if these things blow, off to craigslist they go.
i-LHKzXhh-XL.jpg

i-Cqj8LFv-XL.jpg


Up next will be figuring out a way to mount the now larger spare tire under the tongue area since it won't fit in the normal spot and also extend the corner stabilizers. I'll make a run to the steel place tomorrow, hopefully.
i-ffzxtHW-XL.jpg


So final stats:

24" Maxxis load range C tires
Suspension lift of 1.25"
Tire lift of 1.13"
Total lift about 2.4"
Distance from the ground to the bottom of the frame is 21.5"

Backing this thing up to my house tonight reminded me I really need backup lights. Anyway, this is only the beginning, lots more to come.
 
This will be a short update. Made a run to the steel place and got some supplies to extend the stabilizers.

Cut the steel.
i-8sBv7tS-XL.jpg


Weld 'em up.
i-gktbqRH-XL.jpg


You can also see the beginnings of a steel plate target I'm making for fun in the desert.
i-dw8bsmG-XL.jpg


Got done with the stabilizer extensions, but I fear the back ones are too long. I made them so that on level ground the stabs will be in the middle of their stroke, but it looks like they're too long to allow them to swing up and down.

i-4nD8nVX-L.jpg
 
Finishing up some loose ends with this phase of the project. Since the larger spare tire won't fit in the normal spare tire location I had to put it under the tongue. But since the nuts for the propane J hooks get screwed on from below, I had to come up with a different way of holding down the propane tank. Something else that was in the way of the spare tire was the propane regulator so that had to be moved too.

Starting with the J hook replacement, I bent up some flat stock in the shape of the original J hooks. Here, I used the vise and a big hammer to knock a 90 deg bend into the flat stock, then used another piece of flat stock to help create a nice sharp bend.
i-mxtVxTw-XL.jpg


Here's the finished product.
i-CkQ8Mfp-XL.jpg


Next came the mechanism to hold the spare tire to the tongue. Just a grade 5 bolt tack welded from the back to a piece of angle iron. The other pin is to help locate the bracket and the hitch pin is to hold the bracket to the wheel to make it easier to lift the tire up to the tongue.
i-rdjZQKS-XL.jpg


Here's a picture of everything installed.
i-LRZw7Vg-XL.jpg


You can also see the new bracket I made which moves the propane regulator higher, out of the way of the tire. I never did like how low that thing hung down anyway. All the hitch pins through the bolts prevent the wingnuts from backing out.

Overall views
i-LKZV35m-XL.jpg

i-9t7mZDg-XL.jpg


Now that I am truly done with the suspension phase, the next step will be to mount and wire the new LED flood lights.
 
I've been promising lights, and lights you shall have!

Last year I ordered these LED lights from amazon, but back then they were on sale for $22 each.
http://www.amazon.com/gp/product/B008CSHRL2/ref=oh_details_o02_s00_i00?ie=UTF8&psc=1
18 watts, 1350 lumens each. I intended to use 2 for backup lights and 2 for work lights mounted to the roof.

First things first, wiring. Or in this case, fixing the original sucky wiring.

The main breaker is this thing with exposed terminals.
i-hvPggNg-L.jpg


Seeing as how it still works, I didn't see the need in spending $20 for a new one, so I just wrapped it in heat string tubing. Much better.
i-KZJKGsv-L.jpg


As for the light wiring, I ran it through the frame, but at every connection I had to make, I waterproofed it by coating it in several coats of liquid electrical tape, then heat shrink tubed it.
i-pCg2WjW-L.jpg

i-fzT4Mcf-L.jpg


For the reverse switch, I used a single pole, double throw switch which is wired to be On, Off, or Automatically switched on when I put the truck into reverse. I found a box at radio shack so I could waterproof all the connections and mount the switch in a protected area of the tongue
i-4L78c8K-L.jpg


Here's one of the LED backup lights
i-hVJMg2w-L.jpg
 
On to the roof lights. I decided to put the switch on the inside of the camper, just in case I wanted to turn on the lights when things go bump in the night outside.

This is the reason I hate those quick splice connectors. They cut through the wires which weaken the wire and could eventually break completely.
i-zTD5TzF-L.jpg


Properly soldered and self vulcanizing tape protected.
i-gGRQRcz-L.jpg


Here's the switch location, well within reach from outside the door.
i-B4SqzrX-L.jpg


To get the wiring up to the roof, I took a queue from the way Coleman did it and ran it through the seams of the canvas.
i-wDSXRH6-L.jpg

i-xDrBM2j-L.jpg


Here's how I mounted and sealed the lights to the roof.
i-DCSRxFp-L.jpg


With some scrap steel I had laying around, I made a backing plate to distribute the load of the nut
i-xfVRsSk-L.jpg


This is what it looks like on the inside
i-mmhjzmQ-L.jpg
 
And finally after all that work, it all pays off. Here's what the whole thing looks like.
i-29Vrb23-L.jpg

i-P2dBNGm-L.jpg


I guess you all want to see what they look like at night.

Backup lights only.
i-sZ4xCjF-L.jpg


Side lights only.
i-vvcqTJg-L.jpg


And both at the same time.
i-Rs2vh9h-L.jpg


I'm pretty sure I heard the Hallelujah song playing when I flipped the switch, despite being in the middle of nowhere.
 
Very nicely executed sir! Looks very well done and clean!

-Daniel Kent
 
Great build thread.

You may want to consider a stronger axle with all the upgrades you have planned. Just my .02

I installed a max coupler on my pop-up this spring and that is definitely the best upgrade I've done so far. I was always afraid of the standard ball coupler popping off on the twisty stuff.
 
Holy smokes! Had I known these things could be built up like this, I wouldn't have refused the free one that someone was going to give me! Well done, and boy does it look very practical for a family of 5.

I've always wanted to bring the entire family with me when I go for my hunting trips. But these trips are usually in our cold (or wet AND cold) Canadian Falls and Winters. With something like this, I think the wife will be happy cos there's a furnace and she can remain warm and toasty whilst I take the girls out to harvest some game.

How durable is it on the backroads? Tried it on hard gravel and washboard yet?
 
I find it interesting that the suspension lacks shocks, very cool. How does the trailer behave while bouncing around on uneven terrain? Does it tend to keep oscillating or does the body settle down rather quickly?
 
Last edited:
Awesome work all around! Going to use your propane hold-down idea for sure. Love the lighting. Enjoy!
 
I find it interesting that the suspension lacks shocks, very cool. How does the trailer behave while bouncing around on uneven terrain? Does it tend to keep oscillating or does the body settle down rather quickly?

A trailer that light doesn't need shocks. I am building a custom trailer for a guy who insisted that I put them on because his buddies are going to go crawling under it to ooh and ah. I called the Rancho Shock technical support and the man said, "what on Earth for?" Then suggested a Monroe shock.
 
I'll disagree, any suspension should have shocks. If the trailer doesn't appear to need shocks then the spring rate is far too high for the weight carried.
 
Sorry, I haven't been checking this thread that often and didn't see the replies.

Thanks everybody.

The longest washboard road I've taken it on was probably about an hour round trip at 30mph average and 40-50 mph max speed. Over the course of the 2 years I've had it, it's definitely showing signs of vibration problems like interior screws and staples backing out, but nothing too major. As that happens I just replace things with much beefed up machine screws or a lot of wood screws glued in place.

Off road bumps don't seem to bother it much but I wouldn't want to be riding on it either. Handling wise it's fine and I never even know it's back there. On road is the bigger problem because there's 1 or 2 big transitions to some bridges that are really uncomfortable and I can only imagine the amount of air it catches.

I think some kind of max coupler would be good because I see some damage to the ball already.

As for shocks go, the original springs were slipper springs which mean the kind that don't have shackles and they just rub on the frame. This provides the damping and didn't need shocks. I think with this type of suspension shocks are needed, especially for off road use. Even the guys at the trailer parts shop recommended them once I told them what I'm going to use the trailer for.

Here's a trip to Sedona I took earlier in the year. As usual, the pictures don't do the trail justice.

i-ktDWRtX-L.jpg


i-3jsTJrz-L.jpg


i-4Q8q2Rt-L.jpg


i-8vg7rTK-L.jpg


i-ZPnvsZm-L.jpg
 

Users who are viewing this thread

Back
Top Bottom