I made a new front bar about the middle of last year. I took a few pics along the way with the intention of posting the build up on here at some point. There was nothing wrong with the old bar, it was just time for a change and I was looking for a new project to keep me out of trouble.
I spent a great deal of time scouring the inter-web for rear bar designs to garner new and different design ideas. With my research done and a firm idea of what I wanted, I got stuck into the build. Not long into it, I soon realised most of those wonderful grandiose ideas I had were thrown out the window and I just went with the flow. It took a $hit load of work in welding, cutting, grinding and painting but the end result was worth it.
Tools used were:
4in grinder
5in grinder
2 clamps
1 straight edge
a heap of 5in thin cutting dics
2 5in grinding discs
7 4in flap wheels
mig welder
about 2kg welding wire
1/2 bottle argoshield
2 saw-horses
an assortment of paint tins and boxes for support.
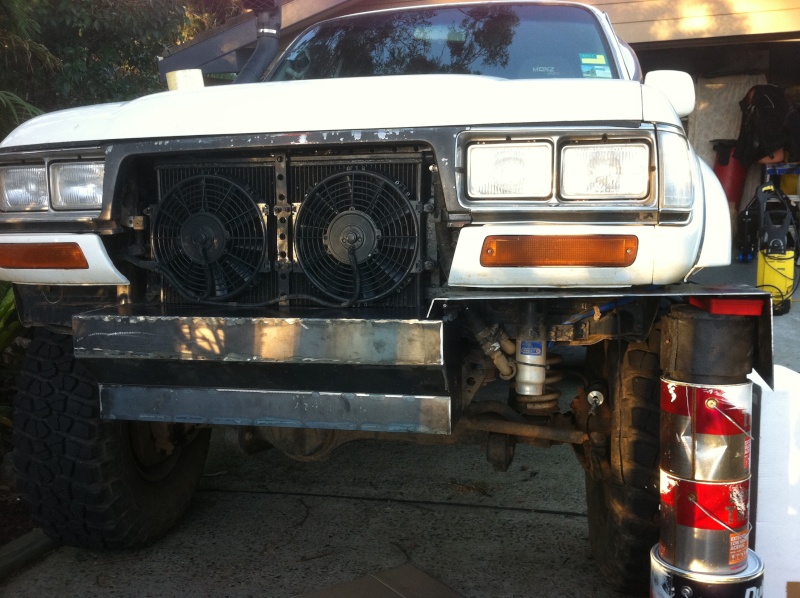
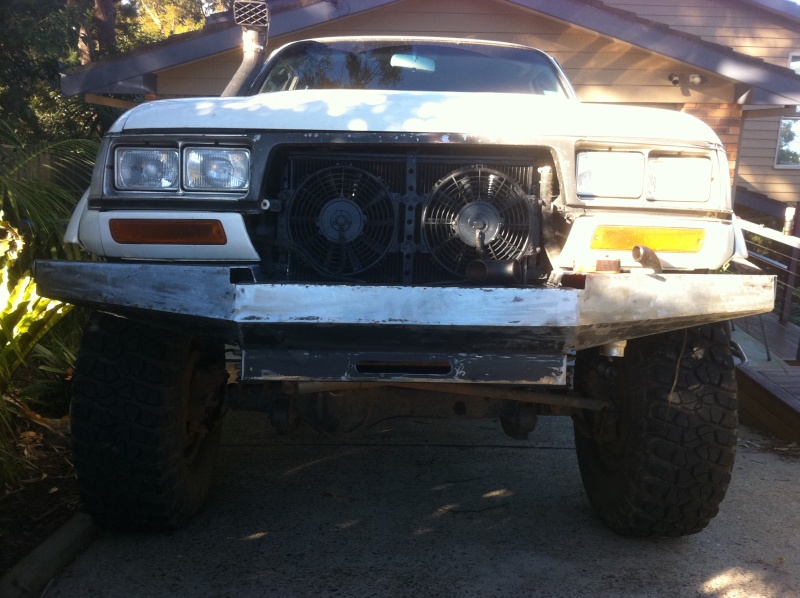
Blank canvas ready to go. Note I had already removed the centre section of the lower panel the blinkers are housed in. I then folded, welded and painted the remainder to finish it off. This was done to increase airflow through all the coolers and rads that are now mounted in front.
http://www.servimg.com/image_preview.php?i=365&u=14684539
I haven't used a winch for many years but still wanted this one to be winch compatible. I originally wanted to use 8mm plate for the winch frame but the steel shop was out of stock and I wasn't waiting for another weekend for the sake of 4 extra mm. So an off cut piece of 12mm plate it was. Funnily enough, it was the exact length I needed.
http://www.servimg.com/image_preview.php?i=366&u=14684539
The side mountings are 8mm plate. It bolts on using all the factory mounting points. What I haven't shown images of is the 6 x 65mm holes I drilled out of the 12mm winch plate - both for drainage and weight reduction. The final weight was 37.6kg
http://www.servimg.com/image_preview.php?i=367&u=14684539
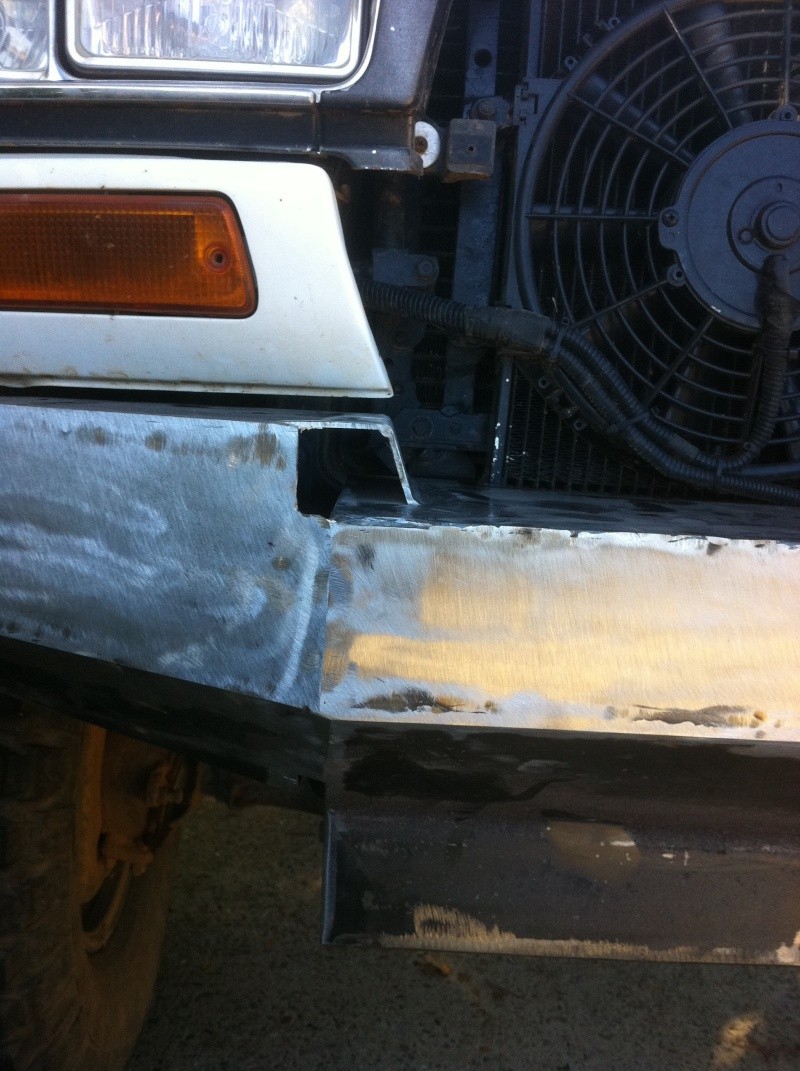
With the winch frame done it was time to wrap it up. I did this using 3mm plate. I bent it up by marking the fold points on the back (or front, depending which way you want the fold to go). I then clamped a straight edge along the line score along the line with a grinder. This gives you a perfectly straight line and a neater fold. On 3mm, you need the score about 1.5 > 2mm deep. Once it's bent into shape by hand and welded into position, you just weld up the score line. Once ground back and finished off with a flap wheel, it looks like a factory bend. Here, I've also started making the sides. Cardboard templates make life easy but keep in mind that after many years of offroad use and the odd repair, no two sides are rarely the same - so it may be necessary to make two templates. Note my high tech assortment of supports... patent pending
http://www.servimg.com/image_preview.php?i=368&u=14684539
Both side wings are on, again using the score, fold and weld method. Also, by welding the internal corners, you reinforce them and add thickness so you can round the external corners without weakening the job.
http://www.servimg.com/image_preview.php?i=369&u=14684539
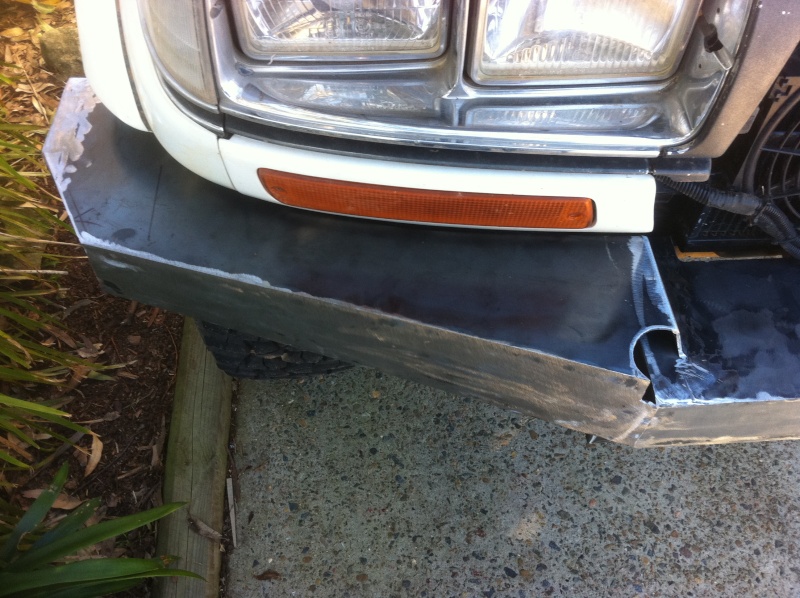
One design feature I wanted in the new bar was a little more protection on the front corners. I achieved this by extending the side wings about 30mm past the flare. Already this has proved to be a great idea after an intimate encounter with a tree and a 40deg side angle through some ruts.
http://www.servimg.com/image_preview.php?i=370&u=14684539
Here, I've cut the hole to recess the hoop into. I also spent some time trying to keep things symmetrical with existing, like matching the angle of the turn-down of the side wing / blinker panel. Only the observant ones really notice but I like retaining little details like that.
http://www.servimg.com/image_preview.php?i=371&u=14684539
I spent a great deal of time scouring the inter-web for rear bar designs to garner new and different design ideas. With my research done and a firm idea of what I wanted, I got stuck into the build. Not long into it, I soon realised most of those wonderful grandiose ideas I had were thrown out the window and I just went with the flow. It took a $hit load of work in welding, cutting, grinding and painting but the end result was worth it.
Tools used were:
4in grinder
5in grinder
2 clamps
1 straight edge
a heap of 5in thin cutting dics
2 5in grinding discs
7 4in flap wheels
mig welder
about 2kg welding wire
1/2 bottle argoshield
2 saw-horses
an assortment of paint tins and boxes for support.
Blank canvas ready to go. Note I had already removed the centre section of the lower panel the blinkers are housed in. I then folded, welded and painted the remainder to finish it off. This was done to increase airflow through all the coolers and rads that are now mounted in front.
http://www.servimg.com/image_preview.php?i=365&u=14684539

I haven't used a winch for many years but still wanted this one to be winch compatible. I originally wanted to use 8mm plate for the winch frame but the steel shop was out of stock and I wasn't waiting for another weekend for the sake of 4 extra mm. So an off cut piece of 12mm plate it was. Funnily enough, it was the exact length I needed.
http://www.servimg.com/image_preview.php?i=366&u=14684539

The side mountings are 8mm plate. It bolts on using all the factory mounting points. What I haven't shown images of is the 6 x 65mm holes I drilled out of the 12mm winch plate - both for drainage and weight reduction. The final weight was 37.6kg
http://www.servimg.com/image_preview.php?i=367&u=14684539

With the winch frame done it was time to wrap it up. I did this using 3mm plate. I bent it up by marking the fold points on the back (or front, depending which way you want the fold to go). I then clamped a straight edge along the line score along the line with a grinder. This gives you a perfectly straight line and a neater fold. On 3mm, you need the score about 1.5 > 2mm deep. Once it's bent into shape by hand and welded into position, you just weld up the score line. Once ground back and finished off with a flap wheel, it looks like a factory bend. Here, I've also started making the sides. Cardboard templates make life easy but keep in mind that after many years of offroad use and the odd repair, no two sides are rarely the same - so it may be necessary to make two templates. Note my high tech assortment of supports... patent pending
http://www.servimg.com/image_preview.php?i=368&u=14684539
Both side wings are on, again using the score, fold and weld method. Also, by welding the internal corners, you reinforce them and add thickness so you can round the external corners without weakening the job.
http://www.servimg.com/image_preview.php?i=369&u=14684539
One design feature I wanted in the new bar was a little more protection on the front corners. I achieved this by extending the side wings about 30mm past the flare. Already this has proved to be a great idea after an intimate encounter with a tree and a 40deg side angle through some ruts.
http://www.servimg.com/image_preview.php?i=370&u=14684539
Here, I've cut the hole to recess the hoop into. I also spent some time trying to keep things symmetrical with existing, like matching the angle of the turn-down of the side wing / blinker panel. Only the observant ones really notice but I like retaining little details like that.
http://www.servimg.com/image_preview.php?i=371&u=14684539