
Your definitely not 21 and your management now, so....
-
North American Clubhouses - East RegionCA.ON- SOTEC CA.ON- Upper Canada Land Cruisers CA.QC- Club TORQ CA.QC- Quebec Cruisers AL- DixieLand Cruisers AL- Hot South Cruisers FL- Florida Land Cruiser Association FL- Northwest Florida Toyota 4WD FL- Tampa Bay Land Cruiser Association GA- Pavement Pounders GA- Georgia Cruisers GA/FL/AL- Red Hills Land Cruiser Club GA- YOTA IL- Windy City Land Cruisers IN- Hoosier Cruisers IN- Indiana Land Cruisers KY- Kentucky Landcruiser MA/NH- Yankee Toys MI- Lake Michigan Land Cruisers MS- CottonLand Cruisers NC- Olde North State Cruisers NJ- Garden State Land Cruisers NY/CT/MA- FJNortheasters NY- Gotham City Land Cruisers OH- The Buckeye Birfield Syndicate PA- Keystone Cruisers PA- Steel City Land Cruiser Club SC: Land Cruisers: Charleston SC- Palmetto State Land Cruiser Association SC- Upstate Cruisers SC- Swamp Fox Land Cruisers SC- Low Country Land Cruisers TN- Appalachia Cruisers TN- Bluff City Cruisers TN- STLCA VA- Bay to Blue Ridge Cruisers VA- COVA CRUISERS VA/DC/MD- Capital Land Cruiser Club VA/NC- Mid-Atlantic TLCA VA- Star City Land Cruisers VT/NH/MA/ME Acadian Overlanders WI- Land Cruiser Legends WV- Mountaineer Cruisers
-
North American Clubhouses - Central RegionCA.AB- Oil Country Cruisers CA.AB- Rocky Mountain Land Cruiser Association CA.AB- Toyota Ghost Wheelers AR- Razorback Land Cruisers AR/MO- Ozark Mountain Cruisers CO- BookCliff Cruisers CO- Colorado Land Cruisers CO- Derailed Cruisers CO- Rising Sun 4WD Club CO/WY- Horsetooth 4 Wheelers Cruiser Club IA- Tall Corn Cruisers KS/MO- Tornado Alley Cruisers LA- Bayou State Land Cruisers LA- Louisiana Land Krewesers MO- Gateway Cruisers MT- 406 Cruisers MT- Big Sky Cruisers NE- Flat Land Cruisers NM- High Desert Cruisers OK- Green Country Cruisers SD- Dakota Territory Cruisers TX- Alamo City Land Cruisers TX- Bayou City Land Cruisers TX- Lone Star Land Cruisers TX- Lone Star Land Cruisers - Austin Chapter TX- The White Trash of the Elwood Chapter TX- Toyota Trail Riders
-
North American Clubhouses - West RegionCA.BC- Coastal Cruisers CA.BC- Okanagan-Similkameen Land Cruisers CA.BC- Peace Canyon Toyota Swamp Donkeys CA.BC- Calgary Chapter: Swamp Donkeys
CA.BC- Vancouver Island Cruisers AZ- Copper State Cruisers CA- Beach-n-Toys CA- Central Coast Land Cruisers CA- Central Valley Crawlers CA- Gold Country Cruisers CA- Inland Empire Cruisers CA- L.A. County Trailcrew CA- Mountain Transit Authority CA- Pacific Mountain Cruisers CA- San Diego Cruisers CA - Santa Cruz Land Cruisers CA- SoCal 80's CA- Southern California Land Cruisers CA- Toyotally Awesome Cruisers HI- Hawaiian Island Land Cruisers ID- Treasure Valley Land Cruisers NV- Battle Born Cruisers of Northern Nevada NV- Southern Nevada Land Cruisers OR/CA- Jefferson State Cruisers OR- Cascade Cruisers OR- Central Oregon Cruisers OR- Portland Metro Cruisers UT- Red Rock Cruiser Club UT- Wasatch Cruisers WA- Central Washington Cruisers WA- North Sound Cruisers WA- South Sound Cruisers WA- Spokane Land Cruisers
Navigation
Install the app
How to install the app on iOS
Follow along with the video below to see how to install our site as a web app on your home screen.
Note: This feature may not be available in some browsers.
More options
Style variation
You are using an out of date browser. It may not display this or other websites correctly.
You should upgrade or use an alternative browser.
You should upgrade or use an alternative browser.
Yotafun 00' 4Runner Build - Annabelle
- Thread starter YotaFun
- Start date
This site may earn a commission from merchant affiliate
links, including eBay, Amazon, Skimlinks, and others.
- Thread starter
- #42
Started to get the truck buttoned up, new stainless steel braided brake lines for the front:
I bled the brakes, filled the fluid, and took her out for a spin. So nice to have the 4.88 back, will roast the tires so easily if I power break it
The rear drums are scrapping the backing plates hard, so I will have to go through that as well.
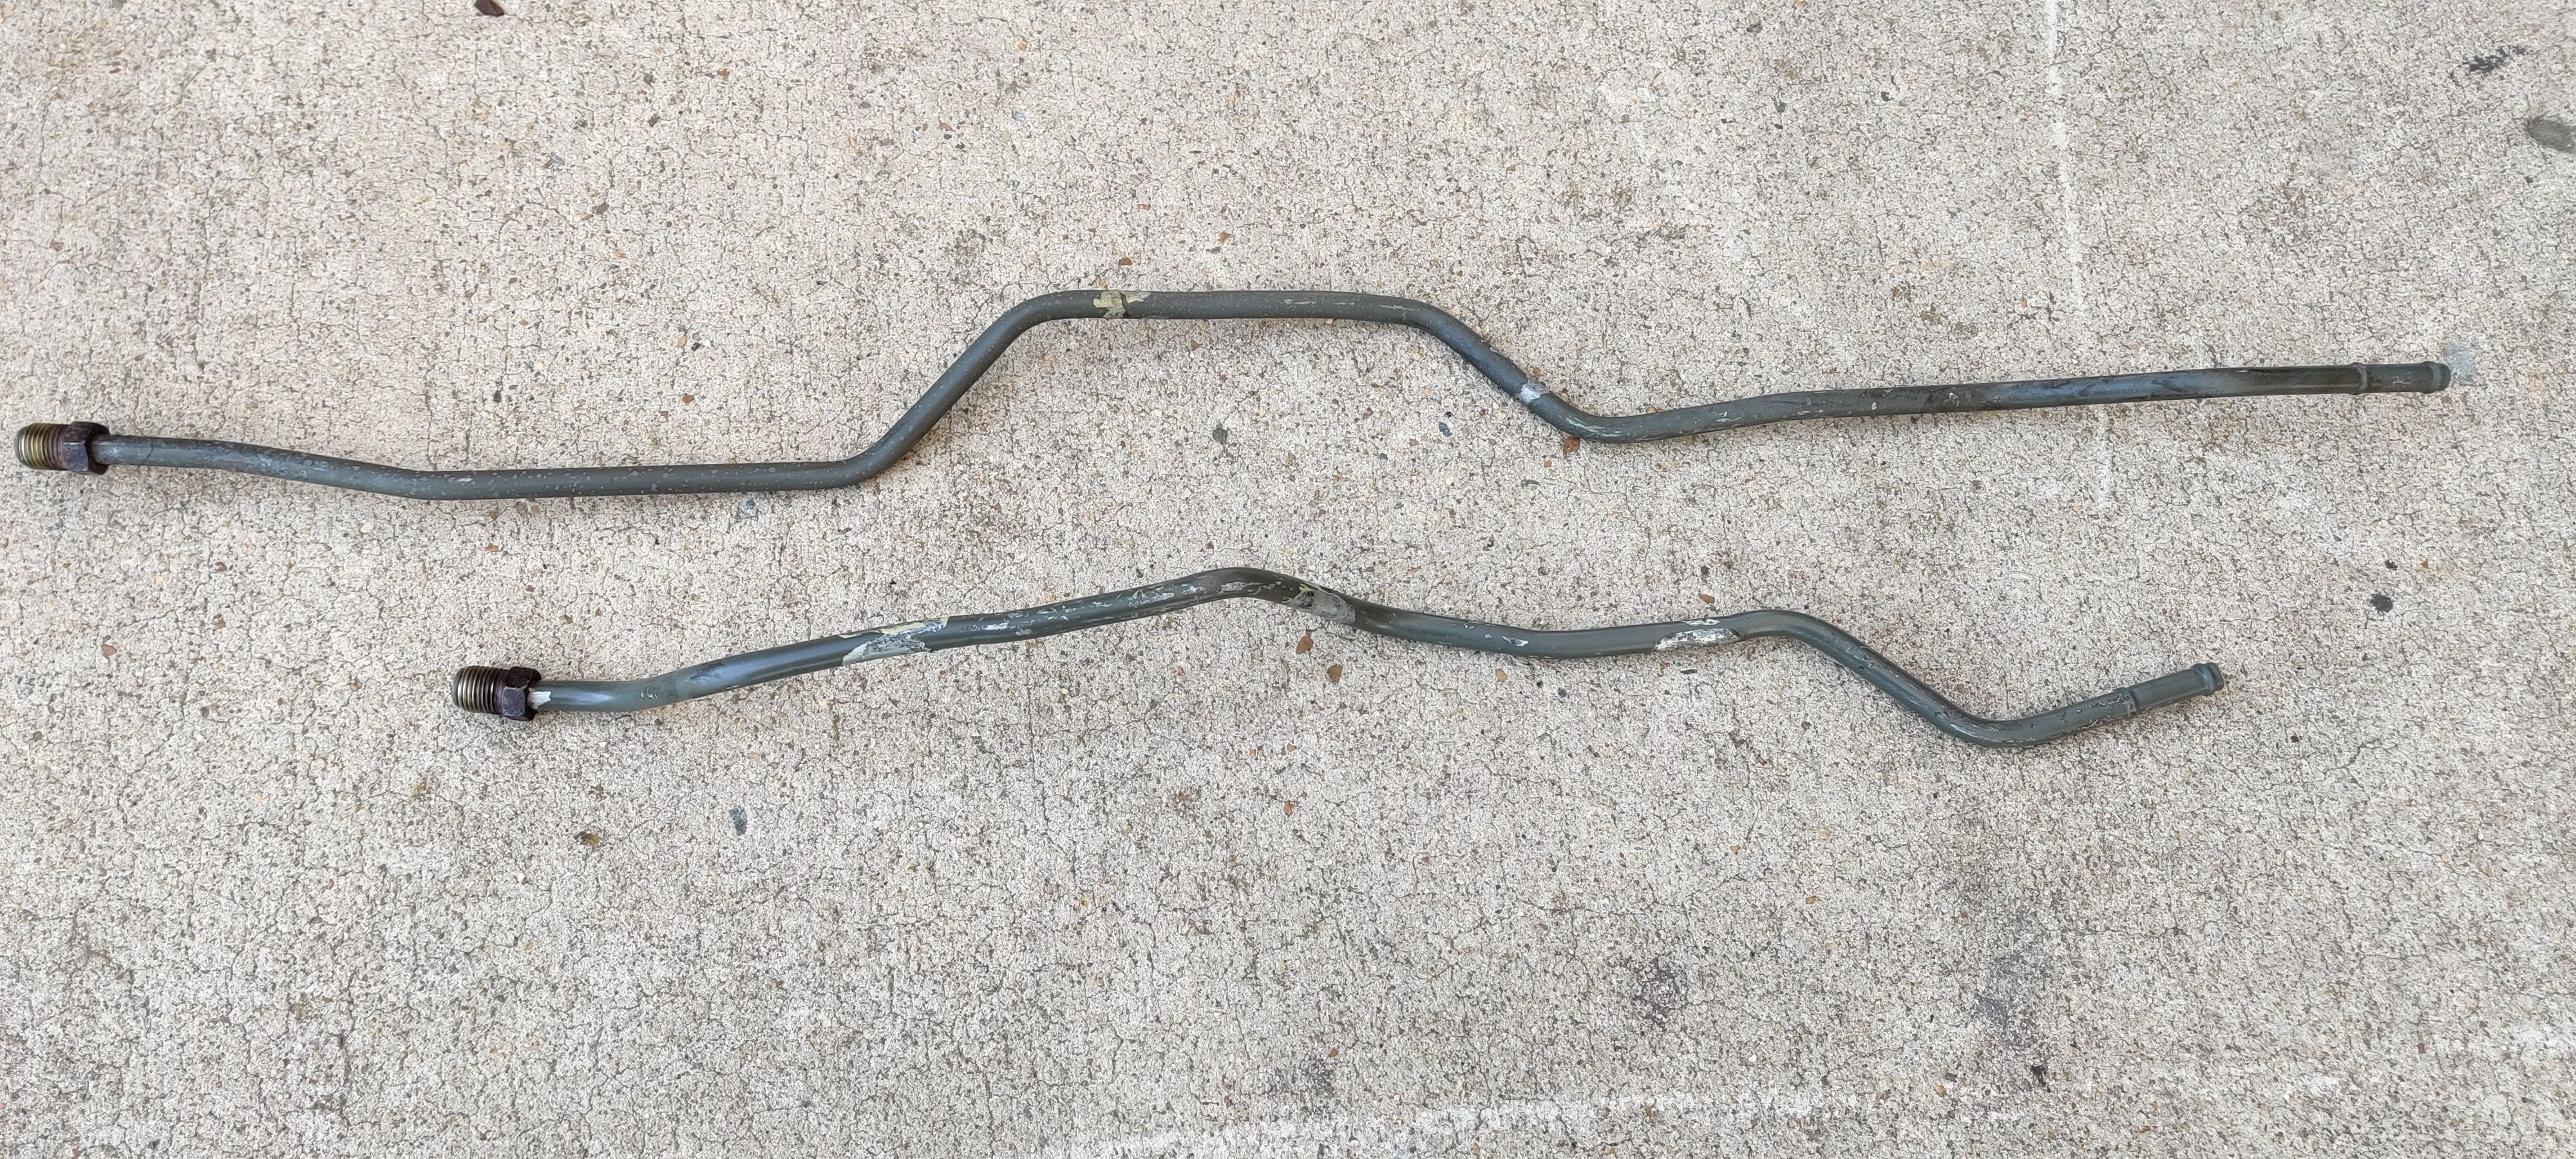
The fix I thought I had for the transmission cooler lines didn't work, I believe the hard lines are starting to seep through the rusted bits. So thankful I have a spare parts bin in the garage... I pulled the hard lines off the brown truck and gave them a clean up. Thank you coal country dirt. That with years of oil preserved these 23 year old lines! I am going to give them a few coats before I pop them into the silver 4Runner:
Another thing I noticed is that I had a vibration in the front end when in 4WD, I have the front drive shaft out currently and I locked the truck into 4WD to get the diff to lock in and got no vibration which makes me think it may be the drive shaft so I pulled the one out of the brown truck and will install it later:
For now I am done for a bit and let my body recoup.

I bled the brakes, filled the fluid, and took her out for a spin. So nice to have the 4.88 back, will roast the tires so easily if I power break it
The rear drums are scrapping the backing plates hard, so I will have to go through that as well.
The fix I thought I had for the transmission cooler lines didn't work, I believe the hard lines are starting to seep through the rusted bits. So thankful I have a spare parts bin in the garage... I pulled the hard lines off the brown truck and gave them a clean up. Thank you coal country dirt. That with years of oil preserved these 23 year old lines! I am going to give them a few coats before I pop them into the silver 4Runner:


Another thing I noticed is that I had a vibration in the front end when in 4WD, I have the front drive shaft out currently and I locked the truck into 4WD to get the diff to lock in and got no vibration which makes me think it may be the drive shaft so I pulled the one out of the brown truck and will install it later:

For now I am done for a bit and let my body recoup.
I see a mini truck case on the floor. Plans?
What are those five longer bolt/studs from? Not to connect a driveshaft I think......Started to get the truck buttoned up, new stainless steel braided brake lines for the front:
I bled the brakes, filled the fluid, and took her out for a spin. So nice to have the 4.88 back, will roast the tires so easily if I power break it
The rear drums are scrapping the backing plates hard, so I will have to go through that as well.
The fix I thought I had for the transmission cooler lines didn't work, I believe the hard lines are starting to seep through the rusted bits. So thankful I have a spare parts bin in the garage... I pulled the hard lines off the brown truck and gave them a clean up. Thank you coal country dirt. That with years of oil preserved these 23 year old lines! I am going to give them a few coats before I pop them into the silver 4Runner:
Another thing I noticed is that I had a vibration in the front end when in 4WD, I have the front drive shaft out currently and I locked the truck into 4WD to get the diff to lock in and got no vibration which makes me think it may be the drive shaft so I pulled the one out of the brown truck and will install it later:
For now I am done for a bit and let my body recoup.
- Thread starter
- #45
I see a mini truck case on the floor. Plans?
You know
crawl box eventually 
- Thread starter
- #46
What are those five longer bolt/studs from? Not to connect a driveshaft I think......
If you are referring to the ones next to the jack stands in the front driveshaft picture, those are extra bolts for the rear axle. When I picked up the axle housing and kept the hardware that attaches the links to it on it. Bad habbits die hard, I have tons of extra bolts and nuts lol
- Thread starter
- #47
Found a little motivation this evening (started around 3 ended around 8:30....) to get the dust plates clearance fixed, adjust the rear lower control arms, install the better transmission cooler lines and the front drive shaft...
To start with the cooler lines:
Out with the old!
These lines came out surprisingly easy. I was expecting the fittings to be frozen tights, I was actually able to practically use my hand after getting them broken loose.
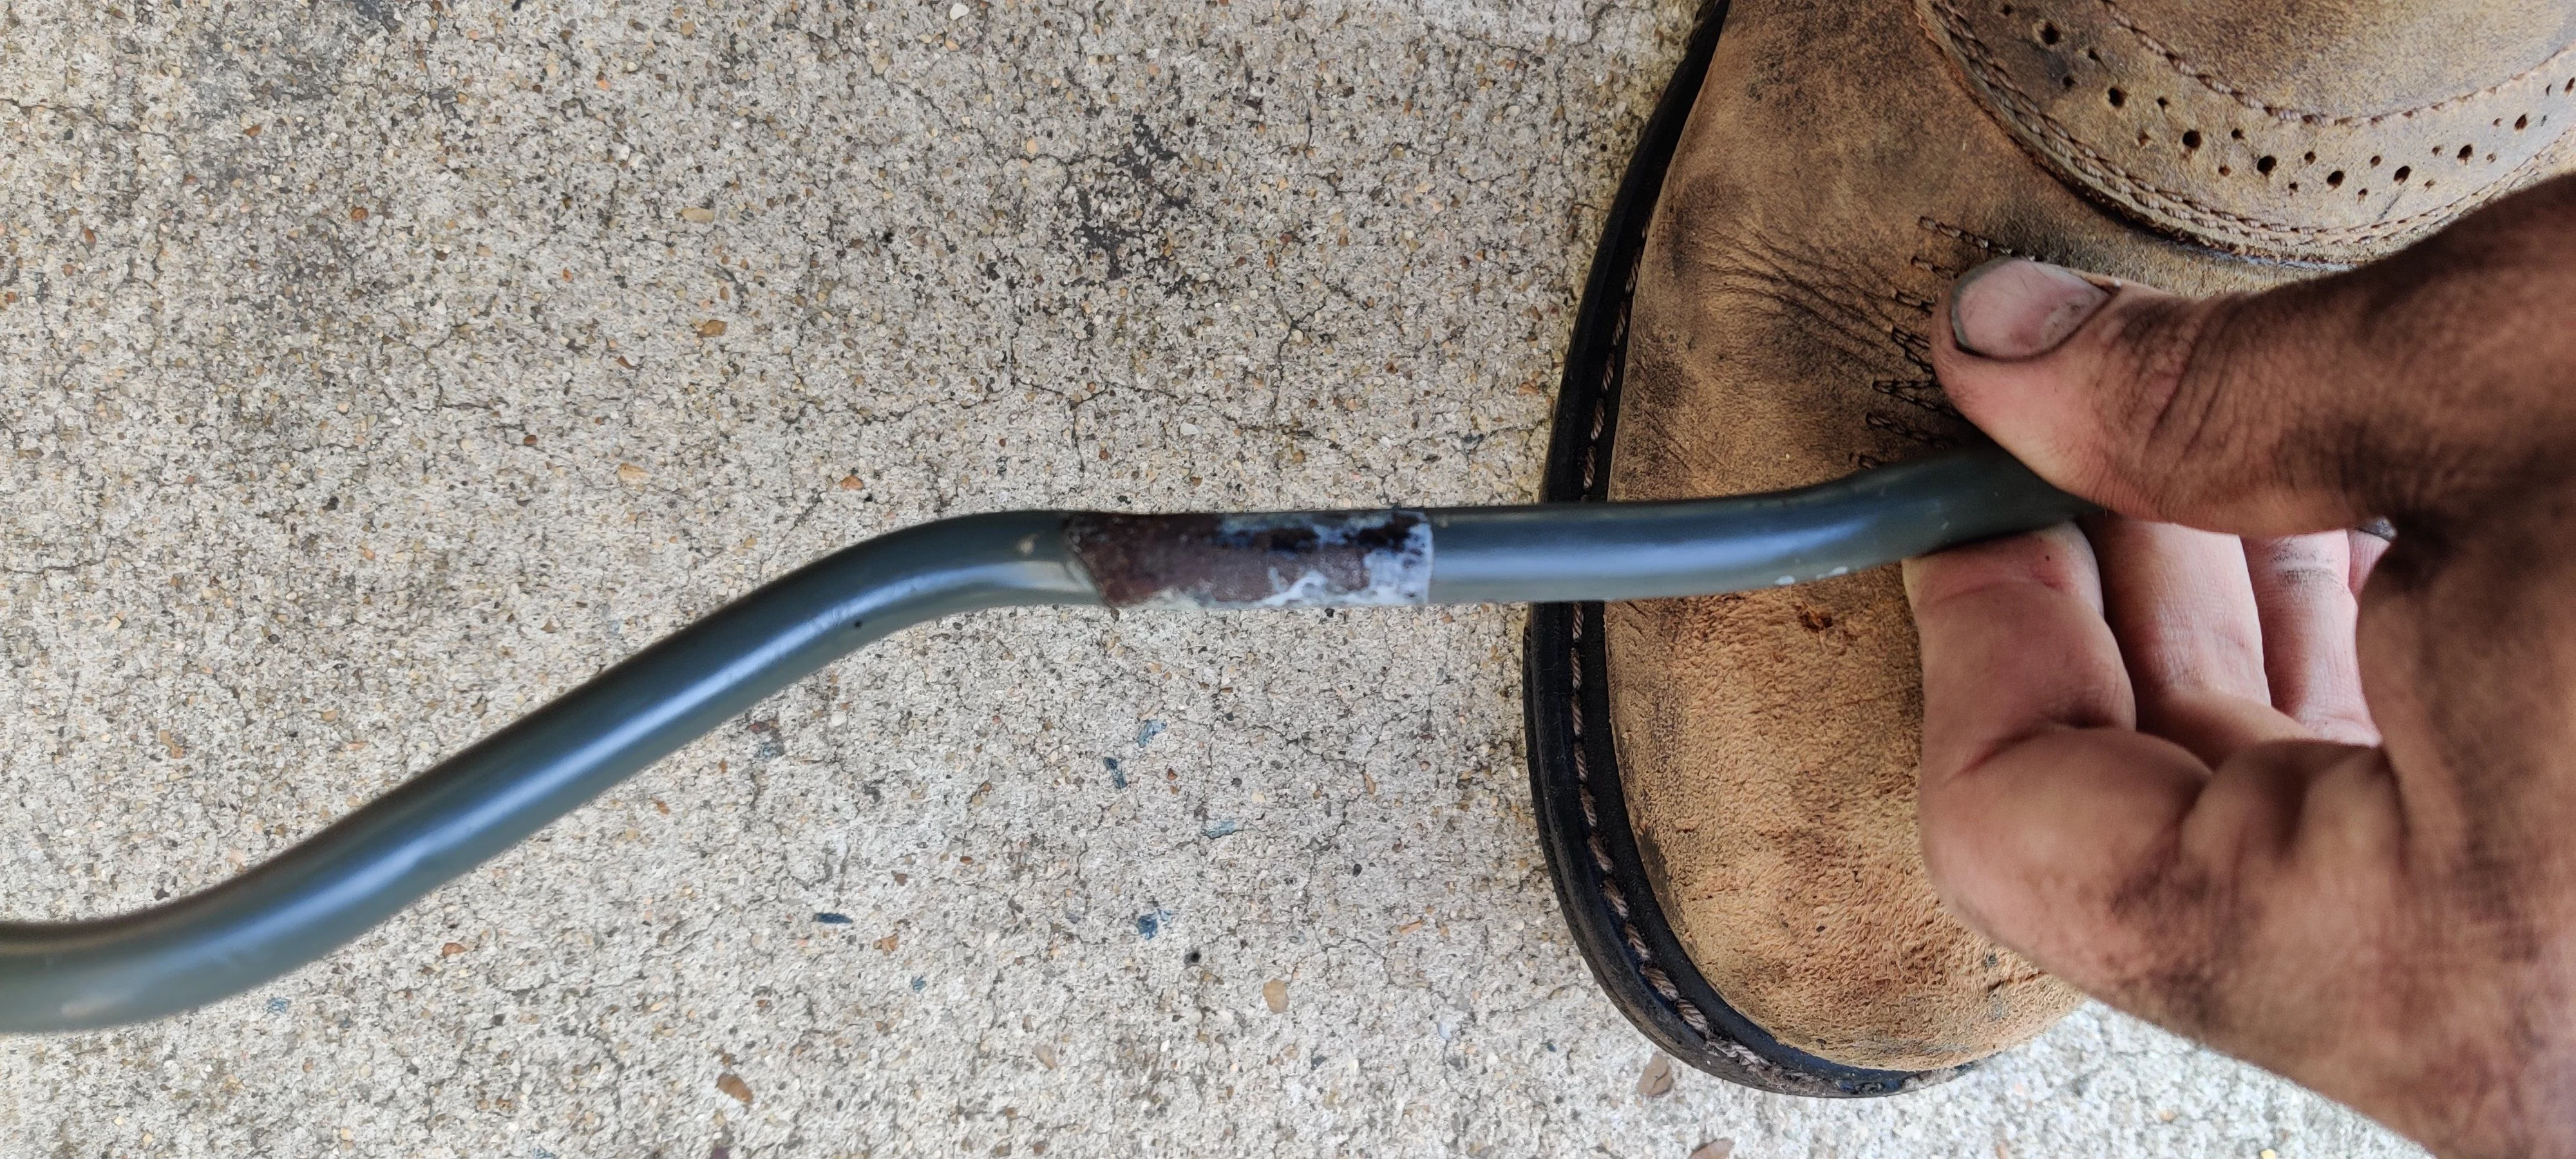
Here is the culprit, this is where it was starting to seep, I think another month and it would have probably completely blow...
Old and newer:
The old rubber for where the lines are held in the mounts were not going to transfer over, so I found some drawer lining to make some:
I do not have any pictures of them installed in the truck, but I topped off fluid and ran it and so far no leaks!
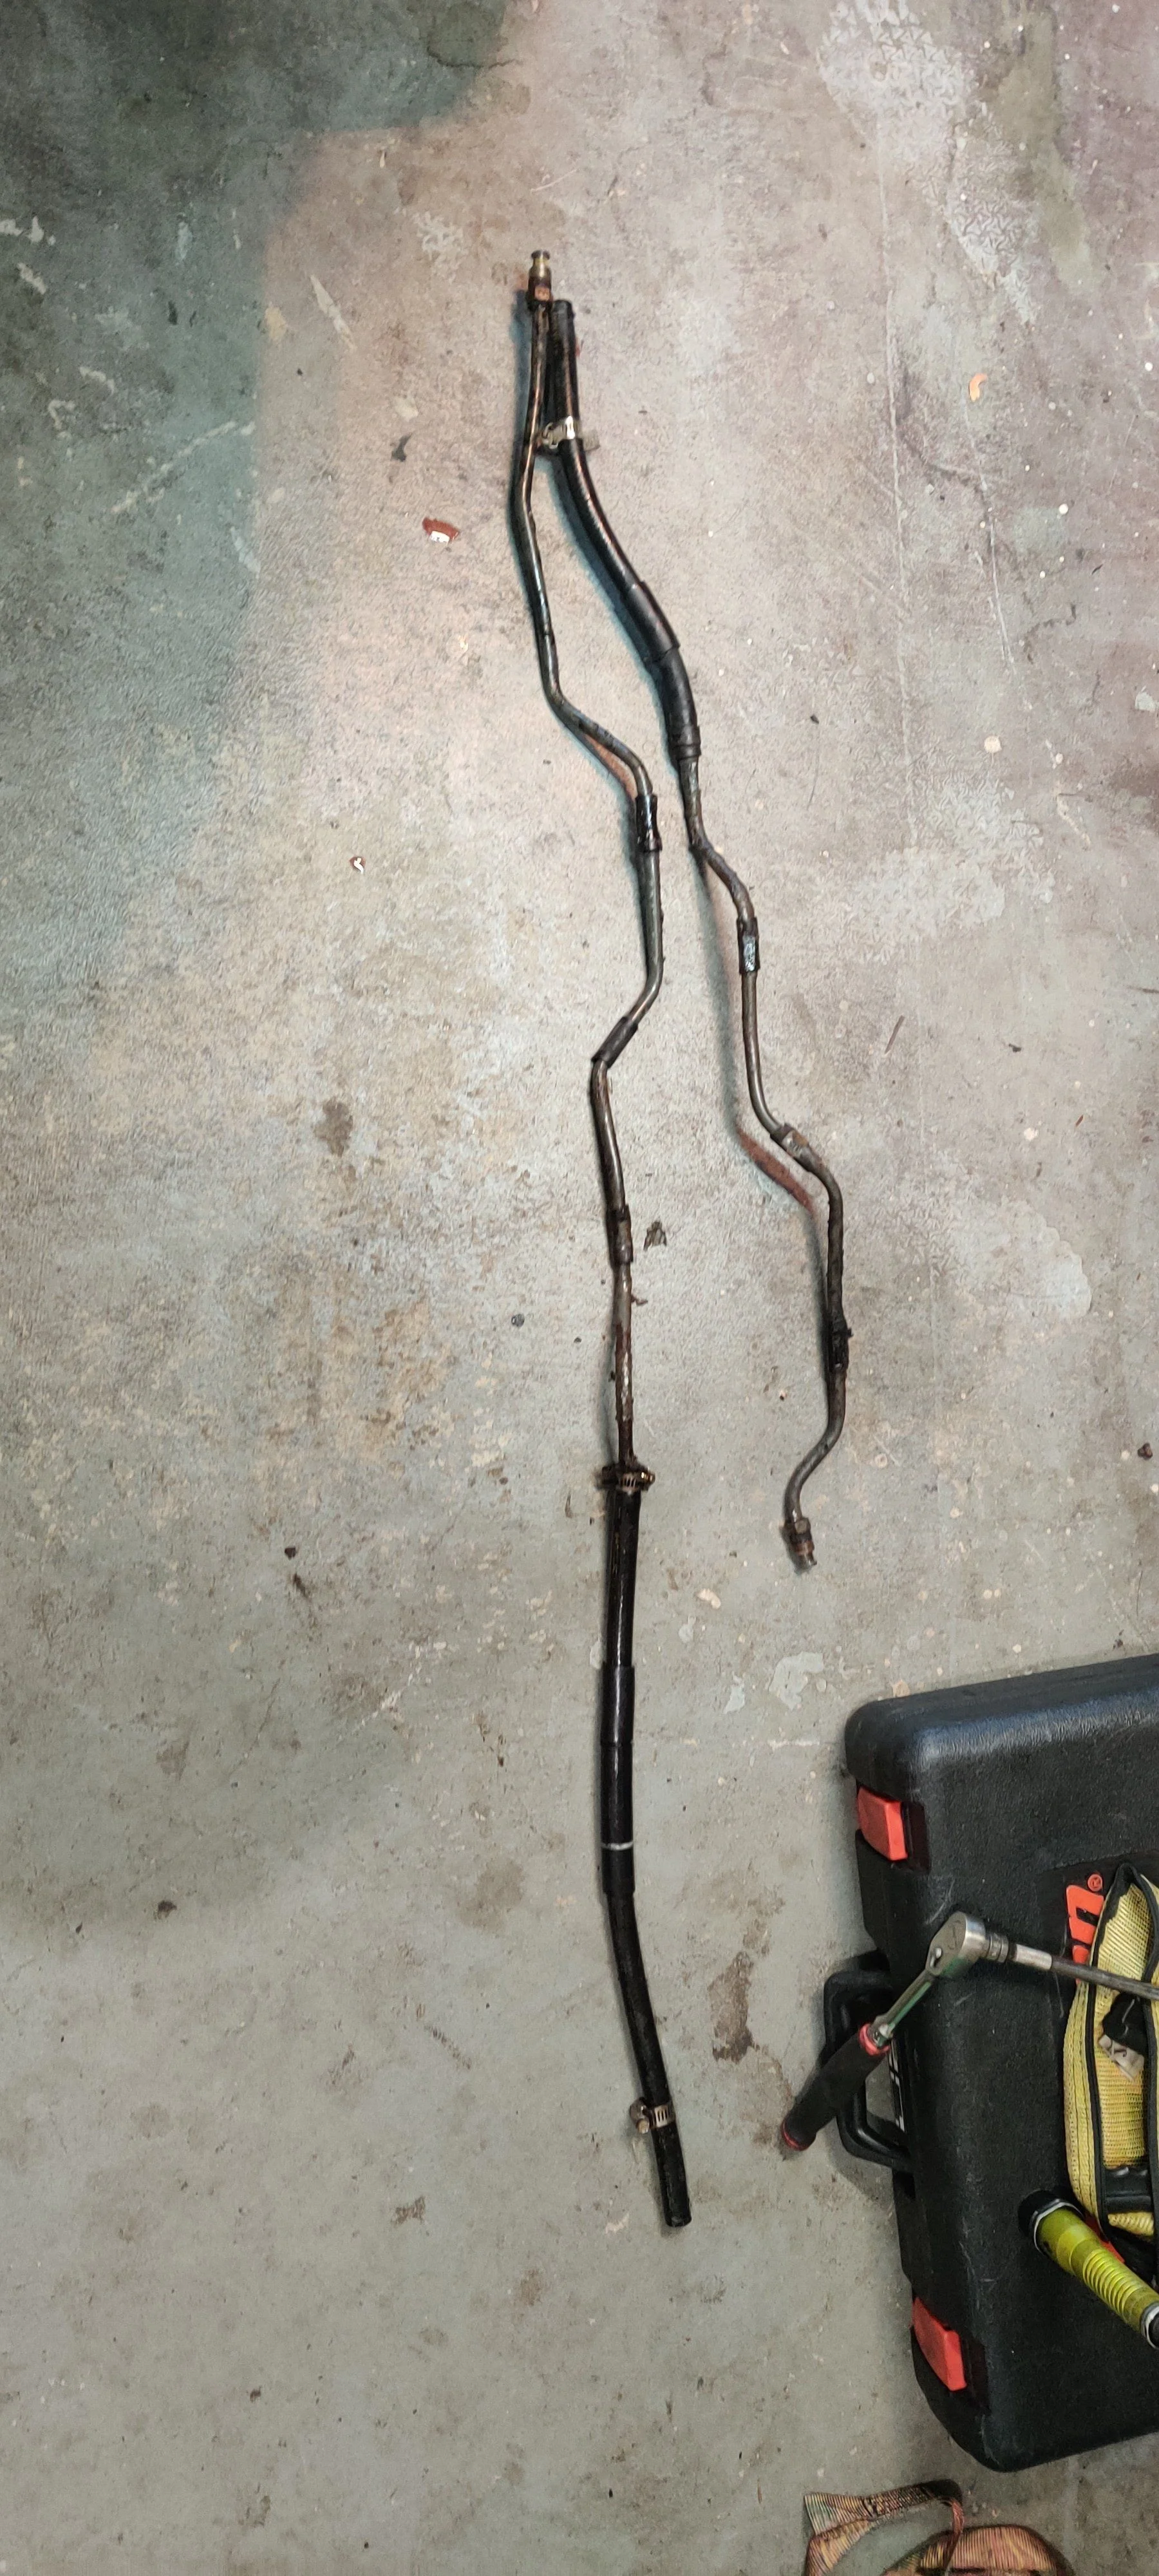
I think the next line to be figured out are going to be the power steering lines.... I am getting tired of having to replace these things but it is what it is, 240K and i am sure not a lot of care before I got a hold of it so meh.
Next was the drive shaft. If you recall earlier I mentioned I would use the one from the brown 4Runner to fix a vibration I had when in 4wd and then learned something new....
I was under the impression that all the 4Runners had the same length drive shafts and the only time it was different was when it was a 4cyl vs. 6cyl.
Well, I guess because of the multi-mode transfer case that has the center differential for AWD function, it makes the case significantly longer...
So I guess this sort of is steering me in a new direction for what I am going to do as far as a dual case setup and when I eventually SAS, time to break out the wiring diagram books and see what differs between the two style 4wd system and what I will need to do to make it work correctly...
As I stated above I also adjusted the links on the rear axle, I noticed when I first lifted it that the axle looked like it may have been off center, which was confirmed after the adjustment, found a straight edge and its dead on now. The back end doesn't feel twitchy anymore, when accelerating hard it feels tighter and doesn't want to fight and same on hard braking, it used to want to pull left now it stops in a dead straight line.
To start with the cooler lines:
Out with the old!
These lines came out surprisingly easy. I was expecting the fittings to be frozen tights, I was actually able to practically use my hand after getting them broken loose.
Here is the culprit, this is where it was starting to seep, I think another month and it would have probably completely blow...

Old and newer:

The old rubber for where the lines are held in the mounts were not going to transfer over, so I found some drawer lining to make some:


I do not have any pictures of them installed in the truck, but I topped off fluid and ran it and so far no leaks!
I think the next line to be figured out are going to be the power steering lines.... I am getting tired of having to replace these things but it is what it is, 240K and i am sure not a lot of care before I got a hold of it so meh.
Next was the drive shaft. If you recall earlier I mentioned I would use the one from the brown 4Runner to fix a vibration I had when in 4wd and then learned something new....

I was under the impression that all the 4Runners had the same length drive shafts and the only time it was different was when it was a 4cyl vs. 6cyl.
Well, I guess because of the multi-mode transfer case that has the center differential for AWD function, it makes the case significantly longer...
So I guess this sort of is steering me in a new direction for what I am going to do as far as a dual case setup and when I eventually SAS, time to break out the wiring diagram books and see what differs between the two style 4wd system and what I will need to do to make it work correctly...
As I stated above I also adjusted the links on the rear axle, I noticed when I first lifted it that the axle looked like it may have been off center, which was confirmed after the adjustment, found a straight edge and its dead on now. The back end doesn't feel twitchy anymore, when accelerating hard it feels tighter and doesn't want to fight and same on hard braking, it used to want to pull left now it stops in a dead straight line.
- Thread starter
- #48
Got some deliveries from Amazon so I could complete some more projects in the 4Runner.
Mind you I've actually had the snorkel for 5 years....
i bought the washer bottle relocation kit last summer as well to help get the ball rolling with fitting the 35s.
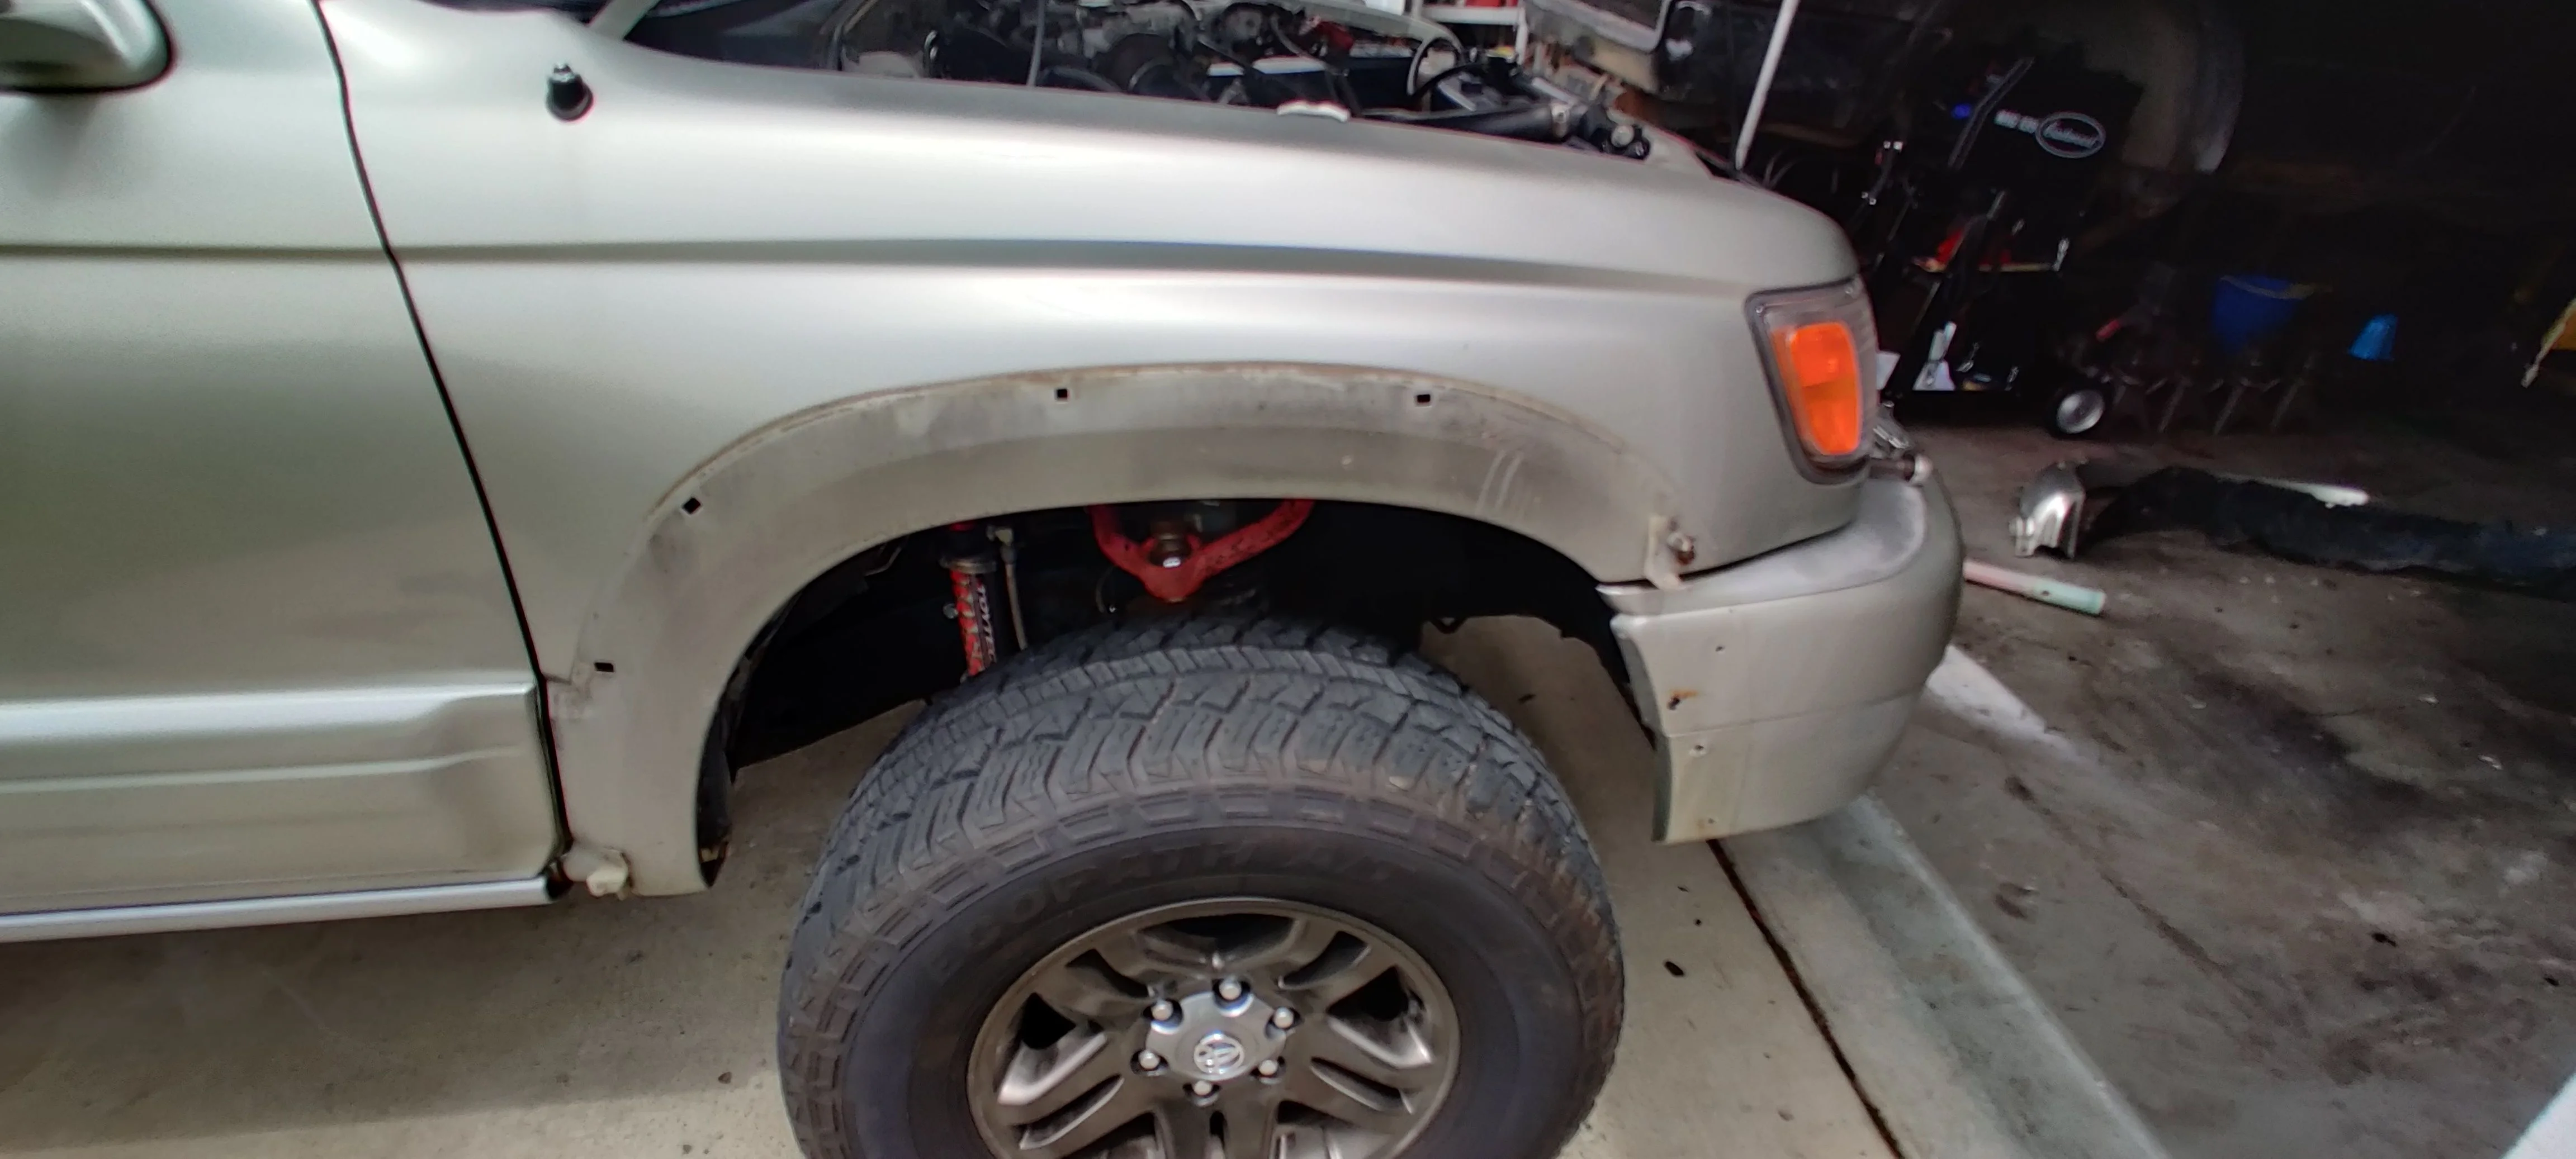
I removed the fender line to get better access for the install of the tube for the snorkel that also involved removing the fender flares to get it out, what a pain that was!
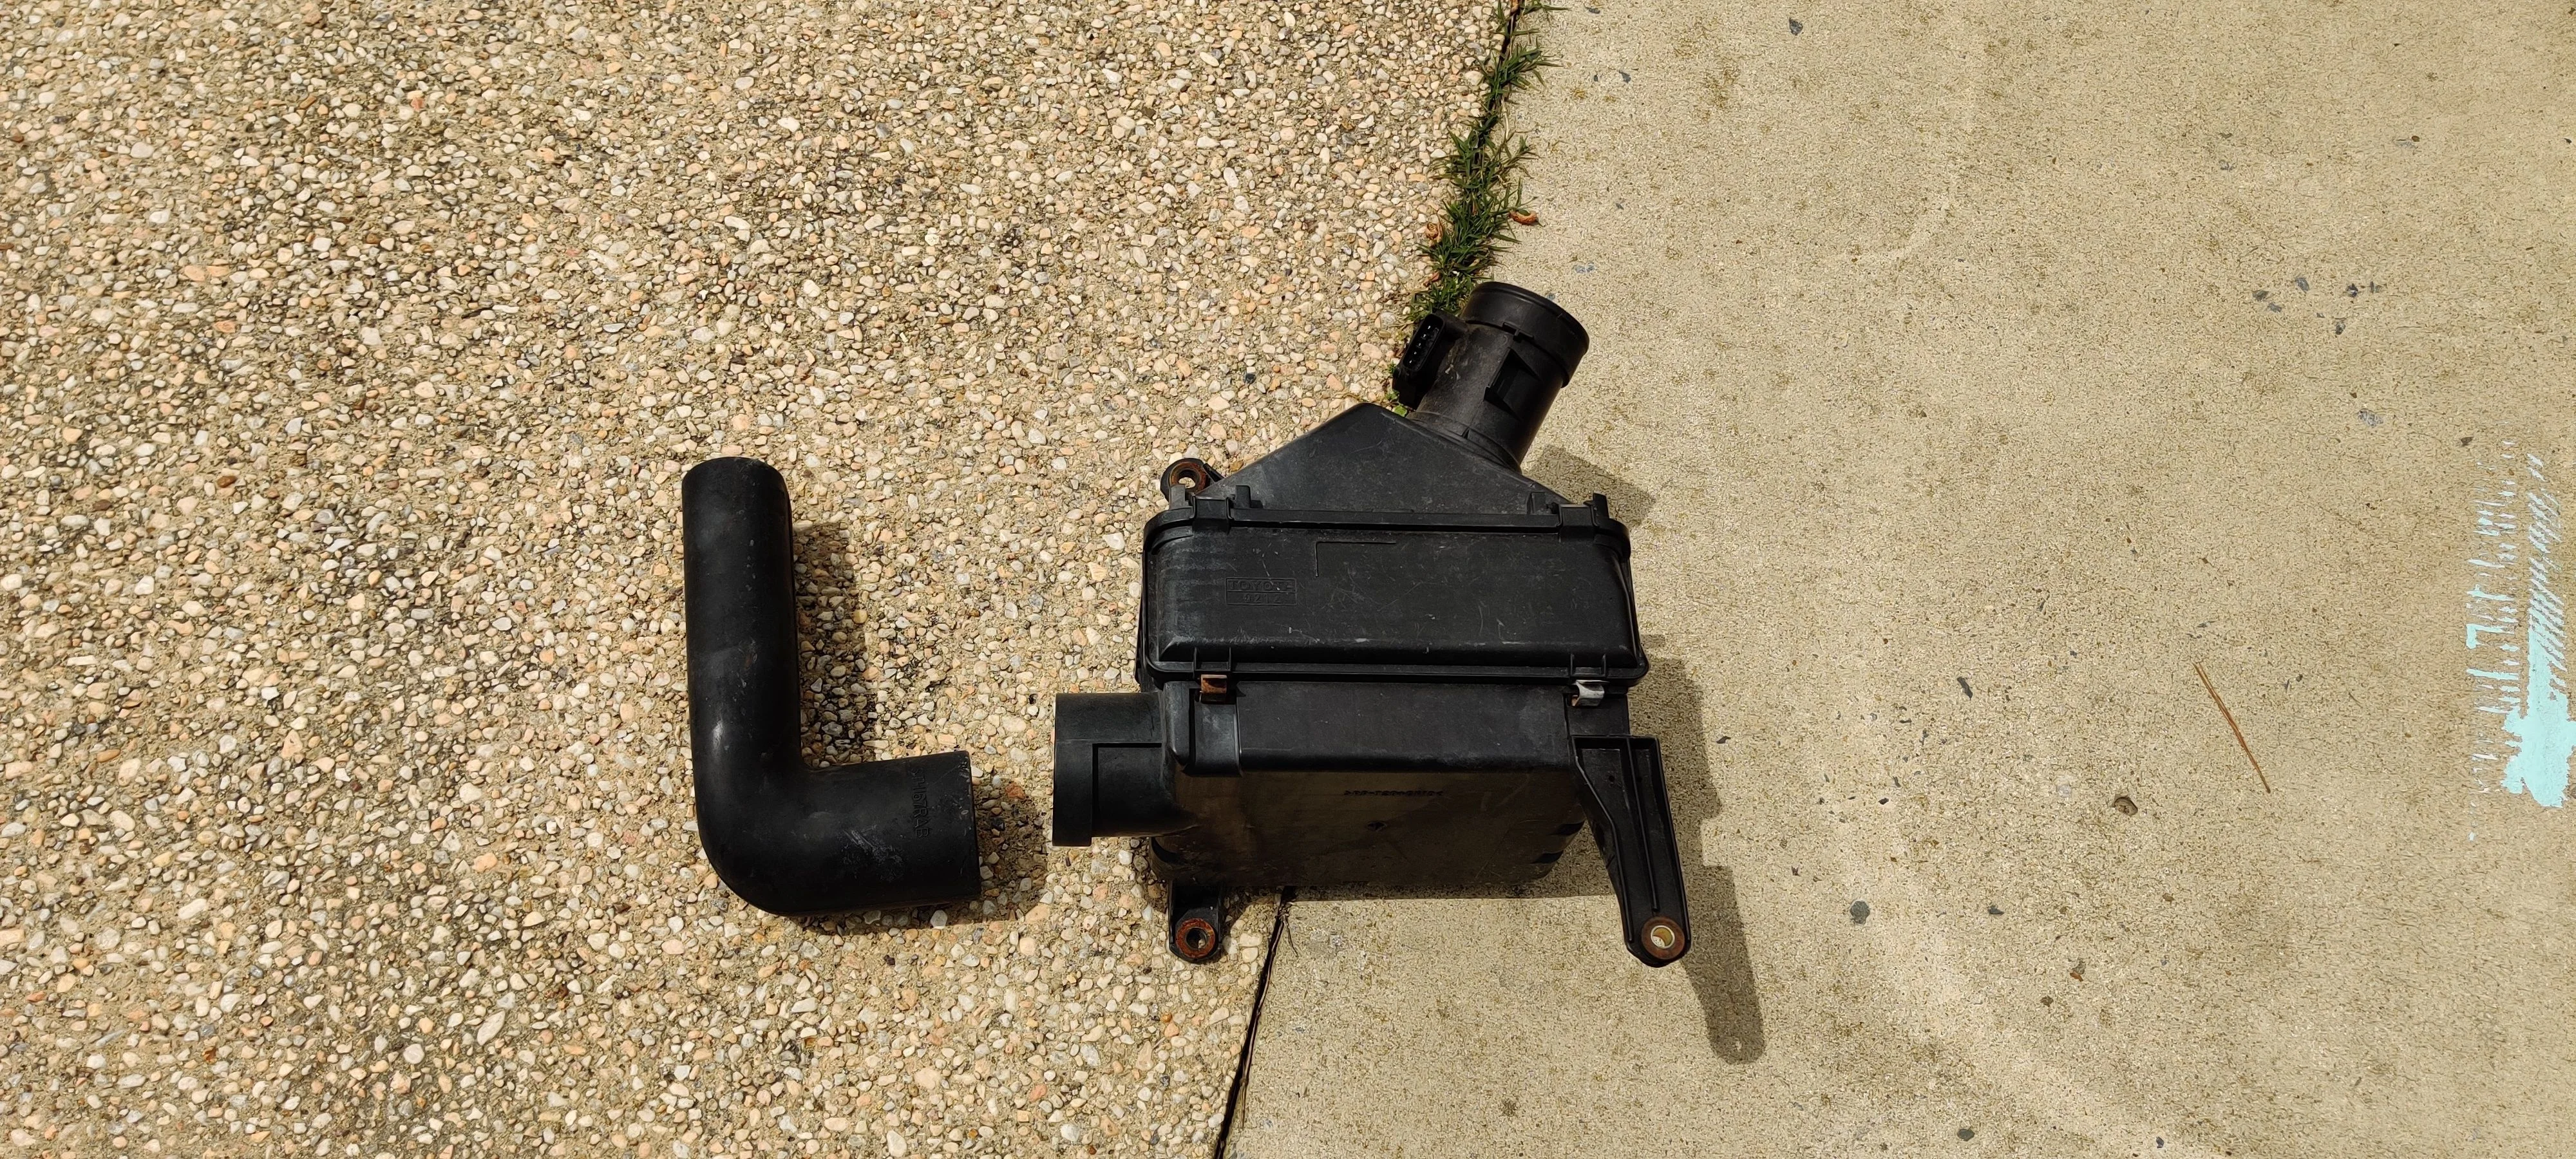
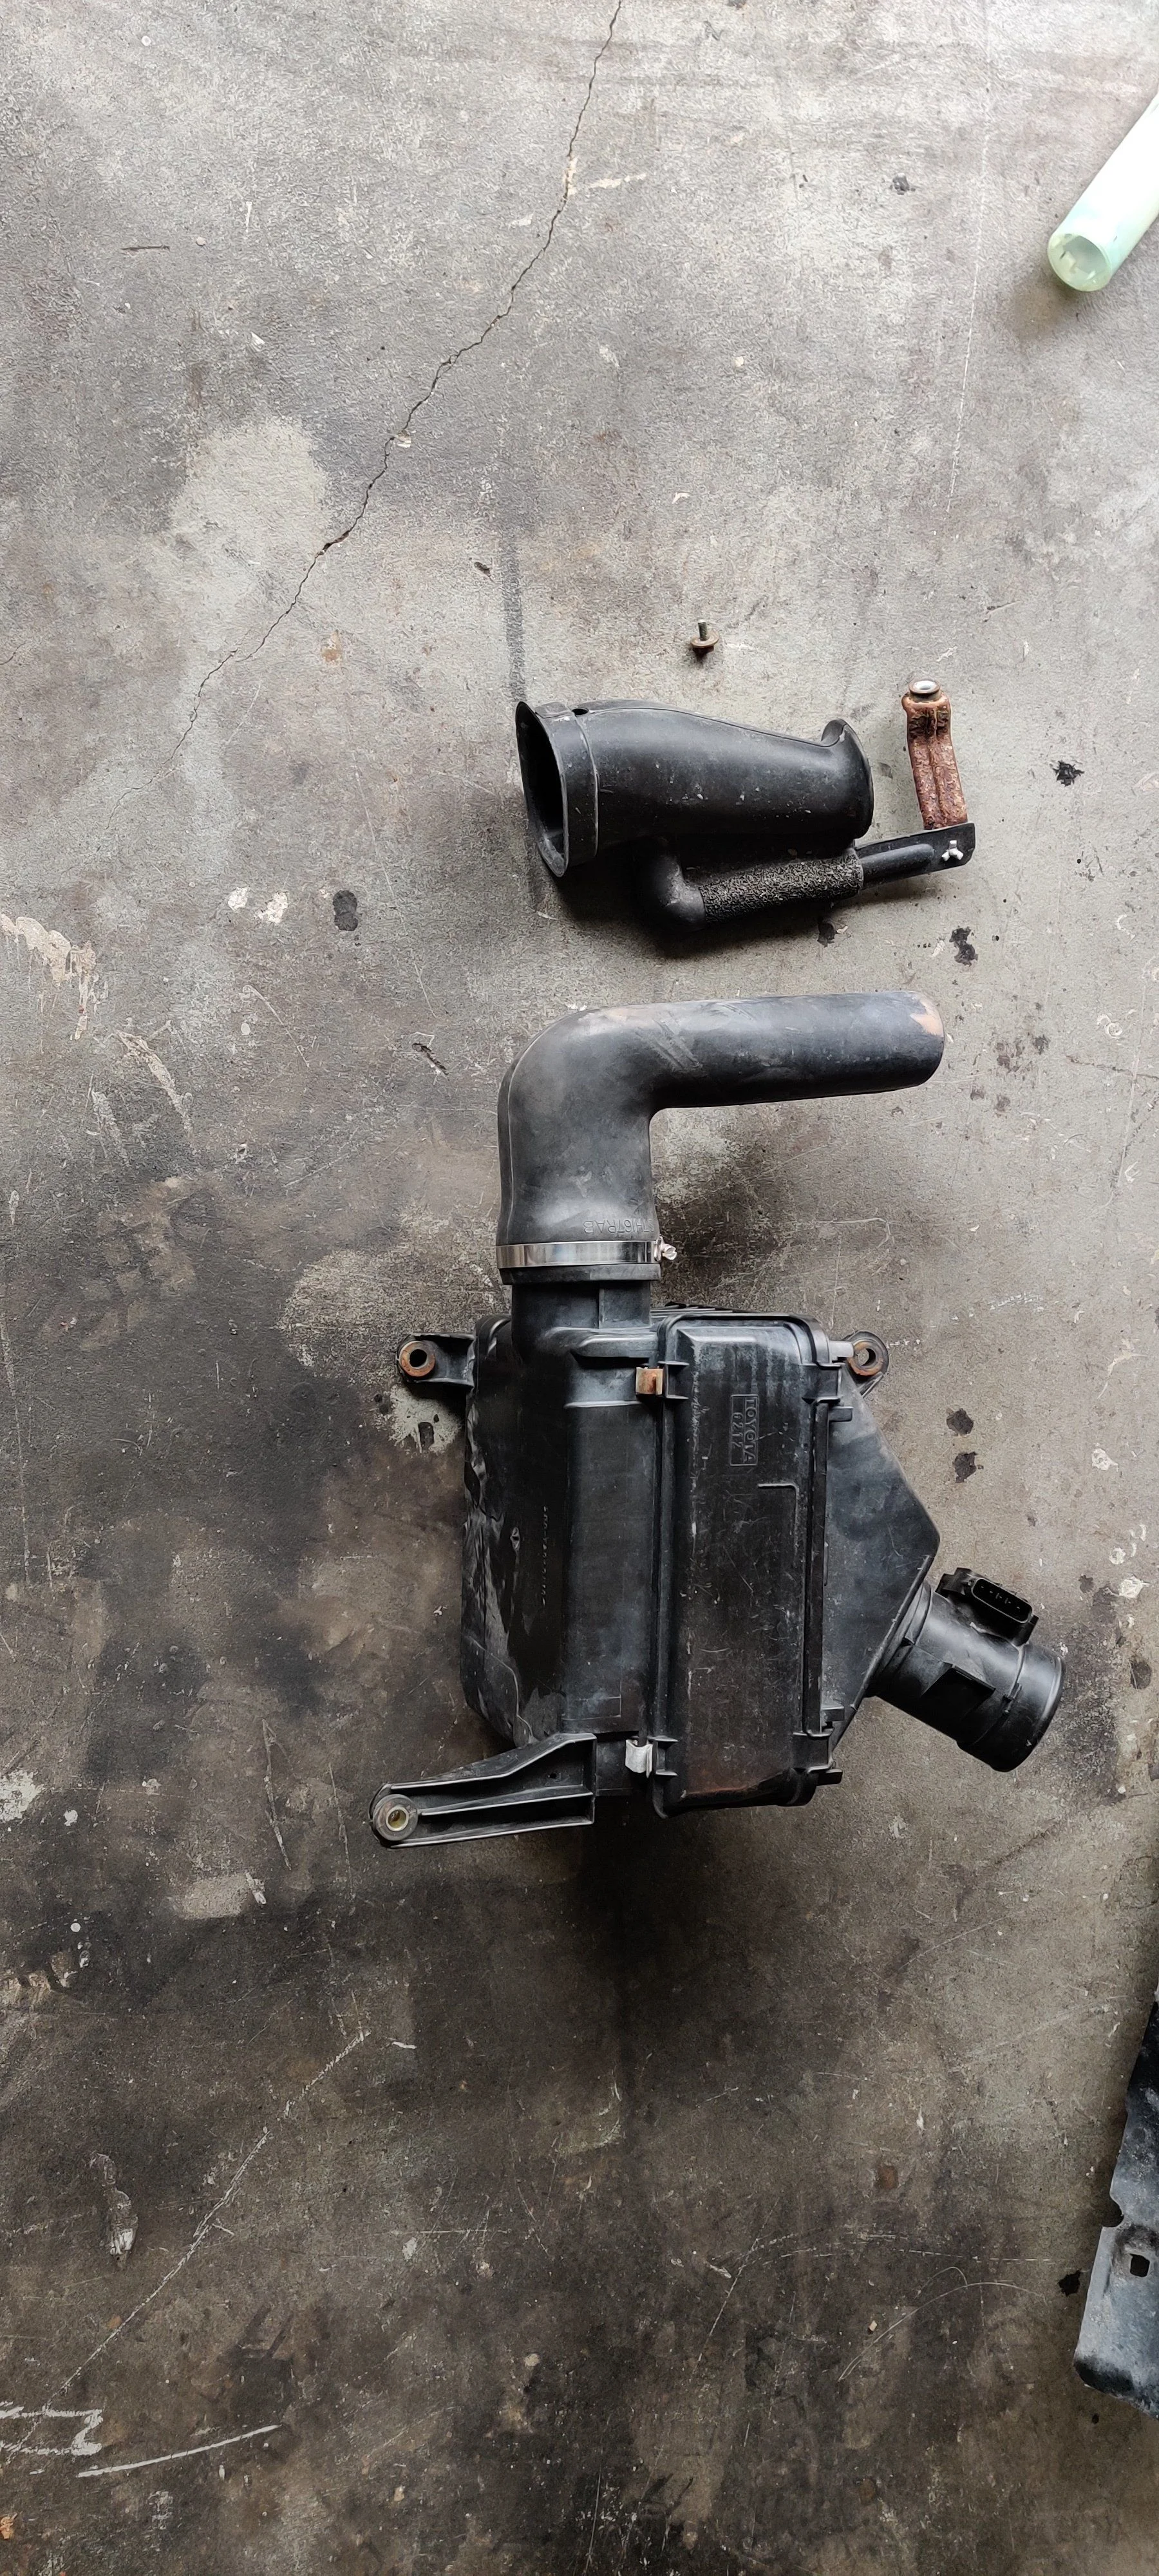
The snorkel is for a 167 Series Hilux Pickup but it was cheaper then the ARB Tacoma option and still fits well but there will be some finesse needed....
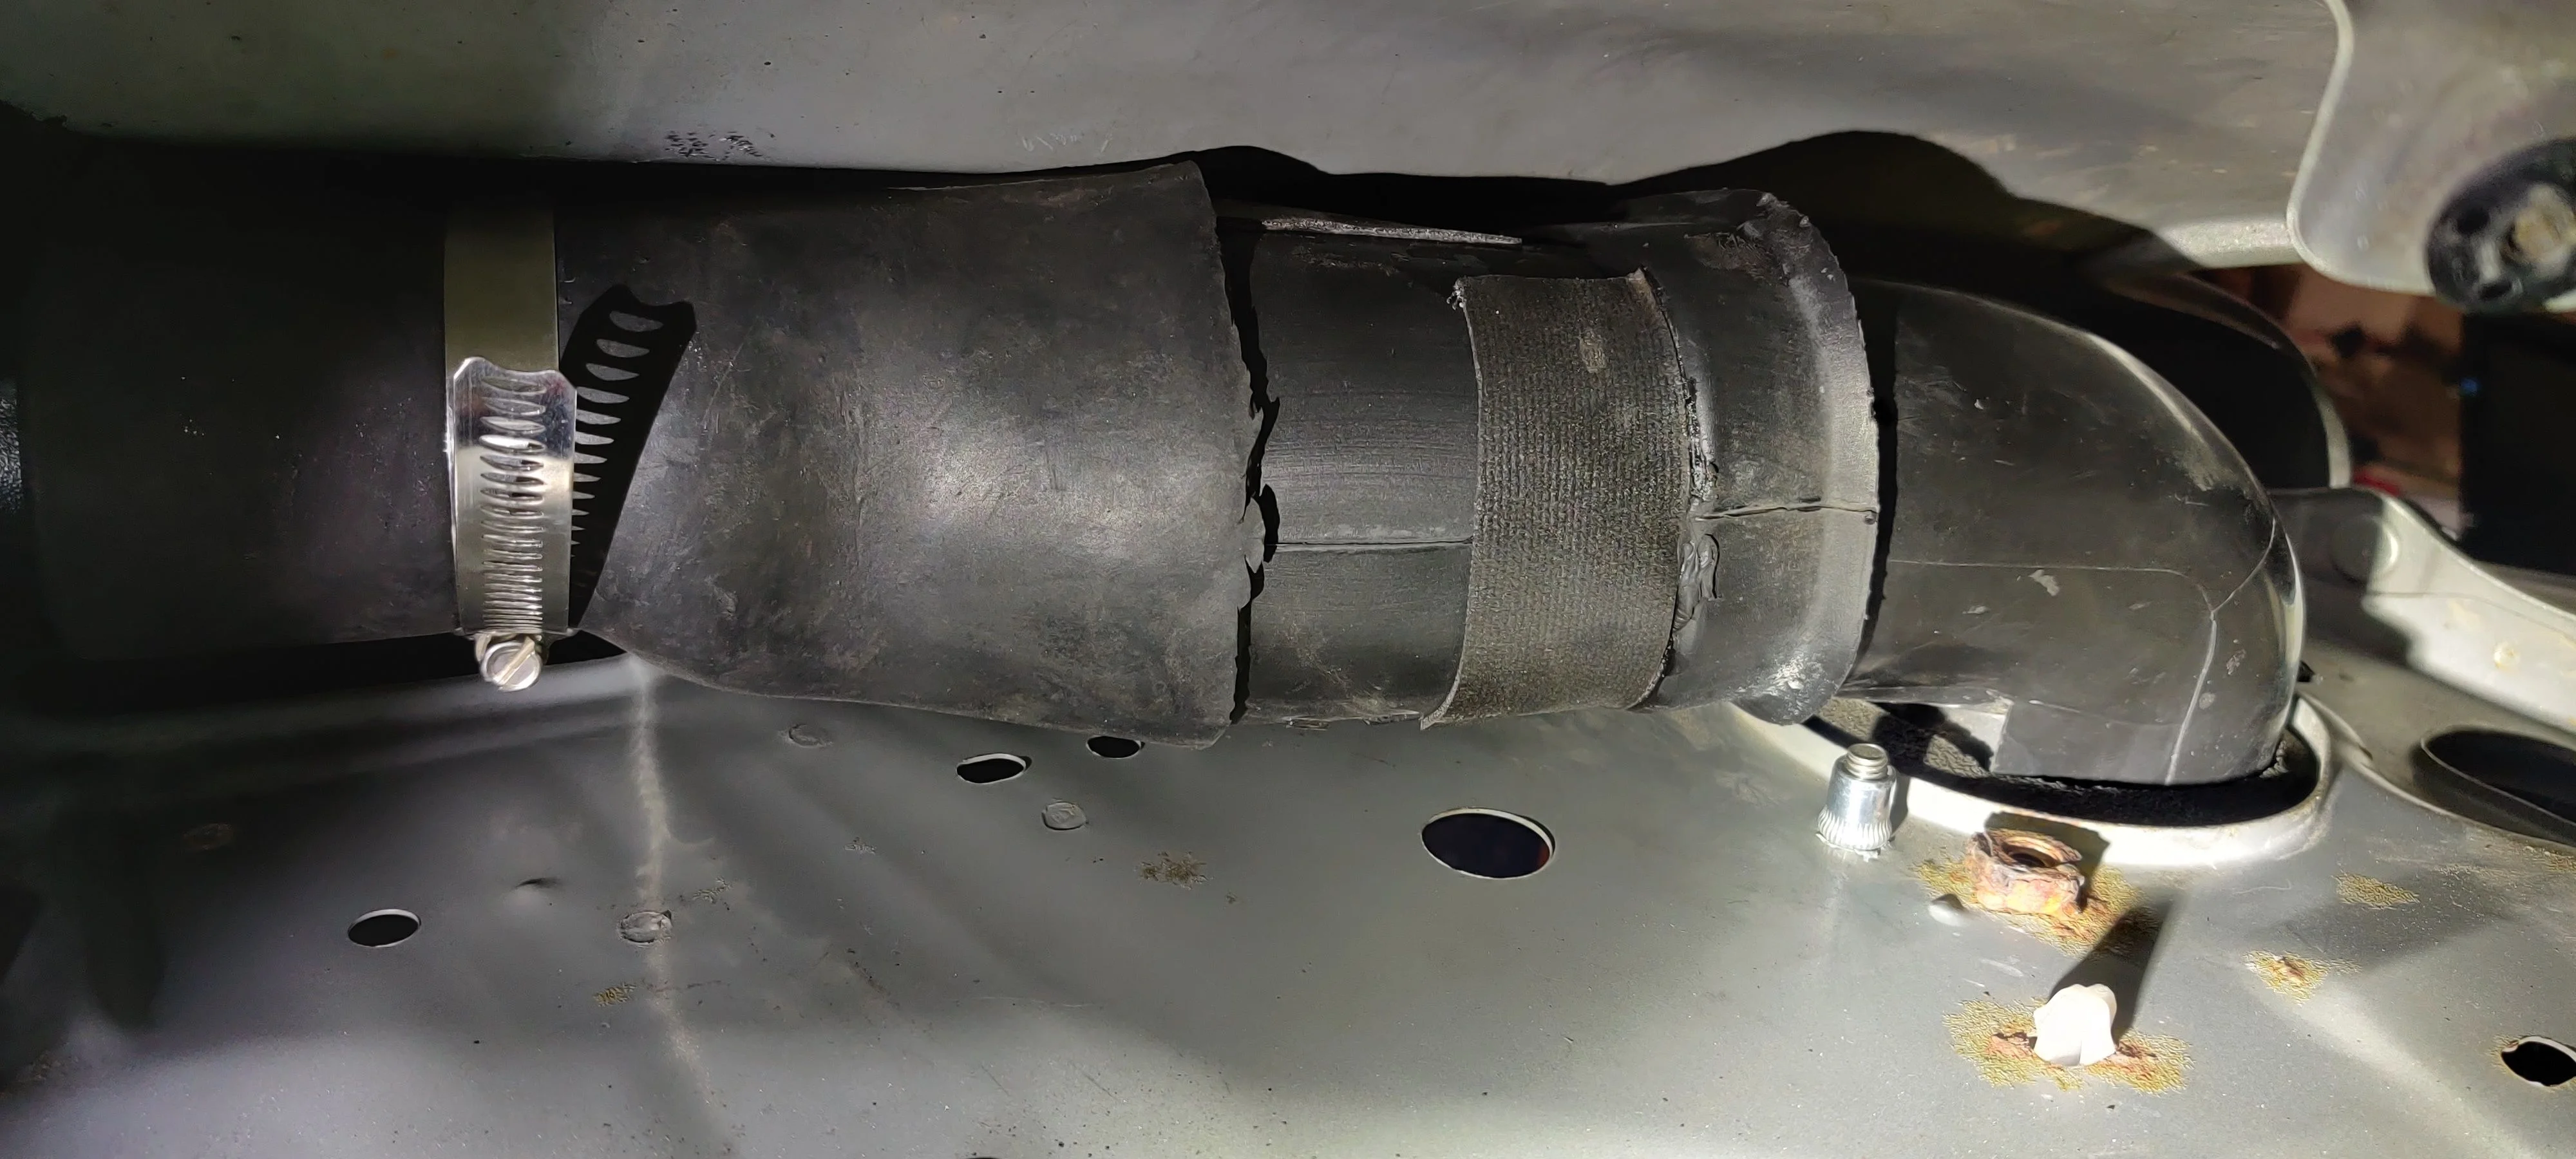
First being the rubber elbow that connects the airbox to the snorkel, I let it sit in the sun a little bit before using a screw driver to stretching it over the air box:
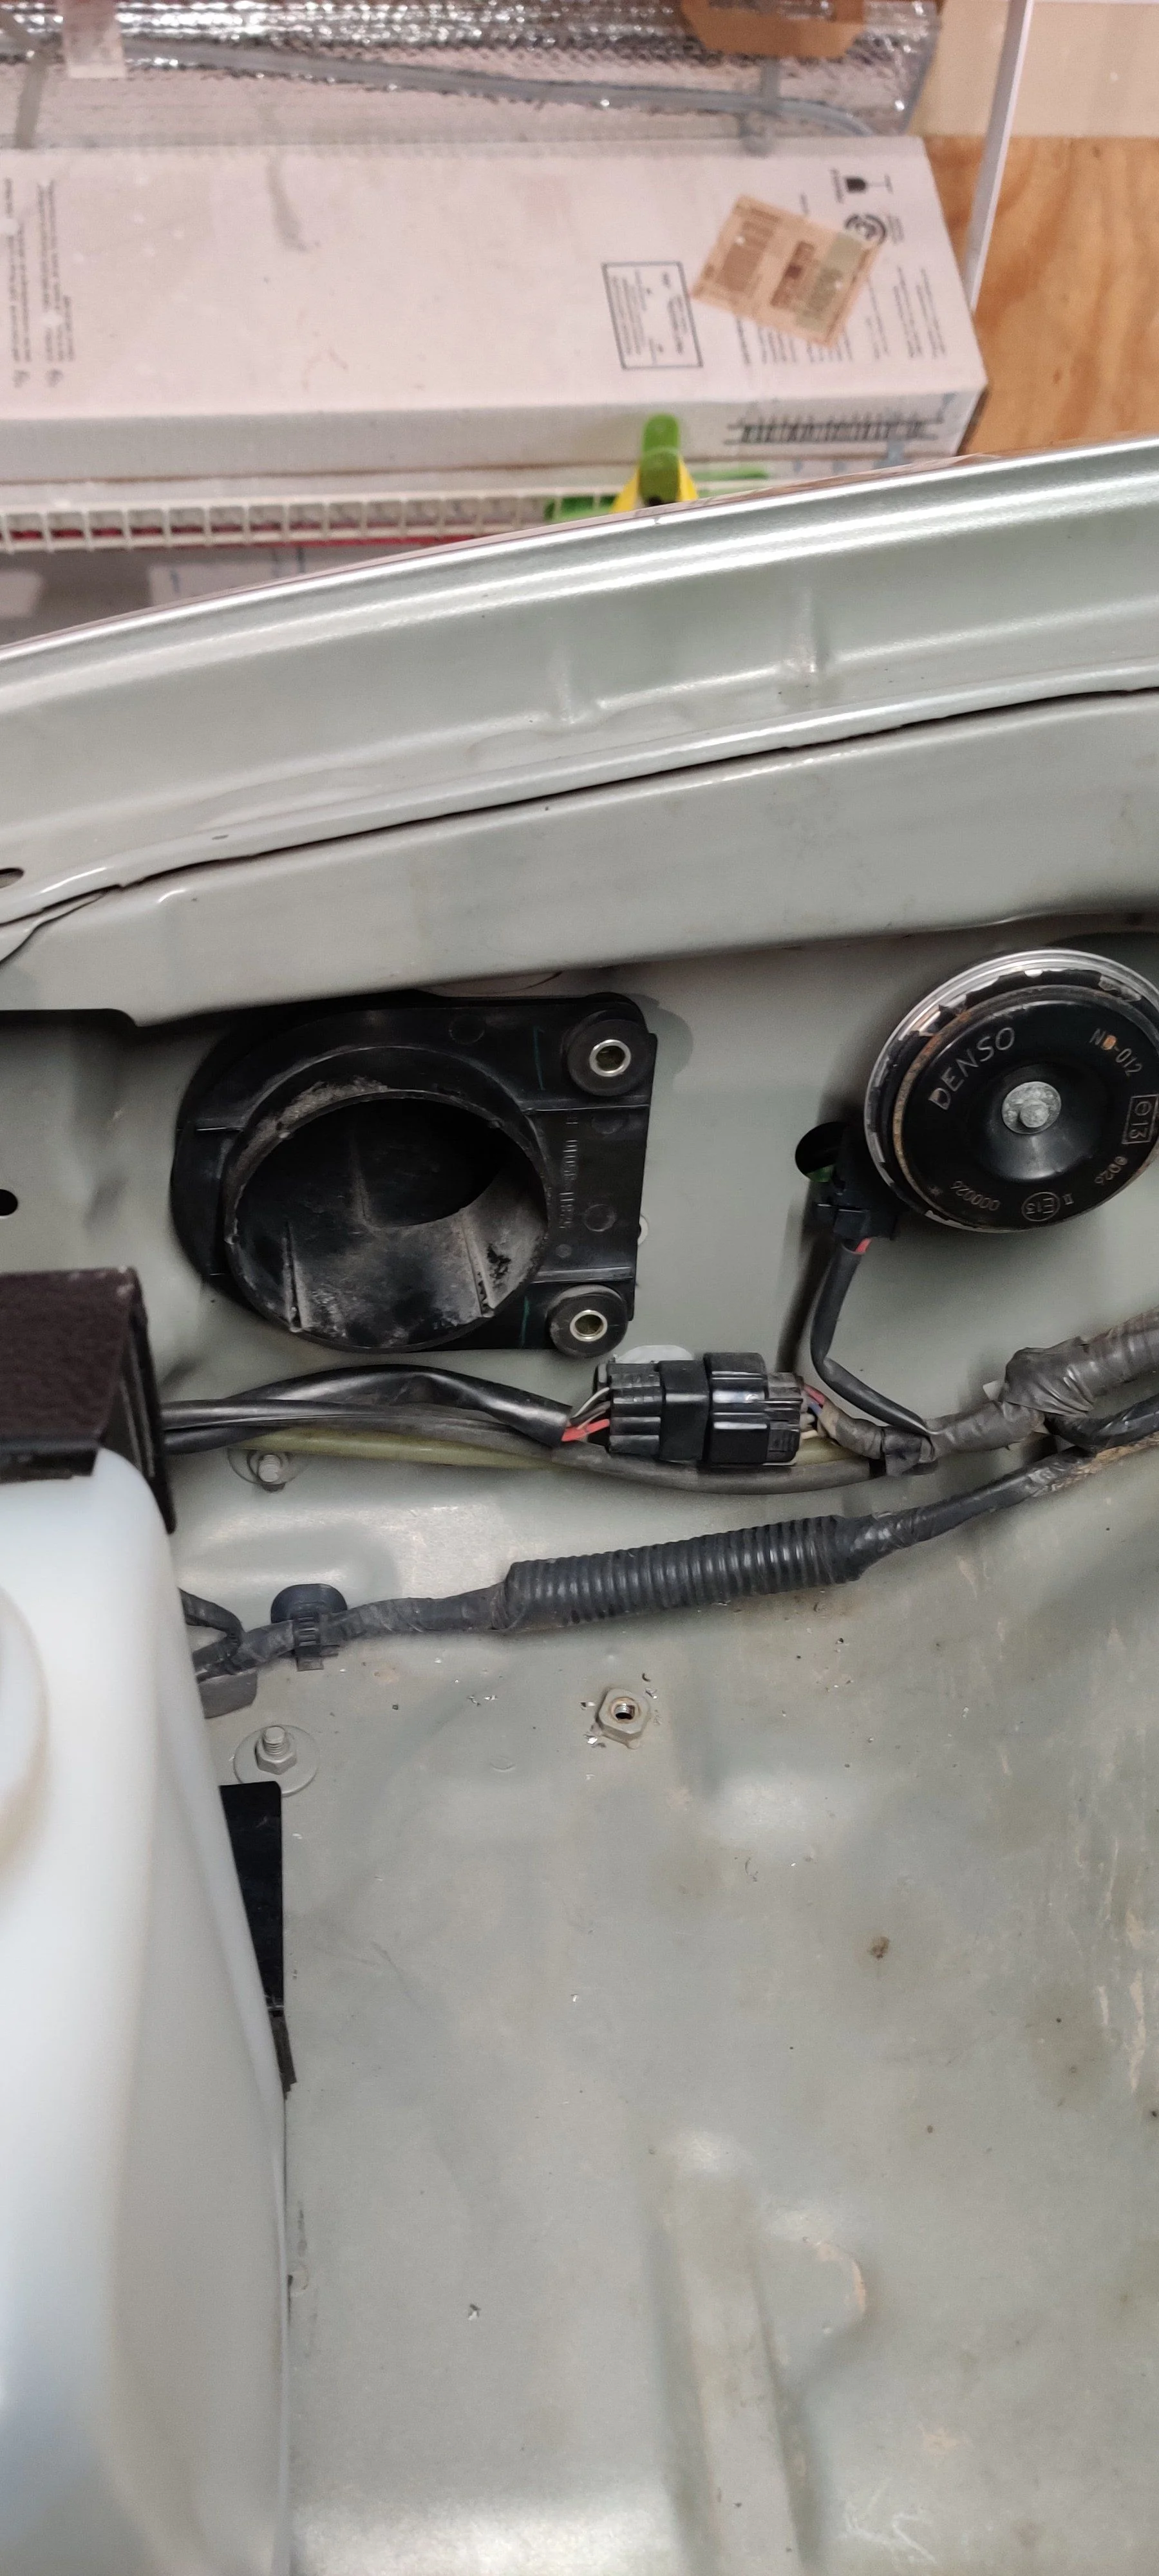
After this I worked on removing the old washer bottle and preparing the lines and the new washer bottle:
Then I started to get everything situated:
I don't have any pictures but I had to modify the top front bracket of the air box and the bottom bracket of the washer bottle kit to move the bottle over to clear the fan on the back of the LED light.
I just need to find some padding now to go around it to keep it in place a little more solid. Recommendations would be greatly appreciated because I have no idea...
This is where I stopped for today, the sun sunk behind the clouds, it got cold and I am still mustering up the courage to cut a hole in the perfectly straight fender... That and I need to transcribe the template to paper since the cardboard one I can't see through to mark the holes to drill for the studs for the snorkel......

Mind you I've actually had the snorkel for 5 years....
i bought the washer bottle relocation kit last summer as well to help get the ball rolling with fitting the 35s.
I removed the fender line to get better access for the install of the tube for the snorkel that also involved removing the fender flares to get it out, what a pain that was!

The snorkel is for a 167 Series Hilux Pickup but it was cheaper then the ARB Tacoma option and still fits well but there will be some finesse needed....
First being the rubber elbow that connects the airbox to the snorkel, I let it sit in the sun a little bit before using a screw driver to stretching it over the air box:


After this I worked on removing the old washer bottle and preparing the lines and the new washer bottle:


Then I started to get everything situated:


I don't have any pictures but I had to modify the top front bracket of the air box and the bottom bracket of the washer bottle kit to move the bottle over to clear the fan on the back of the LED light.
I just need to find some padding now to go around it to keep it in place a little more solid. Recommendations would be greatly appreciated because I have no idea...
This is where I stopped for today, the sun sunk behind the clouds, it got cold and I am still mustering up the courage to cut a hole in the perfectly straight fender... That and I need to transcribe the template to paper since the cardboard one I can't see through to mark the holes to drill for the studs for the snorkel......
- Joined
- Jun 27, 2013
- Threads
- 12
- Messages
- 464
- Location
- Margate, NJ
- Website
- margatefishing.wordpress.com
Annabelle coming along nicely Avi. Question- where did you get the washer kit? I deleted mine and never got around to fitting a new one. I was going to rig one out of pvc pipe.
How about some rubber or neoprene glued to it to keep things in place.
Annabelle coming along nicely Avi. Question- where did you get the washer kit? I deleted mine and never got around to fitting a new one. I was going to rig one out of pvc pipe.
Joe, would this option work on yours?
- Thread starter
- #52
Annabelle coming along nicely Avi. Question- where did you get the washer kit? I deleted mine and never got around to fitting a new one. I was going to rig one out of pvc pipe.
I bought a kit from Sonoran Steel. Just seemed like the best option for me at the time since I have two washer motors.
Last edited:
- Thread starter
- #53
Wish this was an option, but the ABS and Cruise control box are in the way. @caz Was that the lower half of your washer bottle?
Last edited:
- Thread starter
- #54
Did a little more today, removed the brackets for the washer bottle and used the same rubber I used for the transmission coolant lines to build up some cushioning, the fit is much better. I will try to take pictures, I didn't today.
I also did this today:
The moment right after this I went inside and poured a really stiff drink and then sat by the truck and sobbed at what I had done.
Still coming to terms that this truck will be the new wheeling rig, considered it is still pretty straight it's hard to do things like this.
Andy @jamarquardt22 asked "if this bugs you, how the hell am I gonna get you to cut up for 35s" and I responded "Copious amount of hard liquor"
Continued to drill the holes and used some paint applied by q-tips to help prevent some rust.
Installed tight in the fender, and on the windshield frame, I used some RTV with the rivets to help with any water intrusion. I was originally going to use nut certs but there just isn't enough room so the the rivets will have to do, seems solid.
From here I buttoned everything up and went for a test drive, well tried....
The rubber elbow is not as strong as I thought it would be, when I got WOT the elbow would collapse starve the truck of air and then pull itself off the snout of the snorkel. So I decided to utilize the parts I had left over from the truck:
I am going to utilize the factory elbow that is hard plastic. I have to clock it so that it points in the correct direction. Pieced with the left over factory plastic elbow and the rubber of elbow that came in the kit, I think I will be able to make something work.
You get what you paid for, I understand that, but I couldn't justify $400+ for the snorkel at the time. I saw this as an option and actually got it as a Christmas present *cough* 5 years ago.... so Its a 1/4 of the cost and requires some MacGyver skills to make it work. I am use to doing things like that now lol
I also did this today:


The moment right after this I went inside and poured a really stiff drink and then sat by the truck and sobbed at what I had done.
Still coming to terms that this truck will be the new wheeling rig, considered it is still pretty straight it's hard to do things like this.
Andy @jamarquardt22 asked "if this bugs you, how the hell am I gonna get you to cut up for 35s" and I responded "Copious amount of hard liquor"
Continued to drill the holes and used some paint applied by q-tips to help prevent some rust.


Installed tight in the fender, and on the windshield frame, I used some RTV with the rivets to help with any water intrusion. I was originally going to use nut certs but there just isn't enough room so the the rivets will have to do, seems solid.


From here I buttoned everything up and went for a test drive, well tried....
The rubber elbow is not as strong as I thought it would be, when I got WOT the elbow would collapse starve the truck of air and then pull itself off the snout of the snorkel. So I decided to utilize the parts I had left over from the truck:

I am going to utilize the factory elbow that is hard plastic. I have to clock it so that it points in the correct direction. Pieced with the left over factory plastic elbow and the rubber of elbow that came in the kit, I think I will be able to make something work.
You get what you paid for, I understand that, but I couldn't justify $400+ for the snorkel at the time. I saw this as an option and actually got it as a Christmas present *cough* 5 years ago.... so Its a 1/4 of the cost and requires some MacGyver skills to make it work. I am use to doing things like that now lol
- Thread starter
- #55
Finished things up today and took it for a test drive and all is well.
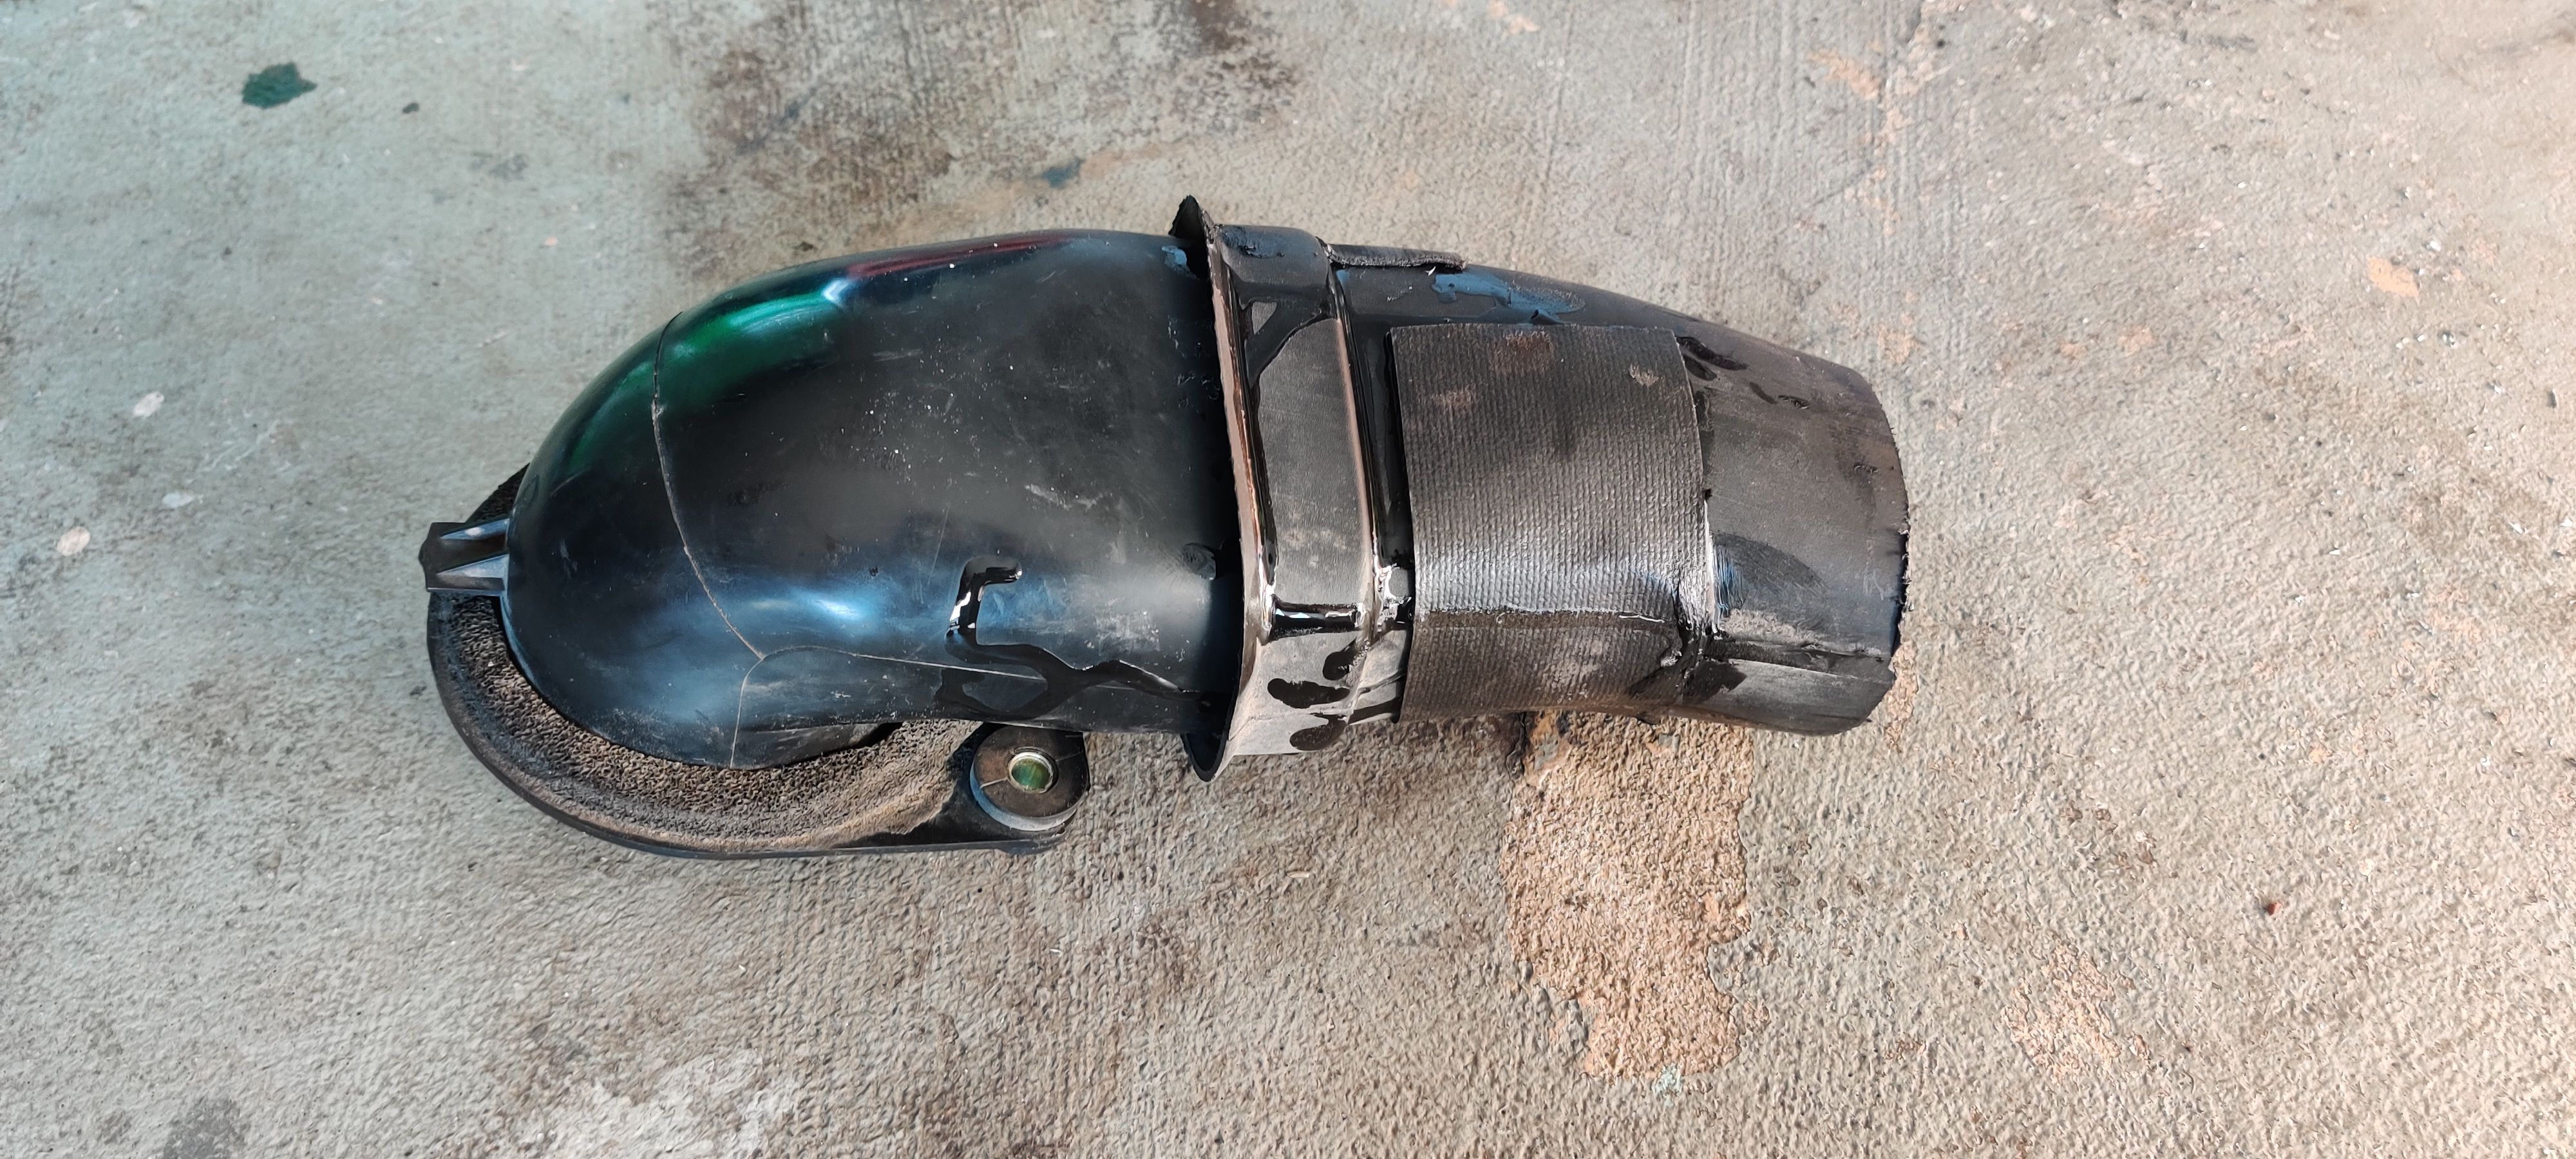
First item on the list was clocking the factory elbow. I used a nut cert and just one bolt since the second both would have to go through a pinch weld and I don't have a drill bit hard enough to go through (at least I don't think), but it kind of worked out since it allowed for some movement to align everything up:
It isn't pretty but it works, did some WOT pulls and nothing popped off, honestly I will be surprised if it does, everything is so packed in there isn't much room for movement beyond maybe an 1/8" so everything should be nice and tight for a while
Went for a drive to get some miles on the diffs, pick up meds for the pooches, found a spot to take a picture:
Surprisingly I don't even notice it is there except for the head that is just at the corner of my line of sight from the windshield. I have never been in a rig with a snorkel, but I was honestly expecting to see it more, I am pleasantly surprised and happy with the turnout.
First item on the list was clocking the factory elbow. I used a nut cert and just one bolt since the second both would have to go through a pinch weld and I don't have a drill bit hard enough to go through (at least I don't think), but it kind of worked out since it allowed for some movement to align everything up:


It isn't pretty but it works, did some WOT pulls and nothing popped off, honestly I will be surprised if it does, everything is so packed in there isn't much room for movement beyond maybe an 1/8" so everything should be nice and tight for a while
Went for a drive to get some miles on the diffs, pick up meds for the pooches, found a spot to take a picture:
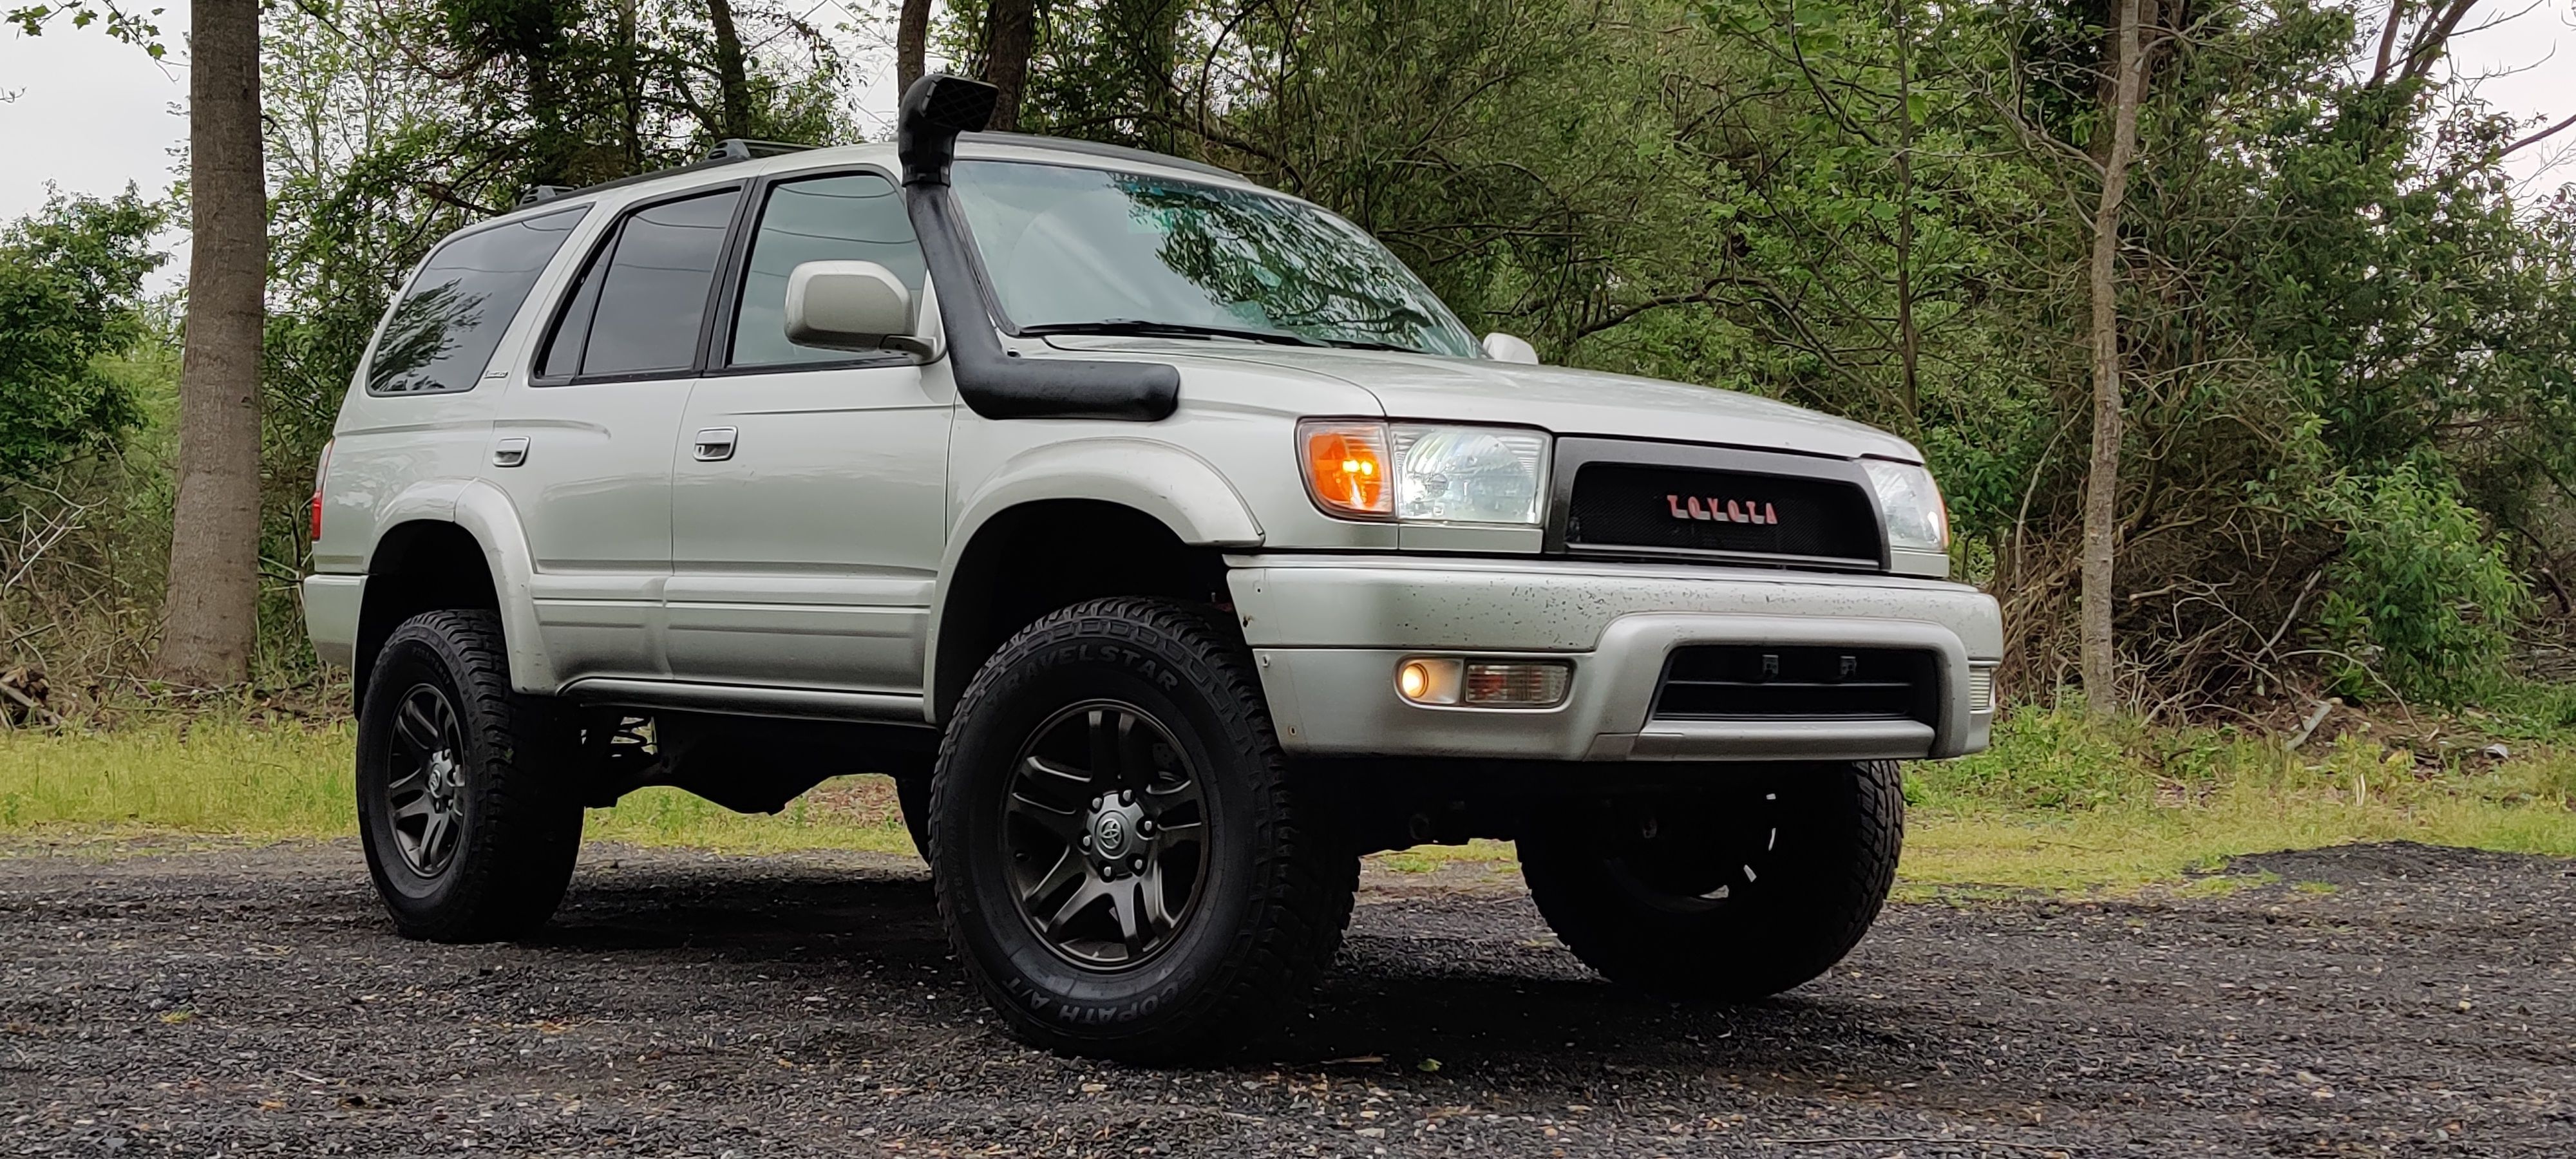
Surprisingly I don't even notice it is there except for the head that is just at the corner of my line of sight from the windshield. I have never been in a rig with a snorkel, but I was honestly expecting to see it more, I am pleasantly surprised and happy with the turnout.
- Joined
- Jun 27, 2013
- Threads
- 12
- Messages
- 464
- Location
- Margate, NJ
- Website
- margatefishing.wordpress.com
Negative Andy- My truck has stuff jammed in that area already plus my ARB solenoid and the compressor- real estate is at a premium under the hood.
- Thread starter
- #58
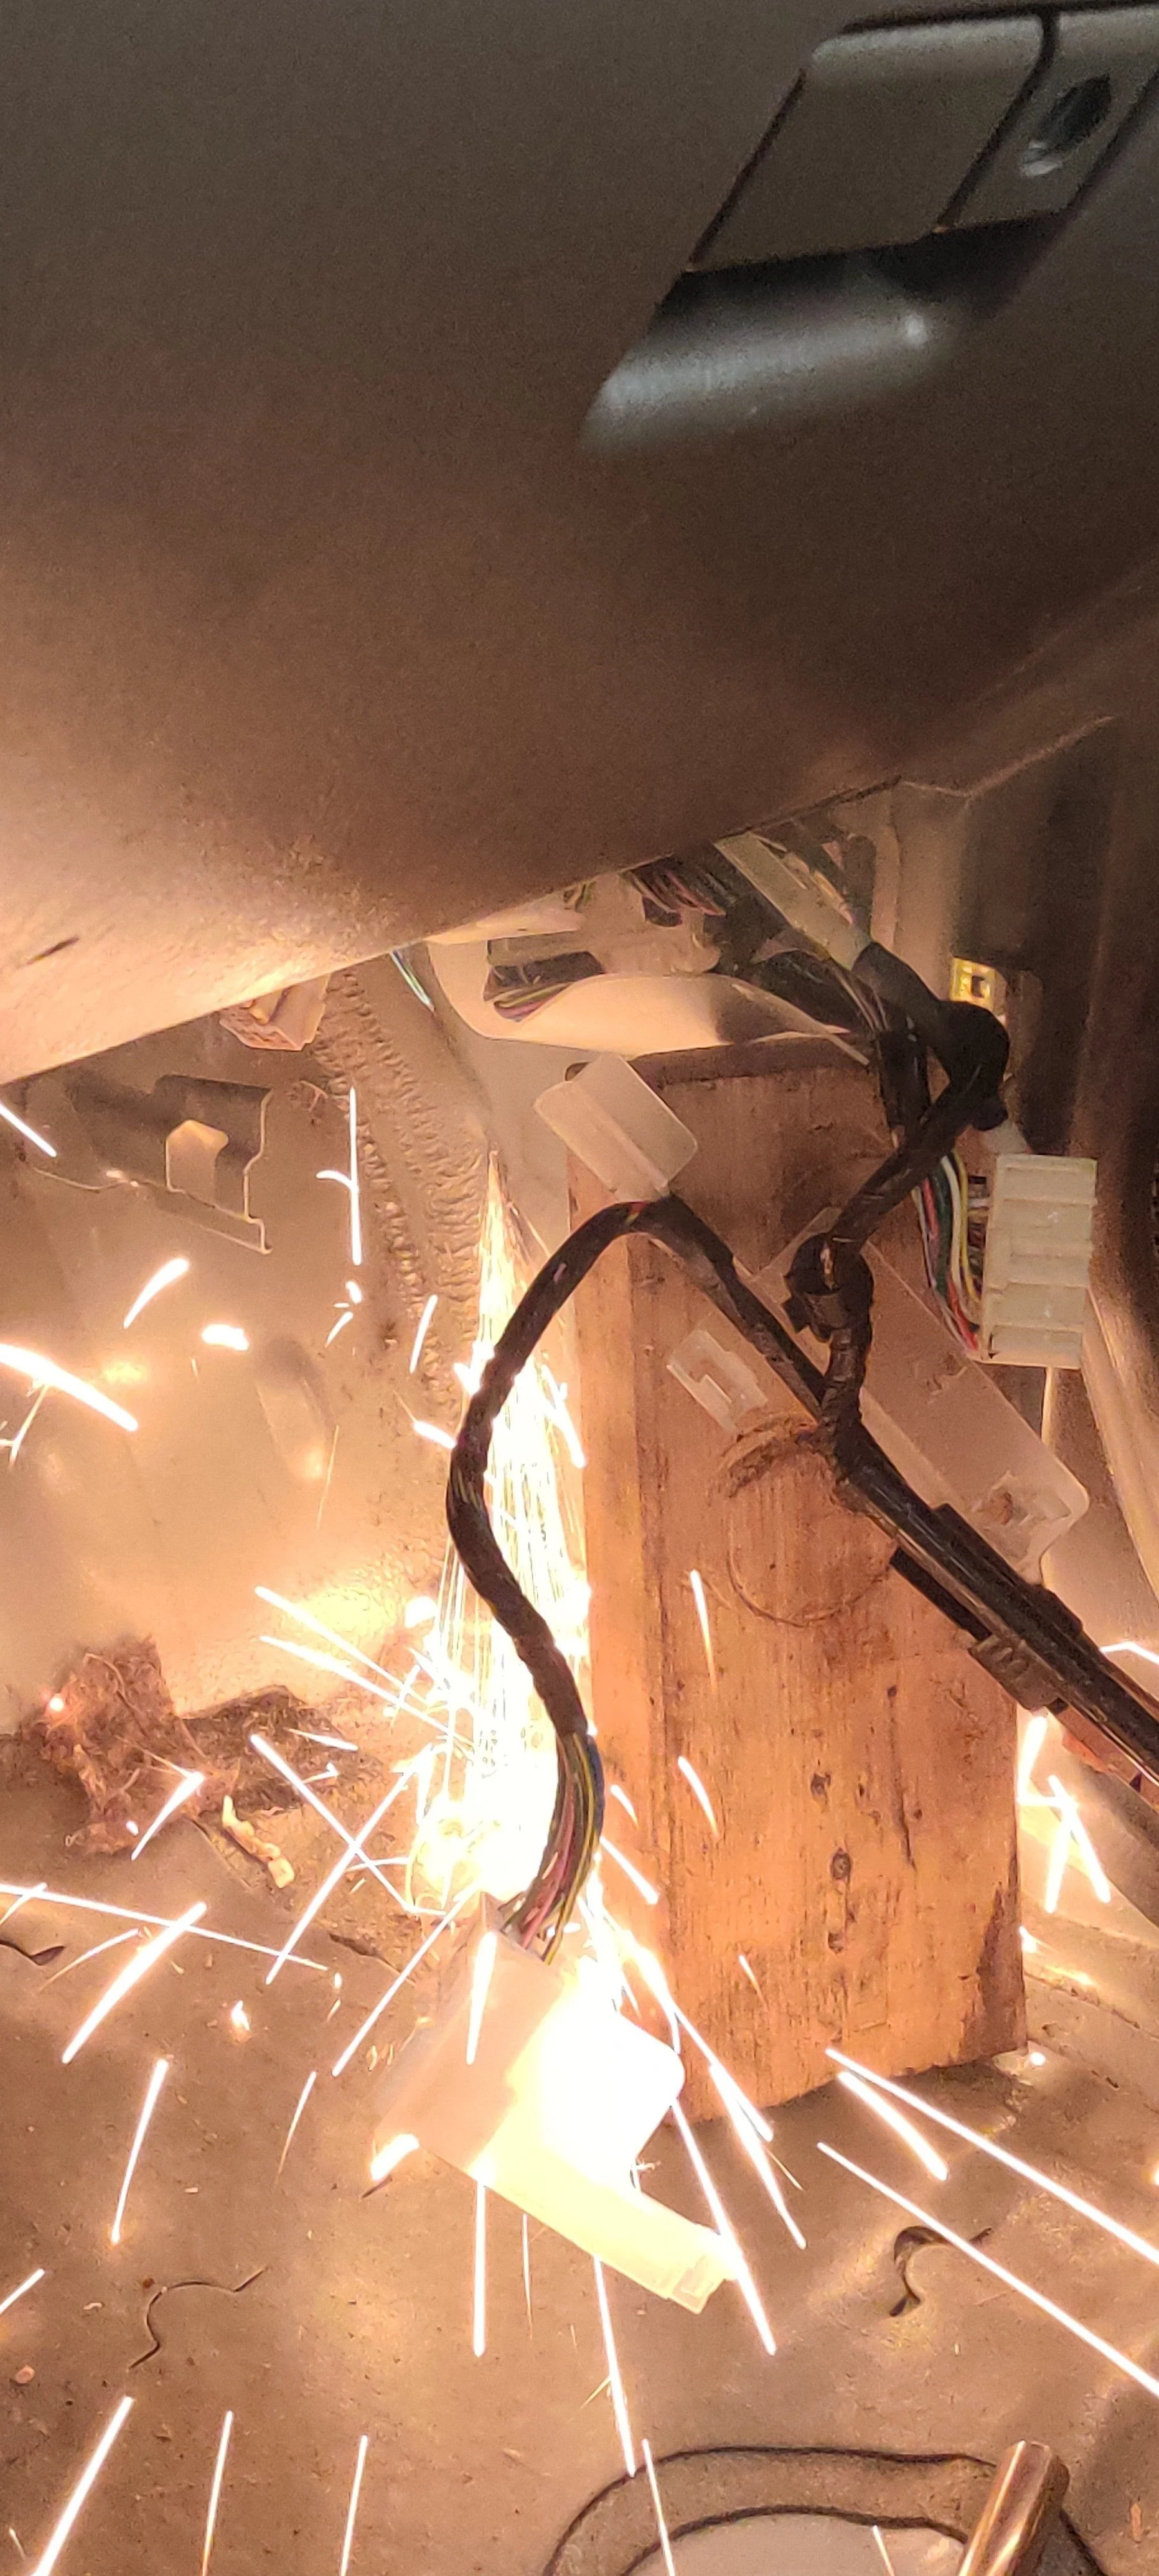
After our recent Green Trail run on June 20th, Andy suggested I leave my 4Runner with him so it actually has a better chance of getting chopped for 35s, because I have procrastinated long enough.
Today, I headed up there to assist with the operation, getting the fenders off and helping with the removing of struts and such. The it was time to break out the knife and start the surgery:
My time was limited, this is as far as we have gotten. I stopped early to get tips on welding, I had brought my machine up to console in the expertise of the almighty Andy. Literally after 5 minutes I was already making huge strides over the globs I had put down before. Sorry no pictures.
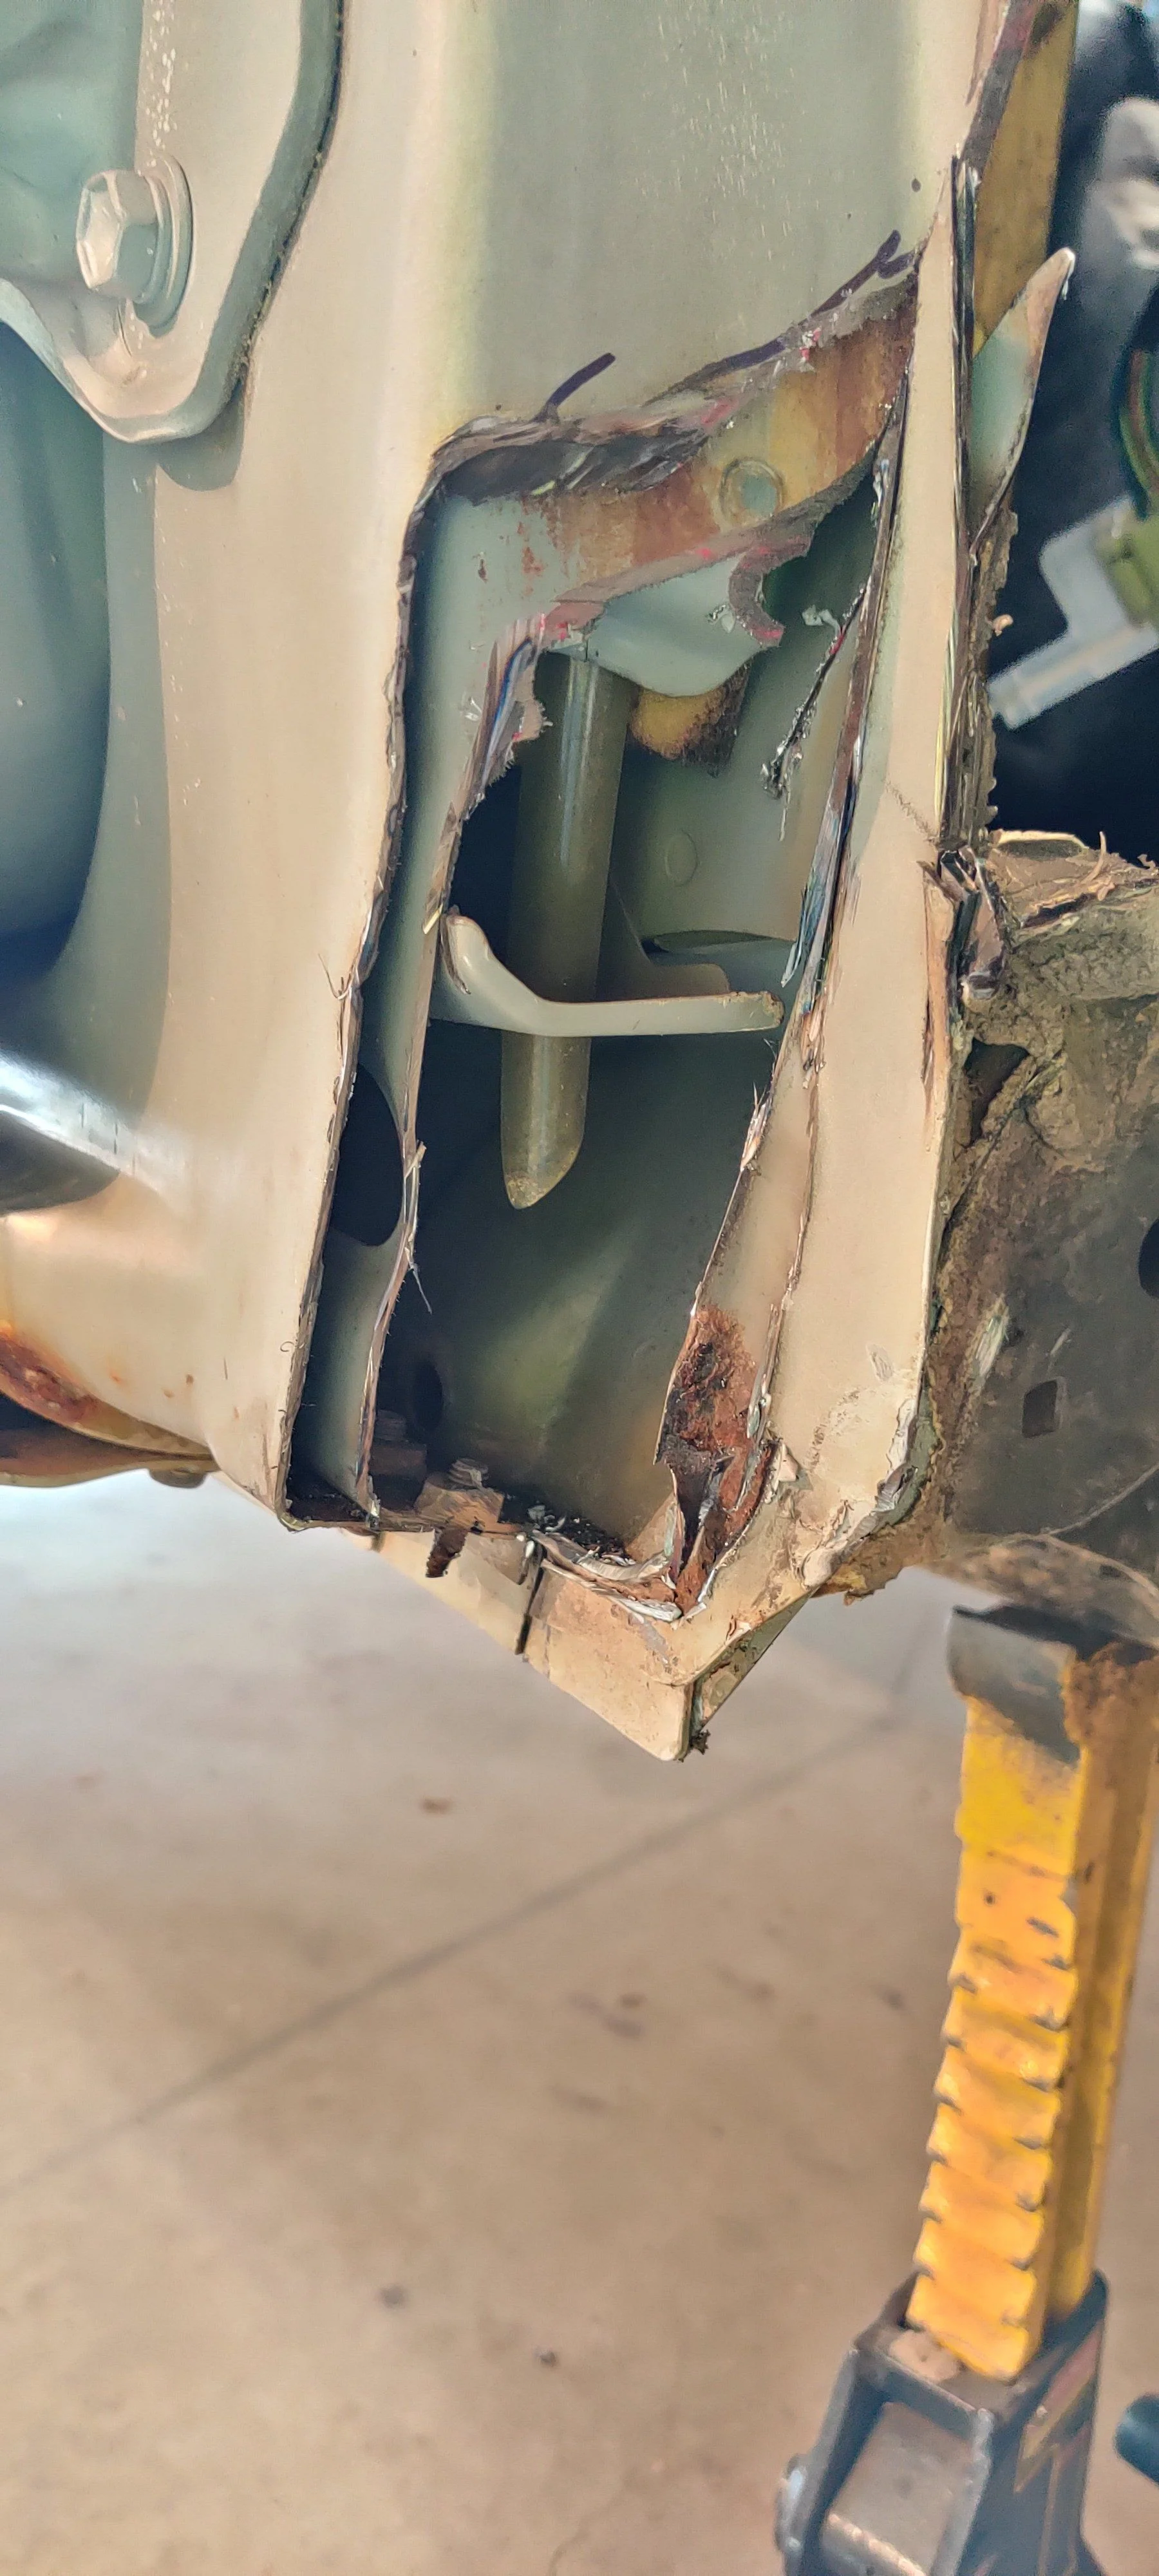
Also today I learned if a vital flaw in Toyotas design with the 4Runner that really pissed me off:
Some 'genius' at Toyota thought it would be a grand idea to fit the front sunroof drains to drain INTO THE ROCKER! I always thought it went some where above the front body mount but apparently not....
I'm sure it's not the only cause of the rust that took away the rockers in the brown 4Runner but it sure doesn't help!
Today, I headed up there to assist with the operation, getting the fenders off and helping with the removing of struts and such. The it was time to break out the knife and start the surgery:


My time was limited, this is as far as we have gotten. I stopped early to get tips on welding, I had brought my machine up to console in the expertise of the almighty Andy. Literally after 5 minutes I was already making huge strides over the globs I had put down before. Sorry no pictures.
Also today I learned if a vital flaw in Toyotas design with the 4Runner that really pissed me off:
Some 'genius' at Toyota thought it would be a grand idea to fit the front sunroof drains to drain INTO THE ROCKER! I always thought it went some where above the front body mount but apparently not....
I'm sure it's not the only cause of the rust that took away the rockers in the brown 4Runner but it sure doesn't help!
- Joined
- Jun 27, 2013
- Threads
- 12
- Messages
- 464
- Location
- Margate, NJ
- Website
- margatefishing.wordpress.com
Haha we are doing the same project! I’m hoping to be done this week and be ready for the cmcc alternative weekend.
- Thread starter
- #60
Haha we are doing the same project! I’m hoping to be done this week and be ready for the cmcc alternative weekend.
It's going to be a few weeks, so no CMCC alternative fornme.
I asked Andy if he would be okay waiting for me to work on it with him. For me it's the knowledge base, while I still have a lot to learn with welding, I still learn best by watching. Plus it's always better doing projects with friends. Drinking beer and hanging out.